“You got the cupcakes ready, right?” my sister’s voice crackled over the phone, just as I was wrestling with a mound of fondant on the kitchen counter. Honestly, I wasn’t sure I could pull off these perfect chocolate graduation cupcakes with elegant fondant caps. The truth is, I’d never attempted fondant before, let alone for such a big milestone. Graduation day was looming, and the pressure to bake something memorable was real. I had flirted with the idea of just buying cupcakes, but the thought of presenting plain desserts felt, well, uninspired.
That morning, between frosting smudges and fondant folds, I realized this recipe wasn’t about perfection or fancy bakery skills. It was about crafting a sweet moment that marked years of hard work and late-night cram sessions. The rich chocolate cake base turned out moist and tender, the kind that makes you pause and savor despite the chaos around you. And the fondant caps? They weren’t flawless, but their charming imperfections made them feel homemade and heartfelt.
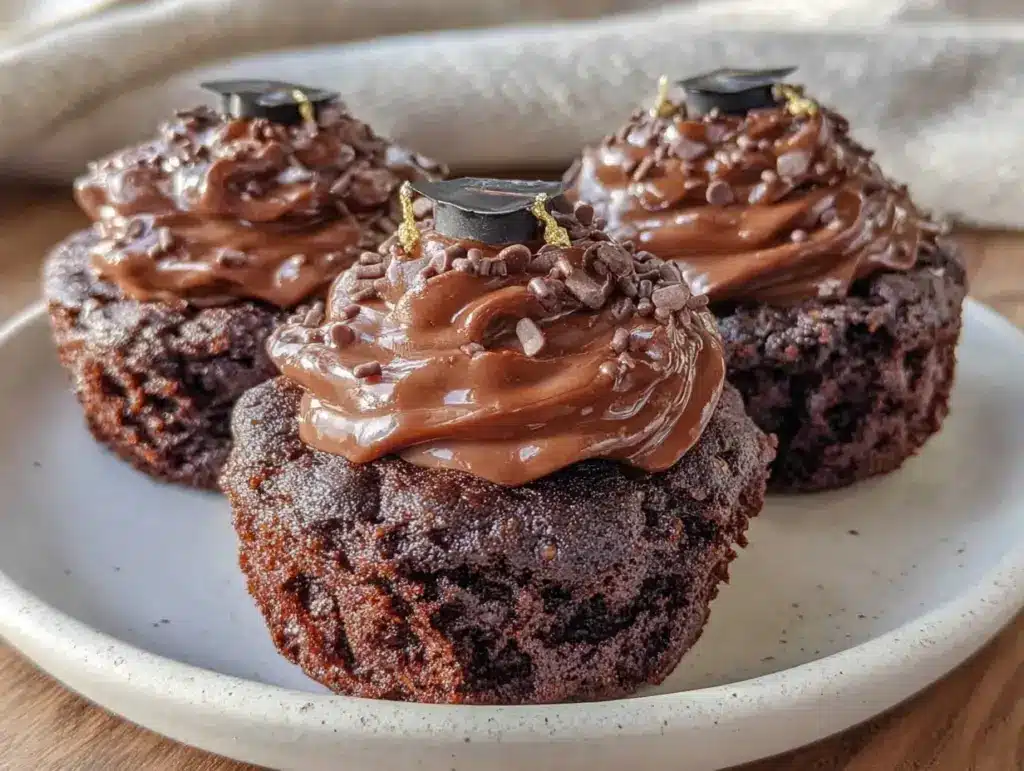
There’s something quietly satisfying about seeing those tiny graduation caps sitting proudly atop each cupcake, a miniature celebration you can hold in your hand. The recipe stuck not because it was the easiest, but because it became a personal little tradition—a way to say “congratulations” with a bit of homemade love. If you’re wondering whether you can make these yourself, trust me: you definitely can.
Why You’ll Love This Recipe
This recipe for perfect chocolate graduation cupcakes with elegant fondant caps has a way of turning a simple dessert into a standout celebration treat. After baking and decorating these cupcakes multiple times, I can confidently say they’ve become a go-to for graduation parties, school events, and even last-minute celebrations.
- Quick & Easy: The chocolate cupcake batter comes together in under 30 minutes, making it perfect for busy weeknights or surprise party plans.
- Simple Ingredients: No need for specialty stores—most ingredients are pantry staples, and the fondant is straightforward to handle with just a few basic tools.
- Perfect for Graduation Celebrations: The elegant fondant caps add a festive and personalized touch that’s great for commemorating academic milestones.
- Crowd-Pleaser: Kids, teens, and adults alike rave about the moist chocolate cake paired with smooth buttercream frosting.
- Unbelievably Delicious: The combination of rich cocoa flavor and sweet, silky fondant creates a texture and flavor that feels indulgent yet familiar.
What makes this recipe stand out is the balance between classic chocolate cupcake comfort and the creative twist of homemade fondant caps. Unlike store-bought cupcakes with generic decorations, these feel like a special, customized treat. The fondant caps might seem fancy, but the method I share keeps things manageable for home bakers without needing professional skills or tools. I’ve tested this recipe repeatedly, tweaking the frosting consistency and fondant thickness so that the caps hold their shape but still taste great.
Honestly, this recipe isn’t just dessert—it’s a little celebration wrapped in chocolate and sugar, the kind that makes you smile before the first bite. Whether you’re hosting a graduation party or simply want to mark the day with something sweet, these cupcakes bring a touch of joy without the fuss.
What Ingredients You Will Need
These perfect chocolate graduation cupcakes rely on straightforward, wholesome ingredients to deliver both bold chocolate flavor and a smooth, elegant finish. You won’t need to hunt down anything exotic—the star players are classic baking essentials and a bit of fondant creativity.
- For the Chocolate Cupcakes:
- All-purpose flour (1 ½ cups / 190 g)
- Granulated sugar (1 cup / 200 g)
- Unsweetened cocoa powder (⅓ cup / 35 g) – I prefer Ghirardelli for its rich taste
- Baking powder (1 tsp)
- Baking soda (½ tsp)
- Salt (¼ tsp)
- Buttermilk (¾ cup / 180 ml) – adds moisture and tang
- Vegetable oil (⅓ cup / 80 ml) – keeps cupcakes tender
- Large eggs (2, room temperature)
- Vanilla extract (1 tsp)
- Hot water (½ cup / 120 ml) – blooming cocoa intensifies chocolate flavor
- For the Buttercream Frosting:
- Unsalted butter (1 cup / 230 g, softened)
- Powdered sugar (3–4 cups / 360–480 g), sifted
- Vanilla extract (1 tsp)
- Heavy cream or milk (2–3 tbsp / 30–45 ml) – adjust for smoothness
- Pinch of salt
- For the Fondant Caps:
- Pre-made white fondant (about 1 lb / 450 g) – Wilton brand is reliable for beginners
- Black gel food coloring – to tint fondant for the caps
- Edible gold or silver dust (optional) – adds a subtle shimmer
- Edible glue or water – to help pieces stick together
Substitution tips: If you don’t have buttermilk handy, mix ¾ cup milk with 1 tbsp white vinegar or lemon juice and let it sit for 5 minutes. For a dairy-free version, use coconut milk-based cream for frosting and vegan butter substitutes. For a gluten-free spin, almond or oat flour can work, but expect a slightly different texture. The fondant caps are surprisingly forgiving—you can even tint fondant with cocoa powder for a natural color tweak.
Equipment Needed
Gathering the right tools can make this recipe feel easier and more enjoyable. Don’t worry—nothing fancy is required, and I’ll share some budget-friendly alternatives too.
- Mixing Bowls: At least two medium bowls for dry and wet ingredients.
- Electric Mixer: A handheld or stand mixer helps cream butter and blend batter smoothly. I’ve done it by hand, but it’s a workout!
- Muffin Tin: Standard 12-cup muffin pan works perfectly.
- Cupcake Liners: Paper liners prevent sticking and make serving easier.
- Spatula: For folding and scraping bowls clean.
- Rolling Pin: Essential for rolling out the fondant caps evenly. If you don’t have one, a smooth wine bottle can do the trick.
- Small Cookie Cutters or Knife: To shape the fondant caps—square or circle shapes work well.
- Food-Safe Brushes: For applying edible glue or dust.
- Cooling Rack: Allows cupcakes to cool evenly and avoid sogginess.
If fondant feels intimidating, silicone mats and fondant smoothers are helpful but optional tools. I remember my first attempt rolling out fondant—it stuck a bit, and I improvised by dusting with powdered sugar. It worked fine, so don’t sweat it if your fondant isn’t perfectly smooth on the first try.
Preparation Method
- Preheat and prep: Heat your oven to 350°F (175°C). Line a 12-cup muffin tin with cupcake liners and set aside. This step saves you from scrambling later.
- Mix dry ingredients: In a medium bowl, sift together 1 ½ cups all-purpose flour, 1 cup granulated sugar, ⅓ cup unsweetened cocoa powder, 1 tsp baking powder, ½ tsp baking soda, and ¼ tsp salt. Sifting makes a lighter cupcake texture.
- Combine wet ingredients: In a separate large bowl, whisk ¾ cup buttermilk, ⅓ cup vegetable oil, 2 large eggs, and 1 tsp vanilla extract until smooth.
- Blend wet and dry: Gradually add dry ingredients to the wet mixture, stirring gently with a spatula until just combined. Avoid overmixing to keep cupcakes tender.
- Add hot water: Slowly pour in ½ cup hot water while stirring. The batter will be thin — that’s exactly how it should be. This step deepens the chocolate flavor and keeps cupcakes moist.
- Fill cupcake liners: Use an ice cream scoop or spoon to fill liners about two-thirds full. This helps cupcakes rise evenly.
- Bake: Place in the oven and bake for 18–22 minutes. Check doneness by inserting a toothpick into the center; it should come out clean or with a few moist crumbs.
- Cool completely: Transfer cupcakes to a wire rack to cool for at least 30 minutes before frosting. Fondant will slide off warm frosting, so patience pays off here.
- Prepare buttercream: Beat 1 cup softened unsalted butter on medium-high speed until fluffy (~3 minutes). Gradually add 3–4 cups powdered sugar, 1 tsp vanilla, pinch of salt, and 2–3 tbsp heavy cream. Beat until smooth and spreadable. Adjust cream or sugar to get the right consistency for piping or spreading.
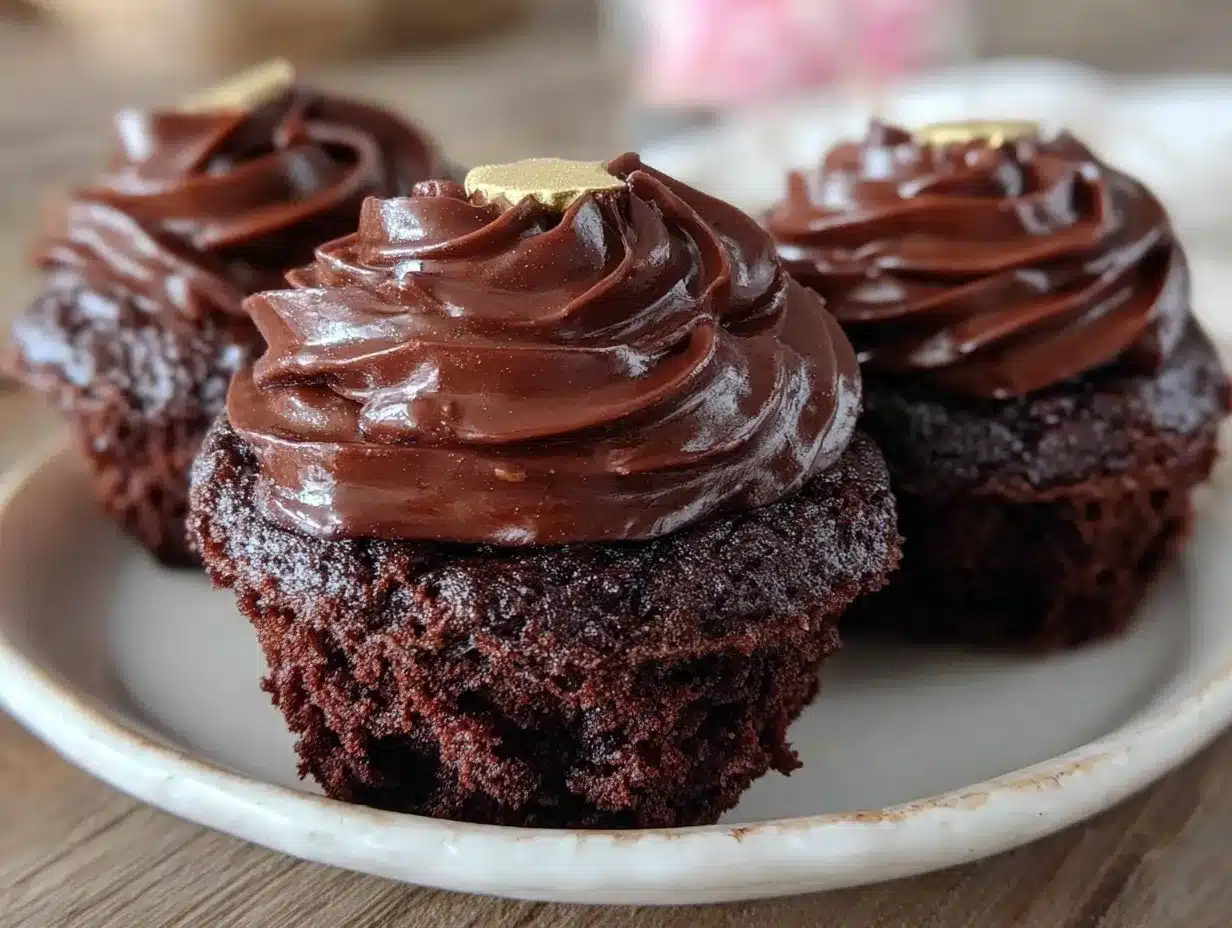
- Frost cupcakes: Spread or pipe buttercream evenly on cooled cupcakes. A smooth, slightly domed top works best for placing fondant caps.
- Tint and roll fondant: Knead black gel food coloring into white fondant until color is even. Roll fondant on a powdered sugar-dusted surface to about ¼-inch (6 mm) thickness.
- Cut fondant caps: Use a small square or circle cutter (about 1.5 inches / 4 cm) to cut fondant pieces. For the cap’s “button,” roll tiny black fondant balls or use a small edible gold dust brush for shine.
- Assemble caps: Lightly brush the cupcake frosting with edible glue or water, then gently place the fondant cap on top. Add the button detail and gently press in place.
- Final touches: Optionally, dust caps with edible shimmer for a polished look. Let cupcakes rest for 15 minutes to set before serving.
Pro tip: If fondant cracks while rolling, warm it slightly by kneading with your hands. Also, don’t hesitate to adjust the frosting thickness; a firmer base holds the fondant better. I found that chilling cupcakes briefly before adding fondant helps keep everything intact.
Cooking Tips & Techniques
Handling fondant and baking moist chocolate cupcakes can feel tricky, but some little tricks make a big difference. Here’s what I’ve learned through a few trial runs (and some frosting mishaps!).
- Don’t skip sifting: Sift dry ingredients for lighter cupcakes. It prevents lumps in the cocoa and ensures even rising.
- Use hot water carefully: The batter will be thin—that’s normal! It helps the cupcakes stay moist and intensifies the chocolate, so don’t be tempted to skip this step.
- Let cupcakes cool fully: Fondant doesn’t stick well to warm frosting. Patience is key here to avoid melting or sliding caps.
- Kneading fondant: Warm it gently in your hands before rolling to avoid cracks. If it sticks, dust lightly with powdered sugar or cornstarch.
- Cutting fondant shapes: Use sharp cutters or clean knives to get clean edges. Reroll scraps to minimize waste.
- Applying edible glue: A tiny brush dipped in water or edible glue helps fondant pieces stick without making the fondant soggy.
- Multi-task while baking: While cupcakes bake, prepare the frosting and prep fondant. This keeps things moving smoothly and cuts down wait time.
- Practice makes perfect: My first fondant caps were a bit lopsided, but they tasted great and looked charming. The more you work with fondant, the easier it gets.
These tips helped me keep my sanity and the cupcakes looking impressive even when the clock was ticking. If you’re looking for a fun savory snack to accompany your celebration, these crispy baked turkey sliders also pair wonderfully with festive occasions.
Variations & Adaptations
Making perfect chocolate graduation cupcakes allows for plenty of room to customize based on your taste and dietary needs.
- Flavor twists: Try substituting half the cocoa powder with espresso powder for a mocha kick. Or add orange zest to the batter for a citrus-chocolate combo that’s surprisingly fresh.
- Dietary swaps: Use almond flour instead of all-purpose for a gluten-free version, and swap dairy butter and cream with coconut-based alternatives to make these vegan-friendly.
- Fondant alternatives: If fondant isn’t your thing, try modeling chocolate or marzipan for a softer, more pliable topping. You can also pipe buttercream caps decorated with edible glitter or sprinkles for a quicker look.
- Seasonal decoration: Change the fondant color to match school colors or use edible markers to write initials or graduation years on the caps.
- Personal experience: Once, I added mini edible flowers to the fondant caps for a spring graduation, which added a delicate, whimsical touch that guests loved.
Serving & Storage Suggestions
These chocolate graduation cupcakes are best served at room temperature so the buttercream stays smooth and the fondant soft enough to bite through without cracking teeth.
For a polished presentation, arrange cupcakes on a tiered stand or a simple white platter to let the caps stand out. Pair with cold milk, coffee, or sparkling lemonade for a festive vibe.
Store leftover cupcakes in an airtight container at room temperature for up to 2 days. If your home is warm or humid, refrigeration is safer but bring cupcakes back to room temperature before serving to revive frosting texture.
For longer storage, freeze unfrosted cupcakes wrapped tightly in plastic wrap for up to 3 months. Thaw fully before adding buttercream and fondant caps. Leftover fondant can be wrapped and refrigerated or frozen but should be brought back to room temperature before reuse.
Flavors tend to mellow and deepen a bit after resting overnight, so if you can make them a day ahead, that’s even better. If you’re planning a full celebration spread, a lighter savory option like these crispy baked ham and cheese croissants complements the sweet cupcakes perfectly.
Nutritional Information & Benefits
Each chocolate graduation cupcake (including frosting and fondant cap) contains approximately 320 calories, 15 grams of fat, 40 grams of carbohydrates, and 3 grams of protein. These are treats best enjoyed in moderation during celebrations.
Key ingredients like cocoa powder provide antioxidants that may support heart health, and the eggs contribute beneficial proteins and nutrients. By controlling sugar levels and using quality ingredients, these cupcakes feel like a thoughtful indulgence rather than an over-the-top dessert.
For those watching allergens, this recipe contains gluten, dairy, and eggs but can be adapted with almond flour, plant-based milks, and egg replacers to suit most dietary needs.
Conclusion
Perfect chocolate graduation cupcakes with elegant fondant caps are more than just a sweet bite—they’re a little ceremony you bake yourself. The rich chocolate, creamy frosting, and charming handmade caps come together to celebrate milestones in a way that feels personal and special.
I love this recipe because it’s approachable for home bakers but impressive enough to bring smiles and compliments. Whether you tweak the flavors or decorations, these cupcakes invite creativity and make any graduation unforgettable.
If you give this recipe a try, I’d love to hear how you customized your caps or what memories you made while baking. Sharing those stories keeps the joy of homemade celebrations alive. So grab your rolling pin, and let’s make graduation extra sweet!
FAQs about Perfect Chocolate Graduation Cupcakes with Elegant Fondant Caps
How far in advance can I make these cupcakes?
You can bake the cupcakes up to 2 days ahead and keep them in an airtight container at room temperature. For longer storage, freeze the unfrosted cupcakes and add frosting and fondant caps after thawing.
Can I use homemade fondant instead of store-bought?
Yes, homemade fondant works well but can be trickier to get right. For beginners, store-bought fondant like Wilton is easier to handle and consistent in texture.
What if I don’t have a rolling pin for the fondant?
A smooth, clean wine bottle or glass bottle makes a great alternative for rolling fondant evenly.
Can I make these cupcakes vegan?
Definitely! Use dairy-free milk, vegan butter, egg replacers, and vegan fondant to make the recipe plant-based without sacrificing taste.
How do I prevent fondant caps from cracking?
Knead the fondant well to warm it up before rolling, and dust your work surface lightly with powdered sugar or cornstarch. Avoid rolling too thin; about ¼-inch thickness is ideal.
Pin This Recipe!
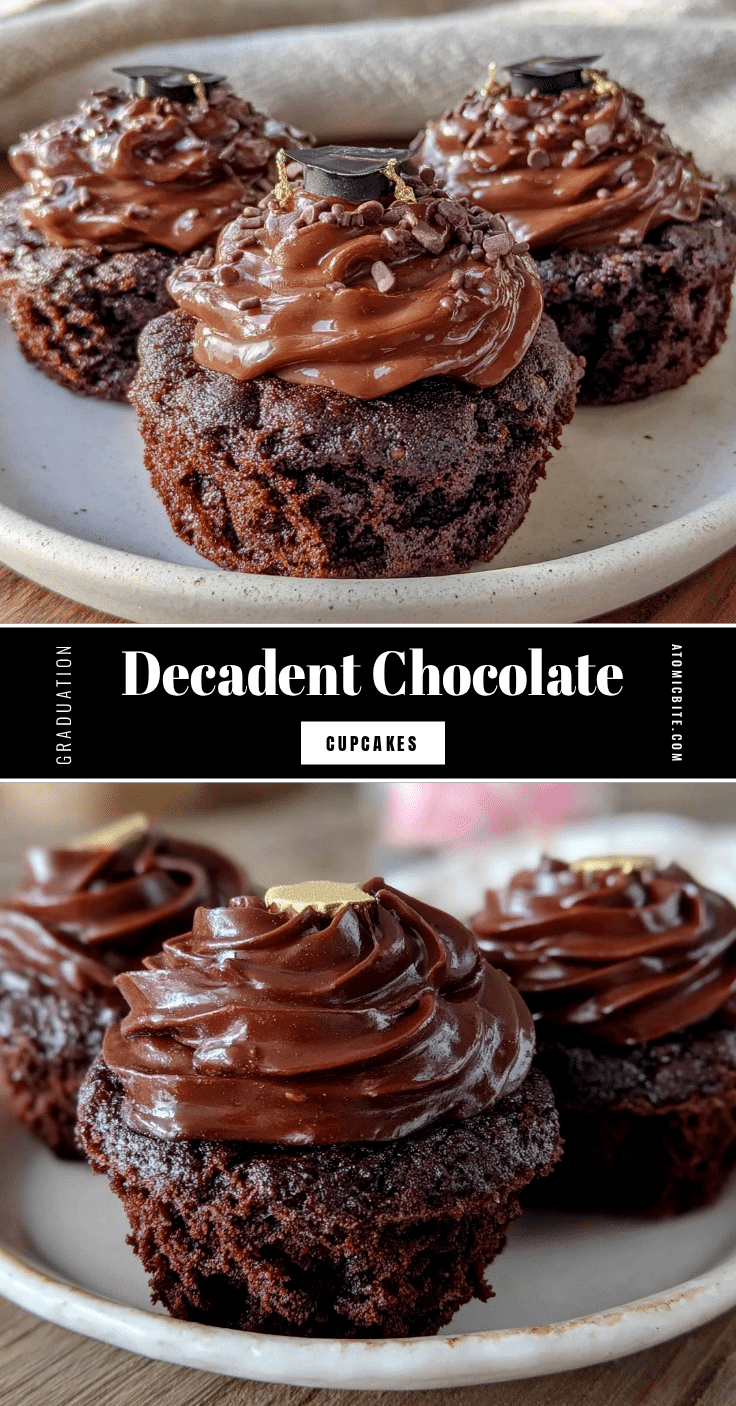
Perfect Chocolate Graduation Cupcakes Easy Homemade Fondant Cap Recipe
These moist and tender chocolate cupcakes are topped with elegant homemade fondant graduation caps, perfect for celebrating academic milestones with a personal touch.
- Prep Time: 20 minutes
- Cook Time: 22 minutes
- Total Time: 42 minutes
- Yield: 12 servings 1x
- Category: Dessert
- Cuisine: American
Ingredients
- 1 ½ cups all-purpose flour (190 g)
- 1 cup granulated sugar (200 g)
- ⅓ cup unsweetened cocoa powder (35 g)
- 1 tsp baking powder
- ½ tsp baking soda
- ¼ tsp salt
- ¾ cup buttermilk (180 ml)
- ⅓ cup vegetable oil (80 ml)
- 2 large eggs, room temperature
- 1 tsp vanilla extract
- ½ cup hot water (120 ml)
- 1 cup unsalted butter, softened (230 g)
- 3–4 cups powdered sugar (360–480 g), sifted
- 1 tsp vanilla extract
- 2–3 tbsp heavy cream or milk (30–45 ml)
- Pinch of salt
- About 1 lb pre-made white fondant (450 g)
- Black gel food coloring
- Edible gold or silver dust (optional)
- Edible glue or water
Instructions
- Preheat oven to 350°F (175°C). Line a 12-cup muffin tin with cupcake liners.
- Sift together flour, sugar, cocoa powder, baking powder, baking soda, and salt in a medium bowl.
- In a separate large bowl, whisk buttermilk, vegetable oil, eggs, and vanilla extract until smooth.
- Gradually add dry ingredients to wet mixture, stirring gently until just combined. Avoid overmixing.
- Slowly pour in hot water while stirring; batter will be thin.
- Fill cupcake liners about two-thirds full using a scoop or spoon.
- Bake for 18–22 minutes until a toothpick inserted comes out clean or with a few moist crumbs.
- Cool cupcakes completely on a wire rack for at least 30 minutes.
- Beat softened butter on medium-high speed until fluffy (~3 minutes). Gradually add powdered sugar, vanilla, salt, and heavy cream. Beat until smooth and spreadable, adjusting consistency as needed.
- Frost cooled cupcakes evenly with buttercream, creating a smooth, slightly domed top.
- Knead black gel food coloring into white fondant until color is even. Roll fondant on a powdered sugar-dusted surface to about ¼-inch (6 mm) thickness.
- Cut fondant caps using a small square or circle cutter about 1.5 inches (4 cm) wide. Roll tiny black fondant balls for the cap’s button or brush with edible gold dust.
- Lightly brush cupcake frosting with edible glue or water, then place fondant cap on top and press gently.
- Optionally dust caps with edible shimmer. Let cupcakes rest for 15 minutes to set before serving.
Notes
Sift dry ingredients for lighter cupcakes. Use hot water to intensify chocolate flavor and keep cupcakes moist. Let cupcakes cool completely before frosting to prevent fondant from sliding. Warm fondant by kneading if it cracks and dust work surface with powdered sugar or cornstarch. Chill cupcakes briefly before adding fondant for better stability.
Nutrition
- Serving Size: 1 cupcake with frost
- Calories: 320
- Fat: 15
- Carbohydrates: 40
- Protein: 3
Keywords: chocolate cupcakes, graduation cupcakes, fondant caps, homemade cupcakes, celebration dessert, easy chocolate cupcakes, buttercream frosting


