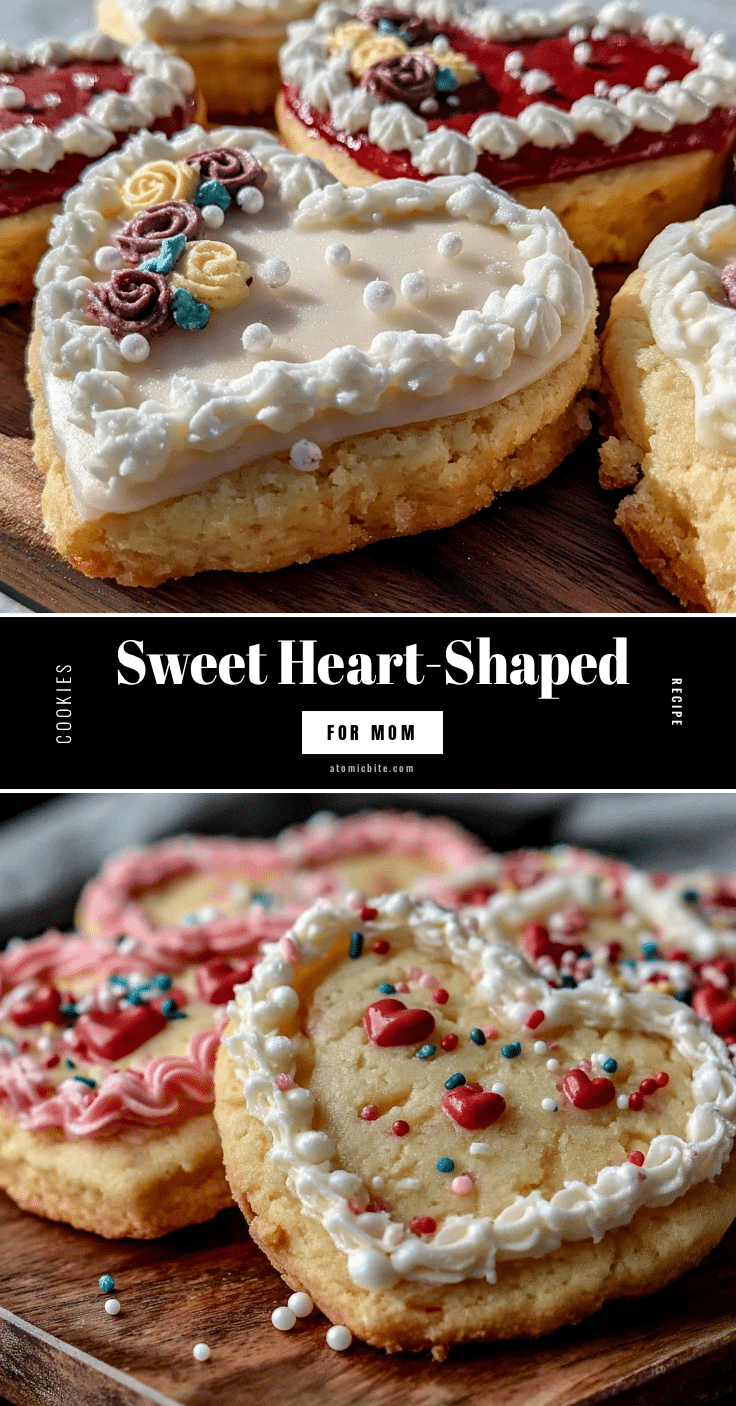
“Mom, can we bake cookies today?” That text popped up on my phone during a particularly hectic afternoon, and honestly, I wasn’t in the mood for anything complicated. But you know how it goes—sometimes, the simplest ideas bring the biggest smiles. So, I rummaged through the pantry, found the basics, and decided to make what would soon become our go-to: perfect heart-shaped decorated sugar cookies for Mom.
There’s something quietly joyful about rolling out dough together, the kitchen filling with that warm vanilla scent, and the clatter of cookie cutters echoing like a small celebration. I was skeptical at first because how often do sugar cookies come out just right on the first try? But these cookies surprised us—thin enough to crisp at the edges, soft in the center, and decorated with just enough icing to feel special without being fussy.
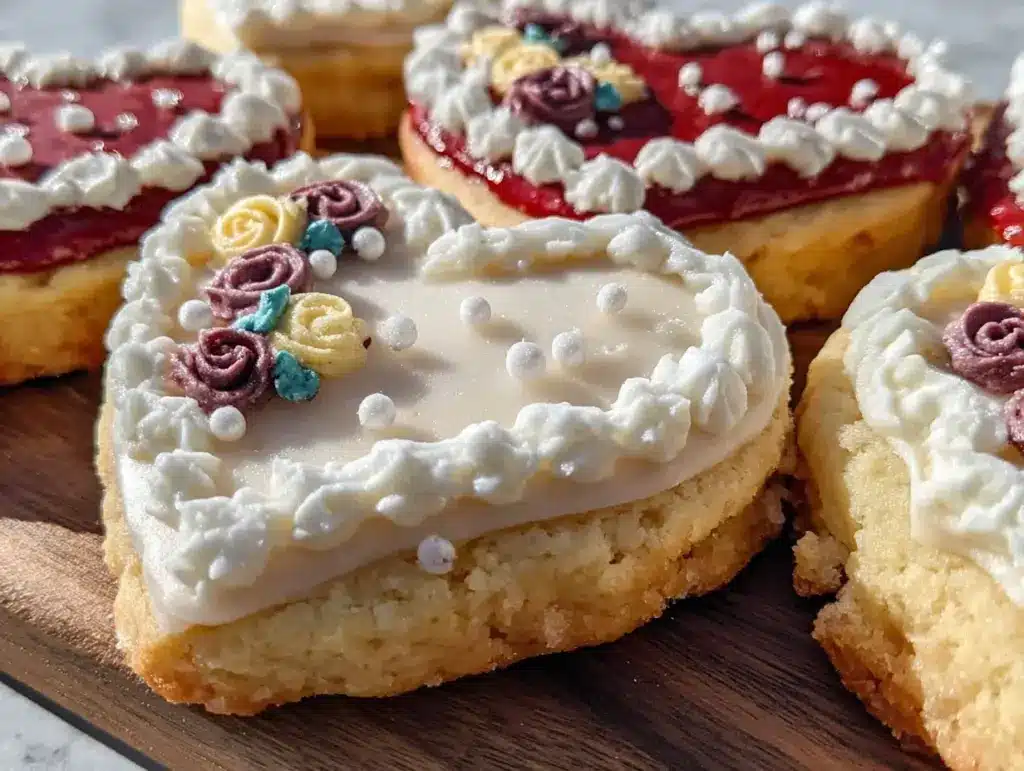
What stuck with me was the way those simple heart shapes, decorated with swirls and dots, brightened up the whole kitchen and, well, the day. It’s not just a cookie; it’s a little act of love you can hold in your hand. So if you’ve ever wanted to bake something that’s both easy and meaningful, this recipe might just be the quiet little win you didn’t know you needed.
Why You’ll Love This Recipe
After making these heart-shaped sugar cookies more times than I can count, I can honestly say they hit the sweet spot between fuss-free and festive. Here’s why you’ll appreciate this recipe as much as I do:
- Quick & Easy: Ready in under 45 minutes from start to finish, making it perfect for last-minute baking sessions or when you want a fun project with the kids.
- Simple Ingredients: Uses pantry staples like flour, sugar, and butter—no special trips to the store necessary.
- Perfect for Celebrations: Whether it’s Mother’s Day, a birthday, or just a random Tuesday, these cookies make any occasion feel a bit sweeter.
- Crowd-Pleaser: My friends and family always ask for these, and the decorated hearts add a personal touch that’s hard to beat.
- Unbelievably Delicious: The cookies have that perfect balance of buttery softness and slight crispness, with icing that’s smooth and not too sweet.
What sets this recipe apart? The dough is chilled just enough to roll out smoothly without cracking, and the royal icing recipe I use dries with a lovely sheen but stays tender—not brittle. Plus, I toss in a pinch of almond extract for a subtle twist that feels special but isn’t overpowering. Honestly, these cookies aren’t just another sugar cookie recipe; they’re the kind I close my eyes to savor, and they always earn a smile from Mom.
What Ingredients You Will Need
This recipe relies on straightforward ingredients that come together to create a dough that’s both easy to handle and delicious. Most are pantry staples, so if your kitchen is like mine, you probably already have everything on hand.
- All-purpose flour (2 ½ cups / 312 grams) – Use a trusted brand for consistent texture, like King Arthur or Gold Medal.
- Baking powder (1 teaspoon) – Helps keep the cookies light.
- Salt (½ teaspoon) – Balances sweetness.
- Unsalted butter (1 cup / 226 grams), softened – Makes cookies tender and rich. I prefer Kerrygold for its creaminess.
- Granulated sugar (1 cup / 200 grams) – Provides sweetness and helps with crisp edges.
- Large egg (1), room temperature – Binds the dough.
- Pure vanilla extract (1 teaspoon) – Classic flavor base.
- Almond extract (½ teaspoon, optional) – Adds a delicate nutty note that pairs beautifully with vanilla.
- Royal icing ingredients:
- Powdered sugar (2 cups / 240 grams)
- Meringue powder (2 tablespoons)
- Water (about ⅓ cup / 80 ml)
- Food coloring (gel colors recommended) – Choose your favorite shades for decorating.
Substitution tips: For a gluten-free version, swap the all-purpose flour with a 1:1 gluten-free baking flour blend. If dairy-free is needed, try using vegan butter sticks like Earth Balance and a flax egg (1 tablespoon ground flaxseed + 3 tablespoons water) in place of the egg. For the icing, you can swap meringue powder for egg whites if you prefer, but be cautious of raw egg safety.
Equipment Needed
To whip up these perfect heart-shaped sugar cookies, here’s what you’ll want on hand:
- Mixing bowls: One large for the dough and another for the icing.
- Electric mixer: A hand or stand mixer makes creaming butter and sugar a breeze, but you can get by with a sturdy whisk and some elbow grease.
- Measuring cups and spoons: Precise measurements make all the difference.
- Rolling pin: A smooth, weighted rolling pin helps get the dough evenly rolled without sticking.
- Heart-shaped cookie cutters: I recommend a medium size around 3 inches (7.5 cm) for the easiest decorating.
- Baking sheets: Heavy-duty, rimmed sheets work best for even baking.
- Parchment paper or silicone baking mats: Prevents sticking and keeps cleanup simple.
- Piping bags and small round tips: For the royal icing details—if you don’t have these, small zip-top bags with a snipped corner work fine.
Honestly, you don’t need fancy gadgets. When I first started making these cookies, I used a simple rolling pin and zip bags for icing, and it worked just fine. Keeping your rolling pin lightly floured helps with smooth dough handling. If you want to invest, silicone mats are a solid choice and last forever with proper care—just hand wash and dry thoroughly after each use.
Preparation Method
- Mix dry ingredients: In a medium bowl, whisk together 2 ½ cups (312 g) of all-purpose flour, 1 teaspoon baking powder, and ½ teaspoon salt. Set aside.
- Cream butter and sugar: In a large bowl, use an electric mixer to beat 1 cup (226 g) softened unsalted butter with 1 cup (200 g) granulated sugar until light and fluffy, about 3-4 minutes. The mixture should look pale and airy, which means the air is incorporated for tender cookies.
- Add egg and extracts: Mix in 1 large egg, 1 teaspoon pure vanilla extract, and ½ teaspoon almond extract (if using) until combined. The batter might look a little glossy here.
- Incorporate dry ingredients: Gradually add the flour mixture to the wet ingredients, mixing on low speed just until a dough forms. It will be soft but not sticky. If it’s too sticky, sprinkle a little extra flour.
- Chill the dough: Divide the dough into two disks, wrap tightly in plastic wrap, and refrigerate for at least 1 hour. Chilling firms the dough, making it easier to roll out and cut without shrinking during baking.
- Preheat oven: Set your oven to 350°F (175°C) and line baking sheets with parchment paper.
- Roll and cut: On a lightly floured surface, roll one dough disk to about ¼ inch (6 mm) thickness. Use your heart-shaped cookie cutter to cut shapes, transferring them carefully to baking sheets. Gather scraps, re-roll, and repeat until dough is used.
- Bake: Bake for 8-10 minutes, or until edges just begin to turn golden. The centers will still look soft but will firm up as they cool. Avoid overbaking to keep that tender texture.
- Cool completely: Transfer cookies to a wire rack and let cool fully before decorating. This prevents icing from melting or sliding off.
- Prepare royal icing: In a clean bowl, combine 2 cups (240 g) powdered sugar, 2 tablespoons meringue powder, and about ⅓ cup (80 ml) water. Beat on high until stiff peaks form, adding water a little at a time to reach a thick but pipeable consistency.
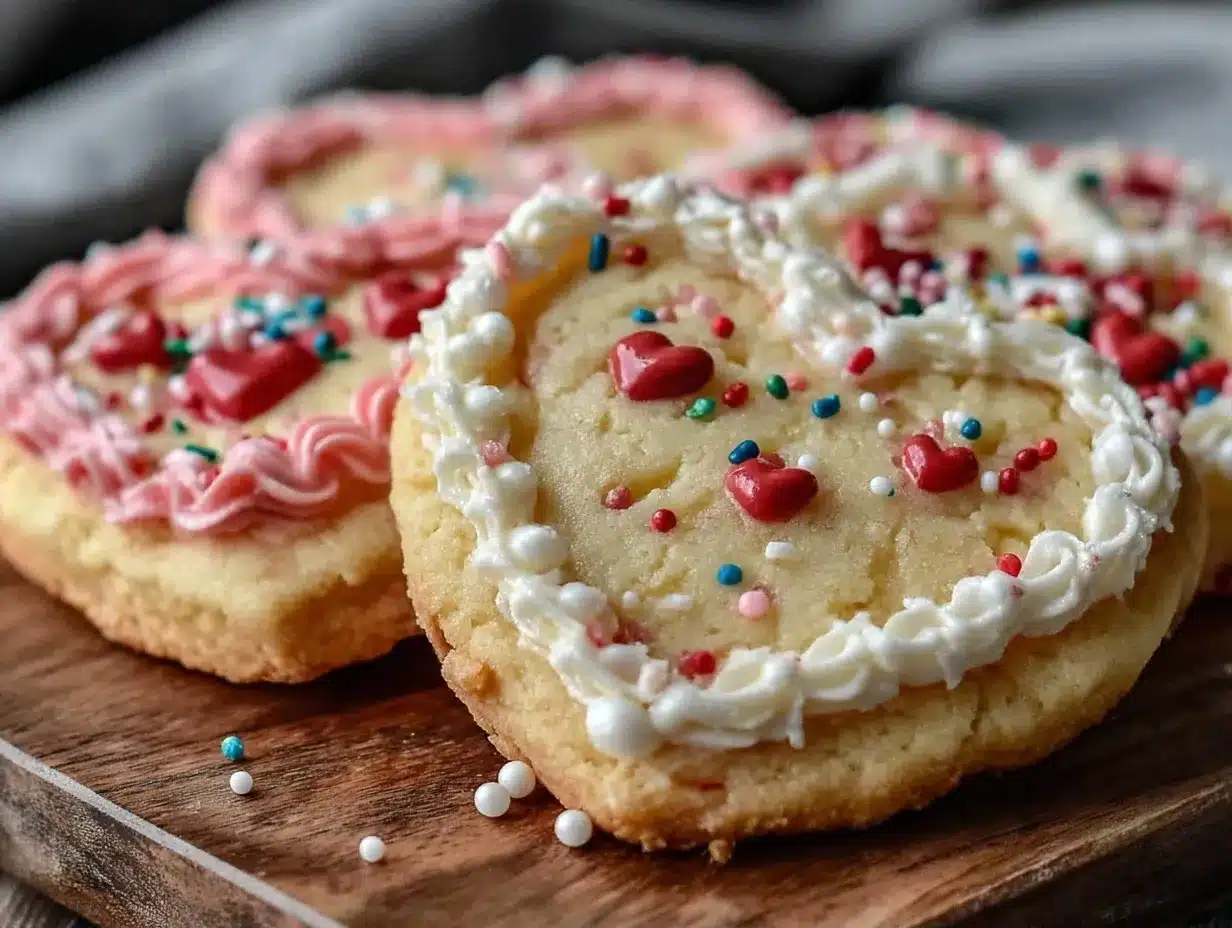
- Color and decorate: Divide icing into small bowls and tint using gel food coloring. Using piping bags fitted with small round tips, outline and flood the cookies with icing. Let each layer dry for 15-30 minutes before adding details to prevent colors from bleeding.
- Dry completely: Allow decorated cookies to air dry for several hours or overnight. This helps the icing set to a smooth, firm finish perfect for stacking or gifting.
Pro tip: If your dough feels too warm while rolling, pop it back in the fridge for 10 minutes. Also, I like to bake a test cookie first to see how quickly it browns in my oven. Oven temperatures can vary, so keeping an eye on that edge color is key.
Cooking Tips & Techniques
Making decorated sugar cookies sounds fancy, but a few simple tricks make all the difference. Here’s what I’ve learned:
- Don’t skip chilling: Chilling the dough is non-negotiable. It prevents spreading and helps keep those clean heart shapes crisp.
- Use gel food coloring: It colors royal icing vibrantly without thinning it out like liquid dyes.
- Practice piping on parchment first: This helps you get comfortable with controlling the flow before decorating your cookies.
- Keep icing covered: Royal icing dries fast, so place a damp cloth over your bowl when not in use to avoid crusty edges.
- Mind the consistency: For flooding (filling in areas), the icing should flow slowly off a spoon but not be runny. For outlining, it should hold its shape.
- Don’t overmix dough: Mixing flour too long can make cookies tough. Mix just until combined.
- Let the cookies cool fully before icing: Warm cookies melt icing, causing it to slide off or get patchy.
I remember my first batch turning into a gooey mess because I iced the cookies too soon—lesson learned the hard way! Also, multitasking by prepping icing while dough chills saves so much time. If you want a fun twist, you can add sprinkles on wet icing before it dries, but do it sparingly for a neat look.
Variations & Adaptations
These heart-shaped cookies are a perfect canvas for creativity, so here are some ways I’ve tweaked the recipe to keep things interesting:
- Flavor swap: Replace almond extract with lemon or orange zest for a fresh, citrusy zing.
- Chocolate chip hearts: Add mini chocolate chips to the dough for a surprise in every bite.
- Gluten-free version: Use a reliable gluten-free flour blend and add a teaspoon of xanthan gum if your mix doesn’t already contain it.
- Vegan adaptation: Use dairy-free butter and a flax egg, and swap meringue powder in icing for aquafaba (chickpea water) for a similar stiff peak effect.
- Seasonal colors: Decorate with pastel shades for spring, red and white for Valentine’s, or bright colors for a birthday twist.
I once made a batch using cream cheese frosting instead of royal icing for a softer, tangier finish—delicious but less sturdy for stacking or gifting. Feel free to experiment with edible glitter or piping designs to match your occasion.
Serving & Storage Suggestions
These sugar cookies are best served at room temperature, letting the icing shine without becoming sticky or soft. For a charming presentation, arrange them on a pretty platter or stack a few tied with a ribbon as a sweet gift.
Pairing them with a cup of tea or a chilled glass of milk is a classic, but you could also serve alongside something savory like crispy baked turkey sliders for a balanced snack spread.
To store, keep cookies in an airtight container at room temperature for up to 5 days. If you want to save them longer, freeze undecorated cookies in a single layer wrapped tightly in plastic wrap, then transfer to a freezer bag. Decorated cookies freeze best after icing has fully dried—wrap carefully to prevent smudging.
When reheating, just let frozen cookies thaw at room temperature. The flavors mellow and meld beautifully over a day or two, making them even more delightful.
Nutritional Information & Benefits
While these sugar cookies are definitely a treat, here’s a rough idea of what you’re getting per cookie (based on 24 cookies per batch):
| Nutrient | Amount |
|---|---|
| Calories | 120-130 kcal |
| Fat | 6-7 g (mostly from butter) |
| Carbohydrates | 16-18 g |
| Sugar | 9-10 g |
| Protein | 1-2 g |
Butter provides vitamin A and healthy fats, while the egg adds a bit of protein. The almond extract, if included, introduces trace nutrients and antioxidants. These cookies are naturally gluten-free if you swap flour, and dairy-free versions work well too. Just a heads up, they do contain eggs and dairy unless substituted.
From a wellness standpoint, I treat these as a joyful indulgence—perfect for moments when you want to slow down and savor something homemade and heartfelt.
Conclusion
So, if you’re looking for a recipe that feels like a warm hug in cookie form, these perfect heart-shaped decorated sugar cookies for Mom are a lovely choice. They’re simple enough to whip up on a whim but special enough to show you care without fuss.
Feel free to tweak the flavors, colors, or decorations to make them uniquely yours—baking should always have a dash of personality. I keep coming back to this recipe because it’s honest, forgiving, and somehow always makes the kitchen feel like a brighter place.
Give it a try, and maybe share your cookie creations with someone you love. I’d love to hear how your batch turns out or any fun decorating ideas you come up with!
FAQs About Perfect Heart-Shaped Decorated Sugar Cookies for Mom
- Can I make the dough ahead of time?
Yes! You can prepare the dough and refrigerate it for up to 3 days before rolling and baking. - What if I don’t have a heart-shaped cookie cutter?
Any cookie cutter shape works, or you can carefully cut hearts freehand with a knife for a rustic look. - How do I keep my royal icing from cracking?
Make sure not to add too much powdered sugar and keep the icing covered when not in use. Also, avoid applying icing on warm cookies. - Can I store decorated cookies for gifting?
Yes, store them in an airtight container at room temperature and layer with parchment paper. They keep well for about 5 days. - Is there a way to make these cookies vegan?
Absolutely! Use vegan butter, a flax egg substitute, and replace meringue powder with aquafaba in the icing.
Pin This Recipe!
Perfect Heart-Shaped Sugar Cookies for Mom Easy Decorated Recipe

These heart-shaped sugar cookies are easy to make, decorated with royal icing, and perfect for celebrations like Mother’s Day. They are crisp at the edges, soft in the center, and decorated with just enough icing to feel special without being fussy.
- Prep Time: 15 minutes
- Cook Time: 10 minutes
- Total Time: 1 hour 25 minutes
- Yield: 24 cookies 1x
- Category: Dessert
- Cuisine: American
Ingredients
- 2 ½ cups (312 grams) all-purpose flour
- 1 teaspoon baking powder
- ½ teaspoon salt
- 1 cup (226 grams) unsalted butter, softened
- 1 cup (200 grams) granulated sugar
- 1 large egg, room temperature
- 1 teaspoon pure vanilla extract
- ½ teaspoon almond extract (optional)
- Royal icing ingredients:
- 2 cups (240 grams) powdered sugar
- 2 tablespoons meringue powder
- about ⅓ cup (80 ml) water
- Gel food coloring (optional)
Instructions
- Mix dry ingredients: In a medium bowl, whisk together 2 ½ cups (312 g) of all-purpose flour, 1 teaspoon baking powder, and ½ teaspoon salt. Set aside.
- Cream butter and sugar: In a large bowl, use an electric mixer to beat 1 cup (226 g) softened unsalted butter with 1 cup (200 g) granulated sugar until light and fluffy, about 3-4 minutes.
- Add egg and extracts: Mix in 1 large egg, 1 teaspoon pure vanilla extract, and ½ teaspoon almond extract (if using) until combined.
- Incorporate dry ingredients: Gradually add the flour mixture to the wet ingredients, mixing on low speed just until a dough forms. If too sticky, sprinkle a little extra flour.
- Chill the dough: Divide the dough into two disks, wrap tightly in plastic wrap, and refrigerate for at least 1 hour.
- Preheat oven: Set oven to 350°F (175°C) and line baking sheets with parchment paper.
- Roll and cut: On a lightly floured surface, roll one dough disk to about ¼ inch (6 mm) thickness. Use heart-shaped cookie cutter to cut shapes and transfer to baking sheets. Re-roll scraps and repeat.
- Bake: Bake for 8-10 minutes, or until edges just begin to turn golden. Centers will look soft but will firm as they cool.
- Cool completely: Transfer cookies to a wire rack and let cool fully before decorating.
- Prepare royal icing: In a clean bowl, combine 2 cups (240 g) powdered sugar, 2 tablespoons meringue powder, and about ⅓ cup (80 ml) water. Beat on high until stiff peaks form, adding water gradually to reach pipeable consistency.
- Color and decorate: Divide icing into small bowls and tint with gel food coloring. Using piping bags with small round tips, outline and flood cookies. Let each layer dry 15-30 minutes before adding details.
- Dry completely: Allow decorated cookies to air dry for several hours or overnight before storing or gifting.
Notes
Chill dough for at least 1 hour to prevent spreading and maintain shape. Use gel food coloring for vibrant royal icing without thinning. Practice piping on parchment paper before decorating cookies. Keep icing covered with a damp cloth when not in use to prevent crusting. Let cookies cool completely before icing to avoid melting. If dough feels too warm while rolling, chill again for 10 minutes. Baking a test cookie first helps adjust baking time for your oven.
Nutrition
- Serving Size: 1 cookie
- Calories: 125
- Sugar: 9.5
- Sodium: 90
- Fat: 6.5
- Saturated Fat: 4
- Carbohydrates: 17
- Fiber: 0.5
- Protein: 1.5
Keywords: heart-shaped sugar cookies, decorated sugar cookies, easy sugar cookies, Mother's Day cookies, royal icing cookies, homemade sugar cookies


