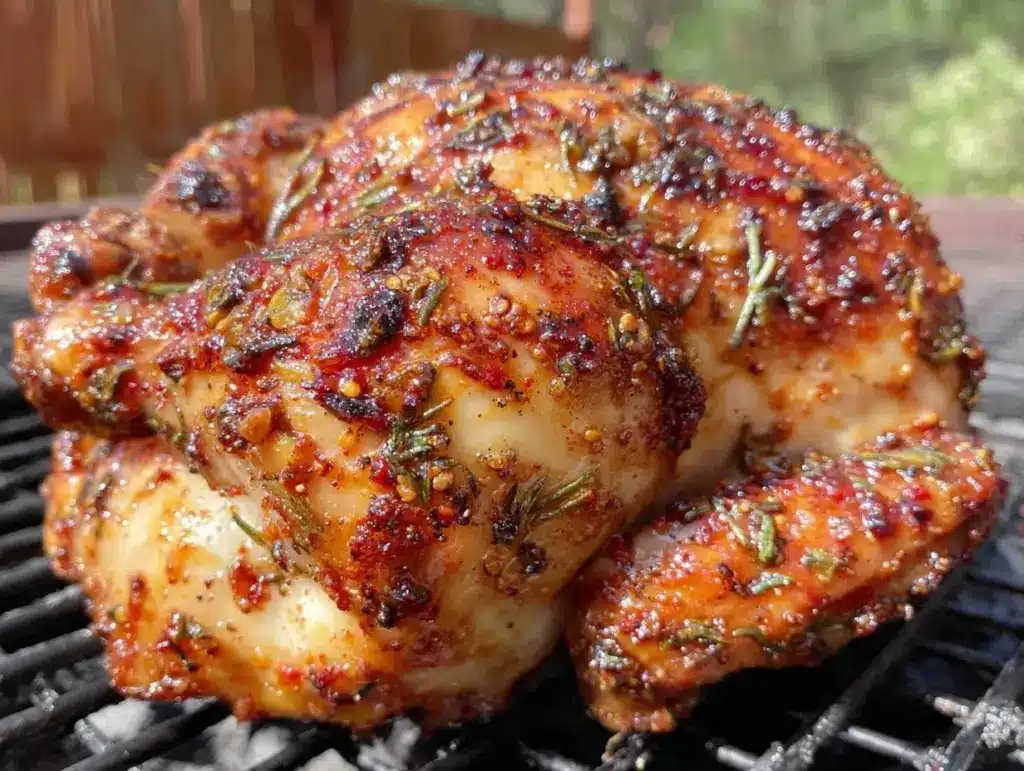
“You sure that’s going to work?” my partner asked, eyeing the chicken perched awkwardly atop the beer can on the grill. Honestly, I was half-expecting a disaster myself. The idea of cooking a whole chicken upright, using a beer can as a stand, sounded like one of those backyard BBQ myths — until that first bite happened. The skin crackled and shattered under my fork, the meat juicy and infused with a subtle hint of hoppy goodness. That night, the crispy beer can chicken with bold dry rub became less of a backyard experiment and more of a go-to crowd-pleaser.
I remember the first time I tried this recipe — it was after a long, exhausting week, and I wanted something easy but impressive for a casual get-together. The bold dry rub wasn’t just a random sprinkle of spices; it had a kick that made everyone’s eyes light up. No fancy marinades, no fuss, just an honest-to-goodness flavor bomb. Since then, I’ve made it so many times that my neighbors started texting for leftovers.
What really got me hooked, beyond the taste, was the way the chicken cooks perfectly on the grill — tender inside, impossibly crispy outside — without needing to babysit it every minute. It’s like magic, really. And if you’re wondering about the beer can part, it’s not about the beer (though that adds a nice subtle steam flavor) but the technique that keeps the chicken upright, so heat circulates evenly. I still get a little thrill when I pull it off the grill, skin golden-brown and crackling, juices locked in.
Now, this recipe is one I trust to impress without stress, whether for an easy weekend dinner or a spontaneous backyard hangout. It’s got that perfect balance of bold flavors and crispy texture that’s hard to beat. Plus, it’s a great way to show off some grilling skills without complicated steps. Let’s just say, this crispy beer can chicken with a bold dry rub has earned its spot as my signature grilled dish — and maybe, just maybe, it’ll become yours too.
Why You’ll Love This Recipe
After testing this crispy beer can chicken recipe over and over, I can say it ticks all the boxes for a winner. Here’s why it might just become a staple in your grilling lineup:
- Quick & Easy: From prep to the grill, it takes about 1 hour and 15 minutes, most of which is hands-off cooking time — perfect for busy weeknights or last-minute backyard gatherings.
- Simple Ingredients: The dry rub uses pantry staples like smoked paprika, garlic powder, and brown sugar. No need for trips to specialty stores.
- Perfect for Any Occasion: Whether it’s a casual family dinner, a summer cookout, or impressing friends at a potluck, this chicken fits right in.
- Crowd-Pleaser: Kids and adults alike rave about the crispy skin and juicy meat combo. It’s hard to find someone who won’t ask for seconds.
- Unbelievably Delicious: The dry rub adds a smoky, slightly sweet, and spicy kick that’s balanced perfectly with the beer steam infusion. The crispy skin – seriously, it’s next-level.
This isn’t just another grilled chicken recipe. What sets it apart is the upright cooking method that lets the heat circulate around the bird for even cooking, combined with a dry rub that brings layers of flavor without overwhelming the natural taste of the chicken. You don’t need to worry about messy marinades or soggy skin here.
Honestly, it’s the kind of recipe that makes you close your eyes after the first bite, savoring that perfect crisp and juicy contrast. It’s comfort food with a bit of a twist, healthier than fried chicken but every bit as satisfying. Plus, if you’re into grilling, it’s a neat technique that adds a little flair to your repertoire — and if you want to try something a little different, this chicken pairs beautifully alongside some crispy baked turkey sliders or even a hearty hobo casserole for a full meal.
What Ingredients You Will Need
This recipe uses simple, wholesome ingredients to deliver bold flavor and satisfyingly crispy texture without any fuss. Most are pantry staples, and substitutions are easy if you’re missing something.
- Whole chicken, about 4 to 5 pounds (1.8 to 2.3 kg) – opt for organic or free-range if possible for better flavor and texture
- Beer can, half full (12 oz / 355 ml) – any lager or ale works; the beer steams the chicken from inside
- Olive oil, 2 tablespoons – helps the rub stick and crisps the skin
- Brown sugar, 2 tablespoons – adds sweetness and caramelization
- Smoked paprika, 1 tablespoon – key for smoky flavor
- Garlic powder, 1 tablespoon – for savory depth
- Onion powder, 1 teaspoon – rounds out the spice blend
- Cayenne pepper, 1/2 teaspoon (adjust to taste) – adds a mild kick
- Salt, 1 tablespoon – essential for seasoning and crisping skin
- Black pepper, 1 teaspoon – fresh ground for best flavor
- Dried thyme, 1 teaspoon – optional, but adds an herby note
For the dry rub, I recommend using a trusted brand of smoked paprika like La Chinata for its rich flavor. If you want to make this gluten-free, double-check your spices for cross-contamination (most are naturally gluten-free, but some mixes may contain fillers).
Substitution tips:
- Use coconut sugar instead of brown sugar for a deeper, less sweet flavor
- Swap cayenne with smoked chili powder if you prefer a smokier heat
- For dairy-free, this recipe is naturally free of dairy, so no worries there
Equipment Needed
- Grill: A gas or charcoal grill works; charcoal adds more smoky flavor but requires more attention.
- Beer can chicken roaster stand (optional): This makes setting up the chicken easier and safer, but you can also just use an empty, cleaned beer can.
- Meat thermometer: A must-have to ensure the chicken is perfectly cooked without drying out. I personally use a digital instant-read thermometer for accuracy.
- Basting brush: For applying olive oil or any glaze if you decide to add one.
- Tongs and heat-resistant gloves: For handling hot chicken and grill grates safely.
- Aluminum foil: Useful for tenting the chicken if it gets too dark before it’s fully cooked.
If you’re on a budget, you can skip the roaster stand and just carefully balance the chicken on the beer can, but be cautious to avoid spills. Also, keeping your meat thermometer clean and calibrated ensures perfect results every time. I’ve found that a simple, affordable model works just fine here.
Preparation Method
- Prep the chicken: Remove any giblets from inside the cavity. Pat the chicken dry thoroughly with paper towels — drying the skin is key to getting that crispy finish. Let it sit at room temperature for 15 minutes.
- Make the dry rub: In a small bowl, combine brown sugar, smoked paprika, garlic powder, onion powder, cayenne pepper, salt, black pepper, and dried thyme. Mix well until evenly blended.
- Apply olive oil: Rub the entire chicken with 2 tablespoons of olive oil, making sure to coat the skin evenly. This helps the dry rub stick and promotes crispiness.
- Season the chicken: Generously rub the dry spice mix all over the chicken, including inside the cavity and under the skin if possible. Be thorough — this is where the bold flavor comes from.
- Prepare the beer can: Open the beer and drink or pour out about half (or use a can of non-alcoholic beer or soda). Insert the can into the chicken cavity so the bird sits upright. If using a roaster stand, secure the chicken in place.
- Heat the grill: Preheat your grill to medium heat (about 350°F / 175°C). If using charcoal, bank coals to one side for indirect heat cooking.
- Place the chicken on the grill: Position the chicken upright over indirect heat. Close the lid and cook for about 1 hour to 1 hour and 15 minutes. Avoid opening the lid too often to keep the temperature steady.
- Check for doneness: Insert a meat thermometer into the thickest part of the thigh (without touching bone). The chicken is done at 165°F (74°C). If the skin crisps too quickly, tent with foil to prevent burning.
- Rest the chicken: Carefully remove the chicken from the grill — it will be hot and juicy! Let it rest upright for 10 minutes before carving. This helps the juices redistribute and keeps the meat moist.
Pro tip: If you want extra crispy skin, you can crank the heat up for the last 5 to 10 minutes, but watch closely to avoid burning. The aroma when the skin starts crisping is unbeatable — like a smoky, spicy invitation you can’t ignore.
Cooking Tips & Techniques
Getting that perfect crispy skin and juicy interior is all about balance and timing. Here’s what I’ve learned through trial and error:
- Dry the skin well: This is the best way to prevent soggy skin. I sometimes even leave the chicken uncovered in the fridge overnight for drier skin.
- Don’t skip the rub under the skin: Loosening the skin gently and seasoning underneath adds flavor right where it counts.
- Use indirect heat: Cooking the chicken upright over indirect heat prevents flare-ups and burns while allowing even cooking.
- Monitor internal temperature: Use a reliable meat thermometer — guessing based on time alone can lead to dry or undercooked chicken.
- Rest before slicing: This keeps juices locked in, making your chicken moist and tender.
- Multitask: While the chicken cooks, prepare quick sides like a fresh salad or grilled veggies to serve warm alongside.
One mistake I made early on was rushing the cook by increasing the heat — that gave me burnt skin and underdone meat. Patience pays off, so let the grill do its job. And if you want to try a different crispy chicken style, you might enjoy the technique in this crispy chicken taquitos recipe, which also nails texture but with a different flavor profile.
Variations & Adaptations
This recipe is versatile and forgiving, so feel free to tweak it to suit your tastes or dietary needs:
- Spice it up: Add chipotle powder or smoked chili flakes to the rub for a smoky heat boost.
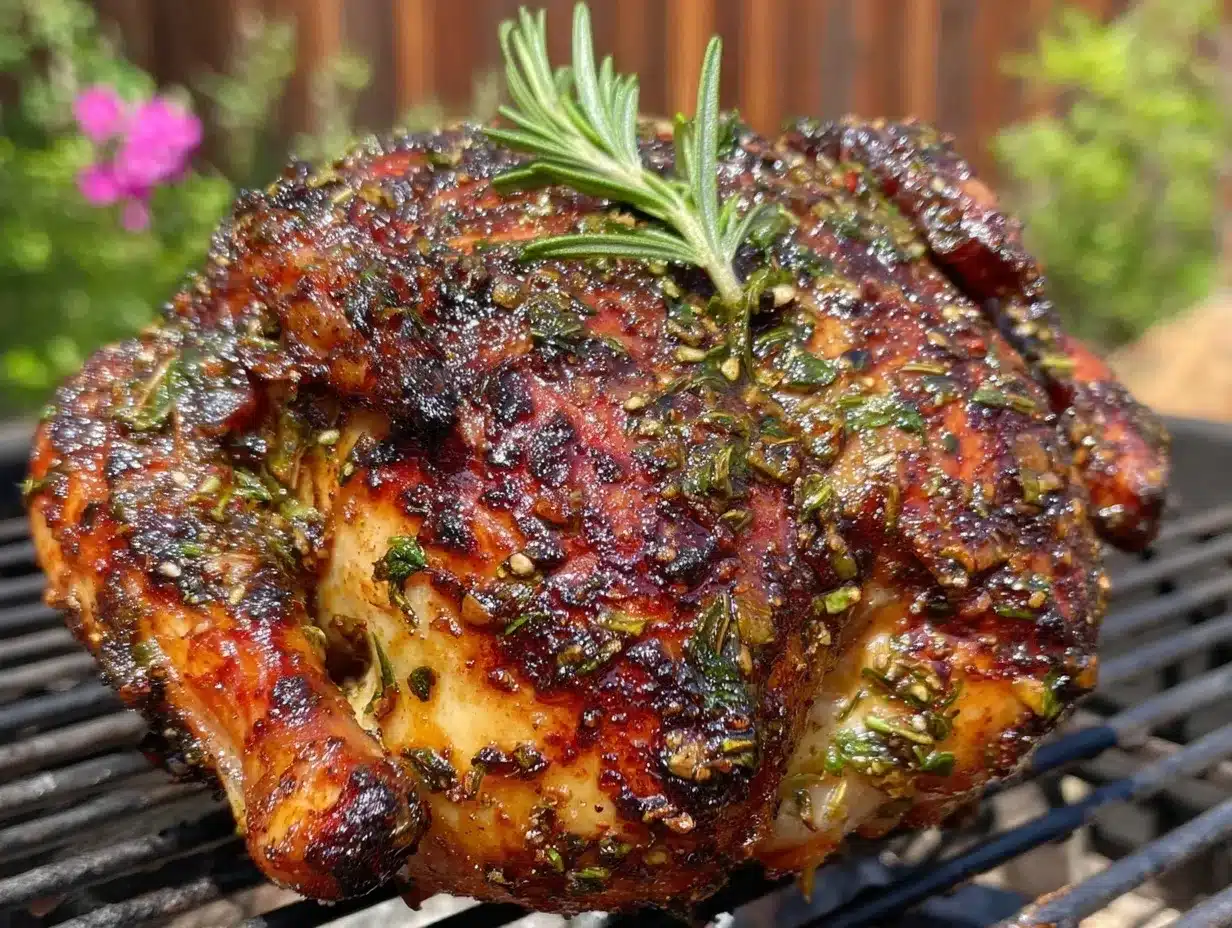
- Herbaceous twist: Swap dried thyme for rosemary or oregano for a different herbal note.
- Gluten-free option: The rub is naturally gluten-free, but check your spice brands. Pair with a gluten-free side like grilled potatoes or a salad.
- Different cooking methods: If you don’t have a grill, you can roast the chicken upright in the oven at 375°F (190°C) for about 1 hour and 20 minutes, though you’ll miss some of that smoky flavor.
- Non-beer alternatives: Use sparkling water or apple cider in place of beer for a milder steam effect.
Personally, I’ve tried swapping beer for a hoppy IPA once when I ran out of lager. The flavor was bolder and a bit more bitter, which surprisingly worked well with the smoky rub. For a full meal, I like pairing this chicken with a side of creamy dill pickle cheese ball — it adds a tangy, creamy contrast that’s just unbeatable.
Serving & Storage Suggestions
Serve your crispy beer can chicken hot off the grill. The skin should be crackling and golden, and the meat tender and juicy. Slice the chicken carefully and arrange it on a platter with freshly chopped herbs for a pop of color.
This chicken pairs beautifully with grilled corn, a crisp green salad, or even a cozy side like the sticky garlic chicken noodles. For beverages, a cold beer or a crisp white wine complements the bold flavors nicely.
To store leftovers, let the chicken cool completely, then refrigerate in an airtight container for up to 3 days. For longer storage, carve the meat and freeze in portions for up to 3 months. Reheat gently in the oven covered with foil to keep the meat moist, then finish under the broiler for a minute or two if you want to revive the crispiness of the skin.
Flavors tend to develop and deepen overnight, so if you can wait, the leftovers might actually taste better the next day — perfect for a quick lunch or dinner.
Nutritional Information & Benefits
This beer can chicken recipe offers a balanced, protein-rich meal with moderate fat content from the skin and olive oil. A 4-ounce (113 g) serving of cooked chicken provides approximately:
| Nutrient | Amount |
|---|---|
| Calories | 220 |
| Protein | 26 g |
| Fat | 12 g |
| Carbohydrates | 1 g (mostly from spices) |
Key health benefits include lean protein to support muscle and tissue repair and antioxidants from spices like paprika and garlic powder, which have anti-inflammatory properties. The recipe is naturally gluten-free and low in carbs, making it suitable for many dietary preferences.
Be mindful of sodium content, especially if you’re watching salt intake; you can reduce the salt in the rub accordingly. Overall, it’s a satisfying, wholesome dish that fits well into a balanced eating plan.
Conclusion
This crispy beer can chicken on the grill with bold dry rub is one of those recipes you can count on when you want something flavorful, impressive, and fuss-free. It’s got the crispy skin we all crave, the juicy meat that keeps you coming back, and a spice blend that’s just right — not too shy, not too overwhelming.
Feel free to play around with the rub or sides to make it your own. I love how adaptable this recipe is, fitting into casual cookouts or even a weeknight meal with minimal effort. Honestly, it’s become a bit of a family tradition around here — a reliable way to bring smiles and full plates without the stress.
If you try this recipe, I’d love to hear how it turned out or what twists you added. Sharing those moments makes the whole experience better. Here’s to many crispy, juicy chickens on your grill!
Frequently Asked Questions
Can I use a can other than beer for this recipe?
Yes! You can use non-alcoholic beer, soda, sparkling water, or even broth in the can. The key is steam inside the chicken cavity to keep it moist.
How do I clean the beer can before using it?
Rinse the can thoroughly with warm water and dish soap, then rinse again. Avoid cans with plastic tops or coatings that might melt.
What if I don’t have a grill? Can I make this in the oven?
You can roast the chicken upright in the oven at 375°F (190°C) for about 1 hour and 20 minutes. It won’t have the smoky flavor but will still be juicy and flavorful.
How do I know when the chicken is done?
Use a meat thermometer inserted into the thickest part of the thigh (avoiding bone). It should read 165°F (74°C) for safe eating.
Can I make the dry rub ahead of time?
Absolutely! The dry rub can be mixed and stored in an airtight container for up to 2 weeks, making prep even easier on grilling day.
Pin This Recipe!
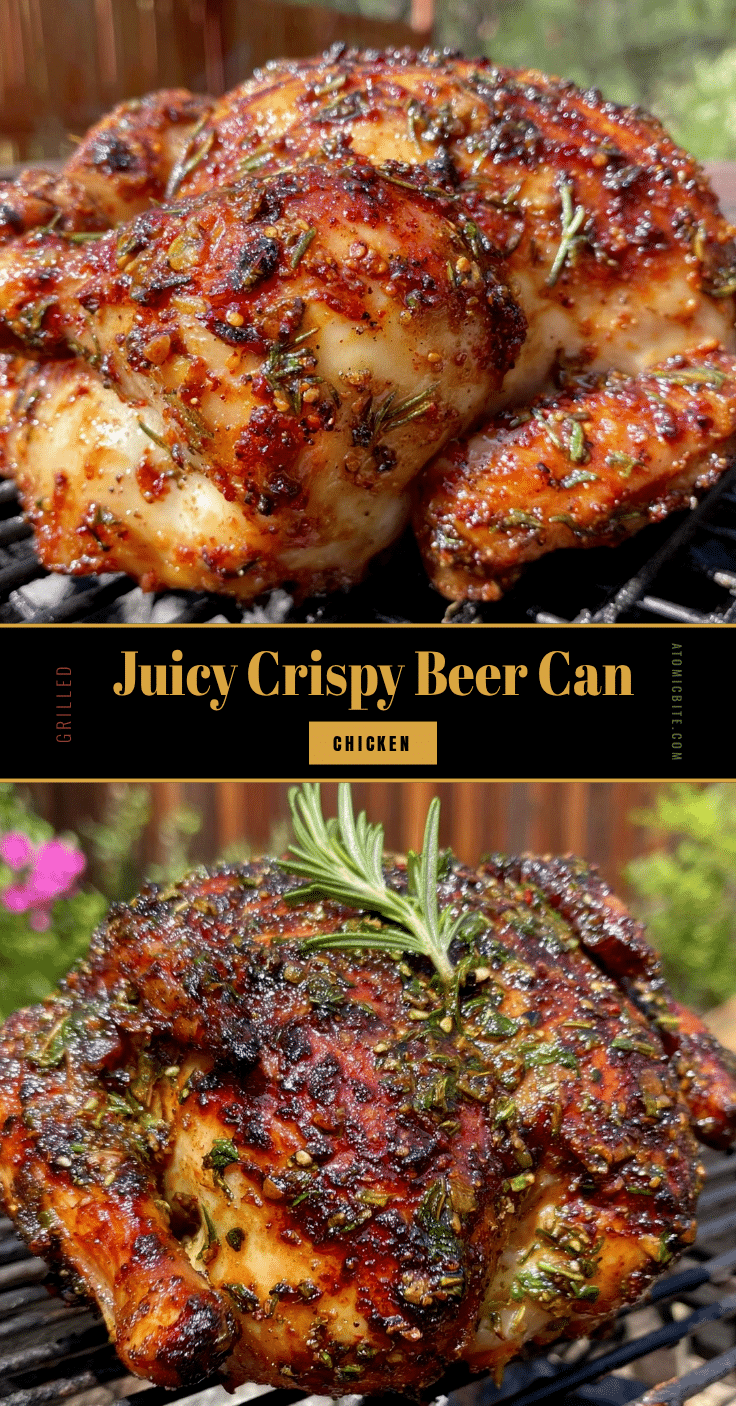
Crispy Beer Can Chicken Recipe with Bold Dry Rub Easy Grilled Perfection

A flavorful and easy grilled whole chicken cooked upright on a beer can with a bold dry rub, resulting in crispy skin and juicy meat.
- Prep Time: 20 minutes
- Cook Time: 1 hour 15 minutes
- Total Time: 1 hour 35 minutes
- Yield: 4 to 6 servings 1x
- Category: Main Course
- Cuisine: American
Ingredients
- 1 whole chicken, about 4 to 5 pounds (1.8 to 2.3 kg)
- 1 half-full beer can (12 oz / 355 ml), any lager or ale
- 2 tablespoons olive oil
- 2 tablespoons brown sugar
- 1 tablespoon smoked paprika
- 1 tablespoon garlic powder
- 1 teaspoon onion powder
- 1/2 teaspoon cayenne pepper (adjust to taste)
- 1 tablespoon salt
- 1 teaspoon black pepper
- 1 teaspoon dried thyme (optional)
Instructions
- Remove any giblets from inside the chicken cavity. Pat the chicken dry thoroughly with paper towels and let it sit at room temperature for 15 minutes.
- In a small bowl, combine brown sugar, smoked paprika, garlic powder, onion powder, cayenne pepper, salt, black pepper, and dried thyme. Mix well until evenly blended.
- Rub the entire chicken with 2 tablespoons of olive oil, coating the skin evenly.
- Generously rub the dry spice mix all over the chicken, including inside the cavity and under the skin if possible.
- Open the beer can and drink or pour out about half. Insert the can into the chicken cavity so the bird sits upright. Secure with a roaster stand if available.
- Preheat your grill to medium heat (about 350°F / 175°C). For charcoal grills, bank coals to one side for indirect heat cooking.
- Place the chicken upright over indirect heat on the grill. Close the lid and cook for about 1 hour to 1 hour and 15 minutes, avoiding opening the lid too often.
- Check for doneness by inserting a meat thermometer into the thickest part of the thigh without touching bone. The chicken is done at 165°F (74°C). Tent with foil if skin crisps too quickly.
- Carefully remove the chicken from the grill and let it rest upright for 10 minutes before carving.
Notes
Dry the chicken skin thoroughly to ensure crispiness. Use indirect heat to prevent flare-ups and burns. Rest the chicken before carving to keep it juicy. You can increase heat for the last 5-10 minutes for extra crispy skin but watch closely to avoid burning. The dry rub can be made ahead and stored for up to 2 weeks. Substitute beer with non-alcoholic beer, soda, or sparkling water if desired.
Nutrition
- Serving Size: 4 oz (113 g) cooked
- Calories: 220
- Fat: 12
- Carbohydrates: 1
- Protein: 26
Keywords: beer can chicken, grilled chicken, dry rub chicken, crispy chicken, BBQ chicken, easy grilled chicken, bold dry rub


