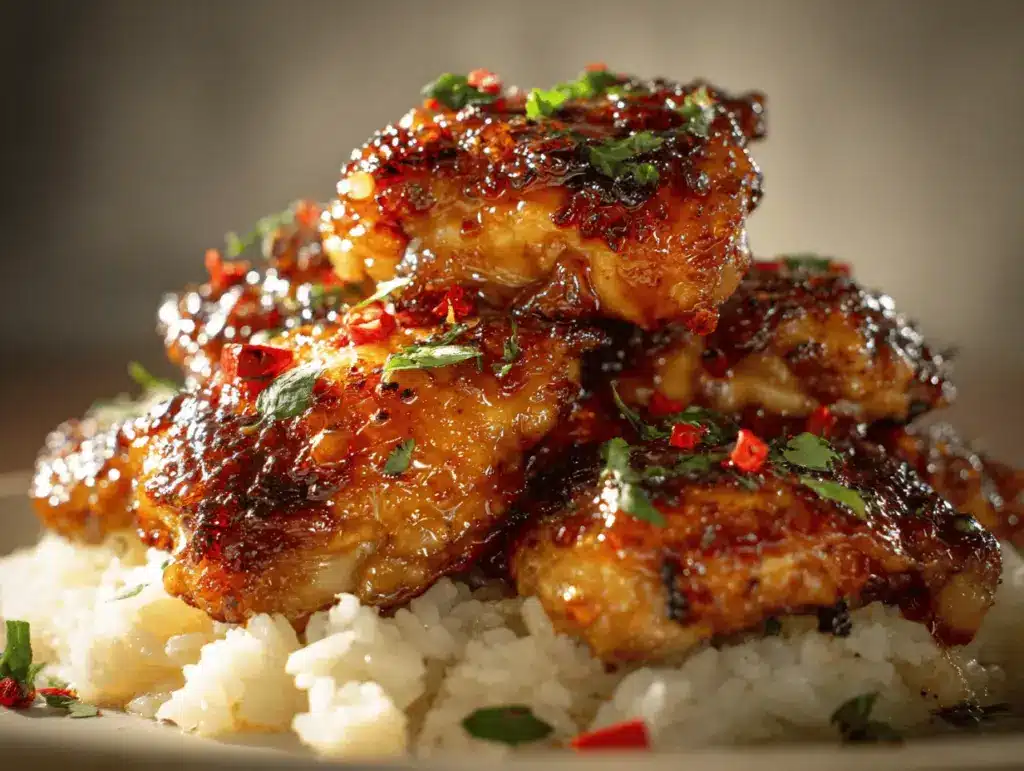
The sound of chicken skin sizzling in a hot skillet—honestly, that’s music to my ears. The first time I made crispy honey garlic chicken thighs over garlic butter rice, the aroma was so tempting my kids came running before I even set the table. If you’re craving something that feels a little fancy but takes less effort than you’d think, this one’s got your name all over it.
I stumbled on this combo during a week when I was running low on inspiration but had a fridge full of chicken thighs. I wanted that golden, crispy skin you only get from a hot pan and a sticky honey garlic sauce that clings to every bite. Add in a savory, garlicky rice that soaks up all those drippings and sauce—let’s just say I was hooked after the first forkful. Over the years, I’ve tweaked and re-tested until this version became my go-to. It’s the kind of meal that turns a regular Tuesday into something special, and honestly, you don’t need to be a pro chef to make it work.
If you love comfort food with a touch of sweet and savory, this is about to become your new favorite. The best part? Crispy honey garlic chicken thighs over rice deliver big flavor without breaking the bank or demanding hours in the kitchen. Perfect for busy families, picky eaters, or anyone who just loves that irresistible combo of crunchy, sticky, and tender. I’ve lost count of how many times I’ve made this, but trust me—it never gets old.
Why You’ll Love This Crispy Honey Garlic Chicken Thighs Over Rice Recipe
I’ve made this dish more times than I can count, and every single time, someone asks for the recipe. Here’s why it’s a winner—whether you’re a seasoned cook or just starting out:
- Quick & Easy: You can have this on the table in about 40 minutes, prep included. Perfect for those nights when takeout seems tempting, but you want something homemade.
- Simple Ingredients: No need to hunt down anything fancy. If you’ve got chicken thighs, rice, garlic, and honey, you’re already halfway there.
- Perfect for Weeknights & Entertaining: It feels impressive enough for guests, but it’s totally do-able even after a long workday. I’ve served it for family dinners, lazy Sundays, and even dinner parties—always a hit.
- Crowd-Pleaser: Even my pickiest eater happily asks for seconds. The crispy chicken, sticky sauce, and buttery rice speak to kids and adults alike.
- Unbelievably Delicious: The contrast of crunchy chicken skin, sticky-sweet honey garlic glaze, and fluffy, garlicky rice is kind of addictive. You won’t want to stop at one serving.
What makes this crispy honey garlic chicken thighs recipe stand out? For starters, I use a simple pan-sear and oven-finish method that guarantees shatteringly crisp skin without drying out the meat. The honey garlic sauce isn’t just poured on top—it simmers with the chicken so every bite is coated. And unlike some versions that drown the chicken, I keep the sauce thick and sticky, which means more flavor per bite.
This isn’t just another chicken and rice dinner. It’s the kind of meal that brings comfort on a tough day, or makes an ordinary night feel special. I love that it’s budget-friendly, packed with flavor, and customizable for various diets. Plus, it’s tested, family-approved, and always leaves the kitchen smelling amazing. That’s a win in my book!
What Ingredients You Will Need
This recipe uses simple, wholesome ingredients to create layers of flavor and texture. Most of these are pantry staples, and I’ll share a few tips for picking the best versions or swapping things out if you need to.
- For the Chicken:
- Bone-in, skin-on chicken thighs (about 2 lbs / 900g) – the skin gets extra crispy and the bone keeps the meat juicy
- Kosher salt & black pepper – for seasoning
- All-purpose flour (2 tbsp / 16g) – creates a thin, crisp crust (swap for gluten-free if needed)
- Neutral oil (2 tbsp / 30ml, like canola or avocado) – for searing the chicken
- For the Honey Garlic Sauce:
- Honey (1/4 cup / 85g) – adds sweetness and helps the sauce thicken
- Low-sodium soy sauce (1/4 cup / 60ml) – brings salty, umami depth (use tamari for gluten-free)
- Fresh garlic cloves (4-5, minced) – the star flavor here
- Rice vinegar (1 tbsp / 15ml) – balances the sweetness
- Crushed red pepper flakes (1/2 tsp, optional) – for a little heat (totally optional!)
- For the Garlic Butter Rice:
- Long-grain white rice (1 1/2 cups / 300g) – Jasmine or Basmati work great for fluffy texture
- Low-sodium chicken broth (3 cups / 720ml) – more flavor than water alone
- Unsalted butter (2 tbsp / 28g) – gives the rice a rich, creamy finish
- Fresh garlic cloves (2, minced) – makes the rice ultra fragrant
- Kosher salt (1/2 tsp) – to taste
- Chopped fresh parsley or green onion (for garnish, optional)
Ingredient notes & swaps: For best results, pick small- to medium-sized chicken thighs—they cook more evenly. If you only have boneless, skinless thighs, you’ll miss that crispy skin, but you can still use them (reduce cook time by about 10 minutes). Out of honey? Maple syrup works in a pinch. For a dairy-free option, use olive oil instead of butter in the rice. Feel free to toss in a handful of frozen peas or corn to the rice for some extra color and nutrition. If you’re out of fresh garlic, use 1/2 tsp garlic powder in both the sauce and rice, but fresh is definitely best for flavor.
I recommend using local honey and fresh garlic if you can—it makes a difference! For the soy sauce, I usually use Kikkoman or San-J (tamari for gluten-free). And honestly, the only “fancy” thing you need is a good pan for crispy chicken—everything else is everyday magic.
Equipment Needed
- Large oven-safe skillet (preferably cast iron): This is my go-to for getting the chicken skin super crisp, then transferring straight to the oven. A heavy-bottomed stainless pan works too.
- Medium saucepan with lid: For cooking the rice. If you have a rice cooker, that works just as well—just sauté the garlic in butter first!
- Tongs: Makes flipping the chicken a breeze (and keeps your hands safe from splatters).
- Measuring cups & spoons: For accuracy. I’ll be honest, I often eyeball the garlic, but for the sauce, measurements help keep things balanced.
- Small mixing bowl: For whisking together the honey garlic sauce ingredients.
- Cutting board & sharp knife: For prepping garlic and herbs.
If you don’t have an oven-safe skillet, just sear the chicken in a regular pan and transfer to a baking dish for the oven part. I’ve done this plenty of times when my cast iron was “resting” (aka soaking in the sink). For the rice, any pot with a tight-fitting lid works. And if you’re on a budget, skip the fancy brands—my $20 cast iron pan has lasted years with just a little TLC (keep it dry and rub with oil after washing).
How to Make Crispy Honey Garlic Chicken Thighs Over Rice

-
Prep the chicken:
Pat 2 lbs (900g) chicken thighs dry with paper towels. This is key for crispy skin! Season both sides with 1 tsp salt and 1/2 tsp pepper. Lightly dust the skin side with 2 tbsp (16g) flour.
Tip: If your chicken is cold, let it sit at room temp for 15 minutes for even cooking. -
Start the rice:
Rinse 1 1/2 cups (300g) rice under cold water until the water runs clear. In a medium saucepan, melt 2 tbsp (28g) butter over medium heat. Add 2 minced garlic cloves and cook for 30 seconds, just until fragrant.
Stir in the rinsed rice and toast for 1 minute. Pour in 3 cups (720ml) broth and 1/2 tsp salt. Bring to a boil, then cover and reduce heat to low. Simmer for 15-18 minutes, until liquid is absorbed.
Rice tip: Don’t peek! Lifting the lid lets steam escape, which can make rice gummy. -
Sear the chicken:
Heat 2 tbsp (30ml) oil in a large oven-safe skillet over medium-high. Place chicken thighs skin-side down. Cook without moving for 7-8 minutes, until the skin is deeply golden and crisp.
Flip and cook 2 minutes more on the other side. Turn off heat.
Warning: Hot oil splatters! Use a splatter guard or a lid tilted over the pan if needed. -
Mix the honey garlic sauce:
In a small bowl, whisk together 1/4 cup (85g) honey, 1/4 cup (60ml) soy sauce, 4-5 minced garlic cloves, 1 tbsp (15ml) rice vinegar, and 1/2 tsp red pepper flakes (if using).
Pour the sauce all over the chicken in the skillet, spooning a bit under the thighs too.
Sauce tip: Taste and add a splash more vinegar or a pinch of salt if you like it tangier. -
Roast the chicken:
Transfer the skillet to a preheated 400°F (200°C) oven. Roast, uncovered, for 18-22 minutes, until the chicken is cooked through (165°F/74°C internal temp) and the sauce is bubbly and thickened.
Note: If your sauce thickens too quickly or gets too dark, loosely cover with foil for the last 5 minutes. -
Finish the rice:
Once rice is done, remove from heat and let sit covered for 5 minutes. Fluff with a fork and stir in chopped herbs if using. -
Serve:
Scoop rice onto plates. Top with crispy chicken thighs and spoon plenty of the sticky honey garlic sauce over everything. Garnish with parsley or green onion if you like.
Personal tip: I always serve extra sauce on the side—my family fights over it!
Cooking Tips & Techniques
Over the years, I’ve picked up a few tricks to make sure crispy honey garlic chicken thighs over rice come out perfect every time—no matter what kind of day you’ve had.
- Don’t skimp on drying the chicken skin: Any moisture means less crisp, more steam. Paper towels are your friend here.
- Start skin-side down, don’t move it: It can be tempting to peek or shuffle the chicken, but letting it sit gets you that golden crust. If it sticks, it’s not ready to flip yet.
- Oven finish is key: Searing gives crispness, but finishing in the oven cooks the thighs through without burning the skin. Don’t rush it—juicy chicken is worth the wait.
- Thick vs. thin sauce: If your sauce is watery, simmer on the stove for a few minutes after baking. If it gets too sticky, whisk in a splash of broth or water.
- Rice troubleshooting: If your rice is undercooked, add a splash more broth and cook covered for a few extra minutes. If it’s mushy, try reducing the liquid next time or letting it steam off uncovered for a minute.
- Multitask: Start the rice while the chicken sears, and prep the sauce while the rice cooks. It all comes together smoothly with a little rhythm.
- Personal lesson learned: The first time I made this, I rushed the sear and ended up with soggy skin (blah). Now I always wait until the chicken releases easily before flipping—it’s worth those extra couple minutes.
Consistency comes with practice, so don’t stress if it’s not picture-perfect the first time. There’s a reason this recipe is on my regular dinner rotation—even if you mess up a step, it’s still delicious!
Variations & Adaptations
One of the best things about crispy honey garlic chicken thighs over rice is how easily you can tweak it to fit your taste, pantry, or dietary needs. Here are a few tried-and-true ideas:
- Gluten-Free: Use gluten-free flour for dusting the chicken and swap soy sauce for tamari or coconut aminos. No one will notice the difference!
- Spicy-Sweet: Add 1-2 teaspoons of sriracha or chili paste to the honey garlic sauce. I tried this for a game night and it was a huge hit with spice-lovers.
- Lighter Version: Use boneless, skinless chicken thighs or even chicken breast. Reduce oven time by about 10 minutes and watch carefully to avoid overcooking. The sauce keeps it juicy.
- Vegetarian Adaptation: Sub tofu steaks or cauliflower “steaks” for the chicken. Coat in flour, sear until golden, and finish with the honey garlic sauce and rice. My veggie friends were shocked by how good this is!
- Seasonal Add-Ins: Stir steamed broccoli, snap peas, or sautéed bell peppers into the rice for extra color and nutrition, especially in spring and summer.
- Low-Carb: Serve the chicken and sauce over cauliflower rice instead of regular rice. I’ve done this for meal prep weeks and it’s still totally satisfying.
- Allergen Swaps: For dairy-free, use olive oil in the rice instead of butter. For nut allergies, all ingredients are safe as written.
Try mixing and matching to find your favorite combo—I love making it spicy-sweet for adults and mild for the kids. And don’t be afraid to use up whatever veggies you have on hand. It’s a forgiving recipe!
Serving & Storage Suggestions
This dish is best enjoyed hot, right after the chicken comes out of the oven. For a little extra flair, serve it family-style in the skillet with the rice alongside, or plate individually with a generous spoonful of sauce over each serving.
Serving ideas:
- Top with extra chopped herbs for color and freshness.
- Add lemon wedges for a bright, zesty finish.
- Pair with a simple side salad or steamed green beans for a complete meal.
- For drinks, a cold glass of iced tea or a crisp white wine works wonders.
Storage tips:
- Leftovers keep well in the fridge for up to 3 days. Store chicken and rice separately for best texture.
- Reheat chicken in a 350°F (175°C) oven for 10-12 minutes to revive crispiness, or use a toaster oven. Rice can be microwaved with a splash of water to fluff it up.
- Freeze cooked chicken thighs (without sauce) for up to 2 months. Thaw overnight and reheat in the oven.
- The flavors deepen as it sits, so leftovers are extra tasty for lunch the next day.
Trust me—if you manage to have leftovers, you’ll look forward to them!
Nutritional Information & Benefits
This meal strikes a balance between comfort food and wholesome eating. Here’s a rough estimate per serving (based on 4 servings):
- Calories: 540
- Protein: 32g
- Carbs: 48g
- Fat: 23g
- Sugar: 14g (from the honey)
Chicken thighs provide plenty of protein and iron, while garlic offers antioxidants and can support heart health. Using honey for sweetness means fewer processed sugars. You can make it gluten-free and dairy-free with simple swaps, and it’s naturally nut-free.
From a wellness perspective, I love that this recipe satisfies cravings without feeling heavy or greasy. It’s filling, energizing, and you get all that comfort-food joy with ingredients you can feel good about.
Conclusion
If you’re looking for a dinner that’s easy, crave-worthy, and guaranteed to make everyone at the table happy, crispy honey garlic chicken thighs over rice is it. The golden skin, sticky-sweet sauce, and garlicky rice are a combo you’ll come back to again and again.
Don’t be afraid to tweak things—add veggies, turn up the spice, or swap out the grains. This recipe is all about making it your own. Personally, it’s my favorite “reward myself” meal after a long week, and I hope it becomes a staple in your kitchen too.
Give it a try, and let me know how it goes! Leave a comment below with your favorite twist, snap a pic for Pinterest, or share your family’s reaction—I never get tired of hearing how this one turns out for other home cooks. Happy cooking!
Frequently Asked Questions
Can I use boneless, skinless chicken thighs?
Yes! They cook a bit faster and won’t have the same crispy skin, but the flavor and juiciness are still amazing. Reduce oven time by about 10 minutes and check for doneness.
What rice works best for this recipe?
I recommend long-grain white rice like Jasmine or Basmati for the fluffiest texture. Brown rice works too—just add extra cooking time and more broth if needed.
Can I make the honey garlic sauce ahead of time?
Absolutely. Mix and refrigerate the sauce for up to 3 days. Give it a good stir before pouring over the chicken, as the honey may settle.
How do I keep chicken skin crispy when reheating?
Reheat in a hot oven (350°F/175°C) for 10-12 minutes. The skin won’t be quite as shatteringly crisp as fresh, but it’ll be way better than microwaving. If you have an air fryer, that works like a charm too.
Is this recipe good for meal prep?
Yes! The chicken and rice both store and reheat well. I like to portion them into containers with extra sauce for grab-and-go lunches. Just keep the sauce separate if you want the chicken skin to stay as crispy as possible.
Pin This Recipe!
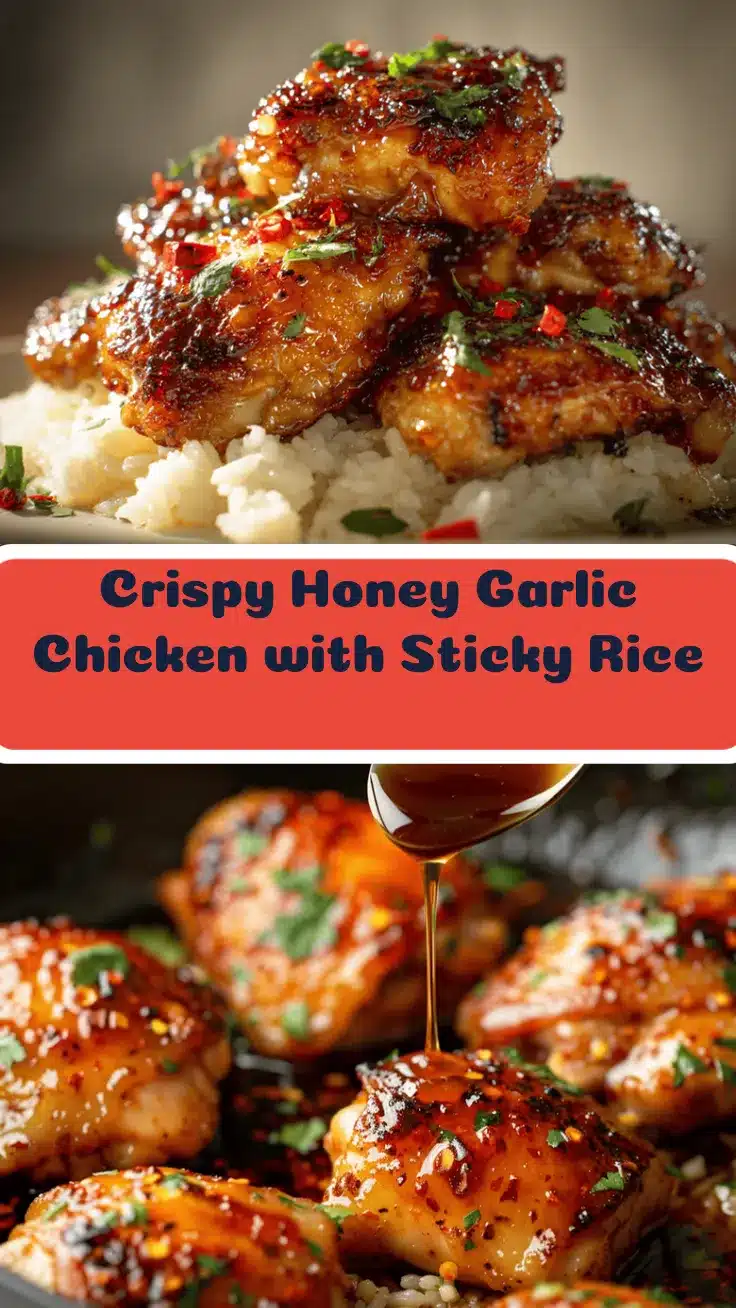
Crispy Honey Garlic Chicken Thighs Over Rice

Crispy honey garlic chicken thighs over garlic butter rice is a comforting, crowd-pleasing weeknight dinner featuring golden, crispy chicken, a sticky-sweet honey garlic sauce, and fluffy, garlicky rice. It’s easy, budget-friendly, and packed with flavor, making it perfect for busy families or entertaining guests.
- Prep Time: 15 minutes
- Cook Time: 25 minutes
- Total Time: 40 minutes
- Yield: 4 servings 1x
- Category: Main Course
- Cuisine: Asian-Inspired
Ingredients
- 2 lbs bone-in, skin-on chicken thighs
- 1 teaspoon kosher salt, plus more to taste
- 1/2 teaspoon black pepper
- 2 tablespoons all-purpose flour (or gluten-free flour)
- 2 tablespoons neutral oil (canola or avocado)
- 1/4 cup honey
- 1/4 cup low-sodium soy sauce (or tamari for gluten-free)
- 4–5 garlic cloves, minced (for sauce)
- 1 tablespoon rice vinegar
- 1/2 teaspoon crushed red pepper flakes (optional)
- 1 1/2 cups long-grain white rice (Jasmine or Basmati)
- 3 cups low-sodium chicken broth
- 2 tablespoons unsalted butter
- 2 garlic cloves, minced (for rice)
- 1/2 teaspoon kosher salt (for rice)
- Chopped fresh parsley or green onion, for garnish (optional)
Instructions
- Pat chicken thighs dry with paper towels. Season both sides with 1 teaspoon salt and 1/2 teaspoon pepper. Lightly dust the skin side with 2 tablespoons flour.
- Rinse rice under cold water until water runs clear. In a medium saucepan, melt 2 tablespoons butter over medium heat. Add 2 minced garlic cloves and cook for 30 seconds until fragrant.
- Stir in rinsed rice and toast for 1 minute. Pour in 3 cups chicken broth and 1/2 teaspoon salt. Bring to a boil, cover, reduce heat to low, and simmer for 15-18 minutes until liquid is absorbed.
- Heat 2 tablespoons oil in a large oven-safe skillet over medium-high. Place chicken thighs skin-side down and cook without moving for 7-8 minutes until skin is golden and crisp. Flip and cook 2 minutes more. Turn off heat.
- In a small bowl, whisk together honey, soy sauce, 4-5 minced garlic cloves, rice vinegar, and red pepper flakes (if using). Pour sauce over chicken in skillet, spooning some under the thighs.
- Transfer skillet to a preheated 400°F oven. Roast, uncovered, for 18-22 minutes until chicken is cooked through (165°F internal temp) and sauce is bubbly and thickened.
- Once rice is done, remove from heat and let sit covered for 5 minutes. Fluff with a fork and stir in chopped herbs if using.
- Serve rice on plates, top with crispy chicken thighs, and spoon honey garlic sauce over everything. Garnish with parsley or green onion if desired.
Notes
For gluten-free, use gluten-free flour and tamari. For dairy-free, use olive oil instead of butter in the rice. Boneless, skinless thighs can be used (reduce oven time by 10 minutes). Add veggies like peas or corn to the rice for extra nutrition. Reheat chicken in the oven to maintain crispiness. Sauce can be made ahead and refrigerated for up to 3 days.
Nutrition
- Serving Size: 1 chicken thigh with 3/4 cup rice and sauce
- Calories: 540
- Sugar: 14
- Sodium: 900
- Fat: 23
- Saturated Fat: 7
- Carbohydrates: 48
- Fiber: 1
- Protein: 32
Keywords: crispy chicken, honey garlic chicken, chicken thighs, weeknight dinner, easy chicken recipe, skillet chicken, garlic butter rice, family dinner, Asian-inspired, comfort food