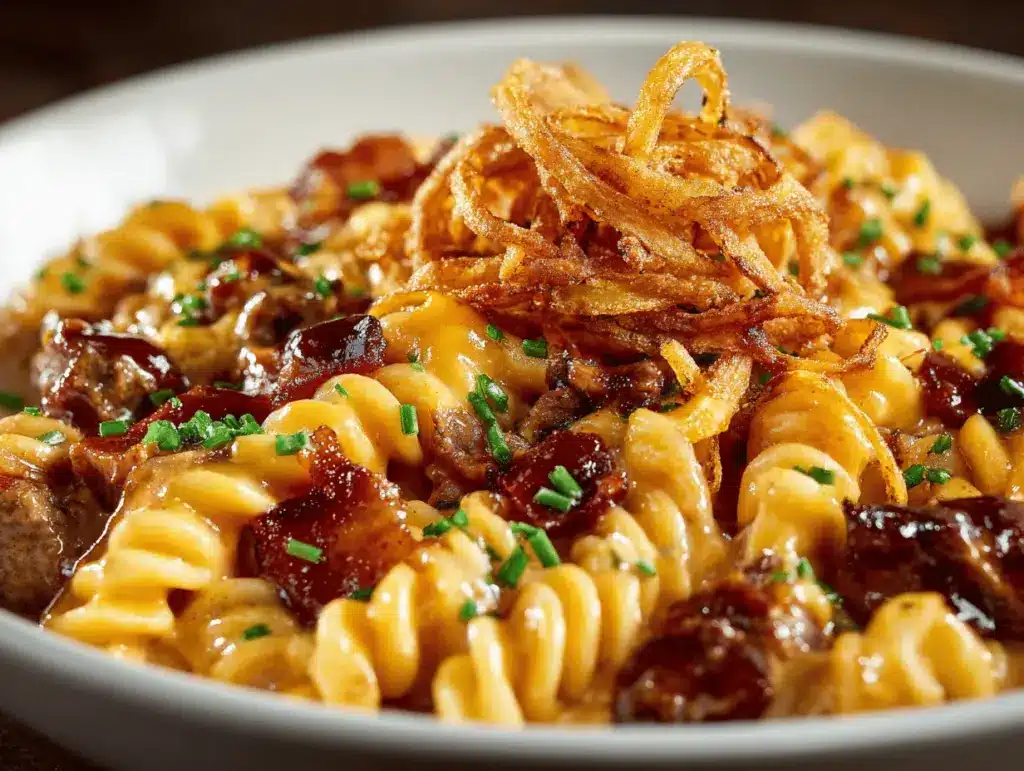
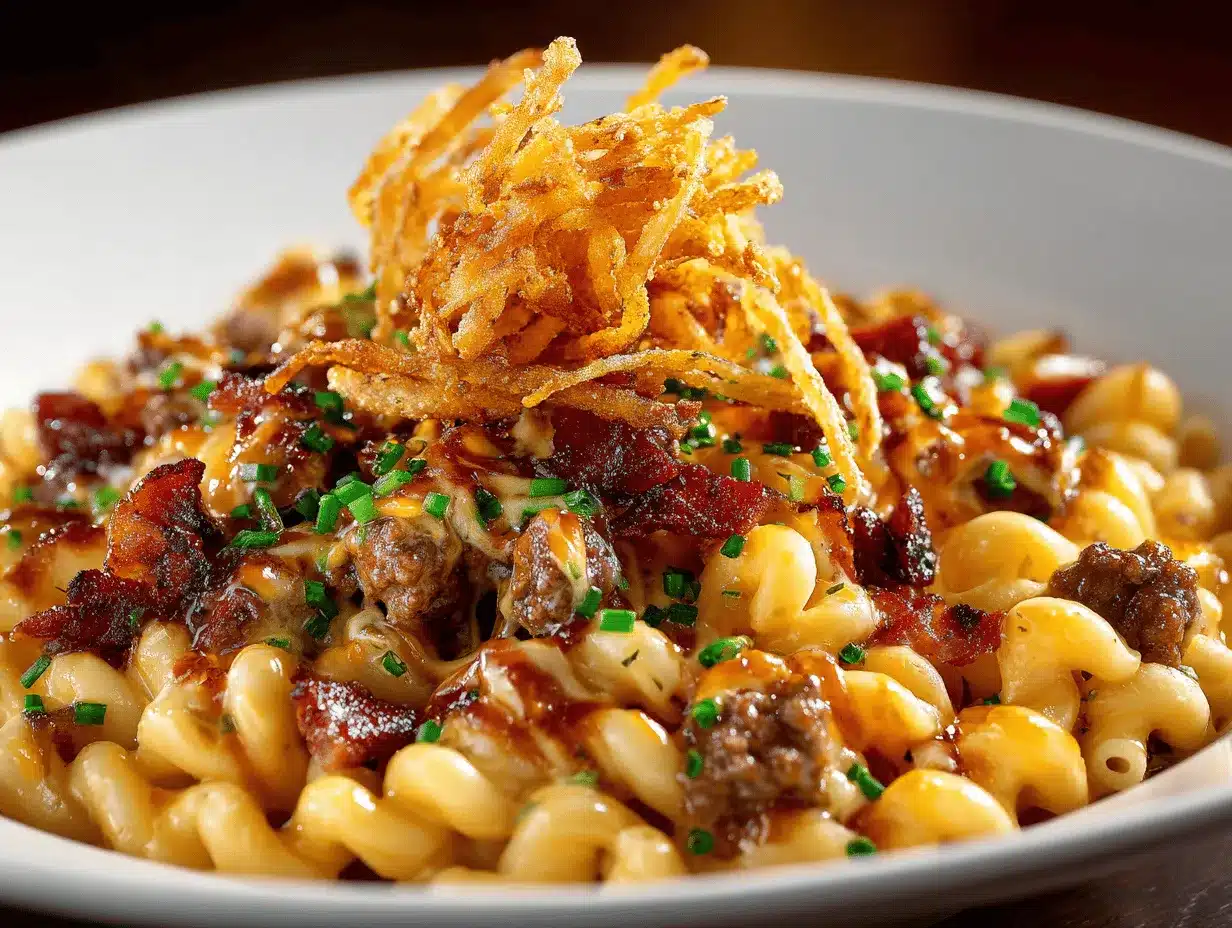
The sizzle of bacon, the tang of BBQ sauce, and the gooey stretch of melted cheese—this BBQ Bacon Cheeseburger Mac Skillet isn’t just dinner; it’s pure comfort in a pan. I can still remember the first time I tossed all my favorite burger flavors into a skillet with pasta—my kitchen smelled like a backyard cookout, and the whole house was drawn to the table by the aroma alone. There’s something about that first bite, with the crunch of crispy onions and the smoky BBQ kick, that just hits the spot every single time.
Honestly, I stumbled across this BBQ bacon cheeseburger mac idea on a weeknight when I had no buns but a craving for all things burger. It was one of those “let’s see what happens” moments, and trust me, it was a happy accident. What I love most is how it brings together the best parts of a classic cheeseburger—savory beef, sharp cheddar, sweet smoky sauce, and bacon, always bacon—then wraps it up in pasta for ultimate comfort. This skillet is perfect for busy nights, picky eaters (kids devour it every time), or anyone who just wants a big, cheesy hug in a bowl.
As someone who’s tested this recipe in every pan I own (and, not gonna lie, burned a batch or two learning the ropes), I can promise you: this BBQ bacon cheeseburger mac is one you’ll come back to again and again. Whether you’re pulling together a quick family dinner or looking for a crowd-pleasing dish for game night, this skillet brings bold flavors, easy clean-up, and a little bit of fun to your table. If you’re a fan of cheeseburgers, bacon, or just crave that perfect BBQ twist, buckle up—this recipe’s about to become your new weeknight go-to.
Why You’ll Love This Recipe
- Quick & Easy: Ready in about 40 minutes, all in one skillet. Perfect for weeknights when you want bold flavor without a pile of dishes.
- Simple Ingredients: You probably have everything you need in your pantry and fridge—nothing fancy, just real food with big taste.
- Perfect for Any Occasion: This BBQ bacon cheeseburger mac skillet shines at family dinners, potlucks, or even casual get-togethers. It’s just as great for feeding a crowd as it is for a cozy night in.
- Crowd-Pleaser: Kids, teens, and adults all love this one. There’s something about the familiar flavors—burger, bacon, cheese, and pasta—that makes everyone want seconds.
- Unbelievably Delicious: Tangy BBQ sauce, crispy bacon, creamy cheese, and the crunch of fried onions—this isn’t just mac and cheese, it’s next-level comfort food.
This BBQ bacon cheeseburger mac skillet stands out because it combines the heartiness of a cheeseburger with the coziness of homemade pasta. The secret? Blending smoky BBQ sauce into the cheesy base and topping everything with crispy onions for an irresistible crunch. I always make extra because the leftovers (if you have any) taste even better the next day. The one-pan approach means less hassle, too—just cook, serve, and enjoy.
It’s honestly the kind of dish that makes you smile after the first bite. It’s hearty, savory, and packed with layers of flavor—like your favorite burger and your best mac and cheese had a delicious, cheesy baby. Whether you’re impressing friends, feeding the family, or just treating yourself, this skillet brings big taste without stress. There’s a reason it’s a favorite in my house, and I’m betting it’ll be a hit in yours, too.
What Ingredients You Will Need
This recipe uses simple, everyday ingredients to capture all the flavors of a BBQ bacon cheeseburger—plus a few pantry staples to tie it all together. Here’s what you’ll need:
- Pasta: 12 oz (340g) elbow macaroni or small shells (classic mac texture, but feel free to swap with rotini or penne for fun)
- Ground Beef: 1 lb (450g) 80/20 or 85/15 ground beef (adds savory, juicy flavor—ground turkey or plant-based crumbles work too!)
- Bacon: 6 slices, chopped (about 6 oz/170g; thick-cut preferred for extra crunch and smoky taste)
- Yellow Onion: 1 small, diced (about 1/2 cup/70g; brings a sweet, mellow base)
- Garlic: 2 cloves, minced (about 2 tsp/6g; for punchy flavor—sub with 1/2 tsp garlic powder if needed)
- BBQ Sauce: 1/2 cup (120ml) (choose your favorite—sweet, smoky, or spicy)
- Ketchup: 1/4 cup (60ml) (adds tangy sweetness, just like a burger)
- Beef Broth: 2 cups (480ml) (helps cook the pasta right in the skillet and amps up the flavor)
- Milk: 1 cup (240ml) whole or 2% (for creamy sauce—dairy-free works too)
- Cheddar Cheese: 2 cups (200g) shredded sharp cheddar (melts beautifully; I like Cabot or Tillamook brands)
- Monterey Jack Cheese: 1 cup (100g) shredded (extra creaminess—swap with mozzarella or more cheddar if you prefer)
- Mustard: 2 tsp (10g) yellow or Dijon (adds a burger-like zing, don’t skip it!)
- Paprika: 1/2 tsp (for mild smoky flavor; smoked paprika is great here)
- Salt & Black Pepper: To taste (start with 1/2 tsp each and adjust as you go)
- Crispy Fried Onions: 1 cup (about 35g; the kind you find in the salad aisle—French’s is my go-to)
- Pickles (optional): Sliced dill pickles for serving (for that full burger experience—highly recommended!)
Ingredient tips: For the best texture, use freshly grated cheese if you can—it melts smoother than pre-shredded. If you’re gluten-free, swap the pasta for your favorite gluten-free brand and check that the crispy onions are gluten-free too. For a spicy kick, add a dash of hot sauce to your BBQ sauce. I’ve tried a dozen combos, but this lineup delivers that classic burger flavor with a BBQ twist every single time.
Equipment Needed
- Large Oven-Safe Skillet: A 12-inch (30cm) cast iron or heavy-duty nonstick skillet is perfect. If you don’t have oven-safe, use any large skillet for the stove and transfer to a baking dish for broiling.
- Slotted Spoon or Spatula: For stirring and browning the beef and bacon.
- Measuring Cups & Spoons: For accurate ingredient portions—important for the sauce texture.
- Box Grater: If shredding cheese yourself (makes it meltier, but pre-shredded works in a pinch).
- Knife and Cutting Board: For dicing onions, chopping bacon, and prepping toppings.
- Colander: For draining pasta (if boiling separately; not always needed if cooking in-skillet).
- Oven Mitts: Essential if finishing under the broiler—those skillet handles get hot fast!
Personal tip: I’ve used everything from budget-friendly nonstick pans to my trusty cast iron. Cast iron gives the best crispy bottom and even heat, but don’t stress if you only have a basic skillet. Just keep an eye on the heat and use a layer of oil to prevent sticking. And if you’re moving dishes from stove to oven, always double-check if the handle is oven safe—learned that the hard way one busy night!
How to Make BBQ Bacon Cheeseburger Mac Skillet
-
Prep Ingredients (10 minutes):
Chop bacon into 1-inch pieces. Dice onion. Shred cheese if using blocks. Measure out all sauce and liquid ingredients—having everything ready makes this much smoother. -
Cook the Bacon (6-7 minutes):
Set your skillet over medium heat. Add bacon pieces and cook, stirring occasionally, until crisp and golden. Transfer bacon to a paper towel-lined plate, leaving about 1 tbsp fat in the pan for flavor (drain excess if you have a lot).
Tip: Save a little bacon for topping at the end! -
Sauté Onion and Garlic (2-3 minutes):
Add diced onion to the bacon drippings in the skillet. Cook until soft and translucent, about 2 minutes. Stir in minced garlic and cook for just 30 seconds—don’t let it burn! -
Brown the Beef (5-6 minutes):
Add ground beef to the skillet. Break it up with your spoon and cook until browned all over, about 5 minutes. Season with salt, pepper, paprika, and mustard. Drain any extra grease if needed (I usually tip the pan and use a paper towel to blot it out—less mess).
Sensory cue: Beef should be crumbly, with no pink left. -
Add Sauces (2 minutes):
Stir in the BBQ sauce and ketchup. Let the mixture bubble for 1-2 minutes so the flavors meld.
Warning: Don’t let it scorch on the bottom—keep stirring! -
Add Pasta and Liquids (10-12 minutes):
Pour in the dry pasta, beef broth, and milk. Stir to combine, scraping any browned bits from the pan. Bring to a gentle simmer, then cover and reduce heat to medium-low. Cook, stirring every 2-3 minutes, until pasta is tender and most of the liquid is absorbed, about 10-12 minutes. If it looks dry, add a splash more broth.
Note: If your skillet is small, you can boil the pasta separately and add it here with half the broth/milk. -
Add Cheese and Bacon (2 minutes):
Remove the lid. Add both cheeses and half the cooked bacon. Stir until everything is melted and creamy. Taste and adjust seasoning—sometimes I add a touch more BBQ sauce for extra zip. -
Top and Broil (3-4 minutes):
Sprinkle crispy fried onions and the rest of the bacon on top. Place skillet under broiler for 2-4 minutes, until the onions are golden and everything is bubbling. Watch closely—those onions go from perfect to burnt real quick!
Sensory cue: Top should be bubbly and onions crisp. -
Serve:
Let cool for 5 minutes (it’ll be piping hot). Add dill pickle slices if you like, then scoop into bowls and enjoy!
Troubleshooting: If your pasta isn’t cooked through but the liquid is gone, just add 1/4 cup (60ml) more broth and keep simmering. If the cheese sauce looks grainy, it probably got too hot—lower the heat before adding cheese next time. And if the onions aren’t crispy enough, pop the pan back under the broiler for another minute.
Cooking Tips & Techniques
- Don’t Overcook the Pasta: Since it cooks right in the sauce, check a piece 2 minutes before you think it’s done. You want it just al dente—it’ll keep soaking up flavor as it rests.
- Cheese Matters: Freshly shredded cheese melts smoother and gives a creamier finish. Pre-shredded can sometimes get clumpy (not the end of the world, but worth knowing).
- Watch the Broiler: Crispy onions go from golden to charred in seconds, so don’t leave the kitchen. I set a timer and peek after 2 minutes, just in case.
- Keep Stirring: Frequent stirring keeps the pasta from sticking to the bottom and helps the sauce stay silky. If things start to stick, add a splash more broth or milk and lower the heat.
- Layer the Flavors: Adding the bacon at two stages (in the mix and on top) gives you both chewy bites and crispy crunch—best of both worlds.
- Multitask Like a Pro: While the bacon and beef brown, shred your cheese or prep the crispy topping. It saves time and gets dinner on the table faster.
I’ve messed up my fair share of cheese sauces by adding cheese to boiling liquids—learn from me! Always let things cool a bit before stirring in the cheese for the creamiest result. And don’t be afraid to taste as you go—adjust salt, BBQ sauce, or mustard to dial in the flavor just how you like it.
Variations & Adaptations
- Gluten-Free: Swap in your favorite gluten-free pasta and check that both the BBQ sauce and crispy onions are certified gluten-free (not all are!).
- Lighter Version: Use ground turkey or chicken instead of beef, and swap bacon for turkey bacon. Reduced-fat cheese and skim milk work, too, though the sauce will be a bit less rich.
- Spicy Kick: Add chopped pickled jalapeños, a squirt of sriracha, or a smoky chipotle BBQ sauce for heat lovers. I sometimes add hot sauce directly to my serving—so good!
- Vegetarian: Use plant-based crumbles for the beef and your favorite veggie bacon. It’s surprisingly satisfying, especially with extra BBQ sauce.
- Seasonal Twists: In summer, add a handful of fresh corn kernels to the pasta; in winter, toss in sautéed mushrooms for an earthy note.
I’ve personally made the spicy version with chipotle BBQ sauce and jalapeños, and it absolutely woke up my taste buds! Don’t be afraid to experiment—this recipe is super forgiving, and you can easily adjust it to fit what you have on hand or any dietary needs in your household.
Serving & Storage Suggestions
This BBQ bacon cheeseburger mac skillet is best served hot and fresh, straight from the oven. Let it rest for 5 minutes so the sauce thickens a bit—then ladle into bowls and top with extra crispy onions or a few pickle slices for that classic burger finish. It’s hearty enough to stand alone, but I love pairing it with a crisp green salad or roasted veggies for balance. For drinks, a cold glass of iced tea, lemonade, or even a frosty root beer fits the vibe perfectly.
Leftovers keep well in an airtight container in the fridge for up to 4 days. For longer storage, portion into freezer-safe containers and freeze for up to 2 months. Reheat gently on the stove with a splash of broth or milk to keep the sauce creamy, or microwave in 1-minute bursts, stirring in between. If you want the onions to stay crispy, add a fresh sprinkle before serving or broil quickly after reheating. The flavors deepen overnight, so don’t be surprised if it tastes even better the next day!
Nutritional Information & Benefits
Each serving (about 1 1/2 cups) of this BBQ bacon cheeseburger mac skillet provides approximately 520 calories, 28g protein, 24g fat, and 45g carbohydrates (values vary based on specific brands and substitutions). It’s a solid source of protein from ground beef and cheese, while the bacon brings that indulgent, smoky flavor. If you use whole wheat or legume-based pasta, you’ll boost the fiber content, too.
Key ingredients like cheddar cheese add calcium, and onions and garlic bring antioxidants and subtle health perks. If you’re watching sodium or saturated fat, swap in lower-salt bacon and use leaner meats. Allergens include gluten, dairy, and potentially soy (in some BBQ sauces and crispy onions)—so always check your labels if you have sensitivities. For a balanced meal, pair with veggies or a side salad. I love making this after a long day—it’s just the right mix of comfort and nutrition for busy, hungry nights.
Conclusion
If you’re craving serious comfort food with a playful twist, this BBQ bacon cheeseburger mac skillet is calling your name. It’s the kind of meal that turns an ordinary night into something special—easy to make, packed with flavor, and guaranteed to spark smiles around the table. Whether you stick to the recipe or make it your own with fun add-ins or healthier swaps, you’ll end up with a dinner that’s as satisfying as it is simple.
Personally, I love this recipe because it brings everyone together—no one can resist that cheesy, smoky, crispy combo. Give it a try, tweak it to fit your taste, and let it become a staple in your kitchen like it did in mine. If you make it, drop a comment below, share your twists, or tag me with your skillet masterpiece. Here’s to happy cooking, full bellies, and lots of second helpings!
Frequently Asked Questions
Can I make BBQ bacon cheeseburger mac ahead of time?
Yes! Prep up to the point before adding the crispy onions, then cover and refrigerate. When ready to serve, sprinkle on the onions and broil until hot and bubbly.
What’s the best pasta shape for this recipe?
I love elbows or small shells—they hold the sauce well! Rotini or penne work too. Just avoid long noodles; they don’t fit the burger mac vibe.
Can I use turkey or plant-based meat instead of beef?
Definitely. Ground turkey, chicken, or plant-based crumbles all work great. You might need a splash more oil if using very lean meat.
How do I keep the cheese sauce from getting grainy?
Let the skillet cool slightly before stirring in the cheese, and use freshly shredded cheese if possible. Don’t let the sauce boil after the cheese goes in.
Is this recipe gluten-free?
It can be! Just use gluten-free pasta and double-check your BBQ sauce and crispy onions for gluten ingredients. Always check labels to be sure.
Pin This Recipe!
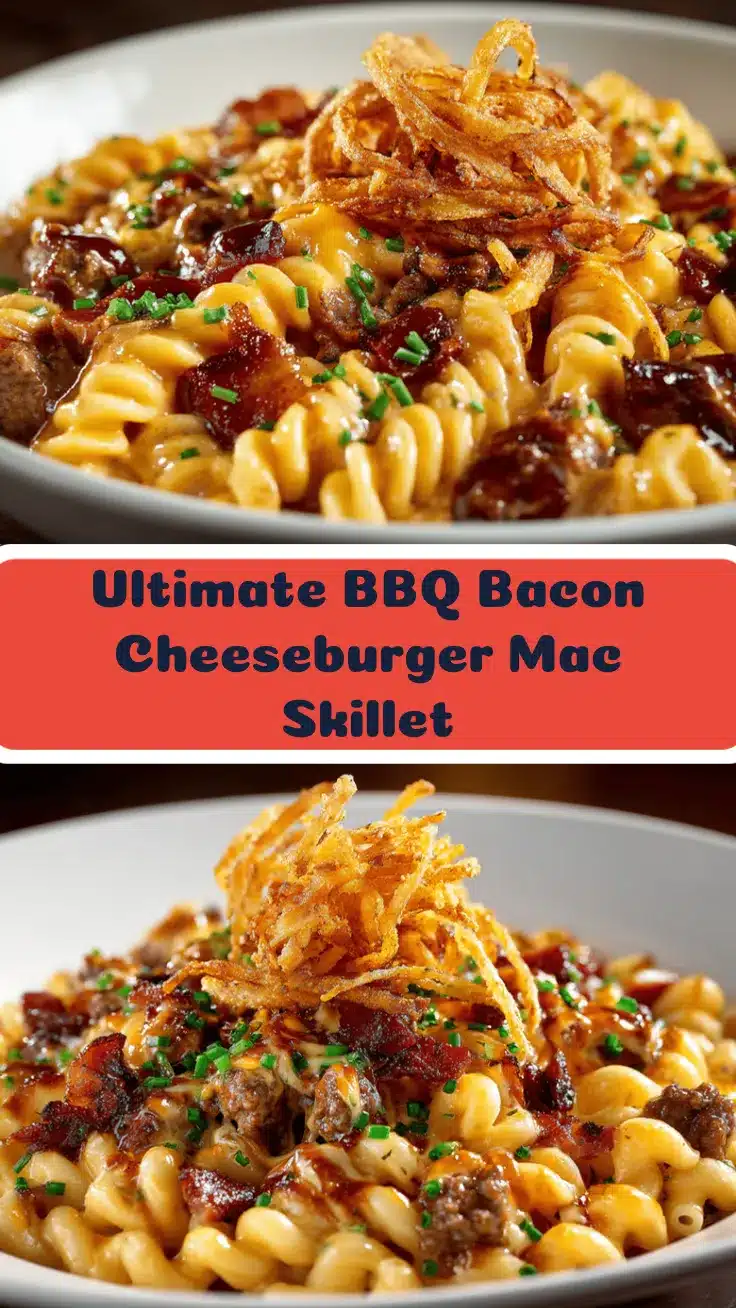
BBQ Bacon Cheeseburger Mac Skillet

This BBQ Bacon Cheeseburger Mac Skillet combines all your favorite burger flavors—savory beef, smoky bacon, tangy BBQ sauce, and gooey cheese—into a comforting, one-pan pasta dish topped with crispy onions. It’s a quick, crowd-pleasing meal perfect for busy weeknights or casual gatherings.
- Prep Time: 10 minutes
- Cook Time: 30 minutes
- Total Time: 40 minutes
- Yield: 6 servings 1x
- Category: Main Course
- Cuisine: American
Ingredients
- 12 oz elbow macaroni or small shells (about 3 cups dry pasta)
- 1 lb ground beef (80/20 or 85/15)
- 6 slices bacon, chopped (about 6 oz)
- 1 small yellow onion, diced (about 1/2 cup)
- 2 cloves garlic, minced (about 2 tsp)
- 1/2 cup BBQ sauce
- 1/4 cup ketchup
- 2 cups beef broth
- 1 cup milk (whole or 2%)
- 2 cups shredded sharp cheddar cheese
- 1 cup shredded Monterey Jack cheese
- 2 tsp yellow or Dijon mustard
- 1/2 tsp paprika (smoked or regular)
- Salt & black pepper to taste (start with 1/2 tsp each)
- 1 cup crispy fried onions
- Sliced dill pickles for serving (optional)
Instructions
- Prep all ingredients: chop bacon, dice onion, shred cheese, and measure sauces and liquids.
- In a large oven-safe skillet over medium heat, cook bacon until crisp (6-7 minutes). Remove bacon with a slotted spoon and set aside, leaving about 1 tbsp bacon fat in the pan.
- Add diced onion to the skillet and sauté until soft (about 2 minutes). Stir in minced garlic and cook for 30 seconds.
- Add ground beef to the skillet. Cook, breaking up with a spoon, until browned and crumbly (5-6 minutes). Season with salt, pepper, paprika, and mustard. Drain excess grease if needed.
- Stir in BBQ sauce and ketchup. Let bubble for 1-2 minutes, stirring to prevent scorching.
- Add dry pasta, beef broth, and milk. Stir to combine and bring to a gentle simmer. Cover and cook on medium-low, stirring every 2-3 minutes, until pasta is tender and most liquid is absorbed (10-12 minutes). Add more broth if needed.
- Remove lid. Add both cheeses and half the cooked bacon. Stir until cheese is melted and sauce is creamy. Adjust seasoning to taste.
- Sprinkle crispy fried onions and remaining bacon on top. Broil skillet for 2-4 minutes until onions are golden and top is bubbly. Watch closely to avoid burning.
- Let cool for 5 minutes. Top with dill pickle slices if desired and serve hot.
Notes
For best results, use freshly shredded cheese for a smoother sauce. Watch the broiler closely to avoid burning the onions. To make gluten-free, use gluten-free pasta and check labels on BBQ sauce and crispy onions. Leftovers reheat well with a splash of broth or milk. Add pickled jalapeños or chipotle BBQ sauce for a spicy kick.
Nutrition
- Serving Size: About 1 1/2 cups
- Calories: 520
- Sugar: 8
- Sodium: 980
- Fat: 24
- Saturated Fat: 11
- Carbohydrates: 45
- Fiber: 2
- Protein: 28
Keywords: bbq bacon cheeseburger mac, skillet pasta, one pan dinner, comfort food, cheeseburger mac and cheese, easy weeknight meal, bacon mac and cheese, crispy onions, family dinner, kid friendly