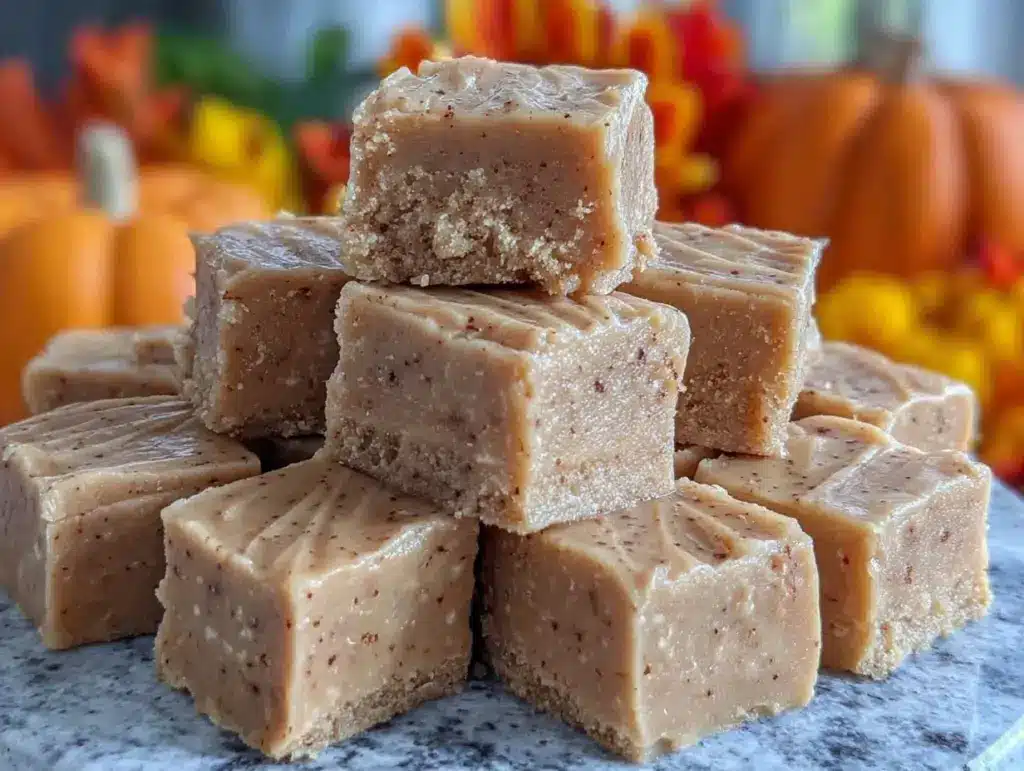
Let me just say, the scent of sweet pumpkin swirling with vanilla and cinnamon as it bubbles away on the stovetop—well, it’s the kind of aroma that turns a regular Tuesday into a full-on autumn celebration. Imagine walking into your kitchen and being greeted by that warm, cozy hug of spice and sweetness, all wrapped up in a batch of Creamy Pumpkin Fudge Squares. The first time I tried these, I was honestly just playing around with some leftover pumpkin puree after a Thanksgiving pie marathon. I’ll never forget that moment—scraping the saucepan, sneaking a taste, pausing for a second because, wow, it was good. That’s the sort of discovery that makes you grin and think, “Why haven’t I been making fudge like this every fall?”
This easy fall fudge recipe wasn’t handed down from a grandma, but it’s quickly become a family tradition in my kitchen. You know, when I was knee-high to a grasshopper, fudge meant chocolate and maybe peanut butter if you were lucky. Pumpkin fudge? That was a revelation I wish I’d stumbled across years ago. Now, every Thanksgiving, my kids and husband hover around the fridge, “just checking” to see if the fudge squares are ready—and let’s face it, I’m right there with them. It’s dangerously easy to whip up, and the pure, nostalgic comfort you get with every bite is almost too good to share (almost—if you have enough for leftovers!).
Perfect for potlucks, gifting, or simply jazzing up your Pinterest board with something a little different, these Creamy Pumpkin Fudge Squares have become my go-to sweet treat for the season. I’ve tested this recipe more times than I care to admit (in the name of research, of course), and it’s now a staple for family gatherings, fall bake sales, and those cold, rainy weekends when you need a little pick-me-up. Feels like a warm hug every single time. If you’re searching for an easy Thanksgiving dessert that’ll wow guests and become a must-make every year, you’re going to want to bookmark this one.
Why You’ll Love This Recipe
When it comes to Creamy Pumpkin Fudge Squares, I’ve cooked, tweaked, and taste-tested my way to a recipe that just gets it right—every time. After a dozen batches (and a few sticky saucepan disasters), I can say with total confidence: this is the fudge you’ll crave all season long. Here’s why you’ll fall head over heels for this easy fall fudge recipe.
- Quick & Easy: Comes together in under 20 minutes—plus chill time. Perfect for last-minute holiday prep or spontaneous sweet tooth emergencies.
- Simple Ingredients: Just five pantry staples, no fancy grocery runs. You probably have everything on hand already, especially if you bake for Thanksgiving!
- Perfect for Thanksgiving: These creamy squares are a standout at potlucks, holiday parties, and cozy family dinners. They look gorgeous on a dessert platter next to pies and cookies.
- Crowd-Pleaser: Kids love the sweet, smooth texture, and adults appreciate the warm spices and pumpkin flavor. I’ve never seen leftovers last more than a day.
- Unbelievably Delicious: The combo of silky pumpkin, creamy white chocolate, and a whisper of cinnamon is pure comfort food. Each bite is soft, melt-in-your-mouth, and just the right amount of sweet.
What makes this fudge stand out? It’s not just another pumpkin dessert. Instead of grainy or overly sugary fudge, my method blends pumpkin puree and sweetened condensed milk for an ultra-creamy texture (no gritty bits, promise). The white chocolate chips add a decadent richness, and the cinnamon brings everything together with a gentle warmth. I even use a dash of vanilla for extra depth—trust me, it’s worth it.
This fudge isn’t just tasty—it’s the kind that makes you close your eyes and savor that first bite. It tastes like all the best parts of Thanksgiving, wrapped into a single, easy treat. If you want something special that’s still simple, this recipe delivers every time. Whether you’re impressing guests or sneaking a square with your afternoon coffee, these Creamy Pumpkin Fudge Squares turn everyday moments into something memorable.
What Ingredients You Will Need
Honestly, it’s hard to believe how much flavor you get from just five humble ingredients. This easy fall fudge recipe uses familiar staples that come together for maximum pumpkin magic—no fuss, no complicated steps.
- White Chocolate Chips (2 cups / 340g): The base of our fudge. I love the creamy richness they bring. Use a good brand (like Ghirardelli or Nestlé) for best meltability.
- Sweetened Condensed Milk (1 can / 14oz / 400g): Adds sweetness and keeps the fudge smooth and silky. Don’t swap this for evaporated milk—condensed is the key!
- Pumpkin Puree (1/2 cup / 120g): Use pure pumpkin, not pie filling. Libby’s and Trader Joe’s are my go-to brands. If you’ve got homemade puree, just make sure it’s thick, not watery.
- Unsalted Butter (2 tablespoons / 28g): For extra creaminess and that melt-in-your-mouth feel. Softened butter is easiest to blend in. If you only have salted, just skip the pinch of salt later.
- Ground Cinnamon (1 teaspoon): Adds warmth and brings out the pumpkin flavor. You can add a pinch of nutmeg or ginger for a little more spice if you like.
Optional Add-Ins & Toppings:
- Vanilla Extract (1/2 teaspoon): For extra depth and a bakery-style finish.
- Pecans or Walnuts (1/4 cup, chopped): Stir in before chilling for crunch. Toast them first for even more flavor.
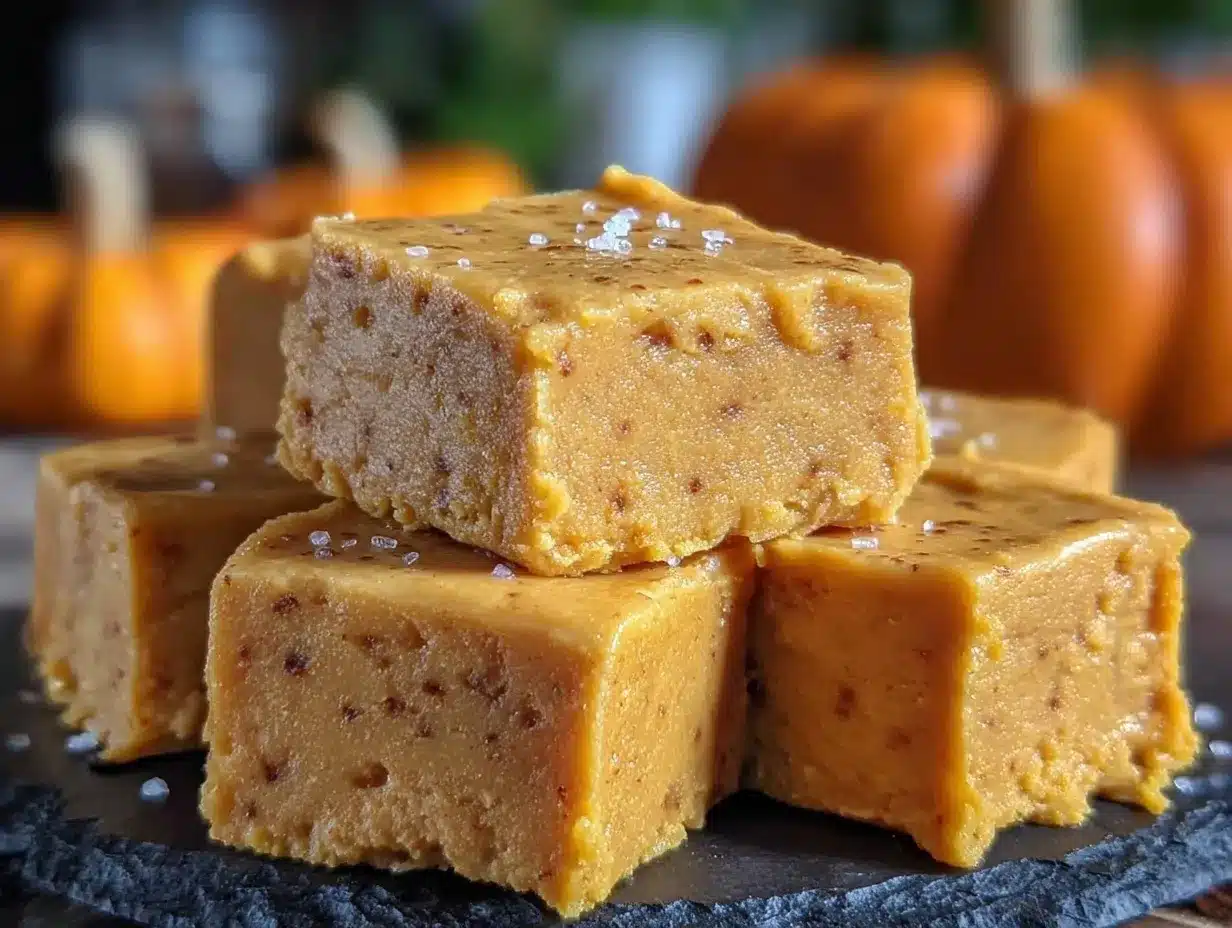
- Pinch of Salt: Balances the sweetness. I always add a tiny bit, especially if using unsalted butter.
- Festive Sprinkles: For a Pinterest-worthy finish, sprinkle on top before the fudge sets.
Ingredient Tips:
- If you’re dairy-free, swap condensed milk and butter for coconut milk and vegan butter (texture will be a bit different, but still tasty).
- For gluten-free, all ingredients listed are naturally gluten-free—just double-check your brands to be safe.
- Want less sugar? Use sugar-free white chocolate chips and condensed milk alternatives (Lakanto makes a great one).
- Seasonal swap: In late fall, mix in a handful of dried cranberries or chopped dried apricots for extra texture and a hint of tartness.
All in all, these ingredients are easy to find, easy to work with, and flexible for just about every dietary need. You’ll be amazed how such a simple list creates such a memorable Thanksgiving treat.
Equipment Needed
- Medium Saucepan: Essential for melting and mixing. I’ve used everything from stainless steel to nonstick—just keep the heat gentle and stir often.
- Sturdy Wooden Spoon or Silicone Spatula: For stirring the fudge mixture. Silicone spatulas are my favorite because they scrape every last bit from the pan.
- 8×8-inch (20x20cm) Baking Pan: The classic size for thick, square fudge pieces. You can use a glass or metal pan.
- Parchment Paper or Aluminum Foil: For lining the pan. Makes removing and slicing the fudge a breeze.
- Measuring Cups and Spoons: You want precise measurements—fudge is not the place for guessing!
- Knife and Cutting Board: To slice the fudge once it’s set. A warm knife (run under hot water, dry) gives clean edges.
Don’t have a square pan? Use a loaf pan for thicker pieces or a round cake pan for wedges. If you’re in a pinch, a disposable foil pan works fine—just be sure to line it.
Maintenance tip: If you use nonstick or silicone tools, wash them right after use. Fudge can leave a sticky residue that’s tough to clean later (learned that the hard way!). Budget-friendly pans from the dollar store work, too—no need for fancy equipment.
Preparation Method
-
Prep Your Pan:
Line an 8×8-inch (20x20cm) baking pan with parchment paper or foil, leaving some overhang on the sides. This makes it super easy to lift the fudge out later. Lightly grease the paper if you want extra insurance against sticking. -
Melt the Butter and Chocolate:
In a medium saucepan over low heat, add 2 tablespoons (28g) unsalted butter. Once melted, stir in 2 cups (340g) white chocolate chips. Keep the heat low and stir constantly—white chocolate can scorch quickly! If your chocolate isn’t melting smoothly, remove from heat and keep stirring until creamy. -
Add Condensed Milk and Pumpkin:
Pour in 1 can (14oz/400g) sweetened condensed milk and 1/2 cup (120g) pumpkin puree. Stir until the mixture is smooth and well combined. It should look glossy, thick, and have a warm orange tint. If it separates, don’t panic—just keep stirring gently. A silicone spatula helps get every bit off the sides. -
Spice It Up:
Sprinkle in 1 teaspoon ground cinnamon (plus a pinch of nutmeg or ginger if you like). Add 1/2 teaspoon vanilla and a pinch of salt if using. Stir everything together until the fudge is evenly colored and smells like pumpkin pie heaven. -
Cook and Stir:
Continue stirring over low heat for 2-3 minutes. The mixture should be thick and start to pull away from the sides of the pan. If it seems too runny, cook for another minute, but don’t let it boil—overcooking can make fudge grainy. -
Add-Ins (Optional):
At this point, fold in 1/4 cup chopped pecans, walnuts, or dried fruit if using. Stir gently to avoid breaking up the smooth texture. -
Pour and Smooth:
Quickly pour the fudge mixture into the prepared pan. Use a spatula to spread it evenly into the corners. Top with festive sprinkles, extra cinnamon, or more nuts if you want that Pinterest-perfect look. -
Chill to Set:
Transfer the pan to the fridge and chill for at least 2 hours, or until firm. Overnight is best for super clean slices. If you’re in a rush, you can pop it in the freezer for 45 minutes (just don’t forget it—freezer fudge can get crumbly). -
Slice and Serve:
Lift the fudge out of the pan using the parchment overhang. Cut into 16 squares (or smaller bites for a crowd). Use a sharp knife, and wipe it between cuts for neat edges. -
Troubleshooting:
If your fudge is too soft, it likely needs more fridge time. Too hard? It might have been overcooked—try stirring in an extra tablespoon of condensed milk next time. Grainy texture? That’s usually from boiling the chocolate—keep the heat gentle and stir, stir, stir!
Tip: Keep a damp paper towel handy to clean sticky fingers (and surfaces). I always work near the sink—fudge making is a little messy but so worth it!
Cooking Tips & Techniques
Making fudge sounds simple, but honestly, there are a few tricks to getting that creamy, dreamy result every time. Here’s what I’ve learned after plenty of trial and error with this easy fall fudge recipe.
- Low and Slow: White chocolate melts fast and burns even faster. Keep your heat low and never leave the pan unattended. I learned this after one batch turned out lumpy and scorched—lesson learned!
- Constant Stirring: Use a silicone spatula to scrape the bottom and sides. This helps prevent sticking and keeps the mixture smooth. Wooden spoons work too, but spatulas get every last bit.
- Measuring Matters: Fudge isn’t forgiving if you eyeball ingredients. Use level cups and spoons for precision. If your fudge is too sweet or too soft, double-check your measurements next time.
- Don’t Overcook: Once everything’s melted and combined, cook just until thick and glossy. Overcooking can cause sugar crystals and gritty texture—trust me, I’ve made that mistake more than once!
- Chill Thoroughly: Give your fudge time to set. Rushing with the freezer can work, but fridge chilling overnight gives the best texture and flavor development.
- Clean Cuts: For Pinterest-worthy squares, use a sharp knife warmed under hot water. Wipe between slices to avoid smudges.
- Efficiency Tip: Prep your pan and chop nuts/toppings before you start melting anything. Once the fudge is ready, you’ll need to work quickly to pour and decorate before it sets.
If you’re multitasking (because who isn’t during Thanksgiving week?), get everything lined up before you start. That way, you’re not scrambling for parchment paper or digging for cinnamon while your fudge is on the stove. Consistency is all about practice—every batch gets easier (and tastier!).
Variations & Adaptations
What I love about Creamy Pumpkin Fudge Squares is how easy they are to customize. Whether you’re working around allergies or just want to mix things up, this easy fall fudge recipe is super flexible.
- Dairy-Free Pumpkin Fudge: Swap the sweetened condensed milk for coconut condensed milk and use vegan white chocolate chips. Sub in plant-based butter. The texture will be a bit softer, but still creamy and delicious.
- Nutty Pumpkin Fudge: Stir in a handful of toasted pecans, walnuts, or pepitas for crunch. You could even swirl in almond butter for a richer flavor—just warm it slightly before adding.
- Spiced Pumpkin Fudge: Amp up the autumn vibes with extra spices. Add 1/4 teaspoon ground ginger, 1/4 teaspoon nutmeg, and a pinch of cloves for a pumpkin spice latte twist.
- Chocolate-Pumpkin Marble: Melt 1/2 cup (85g) semi-sweet chocolate chips separately and swirl into the fudge just before pouring into the pan. It looks gorgeous and adds a layer of flavor.
- Gluten-Free Option: All ingredients are naturally gluten-free, but always double-check labels (especially for chocolate chips and toppings).
If you’re making this for a crowd, you can double the recipe and use a 9×13-inch (23x33cm) pan—just extend chill time by an hour. I’ve even tried swapping the pumpkin for mashed sweet potato when I ran out one year, and it turned out surprisingly tasty.
Feeling adventurous? Toss in mini marshmallows or dried cranberries for a holiday twist. Honestly, half the fun is experimenting—so don’t be afraid to make this fudge your own!
Serving & Storage Suggestions
Creamy Pumpkin Fudge Squares are best served chilled, straight from the fridge. The texture is firm but melts in your mouth—just the way fudge should be. Arrange them on a platter with a sprinkle of cinnamon or festive sprinkles for extra flair.
Pair with hot apple cider, pumpkin spice lattes, or a scoop of vanilla ice cream for a decadent dessert plate. These fudge squares also play nicely alongside classic Thanksgiving pies and cookies, adding a pop of color to your dessert spread.
To store, keep fudge in an airtight container in the refrigerator for up to 1 week. If you want to make them ahead, freeze the squares in a single layer, then transfer to a freezer bag—thaw in the fridge overnight before serving. The flavor actually deepens after a day or two, so they’re even better as leftovers.
For gifting, wrap individual squares in wax paper and tuck them in a pretty box or tin. Reheat gently in the microwave for just 5-7 seconds if you prefer a softer bite (don’t overdo it!).
Nutritional Information & Benefits
Each square (based on 16 servings) has approximately:
- Calories: 120
- Fat: 5g
- Sugar: 13g
- Protein: 2g
- Carbs: 18g
Key health benefits come from the pumpkin puree, which provides fiber, vitamin A, and antioxidants. The recipe is gluten-free (just check your brands) and can be adapted for dairy-free diets. Potential allergens include dairy (from butter and condensed milk) and nuts if added.
From a wellness perspective, these Creamy Pumpkin Fudge Squares offer a lighter, portion-controlled way to enjoy fall flavors—without the heaviness of traditional pies. I love that you can sneak in a little nutrition with the pumpkin, and they’re easy to share and enjoy in moderation.
Conclusion
So, why should Creamy Pumpkin Fudge Squares be on your Thanksgiving dessert table? Honestly, they’re the perfect blend of easy, festive, and irresistibly delicious. The recipe is flexible enough for any kitchen, and the results are always impressive—whether you’re a seasoned baker or just starting out.
I love making these because they bring people together. There’s something about the creamy texture and pumpkin spice that feels like home, especially when shared with friends and family. Don’t be afraid to make this fudge your own—try a new spice, add nuts, or make them dairy-free. I’d love to hear how you adapt it!
Drop a comment below with your favorite mix-ins, share your photos on Pinterest, or let me know how your batch turned out. Here’s to sweet, simple moments this fall—may your Thanksgiving be filled with good food and great company!
Frequently Asked Questions
Can I use pumpkin pie filling instead of pumpkin puree?
Nope—pumpkin pie filling has added sugar and spices, which can throw off the texture and flavor. Stick with pure pumpkin puree for best results.
How long do Creamy Pumpkin Fudge Squares need to chill?
At least 2 hours in the fridge, but overnight is best for clean slices and developed flavor. You can speed it up in the freezer for about 45 minutes if you’re in a rush.
Can I make this fudge ahead for Thanksgiving?
Absolutely! Make it up to 1 week in advance and store in the fridge. The flavor gets even better after a day or two.
Is this recipe gluten-free?
Yes! All the main ingredients are naturally gluten-free. Always double-check labels, especially for chocolate chips and any add-ins.
What’s the best way to get clean slices?
Use a sharp knife warmed under hot water (and wiped dry). Cut straight down and clean the blade between slices for picture-perfect fudge squares every time.
Pin This Recipe!
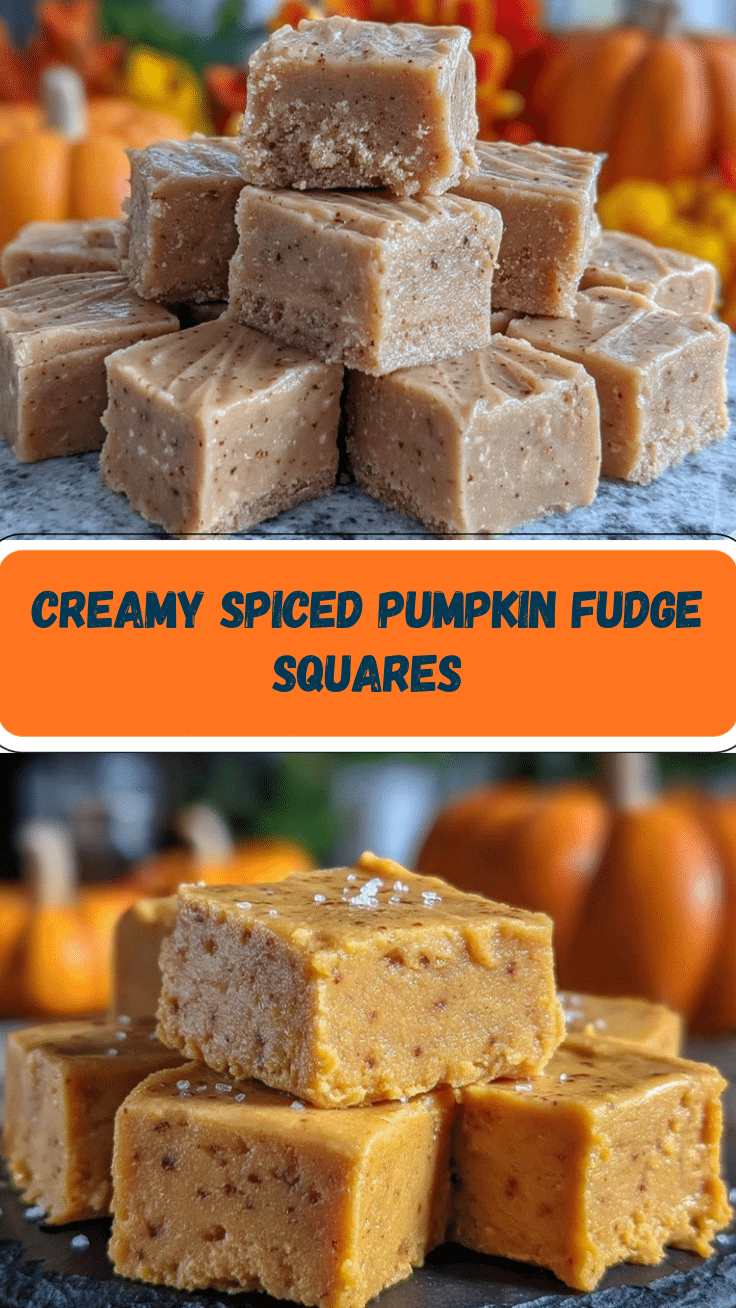
Creamy Pumpkin Fudge Squares

Creamy Pumpkin Fudge Squares are an easy, 5-ingredient fall treat with silky pumpkin, white chocolate, and warm cinnamon. Perfect for Thanksgiving, potlucks, or gifting, these melt-in-your-mouth squares are a festive twist on classic fudge.
- Prep Time: 10 minutes
- Cook Time: 10 minutes
- Total Time: 2 hours 20 minutes
- Yield: 16 squares 1x
- Category: Dessert
- Cuisine: American
Ingredients
- 2 cups white chocolate chips (340g)
- 1 can (14oz) sweetened condensed milk
- 1/2 cup pumpkin puree
- 2 tablespoons unsalted butter
- 1 teaspoon ground cinnamon
- 1/2 teaspoon vanilla extract (optional)
- Pinch of salt (optional, especially if using unsalted butter)
- 1/4 cup chopped pecans or walnuts (optional)
- Festive sprinkles (optional)
- Pinch of nutmeg or ginger (optional)
Instructions
- Line an 8×8-inch baking pan with parchment paper or foil, leaving overhang on the sides. Lightly grease if desired.
- In a medium saucepan over low heat, melt the butter. Add white chocolate chips and stir constantly until smooth and creamy.
- Pour in sweetened condensed milk and pumpkin puree. Stir until the mixture is smooth, glossy, and well combined.
- Add ground cinnamon, vanilla extract (if using), pinch of salt, and any additional spices. Stir until evenly colored and fragrant.
- Continue stirring over low heat for 2-3 minutes until thick and starting to pull away from the sides. Do not let it boil.
- Fold in chopped nuts or dried fruit if desired.
- Quickly pour the fudge mixture into the prepared pan. Spread evenly and top with sprinkles, extra cinnamon, or more nuts if desired.
- Chill in the refrigerator for at least 2 hours, or until firm. Overnight is best for clean slices. Alternatively, chill in the freezer for 45 minutes.
- Lift fudge out of the pan using the parchment overhang. Cut into 16 squares with a sharp, warm knife, wiping between cuts.
- Store in an airtight container in the fridge for up to 1 week or freeze for longer storage.
Notes
For best results, use pure pumpkin puree (not pie filling). Chill overnight for clean slices. Add-ins like nuts, dried fruit, or festive sprinkles can be mixed in or sprinkled on top. For dairy-free, substitute coconut condensed milk and vegan white chocolate chips. All main ingredients are gluten-free, but always check labels. Use a warm, sharp knife for neat cuts.
Nutrition
- Serving Size: 1 square
- Calories: 120
- Sugar: 13
- Sodium: 40
- Fat: 5
- Saturated Fat: 3
- Carbohydrates: 18
- Fiber: 1
- Protein: 2
Keywords: pumpkin fudge, Thanksgiving dessert, fall treat, easy fudge, creamy fudge, pumpkin squares, white chocolate fudge, gluten-free dessert, holiday baking


