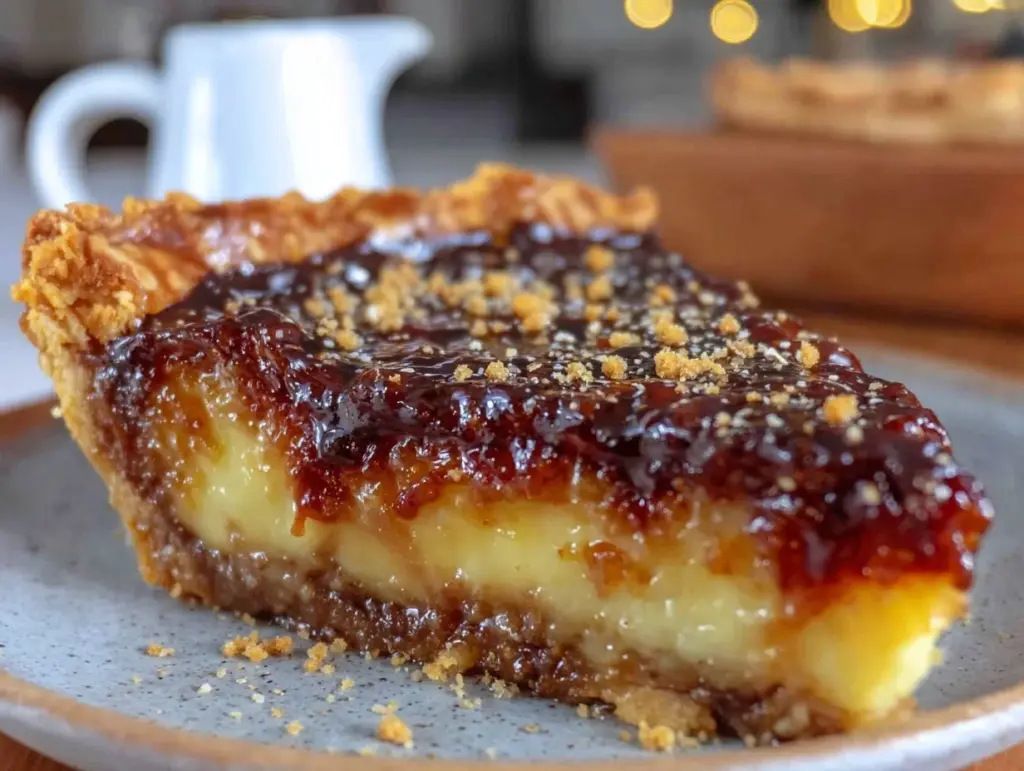
Let me set the scene—picture the aroma of caramelized honey swirling through your kitchen, golden and just a bit smoky, mingling with the buttery scent of a fresh-baked pie crust. The first time I pulled a Crispy Burnt Honey Pie Slice from the oven, I swear, the entire house felt warmer and more inviting. There’s something about the way burnt honey darkens and deepens, turning from a simple sweetness into pure, almost toasty magic. I was instantly hooked, hovering near the oven door like a kid waiting for cookies to cool.
The memory’s vivid—years ago, when I was knee-high to a grasshopper, my grandma would drizzle honey on everything. But I never thought to take honey this far: burning it, letting it bubble and blister until it’s almost smoky, and then folding it into a pie that’s equal parts crispy, gooey, and gloriously golden. Honestly, if I’d discovered this recipe sooner, I’d have brought it to every bake sale and potluck since.
The kind of moment where you pause, take a deep breath, and just smile because you know you’re onto something truly special. My family couldn’t stop sneaking slices off the cooling rack (I can’t blame them—those crispy edges are addictive!). You know what? This pie has become a staple for family gatherings, gifting, and those days when you need a little extra comfort. It’s dangerously easy, and it delivers pure, nostalgic joy with a modern twist. Perfect for brightening up your Pinterest dessert board, adding a sweet treat to your holiday table, or just savoring with a cup of tea on a rainy afternoon.
After testing this Crispy Burnt Honey Pie Slice recipe more times than I care to admit (research, of course), I can tell you—it feels like a warm hug. You’re going to want to bookmark this one. Trust me!
Why You’ll Love This Recipe
When I say this Crispy Burnt Honey Pie Slice is a showstopper, I mean it. Over dozens of kitchen trials and family taste tests, I’ve honed this recipe to deliver maximum flavor, texture, and ease. It’s not just another honey pie—it’s a modern dessert that people actually remember.
- Quick & Easy: You can pull this pie together in about 1 hour. It’s perfect for busy nights or last-minute potluck contributions.
- Simple Ingredients: No wild goose chase at the grocery store. Odds are, you’ve got everything you need right in your pantry.
- Perfect for Any Occasion: Whether it’s a brunch with friends, a cozy weekend dinner, or the centerpiece for your holiday dessert spread, this pie fits in everywhere.
- Crowd-Pleaser: Kids love the sweetness; adults swoon over the burnt honey’s depth. I’ve yet to meet anyone who didn’t want seconds (or thirds!).
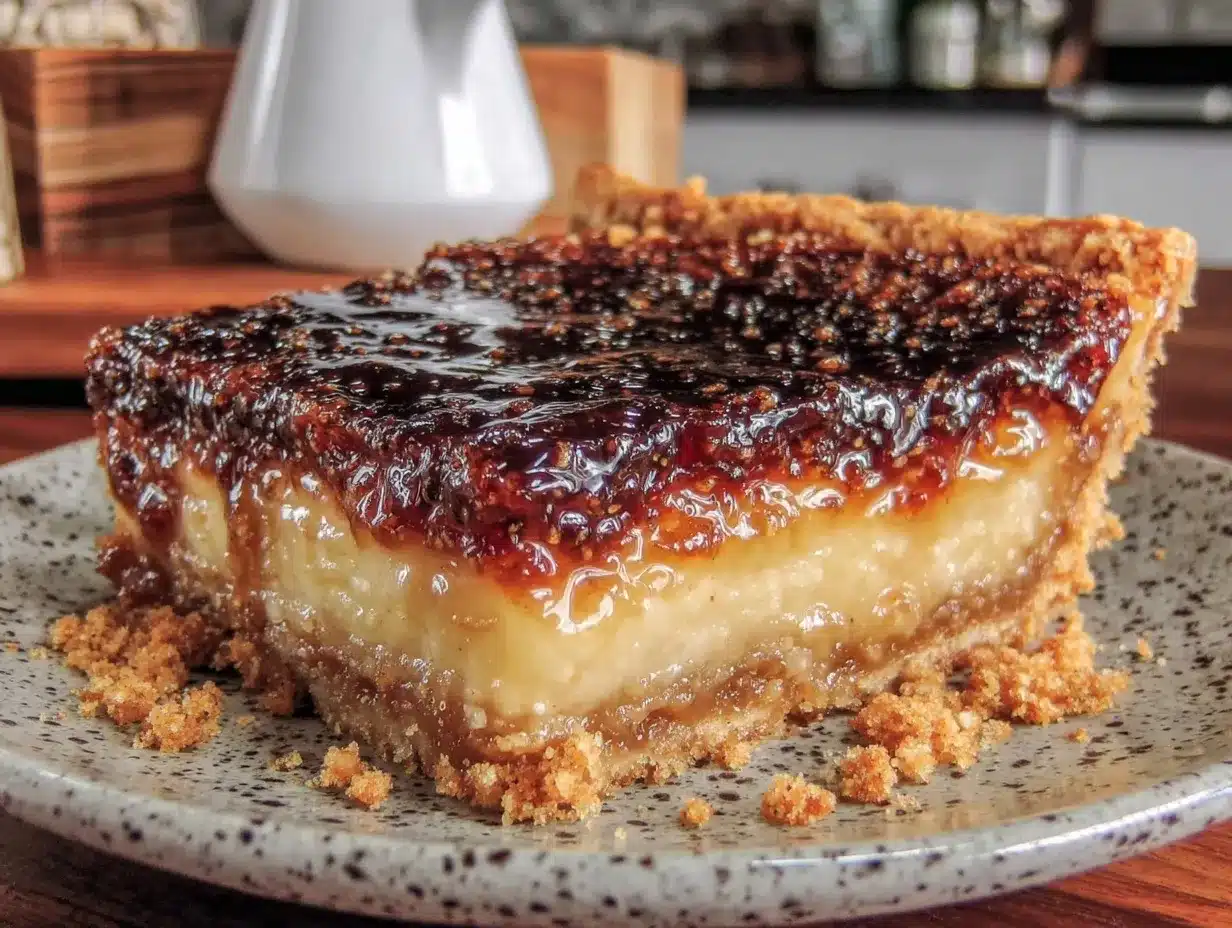
- Unbelievably Delicious: The crispy, caramelized top gives way to a luscious honey custard with every bite. It’s comfort food, but with a unique edge.
What sets this recipe apart? Instead of just pouring honey into a custard, we cook it until it’s dark and complex—almost smoky, but not bitter. That flavor, blended with a hint of sea salt and a flaky crust, is something you won’t find in the standard honey pies. I even tested a version using a dash of lemon zest for brightness, and trust me, it’s a game changer.
This isn’t the kind of dessert you forget about. It’s the kind that makes you close your eyes after the first bite, savoring every crispy edge and dreamy center. It’s modern comfort—healthier than you’d expect, faster than most pies, but every bit as soul-soothing. Whether you’re trying to impress guests or just treat yourself, this pie delivers every time.
What Ingredients You Will Need
This Crispy Burnt Honey Pie Slice recipe uses simple, wholesome ingredients to create bold flavor and a satisfyingly crispy texture. Most of them are pantry staples, and you can swap in alternatives if needed. Here’s what you’ll need:
- For the Pie Crust:
- 1 1/4 cups (150g) all-purpose flour (or use almond flour for gluten-free)
- 1/2 cup (115g) unsalted butter, cold and cubed (vegan butter works too)
- 2 tablespoons (25g) granulated sugar
- 1/4 teaspoon fine sea salt
- 3-4 tablespoons (45-60ml) ice water
- For the Burnt Honey Filling:
- 3/4 cup (255g) raw honey (I recommend local clover or wildflower honey for best flavor)
- 1/2 cup (120ml) heavy cream (use coconut cream for a dairy-free twist)
- 1/4 cup (55g) unsalted butter, melted
- 1/2 cup (100g) light brown sugar
- 2 large eggs, room temperature
- 1 tablespoon (8g) all-purpose flour
- 1/4 teaspoon sea salt (balances the sweetness)
- 1 teaspoon vanilla extract (for depth)
- Optional: 1 teaspoon lemon zest (adds brightness)
- For the Crispy Topping:
- 2 tablespoons (25g) granulated sugar
- 1 tablespoon (15ml) honey
- 1/4 teaspoon flaky sea salt (for garnish)
If you’re missing something, don’t panic. You can swap the heavy cream for half-and-half, or even use oat milk in a pinch (though the filling will be a bit softer). For the crust, pre-made pie dough works fine—just keep an eye on the baking time. I’ve tried this with gluten-free flour blends and the texture holds up nicely. When it comes to honey, darker varieties like buckwheat or chestnut give an extra punch, but lighter honeys work just as well for a more delicate flavor.
Ingredient selection tip: Always use fresh eggs for the creamiest filling. And if you can, opt for organic butter—the flavor really shines through.
Equipment Needed
- 9-inch (23cm) pie pan or tart pan (ceramic or metal both work—metal gives a crispier crust)
- Medium saucepan (for burning the honey)
- Mixing bowls (at least two, for crust and filling)
- Whisk and silicone spatula (I love a sturdy whisk for smooth custard)
- Rolling pin (or just press the dough into the pan with your fingers—sometimes that’s easier!)
- Measuring cups and spoons
- Pastry brush (for the crispy topping, but you can use the back of a spoon if you don’t have one)
- Wire cooling rack
If you don’t own a pie pan, a square baking dish works—just cut the slices into squares instead. For the saucepan, a heavy-bottomed pan prevents scorching (ask me how I know!). My grandma always used a cheap metal pan for burning honey, and it worked just fine, but a nonstick pan makes cleanup easier.
Maintenance tip: Wash your pie pan gently—scrubbing too hard can scratch it and make future pies stick. Budget-friendly tip: Most equipment can be found at thrift stores or big-box retailers for a steal.
Preparation Method
- Prepare the Pie Crust:
In a mixing bowl, whisk together 1 1/4 cups (150g) flour, 2 tablespoons (25g) sugar, and 1/4 teaspoon salt. Cut in 1/2 cup (115g) cold butter until the mixture resembles coarse crumbs. Add 3-4 tablespoons (45-60ml) ice water, one tablespoon at a time, until the dough comes together. Form into a disc, wrap in plastic, and chill for 30 minutes.
Note: If the dough feels sticky, add a tablespoon more flour. If it’s too dry, drizzle in extra water. - Blind Bake the Crust:
Preheat your oven to 375°F (190°C). Roll out the dough to fit your 9-inch (23cm) pie pan, pressing into the edges. Prick the bottom with a fork and line with parchment paper. Fill with pie weights or dried beans. Bake for 15 minutes, then remove weights and bake another 10 minutes until lightly golden.
Sensory cue: The crust should feel dry and just starting to brown at the edges. - Make the Burnt Honey:
In a medium saucepan over medium-high heat, pour 3/4 cup (255g) honey. Let it bubble, stirring occasionally, until it turns a deep amber and smells caramelized—about 3-5 minutes. Watch closely; burnt honey can turn from toasty to bitter fast.
Tip: If you see smoke, take it off the heat immediately! - Mix the Filling:
In a bowl, whisk together 1/2 cup (120ml) heavy cream, 1/4 cup (55g) melted butter, 1/2 cup (100g) brown sugar, 2 eggs, 1 tablespoon (8g) flour, 1/4 teaspoon salt, 1 teaspoon vanilla, and optional lemon zest. Slowly whisk in the hot burnt honey, stirring constantly so the eggs don’t scramble.
Preparation note: The mixture should be smooth and glossy. - Fill and Bake:
Pour the filling into the baked pie crust. Bake at 350°F (175°C) for 30-35 minutes until the center is just set and the edges are puffed and crispy.
Sensory cue: The pie should jiggle slightly in the center but not slosh. A sharp knife inserted should come out clean. - Add the Crispy Topping:
As soon as you remove the pie from the oven, sprinkle 2 tablespoons (25g) sugar and drizzle 1 tablespoon (15ml) honey over the top. Use a pastry brush to spread evenly. Sprinkle with flaky sea salt.
Tip: For extra crunch, use a kitchen torch to caramelize the sugar on top—like a crème brûlée. - Cool and Slice:
Let the pie cool on a wire rack for at least 1 hour before slicing. This helps the filling set and keeps those crispy edges intact.
Efficiency tip: Prepare the crust a day ahead and keep it chilled. If you want thinner slices, use a sharp serrated knife and wipe between cuts for clean edges.
Cooking Tips & Techniques
Burnt honey sounds intimidating, but honestly, once you’ve done it a couple of times, you’ll wonder why you waited so long to try. Here are my best tricks for nailing this Crispy Burnt Honey Pie Slice every time:
- Watch the Honey Closely: Honey goes from golden to burnt in seconds. Stay at the stove, and use your nose—when it smells deep and just-shy-of-smoky, it’s ready.
- Don’t Overbake the Pie: The center should have a gentle jiggle. Overbaking can lead to a tough or grainy texture.
- Use Room Temperature Eggs: This prevents curdling when you add hot honey. Cold eggs can cause the custard to seize up.
- Blind Bake for Crispy Crust: Blind baking is your friend. Skip this step, and you risk a soggy bottom (been there, regretted that).
- Torching for the Top: If you want restaurant-level crunch, a kitchen torch works wonders on the sugar topping. Just a few passes create that glassy, caramelized shell.
- Lemon Zest for Balance: If your honey is very sweet, a pinch of lemon zest brightens the whole pie—try it at least once!
- Slicing Tips: Run your knife under hot water and dry before slicing for picture-perfect wedges.
Common mistakes? Rushing the honey and overbaking. I once left the honey a minute too long—let’s just say, burnt honey can be too burnt. Now I trust my nose instead of the timer. For consistency, measure everything carefully, and let the pie cool fully before cutting. Multitask by prepping the crust while the honey is burning (just keep an eye on that pan!).
Variations & Adaptations
The beauty of this Crispy Burnt Honey Pie Slice is how easily you can tweak it to suit your tastes or dietary needs. Here are some favorite adaptations:
- Gluten-Free Version: Swap the all-purpose flour in the crust and filling with a gluten-free blend or almond flour. The texture stays crisp and nutty.
- Dairy-Free Adaptation: Use vegan butter and coconut cream in place of dairy. The filling will be a touch softer, but the flavor is still fantastic.
- Seasonal Fruit Addition: Layer thin slices of fresh pears, apples, or figs on top of the filling before baking for a fruity twist. In summer, try a handful of blueberries or blackberries.
- Spiced Honey Pie: Add 1/2 teaspoon ground cinnamon or cardamom to the filling for a warm, aromatic flavor.
- Nutty Crunch: Sprinkle chopped toasted walnuts or pecans over the crispy topping for extra texture.
Cooking method variation: Bake the pie as bars in a square pan for easy serving at picnics. For a deeper custard, use a smaller pie dish and increase baking time by 5-10 minutes. Allergens? Swap out eggs for a flaxseed “egg” (1 tablespoon ground flax mixed with 3 tablespoons water per egg), and use dairy-alternatives as needed.
My favorite variation so far: I once added a layer of sliced pears and a dusting of cinnamon to the filling—my family said it tasted like autumn in a slice!
Serving & Storage Suggestions
This Crispy Burnt Honey Pie Slice is best served at room temperature, where the crispy top and creamy center shine. For a pretty presentation, cut into neat wedges and garnish with a drizzle of extra honey or a pinch of flaky salt.
Pair it with a scoop of vanilla ice cream for special occasions, or a steaming mug of black tea for a cozy afternoon treat. It also plays nicely with sharp cheeses if you want to get fancy (honey and cheese—who knew?).
To store, cover the pie tightly and refrigerate for up to 4 days. The crispy topping may soften, but a quick pass under your broiler or a kitchen torch will revive it. For freezing, wrap individual slices in parchment and foil, then freeze up to 2 months. Thaw overnight in the fridge and reheat gently in a low oven (300°F/150°C) for 10 minutes.
As the pie sits, the honey flavor deepens and the custard firms up a bit—honestly, leftovers taste even better the next day. Just remember to let it come to room temp before serving for the best texture.
Nutritional Information & Benefits
Each slice of Crispy Burnt Honey Pie comes in around 310 calories, with 18g fat, 38g carbs, and 4g protein. The honey provides natural antioxidants, while eggs and cream offer a bit of protein and calcium. Using local raw honey may help with seasonal allergies (a trick my grandma swore by!).
This pie can be adapted for gluten-free or dairy-free diets, and there are nut-free options as well. If you’re watching your carbs, swap the sugar for a keto-friendly alternative—just keep an eye on texture.
Allergens to note: Contains dairy, eggs, and wheat (unless adapted). Personally, I love how this dessert gives pure comfort without being heavy or overly sweet. It’s a treat that feels a little bit wholesome, thanks to the simple ingredients.
Conclusion
If you’re searching for a modern dessert that’s truly unforgettable, this Crispy Burnt Honey Pie Slice is worth every minute in the kitchen. The blend of crispy, caramelized honey and creamy custard is pure magic—comforting, nostalgic, yet totally fresh. Don’t be afraid to tweak it to match your family’s tastes or dietary needs.
I love this recipe for its simplicity and unique flavor. It’s the kind of dessert that brings people together, sparking smiles and second helpings. If you try it, please leave a comment below with your tweaks or favorite honey varieties—sharing is half the fun!
Go ahead, bookmark this recipe, pin it, and surprise your loved ones with a slice of something truly special. Happy baking—may your kitchen always smell this sweet!
Frequently Asked Questions
Can I make Crispy Burnt Honey Pie Slice ahead of time?
Absolutely! Bake the pie a day in advance and keep it covered at room temperature or in the fridge. The flavor actually improves as it sits.
What’s the best honey to use for burnt honey pie?
I recommend raw, local honey for the deepest flavor. Clover and wildflower are classic, but darker honeys like buckwheat add a unique twist.
How do I keep the crust crispy?
Blind baking is key. Make sure to bake the crust before adding the filling and don’t skip poking it with a fork. Using a metal pie pan also helps.
Can I make this pie gluten-free?
Yes! Substitute the flour with a gluten-free blend or almond flour for both the crust and filling. The results are delicious and nearly identical in texture.
What if I don’t have a kitchen torch for the topping?
No worries! Just use your oven’s broiler for a minute or two. Watch closely so the sugar caramelizes but doesn’t burn.
Pin This Recipe!

Crispy Burnt Honey Pie Slice

A modern twist on classic honey pie, this dessert features a crispy, caramelized burnt honey topping over a creamy custard filling in a buttery, flaky crust. It’s easy to make, crowd-pleasing, and perfect for any occasion.
- Prep Time: 20 minutes
- Cook Time: 45 minutes
- Total Time: 1 hour 5 minutes
- Yield: 8 servings 1x
- Category: Dessert
- Cuisine: American
Ingredients
- 1 1/4 cups all-purpose flour (or almond flour for gluten-free)
- 1/2 cup unsalted butter, cold and cubed (vegan butter works too)
- 2 tablespoons granulated sugar
- 1/4 teaspoon fine sea salt
- 3–4 tablespoons ice water
- 3/4 cup raw honey (clover or wildflower recommended)
- 1/2 cup heavy cream (or coconut cream for dairy-free)
- 1/4 cup unsalted butter, melted
- 1/2 cup light brown sugar
- 2 large eggs, room temperature
- 1 tablespoon all-purpose flour
- 1/4 teaspoon sea salt
- 1 teaspoon vanilla extract
- 1 teaspoon lemon zest (optional)
- 2 tablespoons granulated sugar (for topping)
- 1 tablespoon honey (for topping)
- 1/4 teaspoon flaky sea salt (for garnish)
Instructions
- Prepare the Pie Crust: In a mixing bowl, whisk together flour, sugar, and salt. Cut in cold butter until the mixture resembles coarse crumbs. Add ice water, one tablespoon at a time, until the dough comes together. Form into a disc, wrap in plastic, and chill for 30 minutes.
- Blind Bake the Crust: Preheat oven to 375°F (190°C). Roll out dough to fit a 9-inch pie pan, pressing into edges. Prick bottom with a fork, line with parchment, and fill with pie weights or dried beans. Bake for 15 minutes, remove weights, and bake another 10 minutes until lightly golden.
- Make the Burnt Honey: In a medium saucepan over medium-high heat, pour honey and let it bubble, stirring occasionally, until deep amber and caramelized (about 3-5 minutes). Remove from heat if you see smoke.
- Mix the Filling: In a bowl, whisk together heavy cream, melted butter, brown sugar, eggs, flour, salt, vanilla, and optional lemon zest. Slowly whisk in hot burnt honey, stirring constantly.
- Fill and Bake: Pour filling into baked pie crust. Bake at 350°F (175°C) for 30-35 minutes until center is just set and edges are puffed and crispy.
- Add the Crispy Topping: Immediately after baking, sprinkle sugar and drizzle honey over the top. Use a pastry brush to spread evenly. Sprinkle with flaky sea salt. For extra crunch, use a kitchen torch to caramelize the sugar.
- Cool and Slice: Let pie cool on a wire rack for at least 1 hour before slicing.
Notes
Blind baking the crust is essential for crispiness. Watch the honey closely when burning—it can go from caramelized to bitter quickly. For a gluten-free version, use almond flour or a gluten-free blend. Dairy-free adaptations work well with coconut cream and vegan butter. For extra crunch, caramelize the sugar topping with a kitchen torch or broiler. Let the pie cool fully before slicing for clean edges.
Nutrition
- Serving Size: 1 slice (1/8 of pie)
- Calories: 310
- Sugar: 26
- Sodium: 180
- Fat: 18
- Saturated Fat: 11
- Carbohydrates: 38
- Fiber: 1
- Protein: 4
Keywords: honey pie, burnt honey, crispy pie, modern dessert, easy pie recipe, honey dessert, caramelized honey, custard pie, holiday dessert, comfort food


