Introduction
Let me paint you a picture: the morning air is crisp, leaves are crunching underfoot, and my kitchen smells like a bakery on a brisk autumn day. The combination of pumpkin and cinnamon is swirling through the house, and honestly, it’s enough to make anyone drop everything for breakfast. You know when you catch that sweet, spicy aroma wafting from the oven—well, it just makes you want to wrap up in a cozy sweater and linger a little longer at the table.
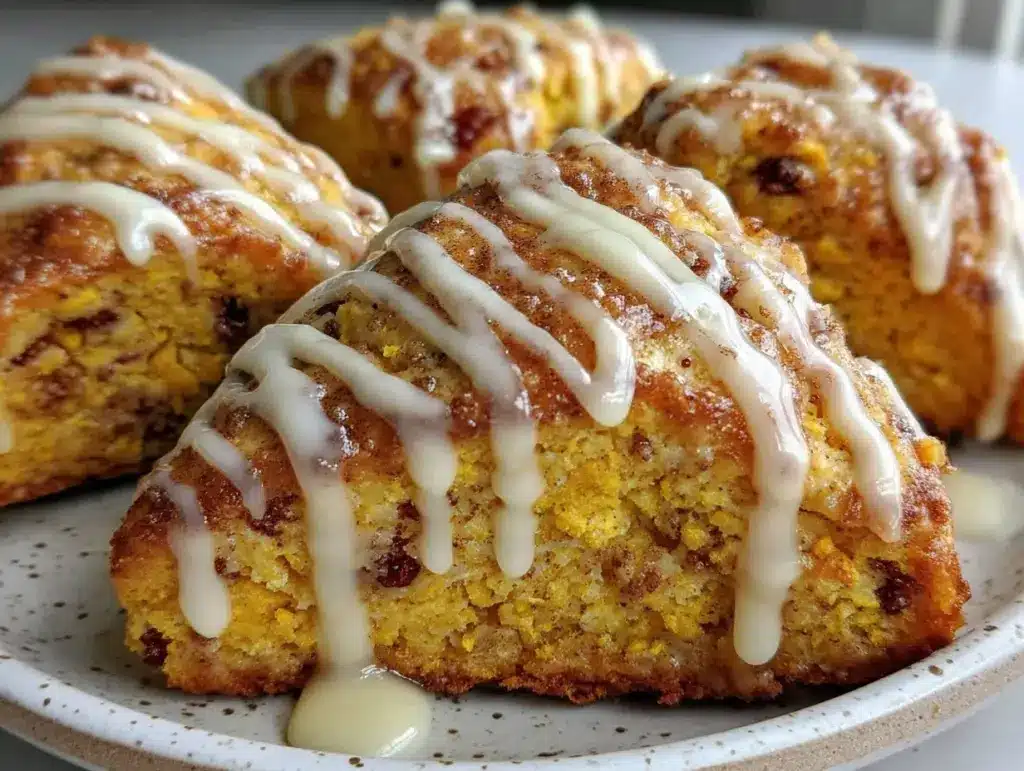
The first time I baked these pumpkin cinnamon scones, it was one of those chilly Saturdays when you can’t decide if you want to bake or just stay under the covers. I was instantly hooked. The scones came out golden, with a tender crumb and those gorgeous flecks of cinnamon running through. It was the kind of moment where you pause, take a deep breath, and just smile because you know you’re onto something truly special.
Growing up, my grandma had a knack for baking—she’d whip up scones with whatever was in season. When I was knee-high to a grasshopper, I’d watch her work the dough, dusting flour everywhere (even on herself, by accident). Years ago, I tried to recreate her magic, but let’s face it, nothing ever tasted quite right until I landed on this pumpkin cinnamon scones recipe. I wish I’d discovered this cozy combo a decade ago!
My family couldn’t stop sneaking scones off the cooling rack (I can’t blame them). Even my picky nephew—who claims to hate pumpkin—devoured two before anyone else got a bite. These scones have this pure, nostalgic comfort that makes them perfect for potlucks, a sweet treat for your kids, or to brighten up your Pinterest breakfast board. I’ve tested this recipe at least six times (in the name of research, of course), and now it’s a staple for family gatherings, gifting, and those slow, quiet mornings that feel like a warm hug. You’re going to want to bookmark this one!
Why You’ll Love This Recipe
There’s something genuinely magical about these pumpkin cinnamon scones, and after countless batches, I can say with absolute certainty you’re in for a treat. Here’s why this recipe stands out (and why it’s become my go-to for fall holidays and breakfast cravings).
- Quick & Easy: Comes together in under 40 minutes, so you don’t have to wait long for that first bite. Seriously, you can have fresh-baked scones before your morning coffee is finished brewing.
- Simple Ingredients: No fancy grocery runs—just pantry staples and a can of pumpkin purée. Honestly, you probably have everything you need right now.
- Perfect for Fall Holidays: These scones are ideal for Thanksgiving morning, Halloween brunch, or any chilly weekend when you want something special.
- Crowd-Pleaser: They’re a hit with kids and adults. Even my neighbor (who’s suspicious of anything orange) asked for the recipe after just one bite.
- Unbelievably Delicious: The tender crumb, warm cinnamon swirl, and subtle pumpkin flavor make every bite feel like a celebration of autumn.
What sets these pumpkin cinnamon scones apart from other recipes? It’s all in the technique—using cold butter and just the right touch of pumpkin keeps the scones fluffy, not dense. The cinnamon sugar swirl inside adds a little surprise and a lot of flavor (trust me, it’s worth the extra step). I’ve tried versions with less spice, more pumpkin, even swapped in whole wheat flour—and this one hits that perfect balance of cozy, sweet, and just a little bit spicy.
Truly, these scones aren’t just good—they’re the kind you serve when you want to impress guests without breaking a sweat, or when you need a breakfast that feels like a treat but is secretly wholesome. It’s comfort food reimagined for busy mornings and lazy fall weekends, with all the nostalgia and soul-soothing satisfaction you crave. I love that these scones make breakfast feel like a mini holiday, even on a regular Tuesday.
What Ingredients You Will Need
This pumpkin cinnamon scones recipe uses simple, wholesome ingredients to deliver bold flavor and satisfying texture—without any fuss. Most of these are pantry staples, and if you bake even occasionally, you’ll likely have everything on hand. If not, substitutions are easy and I’ll walk you through a few options for every major ingredient.
- For the Scone Dough:
- 2 cups (250g) all-purpose flour (King Arthur is my favorite for scones)
- 1/3 cup (65g) granulated sugar (adds sweetness without overpowering)
- 1 tablespoon (12g) baking powder
- 1/2 teaspoon salt
- 1 teaspoon ground cinnamon
- 1/2 teaspoon ground nutmeg (optional, but adds warmth)
- 1/2 cup (115g) unsalted butter, cold and cut into cubes (sticks work best—don’t use margarine)
- 1/2 cup (120g) pumpkin purée (Libby’s or homemade—just not pumpkin pie filling!)
- 1/4 cup (60ml) whole milk or half-and-half (for richer scones)
- 1 large egg (room temperature helps with texture)
- 1 teaspoon vanilla extract (adds depth)
- For the Cinnamon Sugar Swirl:
- 1/4 cup (50g) brown sugar (light or dark, whichever you prefer)
- 1 teaspoon ground cinnamon
- For the Glaze (Optional, but recommended):
- 1/2 cup (60g) powdered sugar
- 1 tablespoon (15ml) milk (any type works—use dairy-free if needed)
- 1/4 teaspoon ground cinnamon
Ingredient tips: For gluten-free scones, swap the all-purpose flour for a 1:1 gluten-free blend (Bob’s Red Mill is reliable). If you need dairy-free, use vegan butter and any plant-based milk. Don’t have nutmeg? Just add a touch more cinnamon—it still tastes amazing. For a bolder pumpkin flavor, you can increase the purée by a tablespoon, but watch the dough texture—it shouldn’t get too sticky. And for the butter: always keep it cold until you use it; that’s the secret to flaky scones.
You can also switch up the spices—try pumpkin pie spice in place of cinnamon and nutmeg for a blend of ginger, cloves, and allspice. If you love mix-ins, toss in a handful of chopped pecans or dried cranberries. When I want a gluten-free version for my sister, almond flour works in a pinch, though the result is more tender and less crumbly.
Honestly, you don’t need anything fancy here—just the basics, a little pumpkin, and a lot of cinnamon. This is the kind of recipe that’s forgiving and flexible, which is why it’s become a fall breakfast staple in my home.
Equipment Needed

- Mixing Bowls: At least two—one for dry ingredients, one for wet. I use glass bowls because they’re easy to clean and don’t stain from pumpkin.
- Pastry Cutter or Fork: For cutting the cold butter into the flour. If you don’t have a pastry cutter, two knives work in a pinch (I’ve actually used my hands on lazy mornings!).
- Baking Sheet: Standard size, lined with parchment paper (makes cleanup so easy).
- Bench Scraper or Knife: To cut the dough into wedges. Bench scrapers make the job neater, but a sharp chef’s knife does the trick.
- Measuring Cups and Spoons: Accurate measurements matter—especially for baking.
- Whisk: For blending wet ingredients and the glaze.
- Rubber Spatula: Helps fold the dough gently without overmixing.
- Wire Cooling Rack: Allows scones to cool evenly (and stops them from getting soggy bottoms).
If you don’t have a pastry cutter, don’t sweat it—use a fork or your fingers, just work quickly to keep the butter cold. I’ve had scones turn out just fine with a humble butter knife, but a bench scraper makes portioning easier. For budget-friendly options, check thrift stores; my best mixing bowl came from a yard sale years ago.
Maintenance tip: Keep your baking sheet parchment-lined for easy cleanup and less sticking. If your wire rack is rusty, give it a quick scrub with baking soda and water. And honestly, don’t worry about having the fanciest tools—half the fun is making do with what you’ve got!
Preparation Method
- Preheat your oven: Set to 400°F (200°C). Line a baking sheet with parchment paper for easy cleanup.
- Mix dry ingredients: In a large mixing bowl, whisk together 2 cups (250g) all-purpose flour, 1/3 cup (65g) sugar, 1 tablespoon (12g) baking powder, 1/2 teaspoon salt, 1 teaspoon ground cinnamon, and 1/2 teaspoon ground nutmeg (if using). The mixture should look evenly mixed, slightly sandy.
- Cut in cold butter: Add 1/2 cup (115g) unsalted butter, cold and cut into cubes. Use a pastry cutter, fork, or your hands to rub the butter into the flour until you see pea-sized lumps. This step is crucial for flaky scones—don’t overwork! If the butter starts to melt, pop the bowl in the fridge for 5 minutes.
- Blend wet ingredients: In a separate bowl, whisk together 1/2 cup (120g) pumpkin purée, 1/4 cup (60ml) milk, 1 egg, and 1 teaspoon vanilla extract. The mixture should be smooth and slightly thick.
- Combine wet and dry: Pour the wet mixture into the flour-butter mix. Use a rubber spatula or your hands to gently fold everything together until just combined. Don’t overmix—lumpy dough is good! If the dough feels too sticky, add a tablespoon of flour; too dry, a splash of milk.
- Prepare cinnamon sugar swirl: In a small bowl, mix 1/4 cup (50g) brown sugar and 1 teaspoon cinnamon.
- Shape the dough: Turn the dough onto a floured surface. Pat it into a rough rectangle, about 8×5 inches (20×13 cm) and 1-inch (2.5cm) thick. Sprinkle the cinnamon sugar mixture over half the dough, then fold the other half on top and gently press together. Some sugar may spill out—just press it back in, no big deal.
- Cut and arrange: Shape the dough into a disk, about 7 inches (18cm) wide. Cut into 8 wedges with a bench scraper or knife. Transfer each wedge to your lined baking sheet, spacing them apart for even baking.
- Bake the scones: Bake at 400°F (200°C) for 18-22 minutes. Scones are done when the tops are golden and a toothpick inserted into the center comes out clean. The kitchen should smell like pumpkin spice heaven.
- Cool: Transfer scones to a wire rack and let them cool for at least 10 minutes before glazing. If you glaze too soon, it’ll melt right off—trust me, I’ve learned the hard way!
- Prepare the glaze (optional): Whisk 1/2 cup (60g) powdered sugar, 1 tablespoon (15ml) milk, and 1/4 teaspoon cinnamon until smooth. Drizzle over cooled scones—use a spoon or even a zip-top bag with the corner snipped.
- Serve: Enjoy warm for the best texture, but honestly, they’re delicious at room temp too.
If your dough is crumbly, add a splash more milk. If it’s too wet, dust with extra flour. Don’t worry if the scones aren’t perfectly shaped—rustic is good! Watch the baking time closely; overbaking can dry them out. And, if you’re making these ahead, skip the glaze until just before serving for prettiest results.
Personal tip: I chill the cut scones on the baking sheet for 10 minutes before baking. It makes them extra flaky. And don’t stress over sticky dough—just dust your hands with flour and keep going!
Cooking Tips & Techniques
After too many scone batches to count, here’s what I’ve learned (so you don’t have to repeat my kitchen blunders). Professional bakers swear by cold butter—don’t let it get soft, or your scones turn cakey instead of flaky. If your kitchen runs warm, chill your flour for 15 minutes before starting.
Common mistakes? Overmixing the dough. Scones like a gentle touch—a few lumps and bumps are totally fine. If you knead too much, they get tough (I’ve made that mistake more than once). Another pitfall: using pumpkin pie filling instead of pure pumpkin. Don’t do it—the added sugar and spices throw everything off.
For multitasking, assemble the cinnamon sugar swirl while your oven preheats. You can even measure out dry ingredients the night before to save time on busy mornings. If you want to freeze scones for later, freeze the dough wedges before baking, then bake straight from the freezer—just add 2-3 minutes to the baking time.
I also recommend using a bench scraper for portioning—less sticking, neater edges. If you don’t have one, a sharp knife dipped in flour works. For consistent results, weigh your flour and pumpkin purée. My first few batches were wildly different until I started measuring by weight.
Last tip: Don’t skip the cooling rack. Scones left on the baking sheet can get soggy bottoms (learned that the hard way!). And if you want extra sparkle, sprinkle a little turbinado sugar on top before baking. It makes for a pretty, crunchy finish that’s totally Pinterest-worthy.
Variations & Adaptations
These pumpkin cinnamon scones are so versatile, you can customize them for almost anyone’s tastes or dietary needs. Here are my favorite variations, plus a few tweaks I’ve tried along the way.
- Gluten-Free: Swap all-purpose flour for a 1:1 gluten-free blend (Bob’s Red Mill works well). The texture’s slightly softer, but still delicious.
- Dairy-Free: Use vegan butter and plant-based milk. I’ve made them with almond milk and Earth Balance, and they come out just as flaky.
- Nutty Crunch: Stir in 1/2 cup (60g) chopped pecans or walnuts for extra crunch. If you love a little chew, dried cranberries or golden raisins are awesome additions.
- Seasonal Spice: Use pumpkin pie spice instead of just cinnamon and nutmeg for a more complex flavor. Try adding a pinch of ground ginger for warmth.
- Chocolate Lovers: Add 1/2 cup (90g) mini chocolate chips to the dough. Pumpkin and chocolate are a match made in autumn heaven.
- Maple Glaze: Swap the milk in the glaze for real maple syrup and add a dash of cinnamon. It’s sweet, sticky, and totally decadent.
For different cooking methods, you can bake these scones in an air fryer (at 350°F/175°C for 12-15 minutes) if you’re short on oven space during the holidays. For a personal twist, I once mixed in orange zest—it gave the scones a fresh, bright flavor that paired beautifully with the pumpkin.
If you’re baking for allergies, skip the nuts and use oat milk. And for savory scones, omit the sugar swirl and add a handful of shredded cheddar and fresh herbs. There’s honestly no wrong way to enjoy these—just pick your favorite and go for it!
Serving & Storage Suggestions
These pumpkin cinnamon scones are best served warm, straight from the oven. The glaze sets quickly and adds a sweet, cinnamon-y finish. For brunch, pile them high on a rustic platter and sprinkle with a little extra cinnamon sugar for sparkle.
Pair with a mug of strong coffee, spiced chai, or even hot apple cider—trust me, it’s a fall breakfast dream! If you’re hosting a holiday breakfast, add a bowl of Greek yogurt and some fresh fruit on the side for balance.
To store, let scones cool completely, then keep in an airtight container at room temperature for up to 2 days. For longer storage, refrigerate for up to 5 days, or freeze individually wrapped scones for up to 2 months. Reheat scones in a 350°F (175°C) oven for 5-7 minutes, or microwave for 20 seconds (the oven keeps them crispier).
Honestly, the flavors deepen overnight, so leftover scones taste even better the next day. If you want to impress guests, glaze just before serving for that fresh-baked look. And if you’re sending them as holiday gifts, wrap in parchment and tie with twine—simple, pretty, and practical!
Nutritional Information & Benefits
Per scone (based on 8 servings): Approximately 220 calories, 7g fat, 35g carbs, 4g protein, and 10g sugar. Pumpkin provides a nice dose of vitamin A, fiber, and antioxidants, while cinnamon is known for supporting healthy blood sugar levels.
These scones can easily be made gluten-free or dairy-free with simple swaps. They’re lower in sugar than most bakery scones, and if you use whole wheat flour, you boost the fiber even more. Allergens to watch for: wheat, dairy, and eggs (but all have easy substitutions).
From a wellness perspective, I love that these pumpkin cinnamon scones feel like a treat but still offer some nutrients. You know, it’s nice to have a breakfast that feels indulgent and supports your health goals all at once!
Conclusion
If you’re searching for a breakfast recipe that truly celebrates fall, these pumpkin cinnamon scones deserve a spot at your table. They’re easy to make, full of cozy spice, and perfect for every autumn occasion—from lazy weekend mornings to festive holiday gatherings.
Don’t be afraid to tweak the recipe to fit your own tastes—add nuts, swap the glaze, or go gluten-free. That’s the beauty of homemade scones: they’re endlessly adaptable. I keep coming back to this recipe because it’s comforting, crowd-pleasing, and always gets rave reviews from my family.
So, grab your pumpkin, warm up your oven, and give these scones a try. If you bake them, let me know in the comments—share your favorite twists or who you shared them with! Wishing you cozy mornings and lots of pumpkin spice happiness.
FAQs
Can I use fresh pumpkin instead of canned pumpkin purée?
Absolutely! Just roast, mash, and cool fresh pumpkin. Make sure it’s thick and not watery, or the dough might get sticky.
How do I make pumpkin cinnamon scones gluten-free?
Swap the all-purpose flour for a 1:1 gluten-free baking blend. The texture will be a little softer, but still delicious.
Can I freeze these scones before baking?
Yes! Cut the dough into wedges, freeze on a baking sheet, then transfer to a bag. Bake straight from the freezer with a few extra minutes.
What’s the best way to reheat leftover scones?
Oven is best—350°F (175°C) for 5-7 minutes. Microwave works too, but the oven keeps them crisp.
Can I make the scones vegan?
Definitely! Use vegan butter, plant-based milk, and swap the egg for a flax egg (1 tablespoon flaxseed meal + 2.5 tablespoons water, mixed and rested for 5 minutes).
Pin This Recipe!

Pumpkin Cinnamon Scones

These pumpkin cinnamon scones are a cozy, tender breakfast treat perfect for fall holidays. With a swirl of cinnamon sugar and a simple glaze, they’re easy to make and crowd-pleasing for any autumn morning.
- Prep Time: 15 minutes
- Cook Time: 22 minutes
- Total Time: 37 minutes
- Yield: 8 scones 1x
- Category: Breakfast
- Cuisine: American
Ingredients
- 2 cups all-purpose flour
- 1/3 cup granulated sugar
- 1 tablespoon baking powder
- 1/2 teaspoon salt
- 1 teaspoon ground cinnamon
- 1/2 teaspoon ground nutmeg (optional)
- 1/2 cup unsalted butter, cold and cut into cubes
- 1/2 cup pumpkin purée
- 1/4 cup whole milk or half-and-half
- 1 large egg
- 1 teaspoon vanilla extract
- 1/4 cup brown sugar
- 1 teaspoon ground cinnamon (for swirl)
- 1/2 cup powdered sugar
- 1 tablespoon milk
- 1/4 teaspoon ground cinnamon (for glaze)
Instructions
- Preheat oven to 400°F (200°C). Line a baking sheet with parchment paper.
- In a large mixing bowl, whisk together flour, granulated sugar, baking powder, salt, cinnamon, and nutmeg.
- Add cold butter cubes and cut into the flour mixture using a pastry cutter, fork, or hands until pea-sized lumps form.
- In a separate bowl, whisk together pumpkin purée, milk, egg, and vanilla extract until smooth.
- Pour wet ingredients into dry ingredients and gently fold together until just combined. Add more flour if too sticky, or a splash of milk if too dry.
- Mix brown sugar and cinnamon in a small bowl for the cinnamon sugar swirl.
- Turn dough onto a floured surface and pat into a rectangle about 8×5 inches and 1-inch thick. Sprinkle cinnamon sugar over half, fold the other half over, and press gently.
- Shape dough into a 7-inch disk and cut into 8 wedges. Arrange on the prepared baking sheet, spacing apart.
- Bake for 18-22 minutes until golden and a toothpick comes out clean.
- Transfer scones to a wire rack and cool for at least 10 minutes.
- For the glaze, whisk powdered sugar, milk, and cinnamon until smooth. Drizzle over cooled scones.
- Serve warm or at room temperature.
Notes
For extra flaky scones, chill the cut wedges on the baking sheet for 10 minutes before baking. Don’t overmix the dough—lumps are good! Scones can be made gluten-free or dairy-free with simple swaps. Freeze dough wedges for future baking. Sprinkle turbinado sugar on top before baking for crunch.
Nutrition
- Serving Size: 1 scone
- Calories: 220
- Sugar: 10
- Sodium: 250
- Fat: 7
- Saturated Fat: 4
- Carbohydrates: 35
- Fiber: 2
- Protein: 4
Keywords: pumpkin scones, cinnamon scones, fall breakfast, autumn baking, easy scone recipe, holiday brunch, pumpkin spice, homemade scones


