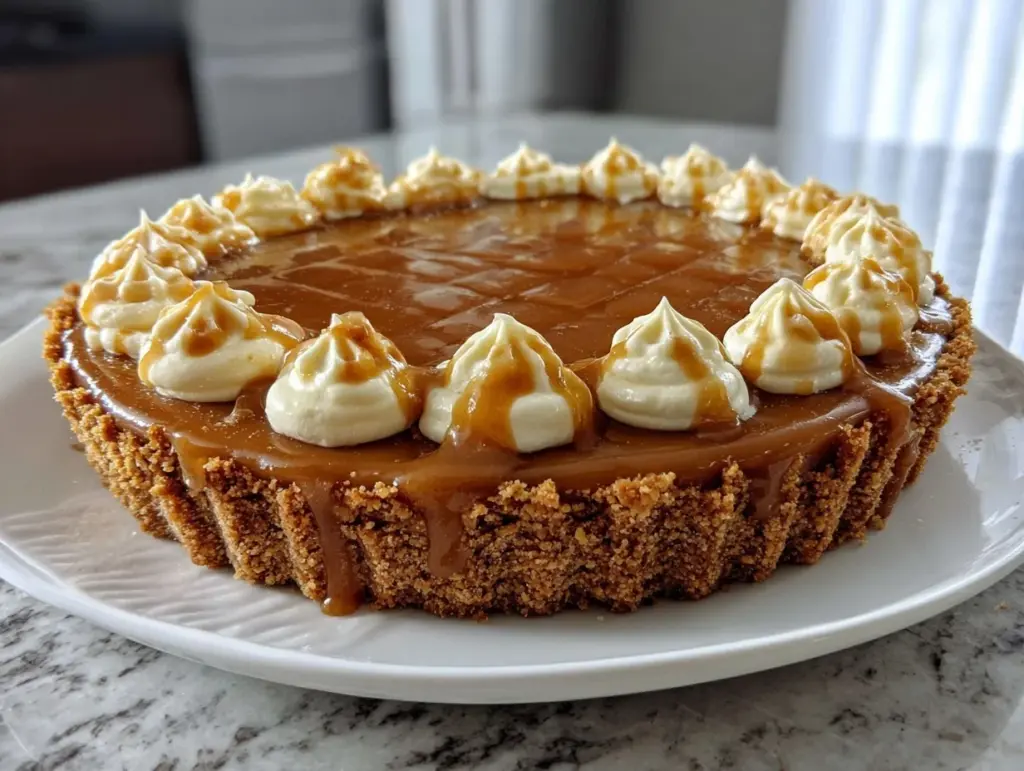
Let me just say, the smell of bubbling butterscotch filling wafting through my kitchen is enough to make anyone’s knees go wobbly. It’s that deep, caramelized sweetness mingling with a hint of toasted graham cracker, all wrapped up in a pillowy cloud of whipped topping. I still remember the first time I made this creamy butterscotch pie: the golden filling shimmered as it cooled, and the crust promised a perfect crunch in every bite. It was one of those rare, magical days when the whole house seemed to pause and soak in the comfort (the kind of moment where you pause, take a deep breath, and just smile because you know you’re onto something truly special).
Honestly, this pie goes way back for me. My grandma used to whip up a version for Sunday dinners, and I was hooked after just one slice. The nostalgia is real! When I was knee-high to a grasshopper, I’d sneak bits of graham crust from the pan—she always pretended not to notice. Years ago, I tried recreating her pie but it wasn’t quite right until I stumbled on the trick: real butterscotch cooked low and slow, then poured into a homemade graham cracker crust. Now, it’s a staple for every potluck, birthday, and rainy weekend when comfort food is absolutely necessary. I wish I’d figured it out sooner, honestly!
My family can’t help themselves—slices disappear faster than you can say “pie.” The whipped topping is always piled high (let’s face it, that’s half the fun). Neighbors ask for the recipe, kids sneak seconds, and even the picky eaters admit it’s “dangerously easy” to love. It’s pure, nostalgic comfort, perfect for brightening up your Pinterest dessert board or bringing to a last-minute get-together. I’ve made it at least a dozen times (all in the name of research, of course), and each time it feels like a warm hug. You’re going to want to bookmark this one—it’s that good.
Why You’ll Love This Creamy Butterscotch Pie
Let’s be real: there are plenty of pie recipes out there, but this creamy butterscotch pie with graham cracker crust and fluffy whipped topping has a few tricks up its sleeve. I’ve tested, tweaked, and devoured more slices than I care to admit, and here’s why you’ll fall head over heels for it:
- Quick & Easy: Comes together in under an hour—no need to fuss with rolling dough or chilling for ages. Perfect for busy weeknights or those “uh-oh, I need dessert!” moments.
- Simple Ingredients: Everything you need is probably already in your pantry. No obscure items or fancy store runs required.
- Perfect for Any Occasion: This pie shines at brunch, potlucks, cozy dinners, and even holiday mornings. It’s versatile enough for every season.
- Crowd-Pleaser: Kids love the sweet filling, adults rave about the nostalgic flavor, and picky eaters just ask for seconds. There’s something about butterscotch that brings everyone together.
- Unbelievably Delicious: Creamy, rich, and with just the right balance of sweetness and crunch, this pie is comfort food at its finest.
Here’s what sets this recipe apart: I blend the butterscotch filling until ultrasmooth, then pour it while it’s still warm into the graham crust. That little detail makes the texture silky, no lumps or graininess allowed. The graham cracker crust is pressed thick for maximum crunch—no soggy bottoms here! And the whipped topping? Fluffy, cold, and piled high for a classic finish. You know what, it’s not just another butterscotch pie—it’s my best version after years of trial and error.
This isn’t just a dessert, it’s a moment. The first bite makes you close your eyes and smile, and the second one (let’s be honest, you’ll want seconds) just seals the deal. It’s comfort food reimagined—faster and easier, but with all the soul-soothing satisfaction you crave. Whether you’re impressing guests or turning a simple meal into something memorable, this creamy butterscotch pie is your secret weapon.
What Ingredients You Will Need
This creamy butterscotch pie recipe uses simple, wholesome ingredients to deliver bold flavor and a satisfying texture without the fuss. Most of these are pantry staples, but there’s room to swap and adapt if needed.
For the Graham Cracker Crust:
- 1 1/2 cups (150g) graham cracker crumbs (about 10 full crackers, crushed)
- 1/4 cup (50g) granulated sugar
- 6 tablespoons (85g) unsalted butter, melted (I like Land O’Lakes for its flavor)
- Pinch of salt
For the Creamy Butterscotch Filling:
- 1 cup (200g) packed light brown sugar (for that classic butterscotch flavor)
- 1/4 cup (30g) cornstarch
- 1/2 teaspoon salt
- 2 cups (480ml) whole milk (or half-and-half for extra richness)
- 4 large egg yolks, room temperature
- 4 tablespoons (57g) unsalted butter, cut into pieces
- 2 teaspoons pure vanilla extract (I recommend Nielsen-Massey for best aroma)
- Optional: 1/4 teaspoon ground cinnamon (for a subtle twist)
For the Whipped Topping:
- 1 cup (240ml) heavy whipping cream, cold
- 3 tablespoons (24g) powdered sugar
- 1/2 teaspoon vanilla extract
- Optional: 1/2 cup (120ml) prepared whipped topping (store-bought works if you’re short on time)
Ingredient Notes & Substitutions:
- Graham Crackers: Use gluten-free graham crackers for a GF version.
- Dairy-Free: Swap whole milk with unsweetened almond or oat milk, and use dairy-free butter.
- Egg-Free: Try an egg replacer for baking, though the texture will be less custardy.
- Brown Sugar: Dark brown sugar is fine, but the flavor will be deeper and more molasses-y.
- Whipped Topping: You can use coconut cream for a dairy-free finish—just whip with a bit of vanilla and sugar.
I always reach for small-curd brown sugar, and I’ve found that using a hand mixer for the whipped topping makes it extra fluffy (those little tricks make a big difference!). In summer, fresh berries on top add a lovely touch. If you’re missing an ingredient, don’t panic—this pie is forgiving. Substitute and experiment, that’s half the fun!
Equipment Needed
- 9-inch (23cm) pie pan (glass or metal works fine, but glass lets you check for that golden crust)
- Medium saucepan (for cooking the butterscotch filling)
- Whisk (essential for smooth filling—don’t skimp here!)
- Mixing bowls (one large, one medium)
- Measuring cups and spoons (accurate measurements are key)
- Hand mixer or stand mixer (for the whipped topping)
- Rubber spatula (for scraping every last bit of filling)
- Plastic wrap or pie dome (for chilling and storing)
- Optional: Food processor (for quick graham cracker crumbs, but a zip-top bag and rolling pin work too)
If you don’t have a pie pan, use a square baking dish—just call it “butterscotch bars” and no one will mind. I’ve tried both hand and stand mixers for the whipped cream, and honestly, the hand mixer is easier to clean when you’re in a hurry. For the crust, a flat-bottomed measuring cup helps pack it tight (no loose crumbs!). If you’re on a budget, skip the food processor and crush crackers in a bag with a rolling pin—works just fine. Keep that whisk in good shape; I swear mine is practically family at this point.
Preparation Method
-
Make the Graham Cracker Crust:
- Preheat your oven to 350°F (175°C).
- Mix 1 1/2 cups (150g) graham cracker crumbs, 1/4 cup (50g) sugar, and a pinch of salt in a medium bowl.
- Pour in 6 tablespoons (85g) melted butter, stirring until the mixture looks like wet sand.
- Press crumbs firmly into the bottom and up the sides of a 9-inch (23cm) pie pan. Use a flat-bottomed cup for even packing.
- Bake crust for 8-10 minutes until just golden and fragrant. Set aside to cool.
-
Prepare the Creamy Butterscotch Filling:
- Combine 1 cup (200g) brown sugar, 1/4 cup (30g) cornstarch, and 1/2 teaspoon salt in a medium saucepan.
- Whisk in 2 cups (480ml) milk until smooth. If using half-and-half, expect a slightly thicker, richer filling.
- In a small bowl, beat 4 egg yolks lightly. (Tip: Don’t skip room temperature eggs—they blend easier!)
- Over medium heat, cook the sugar-milk mixture, whisking constantly until it thickens—about 7-9 minutes. It should coat the back of a spoon.
- Remove from heat. Whisk a bit of the hot mixture into the egg yolks (tempering), then pour yolks into the pan, whisking quickly. Return to heat for 2-3 minutes until thick and glossy.
- Take off the heat and stir in 4 tablespoons (57g) butter and 2 teaspoons vanilla until smooth. If using cinnamon, add now.
- Pour filling into the cooled graham cracker crust. Smooth the top with a spatula and cover with plastic wrap (press gently onto surface to prevent skin).
- Chill in the fridge for at least 4 hours, or overnight if you’ve got the patience. The filling firms up beautifully.
-
Make the Whipped Topping:
- In a large chilled bowl, beat 1 cup (240ml) heavy cream, 3 tablespoons (24g) powdered sugar, and 1/2 teaspoon vanilla until medium peaks form—about 2-3 minutes. Don’t overwhip or it’ll go grainy.
- If using store-bought whipped topping, just spoon on top and spread gently.
- Spread or pipe whipped topping over the chilled butterscotch pie just before serving. Swirl for pretty peaks!
-
Serving:
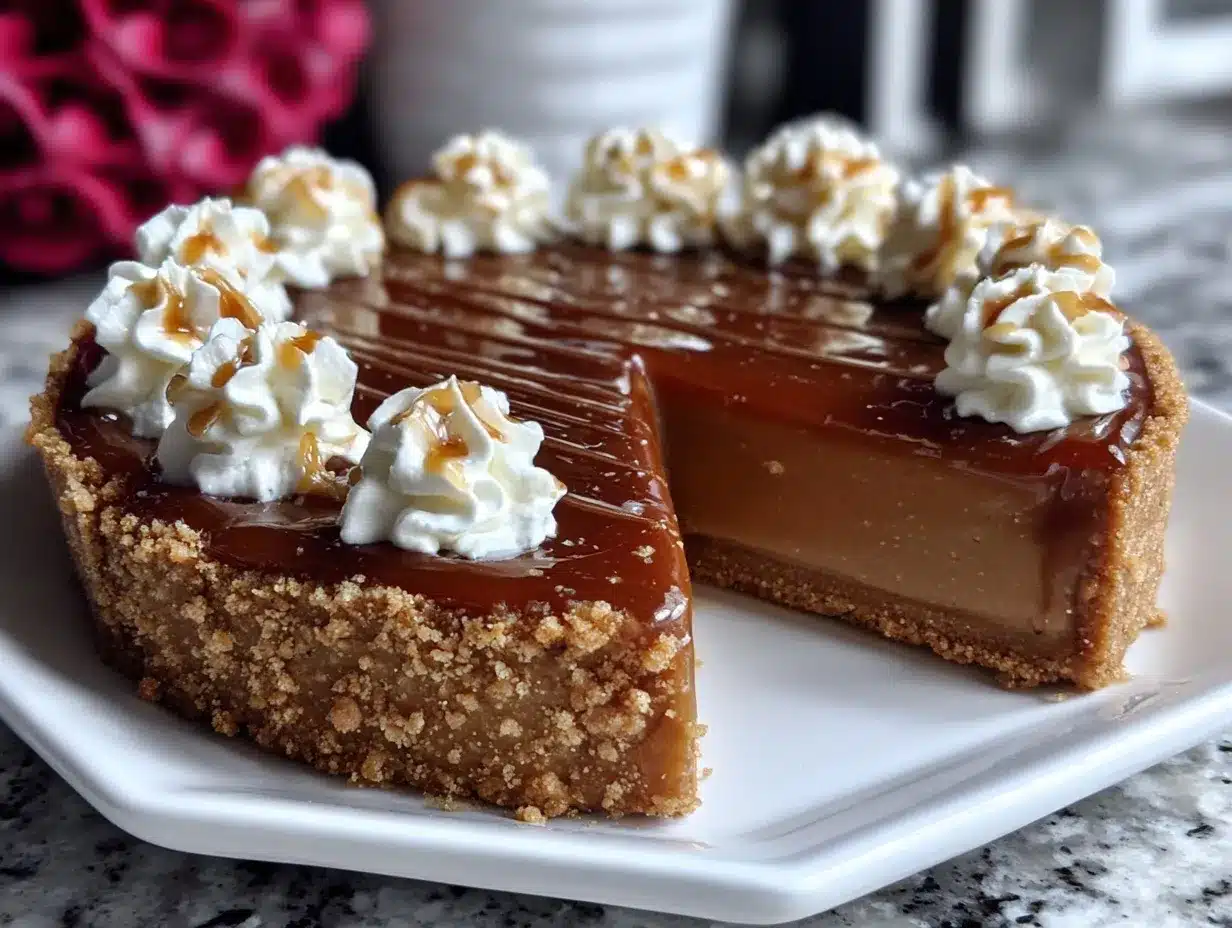
- Slice with a sharp knife, wiping between cuts for clean slices. Serve cold for best texture.
Troubleshooting Tips: If your filling isn’t thickening, keep whisking and don’t rush—cornstarch takes a minute to kick in. Lumpy filling? Strain through a sieve before pouring into the crust. Crust too crumbly? Press harder next time and bake a bit longer for a firmer base. If your whipped cream collapses, chill your bowl and beaters before starting.
Efficiency tip: Prep the crust while the filling cooks, and whip the cream while the pie chills. That way, everything comes together smoothly. The filling should smell nutty-sweet, and the crust should be golden and crisp—trust your senses!
Cooking Tips & Techniques
Let’s talk shop—here’s where experience really makes a difference for this creamy butterscotch pie:
- Low & Slow: Cooking the butterscotch filling over medium (not high) heat keeps it silky and prevents burning. I learned the hard way—rushed it once and ended up with a scorched mess.
- Tempering Eggs: Don’t skip this step! Whisk a little hot filling into the eggs first, then add everything together. This avoids scrambled eggs in your pie. I forgot once and, well, let’s just say it was “chunky custard” at best.
- Even Crust: Use the bottom of a measuring cup to press crust evenly. If it’s too loose, the pie won’t hold together. A tight pack makes slicing easier.
- Chill Thoroughly: Pie needs at least 4 hours in the fridge—overnight is best for clean slices and full flavor. I’ve tried serving early, and the filling just oozes out (still tasty, but a bit messy).
- Whipped Cream Perfection: Cold bowl and beaters = fluffy cream. Overbeating turns it to butter. Stop when you see soft, billowy peaks.
- Multitasking: Prep the crust while the filling cooks. Start the whipped topping while the pie chills. Keeps things moving without chaos.
- Consistency: Use the same brand of butter and vanilla for uniform results. I’ve swapped brands mid-recipe before, and the flavor was just “off.”
Common mistakes? Rushing the cooking, skipping the chilling, under-packing the crust. I’ve learned to trust the process (and my timer). Don’t be afraid to check the filling’s thickness by spoon—if it holds a line, it’s ready. There’s something satisfying about nailing that perfect slice after a little patience!
Variations & Adaptations
This creamy butterscotch pie is a classic, but it loves a little customization. Here’s how you can switch things up:
- Gluten-Free: Use gluten-free graham crackers for the crust. The filling and topping are naturally gluten-free, so only the base needs swapping.
- Dairy-Free: Substitute almond milk and dairy-free butter in the filling, and go for coconut whipped cream on top. The result is surprisingly close in flavor!
- Seasonal Twist: In summer, top with fresh raspberries or blueberries. In fall, add a pinch of pumpkin spice to the filling for a cozy vibe.
- Chocolate Swirl: Drizzle melted dark chocolate over the whipped topping for a “butterscotch meets fudge” moment.
- Nutty Crunch: Sprinkle chopped toasted pecans or walnuts over the top before serving for extra texture.
- Egg-Free: Try an egg replacer (like Bob’s Red Mill) in the filling. The texture is a bit softer but still delicious.
I once made a coconut cream version for a friend with allergies—swapped the milk for coconut milk and topped with toasted coconut flakes. It was a hit! If you’re feeling adventurous, try mini pies in muffin tins for individual servings. The recipe is flexible, so don’t be shy about mixing it up to match your tastes or dietary needs.
Serving & Storage Suggestions
This creamy butterscotch pie is best served cold, straight from the fridge. I love slicing it with a hot knife (run under hot water and wipe dry) for those perfect, bakery-worthy slices. Presentation matters—pile the whipped topping extra high and garnish with a pinch of cinnamon or a few chocolate shavings for flair.
Pair with hot coffee, iced tea, or even a cold glass of milk. It plays nicely with savory brunch dishes or stands alone as a showstopper dessert. For parties or potlucks, slice in advance and arrange on a platter with fresh berries or mint leaves.
Storage is simple: cover with plastic wrap or a pie dome and refrigerate for up to 4 days. The crust holds up well and the filling stays creamy. For longer storage, wrap tightly and freeze slices for up to 2 months. Thaw in the fridge overnight, then add whipped topping fresh before serving. If you’re reheating (not really needed, but hey, sometimes you want warm pie), use low heat in the oven for 10 minutes—just don’t microwave, or the texture will get weird.
Honestly, the flavors deepen after a day in the fridge. That butterscotch gets richer, and the texture sets perfectly. Sneaky midnight snack? I won’t judge—this pie is irresistible any time.
Nutritional Information & Benefits
Each slice (1/8th of the pie) is about 350 calories, with 21g fat, 38g carbs, and 5g protein. It’s not exactly “health food,” but it does offer a few perks:
- Calcium: Thanks to the milk and cream, you get a decent dose for healthy bones.
- Protein: Egg yolks add a bit of protein, making it more satisfying.
- Gluten-Free Option: Easy to adapt for GF diets—just swap the crust.
- Potential Allergens: Contains dairy, eggs, and gluten (unless adapted). Always check with guests before serving.
I like to think of dessert as a little bit of self-care. The comfort and nostalgia this creamy butterscotch pie brings is worth every bite, and with simple swaps, most folks can enjoy a slice. Moderation is key, but honestly, sometimes you just need the real thing.
Conclusion
This creamy butterscotch pie with graham cracker crust and fluffy whipped topping is a recipe you’ll come back to again and again. Whether you’re celebrating a special occasion or just craving a slice of comfort, it’s easy, delicious, and adaptable. Don’t hesitate to tweak it—make it gluten-free, dairy-free, or add your own twist.
I love this pie for its rich flavor and nostalgic charm. There’s something about the way the butterscotch filling melts into the crunchy crust, all topped with that cloud of whipped cream—pure joy in every bite. If you try it, please leave a comment below with your favorite adaptation or family story! Share the recipe with friends, pin it for later, and bring it to your next gathering. You’ll be glad you did.
Remember, the best recipes are the ones you make your own. Happy baking—and may your kitchen always smell like butterscotch!
FAQs About Creamy Butterscotch Pie
Can I make creamy butterscotch pie ahead of time?
Absolutely! You can prepare the pie a day in advance and keep it chilled in the fridge. Add the whipped topping just before serving for best results.
How do I prevent my graham cracker crust from getting soggy?
Bake the crust until golden and let it cool completely before adding the filling. Packing the crumbs tightly also helps keep it crisp.
Can I use store-bought whipped topping instead of homemade?
Yes, you can. Store-bought works in a pinch, but homemade whipped cream has a fluffier texture and richer flavor.
Is there a way to make this pie gluten-free?
Definitely! Just use gluten-free graham crackers for the crust—the filling and topping are naturally gluten-free.
Can I freeze leftover pie?
Yes, wrap slices tightly and freeze for up to 2 months. Thaw overnight in the fridge and add fresh whipped topping before serving for best texture.
Pin This Recipe!

Creamy Butterscotch Pie

This creamy butterscotch pie features a silky homemade butterscotch filling nestled in a crunchy graham cracker crust and topped with fluffy whipped cream. It’s a nostalgic, crowd-pleasing dessert that’s easy to make and perfect for any occasion.
- Prep Time: 20 minutes
- Cook Time: 20 minutes
- Total Time: 4 hours 40 minutes
- Yield: 8 servings 1x
- Category: Dessert
- Cuisine: American
Ingredients
- 1 1/2 cups graham cracker crumbs (about 10 full crackers, crushed)
- 1/4 cup granulated sugar
- 6 tablespoons unsalted butter, melted
- Pinch of salt
- 1 cup packed light brown sugar
- 1/4 cup cornstarch
- 1/2 teaspoon salt
- 2 cups whole milk (or half-and-half for extra richness)
- 4 large egg yolks, room temperature
- 4 tablespoons unsalted butter, cut into pieces
- 2 teaspoons pure vanilla extract
- Optional: 1/4 teaspoon ground cinnamon
- 1 cup heavy whipping cream, cold
- 3 tablespoons powdered sugar
- 1/2 teaspoon vanilla extract
- Optional: 1/2 cup prepared whipped topping (store-bought)
Instructions
- Preheat oven to 350°F (175°C).
- Mix graham cracker crumbs, granulated sugar, and a pinch of salt in a medium bowl.
- Stir in melted butter until mixture resembles wet sand.
- Press crumbs firmly into the bottom and sides of a 9-inch pie pan. Use a flat-bottomed cup for even packing.
- Bake crust for 8-10 minutes until golden and fragrant. Set aside to cool.
- Combine brown sugar, cornstarch, and salt in a medium saucepan.
- Whisk in milk until smooth.
- In a small bowl, beat egg yolks lightly.
- Cook sugar-milk mixture over medium heat, whisking constantly, until thickened (about 7-9 minutes).
- Remove from heat. Whisk a bit of hot mixture into egg yolks, then pour yolks into the pan, whisking quickly. Return to heat for 2-3 minutes until thick and glossy.
- Take off heat and stir in butter and vanilla until smooth. Add cinnamon if using.
- Pour filling into cooled crust. Smooth top and cover with plastic wrap pressed onto surface.
- Chill in fridge for at least 4 hours, or overnight.
- In a large chilled bowl, beat heavy cream, powdered sugar, and vanilla until medium peaks form (2-3 minutes).
- Spread or pipe whipped topping over chilled pie just before serving.
- Slice with a sharp knife, wiping between cuts for clean slices. Serve cold.
Notes
For gluten-free, use GF graham crackers. Chill pie thoroughly for best texture. Use cold bowl and beaters for whipped cream. If filling is lumpy, strain before pouring into crust. Crust can be made in a square dish for bars. Top with berries or chocolate shavings for extra flair.
Nutrition
- Serving Size: 1 slice (1/8th of pi
- Calories: 350
- Sugar: 27
- Sodium: 320
- Fat: 21
- Saturated Fat: 13
- Carbohydrates: 38
- Fiber: 1
- Protein: 5
Keywords: butterscotch pie, creamy butterscotch, graham cracker crust, whipped topping, easy dessert, nostalgic pie, comfort food, potluck dessert, homemade pie, American dessert


