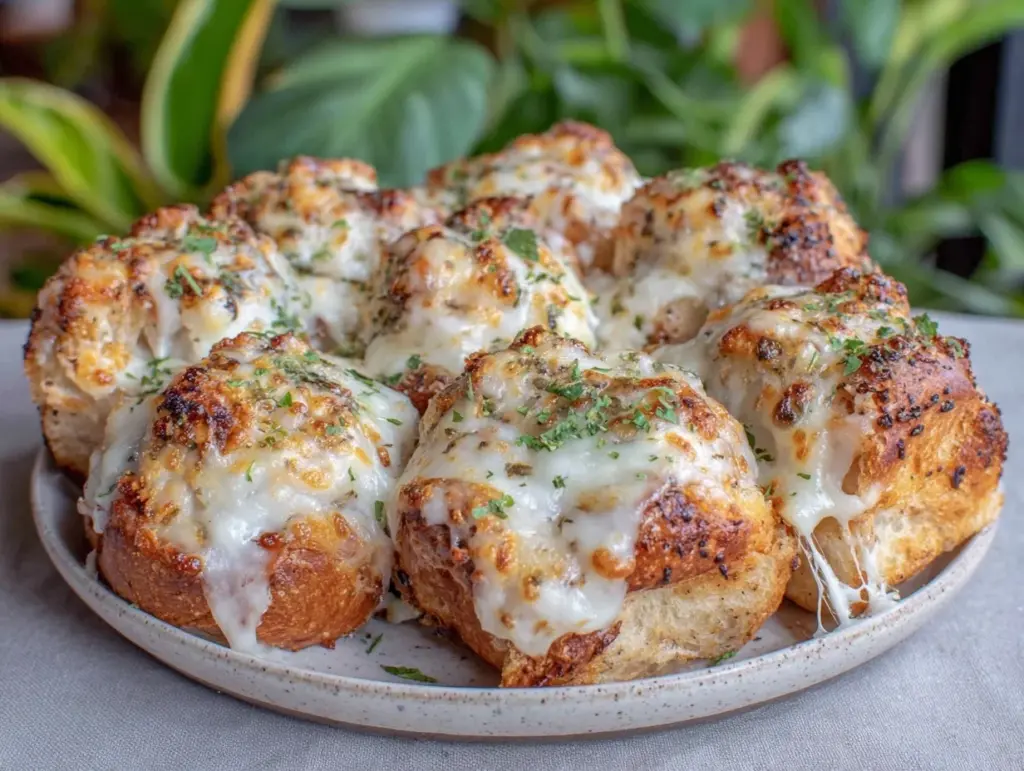
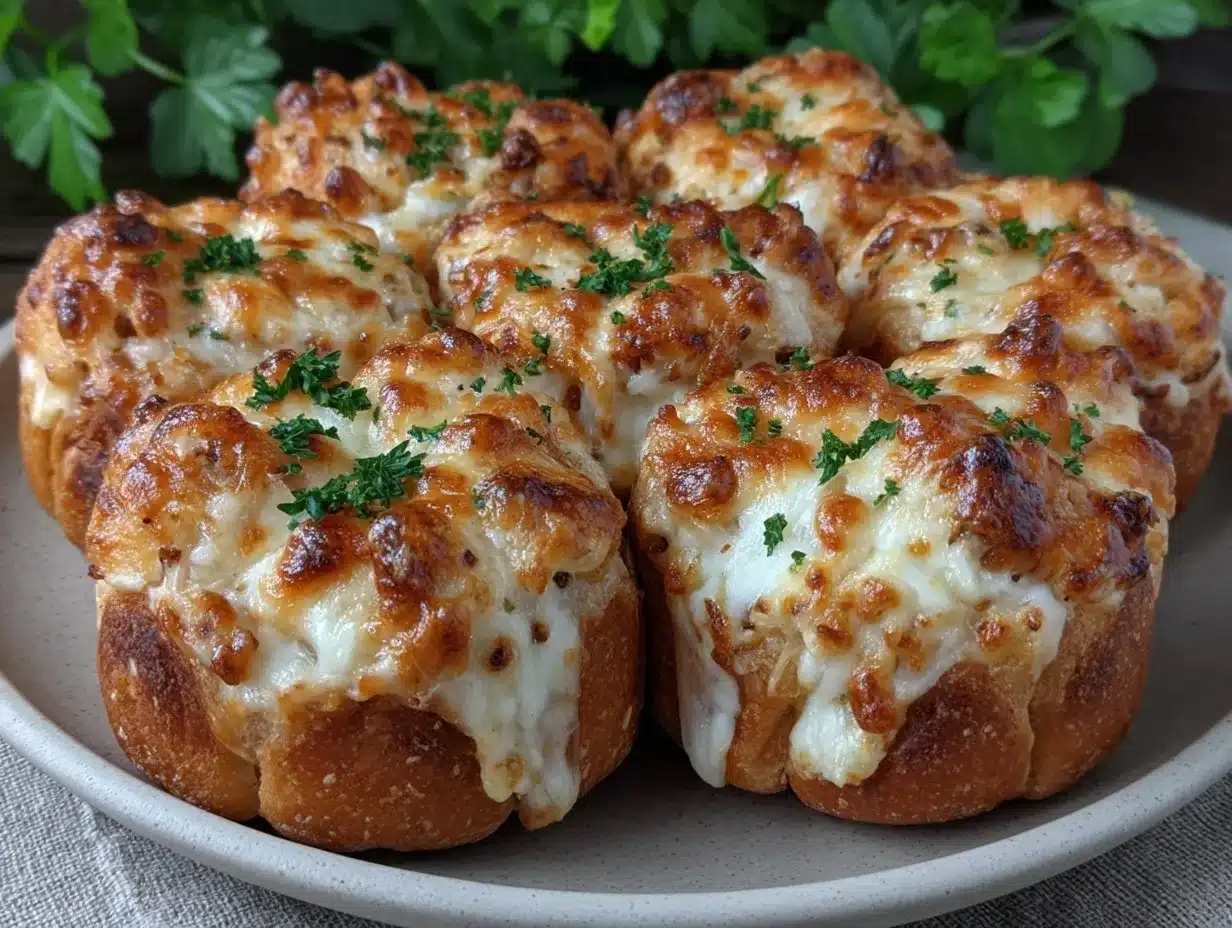
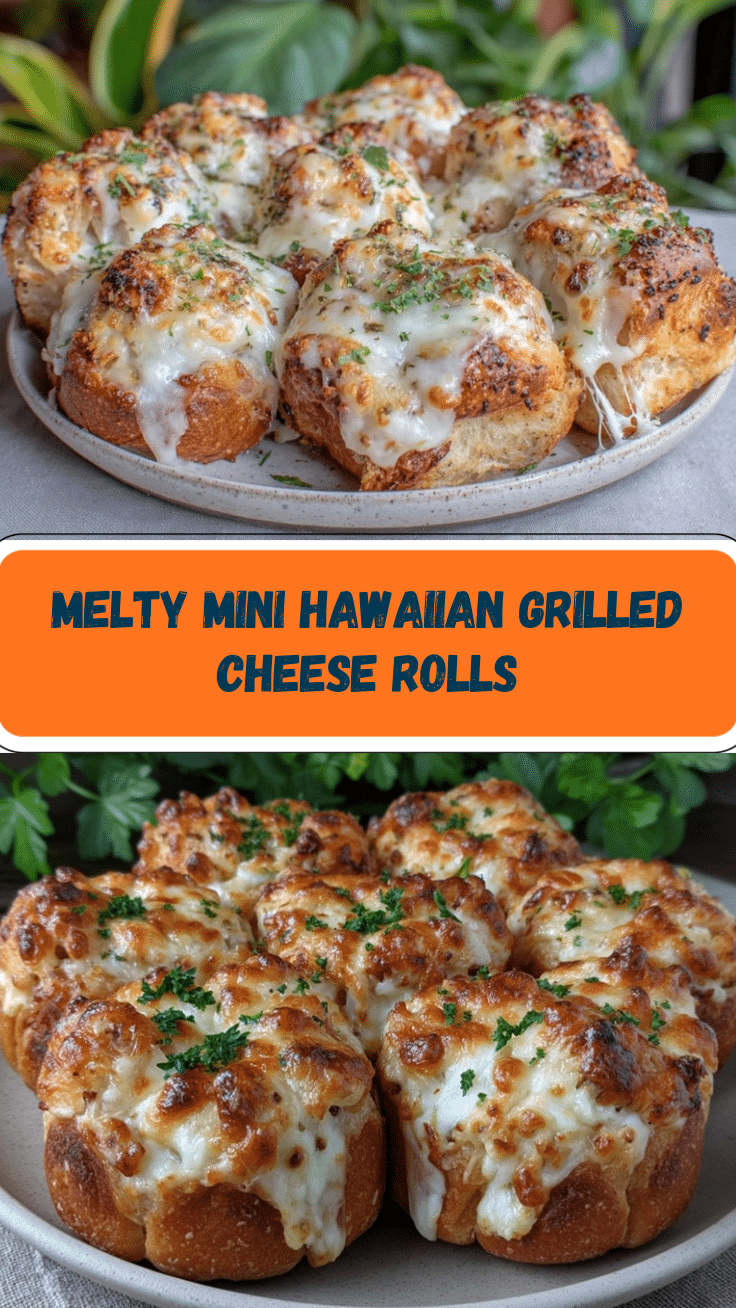
Close your eyes and imagine the sweet, buttery aroma of Hawaiian rolls mingling with bubbling, golden melted cheese as it sizzles on a hot pan. That first bite crackles with a hint of crunch before giving way to gooey, cheesy bliss—pure nostalgia with a modern twist. I still remember the first time I whipped up these crispy mini grilled cheese Hawaiian rolls on a rainy Saturday afternoon. The kitchen filled with the kind of toasty warmth that makes you want to linger, and I had to pause, take a deep breath, and just grin—because I knew I’d stumbled onto something ridiculously good.
When I was knee-high to a grasshopper, grilled cheese was the ultimate comfort food in our house. But honestly, I wish I’d thought to stuff all that cheesy goodness into soft, sweet Hawaiian rolls years ago (who knew something so simple could be so next-level?). My kids couldn’t stop sneaking these sliders off the tray as soon as they cooled enough to grab—and, well, I can’t really blame them. The combination of crisp, buttery crust and sweet, pillowy rolls is pretty much irresistible. Let’s face it, these sliders are dangerously easy and have a way of disappearing faster than you’d expect.
I first made them for a neighborhood potluck, and let me tell you, folks were hovering by the kitchen island, asking for the “secret.” They’re perfect for everything from game day snacks to a sweet treat for your kids’ lunchboxes, and they brighten up any Pinterest-worthy party spread. After several rounds of “testing” (in the name of research, of course), these crispy mini grilled cheese Hawaiian rolls have become a staple for family gatherings, gifting, and—honestly—those lazy weekends when you need a little extra comfort. They feel like a warm hug, and you’re going to want to bookmark this one.
Why You’ll Love This Recipe
From all my years of recipe testing—both as a food blogger and a mom juggling hungry kids—I’ve learned that the very best recipes have a few things in common: they’re easy, reliable, and bring a little magic to everyday moments. These crispy mini grilled cheese Hawaiian rolls check every box (and then some). Here’s why you’re going to love them:
- Quick & Easy: You can whip up a batch in under 25 minutes, which is a lifesaver on busy weeknights or when unexpected guests drop by.
- Simple Ingredients: No need to hunt down specialty items—most of these are probably already in your fridge and pantry.
- Perfect for Parties: These sliders shine at potlucks, game nights, and family gatherings. They’re the ultimate party snack—no forks required.
- Crowd-Pleaser: Kids, teens, and adults all light up when I bring these out. I’ve watched even picky eaters go back for seconds (or thirds!).
- Unbelievably Delicious: The crispy golden crust and sweet, fluffy interior are a match made in comfort food heaven. The cheese stretches just right, and that buttery finish? Chef’s kiss.
What sets these crispy mini grilled cheese Hawaiian rolls apart from your typical grilled cheese? For starters, the use of Hawaiian rolls adds a gentle sweetness that balances the savory cheese, and the sliders are brushed with seasoned butter before toasting, which gives a crunchy, flavorful crust (none of that soggy sandwich business here). You can also stuff in your favorite cheeses or add a sprinkle of garlic powder for a subtle kick. This isn’t just another slider recipe—it’s the one folks ask for again and again.
Honestly, I love how these sliders bring everyone together—no stress, just smiles. They’re the kind of food that makes you close your eyes after the first bite and think, “Yep, this is the good stuff.” Whether you’re feeding a crowd or just want to make a regular meal feel a little more special, these mini grilled cheese Hawaiian rolls are always a win. Trust me, you’ll come back to this recipe again and again.
What Ingredients You Will Need
One of my favorite things about this recipe is how it transforms simple, everyday ingredients into something so satisfying. No fancy shopping trips or hard-to-find cheeses—just straightforward, good stuff that works together to create serious magic. Here’s what you’ll need for these crispy mini grilled cheese Hawaiian rolls:
- 12-pack Hawaiian rolls (King’s Hawaiian or your favorite brand—these add that signature sweetness and are the perfect slider size)
- 8 oz (225 g) sharp cheddar cheese, sliced or shredded (I love Tillamook for its bold flavor, but any sharp cheddar works—feel free to use a mix of cheddar and mozzarella for extra meltiness)
- 4 oz (115 g) provolone or mozzarella cheese, sliced or shredded (optional, but adds stretch and a creamy bite)
- 4 tbsp (56 g) unsalted butter, melted (the butter helps the rolls get that golden, crispy crust—use salted if you want a little extra flavor, just skip the added salt below)
- 1/2 tsp garlic powder (for a hint of savory flavor in the butter—optional but highly recommended!)
- 1/2 tsp dried parsley (or Italian seasoning, for a herby touch on top)
- 1/2 tsp kosher salt (skip if using salted butter or salty cheese)
- 2 tbsp (30 ml) mayonnaise (spread on the inside of the rolls for extra moisture and flavor—Duke’s or Hellmann’s both work well, or use vegan mayo if needed)
Optional Add-Ins:
- Sliced deli ham or turkey (for a heartier slider—just 2-3 slices per roll does the trick)
- Thinly sliced tomatoes (adds a juicy, tangy note—pat dry to avoid sogginess)
- Jalapeños or pickles (for a little kick—totally optional, but fun if you like a twist!)
If you need to swap ingredients, here are some quick tips: use gluten-free Hawaiian-style rolls for a GF option, swap in dairy-free cheese and vegan butter for a plant-based version, or try smoked gouda for a bolder flavor. No matter how you tweak it, the crispy mini grilled cheese Hawaiian rolls always come out delicious. And if you ask me, the real secret is letting everyone pick their favorite cheese combo—makes it feel like a party every time.
Equipment Needed
You really don’t need a fancy kitchen to make these crispy mini grilled cheese Hawaiian rolls (and thank goodness for that). Here’s what you’ll want to have ready:
- Baking sheet or large skillet (I usually bake a big batch on a rimmed baking sheet, but you can also use a skillet for small batches—either way, you want enough room for the rolls to sit flat and crisp up nicely)
- Aluminum foil or parchment paper (for easy cleanup—trust me, you’ll thank yourself later)
- Sharp bread knife (for splitting the rolls evenly—serrated knives work best and don’t smush the bread)
- Pastry brush (for brushing that seasoned butter over the tops—the more, the merrier)
- Small mixing bowl (for melting and mixing the butter with seasonings)
- Spatula (for lifting and serving the sliders without losing any cheese in the process)
If you don’t have a pastry brush, a clean paper towel or even the back of a spoon can do the trick. For small kitchens, a toaster oven works just fine (I’ve done it many times on busy mornings). And if you’re looking for a budget-friendly bread knife, the Victorinox serrated knife is my go-to (it’s lasted years and never let me down). Just keep your knives sharp, and always line your pans—those cheesy bits get sticky!
Preparation Method
- Preheat the oven: Set your oven to 375°F (190°C). If using a skillet, heat it over medium-low so the rolls can crisp slowly without burning.
- Prep the rolls: Without separating the rolls, use a sharp bread knife to slice the entire pack horizontally. You’ll have a top “slab” and a bottom “slab.” Try not to squish the rolls (slow and steady wins this race).
- Prepare the butter mixture: In a small bowl, melt 4 tbsp (56 g) butter. Stir in 1/2 tsp garlic powder, 1/2 tsp dried parsley, and 1/2 tsp kosher salt (if using). Give it a quick taste—add a pinch more salt if you like things extra savory.
- Arrange the bottom layer: Place the bottom half of the rolls, cut side up, on a lined baking sheet. Spread a thin layer of mayonnaise (about 1 tbsp or 15 ml) for added flavor and moisture—don’t skip, it keeps the inside extra creamy.
- Add the cheese: Layer 8 oz (225 g) sharp cheddar and 4 oz (115 g) provolone or mozzarella evenly across the rolls. If you’re adding deli meat or tomatoes, nestle them between the cheeses for best melt and flavor.
- Top and brush: Place the top “slab” of rolls over the cheese. Brush a generous amount of the seasoned butter all over the tops and sides. Don’t be shy—this gives you that signature crispy, golden finish!
- Bake: Cover loosely with foil (so the tops don’t over-brown too soon), and bake for 10 minutes. Uncover, then bake another 7-10 minutes until the cheese is melted and the tops are golden brown and crisp.
- Cool slightly and cut: Let the rolls rest 2-3 minutes after baking so the cheese sets a bit. Using your bread knife, cut along the original roll lines for perfect mini sandwiches.
- Serve warm: These are best enjoyed hot and crispy, but they’re still tasty at room temp. Watch out for cheese lava right out of the oven!
Troubleshooting tips: If the rolls are browning too quickly, tent loosely with foil. If your cheese isn’t melting, try lowering the heat and baking a few extra minutes. For an extra-crisp top, broil for 1-2 minutes at the end, but keep a close eye (cheese burns fast!). And if you’re short on time, assemble the rolls in advance and bake just before serving—they hold up beautifully.
Honestly, the hardest part is waiting for them to cool enough to eat. But trust me, it’s worth it—the crispy mini grilled cheese Hawaiian rolls always disappear in a flash!
Cooking Tips & Techniques
After making these sliders more times than I can count, I’ve picked up a few insider tricks that’ll help you nail them every time (and avoid any last-minute kitchen drama):
- Use room-temperature cheese: Cheese melts more evenly if it’s not fridge-cold. I usually set mine out while prepping the rolls.
- Don’t oversoak the tops: Brush the butter mixture generously, but don’t drench the rolls or they may get soggy instead of crisp. A thin, even layer is your friend here.
- Cover, then uncover: That initial foil tent helps the cheese melt before the tops crisp up—skip this, and you risk burnt tops with unmelted cheese inside (ask me how I know!).
- Let them rest: Giving the baked sliders a couple of minutes to cool makes slicing easier and keeps the cheese from oozing everywhere.
- Work in batches for a crowd: If you need a lot, bake on two trays. You can keep the first batch warm in a low oven (200°F/90°C) while you finish the rest.
One time, I got impatient and tried to rush everything at a higher temp—big mistake. The outsides burned before the cheese got gooey. So go low and steady if you want that perfect crisp-to-melt ratio.
If you’re multitasking (because who isn’t?), assemble the rolls ahead and refrigerate them. Just add a couple of extra baking minutes to compensate for the cold start. And if you want extra flavor, sprinkle a little grated parmesan over the buttered tops before baking—it adds a nutty, salty crunch that’s hard to beat!
Variations & Adaptations
One reason these crispy mini grilled cheese Hawaiian rolls are such a hit is how easy they are to customize. Here are a few favorite ways to switch things up (and keep everyone happy):
- Dietary swaps: Use gluten-free Hawaiian-style rolls and dairy-free cheese for a gluten-free and vegan-friendly version. Vegan butter and egg-free mayo work great for plant-based sliders.
- Flavor twists: Add a layer of crispy bacon or thinly sliced ham for a heartier bite. Or try pepper jack cheese for a little heat—my husband’s favorite!
- Seasonal variations: In summer, layer in fresh basil and sliced tomatoes for a Caprese vibe. In the fall, caramelized onions and smoked gouda add cozy flavor.
- International flair: Swap cheddar for Swiss and add a touch of Dijon mustard for a French-inspired slider. Or try a sprinkle of za’atar seasoning for Mediterranean depth.
- Cooking method: For extra crunch, press the assembled rolls in a panini press instead of baking. They’ll come out super crispy—just be careful not to overfill with cheese to avoid a melty mess!
Personally, I love sneaking in a thin layer of fig jam or spicy honey under the cheese for a sweet-and-savory kick. And for anyone with nut allergies, stick to classic cheeses and seasonings—these sliders are naturally nut-free if you skip fancy toppings. The best part? Everyone can make their own custom mini grilled cheese Hawaiian rolls, and that’s half the fun.
Serving & Storage Suggestions
These sliders are at their absolute best served hot from the oven, when the cheese is still gooey and the tops are crisp. I like to stack them on a wooden board with a sprinkle of fresh parsley for a Pinterest-worthy presentation. They pair perfectly with a bowl of tomato soup, a crunchy salad, or even a fizzy lemonade for a casual party vibe.
Got leftovers? Store cooled sliders in an airtight container in the refrigerator for up to 3 days. To reheat, arrange on a baking sheet and warm in a 325°F (160°C) oven for 8-10 minutes until heated through and crisp again. You can also reheat them in a toaster oven for a quick snack. I don’t recommend microwaving, as the rolls can get chewy instead of crispy.
For longer storage, freeze the baked sliders (wrapped individually in foil) for up to 1 month. Thaw overnight in the fridge and reheat as above for best results. Honestly, the flavors get even better as they sit—a quick warm-up and they taste freshly baked every time.
Nutritional Information & Benefits
Here’s a general idea of what you’re getting in each mini slider (assuming 12 sliders per batch):
- Calories: 210
- Protein: 6g
- Carbohydrates: 15g
- Fat: 13g
- Saturated Fat: 7g
- Sugar: 4g
- Sodium: 320mg
The real benefit here is the balance of comforting carbs, calcium-rich cheese, and a dose of protein. If you use whole grain Hawaiian rolls, you’ll get a little extra fiber. For those watching their dairy, dairy-free cheeses work nicely and still give you that melty satisfaction. Just a heads-up: these contain gluten, dairy, and eggs (if using mayo), so be sure to use appropriate substitutions if you need allergen-friendly sliders.
From a wellness perspective, I see these as a fun, feel-good treat—something to enjoy and share. We all need a little cheesy comfort now and then, right?
Conclusion
If you’re searching for a party-perfect snack that’s as easy as it is irresistible, these crispy mini grilled cheese Hawaiian rolls are the answer. Sweet, buttery rolls, melty cheese, and that crispy, golden finish—what’s not to love? They’re endlessly customizable, come together with minimal fuss, and always disappear fast (in my house, at least!).
Feel free to swap in your favorite cheeses, add a little spice, or get creative with fillings—this recipe loves a personal touch. Honestly, it’s the kind of meal that brings people together, whether you’re hosting a game night or just need a snack that makes you smile. I hope you enjoy these as much as my family does! If you try them, leave a comment below, share with friends, or tag your slider photos—can’t wait to see your creations. Happy snacking, and remember: the best bites are the ones shared.
FAQs About Crispy Mini Grilled Cheese Hawaiian Rolls
Can I make these sliders ahead of time?
Absolutely! Assemble the rolls and keep them covered in the fridge for up to 24 hours. Just add a couple of extra minutes to the baking time when you’re ready to serve.
What’s the best cheese for crispy mini grilled cheese Hawaiian rolls?
Sharp cheddar melts beautifully and gives great flavor, but you can use mozzarella, provolone, Swiss, or a blend. Just steer clear of pre-shredded cheese if possible—it doesn’t melt as smoothly.
How do I keep the bottoms from getting soggy?
Spread a thin layer of mayo or butter on the bottom rolls, and bake on a lined, preheated sheet. This helps form a barrier and keeps things crispy!
Can I freeze leftover sliders?
Yes! Wrap cooled sliders individually in foil, freeze up to a month, and reheat in the oven until crisp and hot. They taste almost as good as fresh.
Are these sliders kid-friendly?
Definitely! Kids love the sweetness of the rolls and the gooey cheese. You can skip the garlic or herbs if your little ones prefer plain flavors.
Pin This Recipe!
Crispy Mini Grilled Cheese Hawaiian Rolls – Easy Party Sliders Recipe

These crispy mini grilled cheese Hawaiian rolls combine sweet, buttery Hawaiian rolls with gooey melted cheese and a golden, crunchy crust. Perfect for parties, potlucks, or family snacks, they’re easy to make and always a crowd-pleaser.
- Prep Time: 8 minutes
- Cook Time: 17-20 minutes
- Total Time: 25-28 minutes
- Yield: 12 sliders 1x
- Category: Appetizer
- Cuisine: American
Ingredients
- 1 (12-pack) Hawaiian rolls (King’s Hawaiian or similar)
- 8 oz sharp cheddar cheese, sliced or shredded
- 4 oz provolone or mozzarella cheese, sliced or shredded (optional)
- 4 tbsp unsalted butter, melted
- 1/2 tsp garlic powder
- 1/2 tsp dried parsley or Italian seasoning
- 1/2 tsp kosher salt (skip if using salted butter or salty cheese)
- 2 tbsp mayonnaise
- Optional: Sliced deli ham or turkey (2-3 slices per roll)
- Optional: Thinly sliced tomatoes (pat dry)
- Optional: Jalapeños or pickles
Instructions
- Preheat oven to 375°F (190°C). If using a skillet, heat over medium-low.
- Without separating the rolls, slice the entire pack horizontally to create a top and bottom slab.
- In a small bowl, melt butter and stir in garlic powder, dried parsley, and kosher salt.
- Place the bottom half of the rolls, cut side up, on a lined baking sheet. Spread mayonnaise evenly over the rolls.
- Layer cheddar and provolone or mozzarella cheese evenly across the rolls. Add optional deli meat or tomatoes if desired.
- Place the top slab of rolls over the cheese. Brush seasoned butter generously over the tops and sides.
- Cover loosely with foil and bake for 10 minutes. Uncover and bake another 7-10 minutes until cheese is melted and tops are golden brown and crisp.
- Let rolls rest for 2-3 minutes after baking. Cut along the original roll lines to create mini sandwiches.
- Serve warm. Enjoy hot and crispy, or at room temperature.
Notes
Use room-temperature cheese for even melting. Brush butter mixture evenly for crisp tops. Cover with foil initially to prevent burning. Let sliders rest before slicing for best results. Can be assembled ahead and baked just before serving. For extra crunch, broil for 1-2 minutes at the end or use a panini press.
Nutrition
- Serving Size: 1 slider
- Calories: 210
- Sugar: 4
- Sodium: 320
- Fat: 13
- Saturated Fat: 7
- Carbohydrates: 15
- Fiber: 1
- Protein: 6
Keywords: grilled cheese sliders, Hawaiian rolls, party snacks, easy appetizer, kid-friendly, comfort food, cheese, baked sliders