
Let me tell you, the aroma of savory Italian meats mingling with gooey melted cheese, all nestled between pillowy-soft Hawaiian rolls, is downright irresistible. The first time I made these Italian sliders with cheesy deli filling, my kitchen filled with the cozy scent of garlic butter and warm bread—honestly, it was the type of moment where you pause, take a deep breath, and smile because you know you’re onto something truly special. I was instantly hooked, and so was my family (they couldn’t stop sneaking bites straight from the baking dish… can’t blame them, really!).
This Italian sliders recipe was first born out of a craving for something comforting but festive—something that could hold its own at a party or just jazz up an ordinary Wednesday night. I remember years ago, standing in my grandma’s kitchen, watching her layer deli meats for her famous party sandwiches. That memory inspired me to experiment with these cheesy sliders, and I wish I’d discovered this shortcut for easy, crowd-pleasing sandwiches ages ago. There’s pure, nostalgic comfort in each bite, like the best bits of a deli sub, all wrapped up in sweet, buttery rolls.
I’ve made these sliders for everything from tailgates to birthday parties, and they never last long. My friends always ask for the recipe, and my kids request them for sleepovers. Honestly, these Hawaiian roll Italian sliders are dangerously easy (which means I test them a lot… in the name of research, of course). They’ve become a staple for family gatherings and gifting, and every batch feels like a warm hug. Whether you’re looking to brighten up your Pinterest board or need something quick for a last-minute get-together, you’re going to want to bookmark this one. It’s the kind of dish you’ll keep coming back to—trust me!
Why You’ll Love This Recipe
You know what? After years of tinkering and taste-testing, I can confidently say these Italian sliders are a notch above the rest. There’s something seriously satisfying about the combo of savory meats, creamy cheeses, and sweet Hawaiian rolls. If you’ve ever made party sandwiches before, you’ll appreciate the little tricks that make these sliders extra special. Here are the top reasons you’re going to love this Italian sliders recipe:
- Quick & Easy: Comes together in under 35 minutes (including prep and bake time). Perfect for busy weeknights or when guests show up unexpectedly.
- Simple Ingredients: You probably have most of these in your kitchen already—no fancy shopping trips required.
- Perfect for Parties: These sliders are a hit at potlucks, birthday parties, tailgates, and even holiday gatherings.
- Crowd-Pleaser: Kids, teens, adults—everyone loves ’em. They’re always the first thing to disappear off the snack table.
- Unbelievably Delicious: The combo of sweet rolls and savory, cheesy filling is pure comfort food. Each bite is soft, gooey, and packed with flavor.
What sets these Italian sliders apart? For starters, I layer sliced provolone and mozzarella between deli meats like salami, ham, and pepperoni, then finish with a homemade garlic butter drizzle that soaks into the rolls. The result is a perfectly balanced sandwich—never soggy, never dry, just melty and flavorful. I’ve tried other recipes, but this one nails that classic Italian sub flavor with way less fuss (and way more cheese!).
This isn’t just another slider—it’s the one you’ll want for game day or Sunday supper. It’s comfort food, but faster and lighter, so you can enjoy guilt-free seconds. Whether you’re looking to impress guests or just treat yourself, these Italian sliders on Hawaiian rolls make every gathering feel special. Trust me, once you try them, you’ll understand why my friends always beg for the recipe. It’s the kind of food that makes you close your eyes after the first bite and savor every moment.
What Ingredients You Will Need
These flavorful Italian sliders use everyday ingredients to deliver bold flavor and mouthwatering texture. Honestly, you don’t need a trip to a specialty store—most of this is right in your fridge or pantry. Here’s what you’ll need:
- For the sliders:
- 1 package (12-count) Hawaiian sweet rolls (soft and a little sweet—King’s Hawaiian is my go-to)
- 8 slices provolone cheese (adds creamy meltiness)
- 8 slices mozzarella cheese (for that classic stretch)
- 6 slices Genoa salami (thinly sliced)
- 6 slices deli ham (I like Boar’s Head for texture)
- 6 slices pepperoni (regular or turkey, depending on your crowd)
- 2 tablespoons sliced pepperoncini (optional, for tang and kick)
- 1/2 cup roasted red peppers, drained and sliced (optional)
- For the garlic butter topping:
- 4 tablespoons unsalted butter (softened)
- 2 cloves garlic, minced (freshly minced is best)
- 1 tablespoon Italian seasoning (you can use dried oregano and basil if you’re out)
- 1 tablespoon grated Parmesan cheese (adds a nutty finish)
- 1/2 teaspoon crushed red pepper flakes (optional, for more heat)
- 1 tablespoon chopped fresh parsley (for color and freshness)
- Salt and pepper, to taste
Ingredient notes: If you want gluten-free sliders, swap in gluten-free dinner rolls. For vegetarians, skip the meats and layer in roasted veggies with extra cheese. You can substitute provolone or mozzarella with your favorite meltable cheese (think fontina or Swiss). If you’re looking for a lighter version, use turkey pepperoni and low-fat cheese. For the best results, I always look for freshly sliced meats from the deli—prepackaged is fine, but you’ll notice the difference in texture.
Don’t be afraid to get creative! Sometimes I throw in a few marinated artichoke hearts or swap roasted red peppers for sun-dried tomatoes. The Hawaiian rolls are key—they hold up to the filling and soak up the buttery topping without getting mushy. If you want to add a little zing, sprinkle some Italian dressing inside before baking. That’s the beauty of this recipe: whatever you have on hand, you can make it work.
Equipment Needed
Making Italian sliders with cheesy deli filling on Hawaiian rolls doesn’t require fancy gadgets. Here’s what you’ll want:
- 1 baking dish (9×13-inch is ideal, but any oven-safe dish that fits 12 rolls works)
- Sharp bread knife (for slicing rolls evenly)
- Cutting board (makes assembly less messy)
- Small microwave-safe bowl (for melting butter)
- Pastry brush (to spread garlic butter—if you don’t have one, a spoon will do)
- Aluminum foil (helps prevent overbrowning)
- Oven mitts (trust me, the dish gets hot!)
If you don’t have a pastry brush, a spoon works just fine for spreading the garlic butter. I’ve used a glass Pyrex, metal baking pan, and even a ceramic casserole—no real difference except baking time may vary slightly. For clean slices, a serrated knife is best. As for maintenance, I always hand-wash my baking dish to keep it from staining. Budget-friendly tools work great—no need to splurge for this recipe. Just make sure your pan isn’t too small, or the filling will overflow!
Preparation Method

- Prep the oven and baking dish: Preheat your oven to 350°F (175°C). Lightly grease a 9×13-inch baking dish with a little butter or nonstick spray.
- Slice the Hawaiian rolls: Keeping the rolls together, slice them in half horizontally with a sharp bread knife. Don’t separate the individual rolls yet—it’s easier to build as one big layer. Place the bottom half in your prepared baking dish.
- Layer the cheeses: Arrange the provolone slices evenly over the bottom half of the rolls. Top with the mozzarella slices. (Pro tip: Overlap the cheese for a gooier bite.)
- Add the deli meats: Layer the salami, ham, and pepperoni over the cheese. Try to cover each roll with a bit of each meat—don’t worry if it’s not perfect.
- Add optional fillings: Scatter sliced pepperoncini and roasted red peppers if using. These add a tangy kick, but you can skip if your crowd prefers classic flavors.
- Top with the other half of rolls: Carefully place the top half of the Hawaiian rolls over the filling, pressing gently.
- Make the garlic butter: In a microwave-safe bowl, melt the butter (about 30 seconds). Stir in minced garlic, Italian seasoning, Parmesan, red pepper flakes, and parsley. Add salt and pepper to taste.
- Brush and bake: Using a pastry brush (or spoon), spread the garlic butter mixture generously over the tops of the rolls. Cover the dish loosely with foil.
- Bake: Bake covered for 18 minutes. Remove foil and bake another 5-7 minutes, until the tops are golden brown and cheese is bubbling. Total bake time: 23-25 minutes.
- Cool and serve: Let the sliders rest for 5 minutes before slicing. Use a sharp knife or metal spatula to cut into individual sliders.
Troubleshooting tips: If your rolls start to brown too quickly, keep them covered with foil. If the cheese isn’t fully melted, add a couple more minutes to bake time. Sometimes fillings slide out when slicing—just press gently and use a serrated knife for cleaner cuts. The garlic butter might drip down the sides (that’s okay, it makes the edges crispy!). For extra flavor, drizzle a little Italian dressing inside before baking.
Personal tip: Assemble the sliders ahead of time and bake just before serving. You can also double the recipe in a large roasting pan for bigger crowds. I’ve made these for school events, and they always come out perfect—just don’t skip the garlic butter topping!
Cooking Tips & Techniques
After making these Italian sliders more times than I can count, I’ve picked up some handy tricks. First, always use freshly grated Parmesan in the garlic butter—it melts better and packs a punch. Layering the cheese directly on the bottom rolls keeps them from getting soggy, while overlapping the meats gives every bite a mix of flavors.
Common mistakes? Overbaking is a big one—the rolls can get tough if left in too long. Check at the 20-minute mark, and cover with foil if needed. If you’ve ever had the cheese leak out, try tucking the slices in a bit and not overfilling. Another thing: don’t skip resting after baking. Letting the sliders sit for 5 minutes makes them easier to slice (and helps the cheese set).
I’ve had a few fails—like using prepackaged meats that were too watery. Fresh deli slices hold up much better. Timing is everything. I like to prep the garlic butter while the oven heats, assemble the sliders during the last 5 minutes, then bake right away. Multitasking like this saves time and keeps everything hot.
For consistency, measure the garlic and Italian seasoning—too much garlic can overpower, too little leaves it bland. I always use a serrated knife to slice the finished sliders, which keeps the layers neat. If you’re serving a crowd, double the garlic butter and bake in two pans side by side. And honestly, don’t stress about perfection—these sliders are meant to be enjoyed, even if a little messy!
Variations & Adaptations
One of the best things about this Italian sliders recipe is how easily you can switch things up. Here are a few of my favorite variations:
- Gluten-Free: Use gluten-free dinner rolls instead of Hawaiian rolls. Check your deli meats for gluten as well.
- Vegetarian: Skip the meats and layer grilled zucchini, roasted red peppers, and extra cheese. Add artichoke hearts for a Mediterranean twist.
- Spicy: Add sliced jalapeños, swap regular pepperoni for spicy soppressata, and increase the red pepper flakes in the garlic butter.
- Seasonal: In summer, swap pepperoncini for fresh basil and sliced tomatoes. In fall, add sautéed mushrooms and caramelized onions.
- Dairy-Free: Use dairy-free cheese slices and olive oil instead of butter for the topping.
For different cooking methods, you can assemble and bake these sliders on a grill using indirect heat (wrap tightly in foil), or reheat leftovers in a toaster oven for a crispy finish. If you want to tweak the flavors, try adding pesto or sun-dried tomato spread inside the rolls. I once made these with smoked turkey instead of ham, and my family loved the twist. If you have allergy concerns, always check your roll and meat labels for hidden dairy or gluten.
That’s the beauty of this recipe—you can customize it for your taste, dietary needs, or whatever’s in the fridge. The classic combo is always a hit, but don’t be afraid to experiment!
Serving & Storage Suggestions
Italian sliders are best served warm, straight from the oven. I usually plate them on a big wooden board, sprinkle with fresh parsley, and let folks help themselves. They make a great main dish for casual dinners or an easy finger food for parties.
For presentation, I like to cut each slider into neat squares and stack them pyramid-style—makes them perfect for Pinterest-worthy photos! Pair with a simple green salad, a bowl of tomato soup, or some crunchy potato chips. For drinks, Italian sodas or a light Pinot Grigio work great.
To store leftovers, wrap the sliders in foil and keep them in the refrigerator for up to 3 days. For longer storage, freeze in an airtight container for up to a month. Reheat in a 350°F (175°C) oven for 10-12 minutes, covered with foil. Microwaving works in a pinch, but the rolls might get a bit chewy. Honestly, these sliders taste even better the next day—the flavors meld together overnight, and the rolls soak up all that garlic butter goodness.
If you’re prepping ahead for a party, assemble the sliders, cover tightly, and refrigerate. Bake just before serving so they’re hot and melty. Trust me, they’ll disappear fast!
Nutritional Information & Benefits
Each Italian slider (based on a batch of 12) contains approximately:
- Calories: 220
- Protein: 10g
- Fat: 11g
- Carbohydrates: 17g
- Sodium: 470mg
Key ingredients like ham, salami, and cheese provide protein and calcium, while the rolls offer simple carbs for quick energy. If you use turkey pepperoni or lower-fat cheese, you can lighten things up. For gluten-free or dairy-free adaptations, the nutritional profile will change accordingly.
Potential allergens include wheat (rolls), dairy (cheese, butter), and processed meats (may contain soy). Always check your labels if serving to guests with allergies. From a wellness perspective, I like to balance these sliders with a fresh salad or veggie platter. They’re indulgent, yes, but with a few tweaks, you can fit them into any meal plan—just enjoy in moderation!
Conclusion
So, why should you try this Italian sliders recipe? Because it’s ridiculously easy, packed with cheesy deli flavor, and guaranteed to bring smiles to any table. These Hawaiian roll sliders are perfect for parties, weeknight dinners, or any time you need a little comfort food that doesn’t take hours to prep.
Customize the fillings, switch up the cheeses, and make it your own. That’s the magic of sliders—they’re versatile, forgiving, and totally delicious. Personally, I love how these bring my family together (and how they disappear in no time). If you’re searching for your next Pinterest hit or just a new staple for gatherings, this is it.
I’d love to hear how you make these Italian sliders your own! Drop a comment below, share with fellow food lovers, or tag me with your creative twists. Happy baking—and may your kitchen always smell amazing!
FAQs
Can I make Italian sliders ahead of time?
Absolutely! Assemble the sliders, cover, and refrigerate up to a day before baking. Bake just before serving for best results.
What’s the best cheese for Italian sliders?
Provolone and mozzarella melt perfectly, but you can use Swiss, fontina, or even cheddar for a different flavor profile.
Can I freeze leftover sliders?
Yes! Cool completely, wrap tightly in foil, and freeze for up to a month. Reheat in the oven (covered) for best texture.
How do I keep the rolls from getting soggy?
Layer cheese first to create a barrier, and don’t overfill with wet ingredients like roasted peppers. Bake covered, then uncover to crisp up.
Are these sliders gluten-free?
Not with traditional Hawaiian rolls, but you can substitute gluten-free dinner rolls. Always check meat and cheese labels for hidden gluten.
Pin This Recipe!
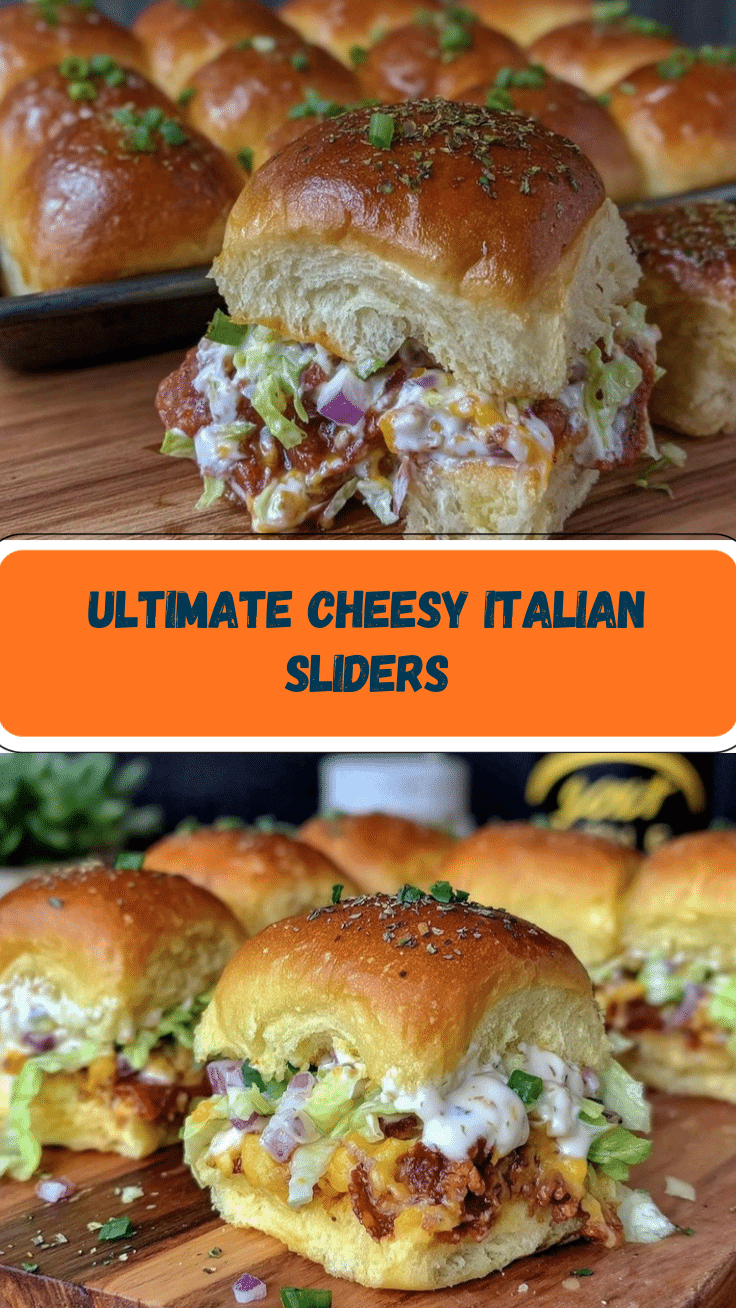
Italian Sliders Recipe: Easy Cheesy Hawaiian Rolls for Parties

These Italian sliders feature layers of savory deli meats and gooey cheeses nestled between soft Hawaiian rolls, finished with a homemade garlic butter topping. Perfect for parties or weeknight dinners, they’re quick to make and always a crowd-pleaser.
- Prep Time: 10 minutes
- Cook Time: 23-25 minutes
- Total Time: 35 minutes
- Yield: 12 sliders 1x
- Category: Appetizer
- Cuisine: Italian-American
Ingredients
- 1 package (12-count) Hawaiian sweet rolls
- 8 slices provolone cheese
- 8 slices mozzarella cheese
- 6 slices Genoa salami
- 6 slices deli ham
- 6 slices pepperoni
- 2 tablespoons sliced pepperoncini (optional)
- 1/2 cup roasted red peppers, drained and sliced (optional)
- 4 tablespoons unsalted butter (softened)
- 2 cloves garlic, minced
- 1 tablespoon Italian seasoning
- 1 tablespoon grated Parmesan cheese
- 1/2 teaspoon crushed red pepper flakes (optional)
- 1 tablespoon chopped fresh parsley
- Salt and pepper, to taste
Instructions
- Preheat oven to 350°F (175°C). Lightly grease a 9×13-inch baking dish.
- Keeping the rolls together, slice them in half horizontally. Place the bottom half in the prepared baking dish.
- Arrange provolone slices evenly over the bottom half of the rolls. Top with mozzarella slices.
- Layer salami, ham, and pepperoni over the cheese.
- Scatter sliced pepperoncini and roasted red peppers, if using.
- Place the top half of the Hawaiian rolls over the filling, pressing gently.
- In a microwave-safe bowl, melt butter (about 30 seconds). Stir in garlic, Italian seasoning, Parmesan, red pepper flakes, parsley, salt, and pepper.
- Spread garlic butter mixture generously over the tops of the rolls using a pastry brush or spoon. Cover dish loosely with foil.
- Bake covered for 18 minutes. Remove foil and bake another 5-7 minutes, until tops are golden brown and cheese is bubbling.
- Let sliders rest for 5 minutes before slicing. Cut into individual sliders and serve warm.
Notes
For gluten-free sliders, use gluten-free dinner rolls. For vegetarian, skip the meats and add roasted veggies and extra cheese. Assemble ahead and bake just before serving. If rolls brown too quickly, keep covered with foil. Let sliders rest before slicing for neat layers. Fresh deli meats and freshly grated Parmesan yield best results.
Nutrition
- Serving Size: 1 slider
- Calories: 220
- Sugar: 5
- Sodium: 470
- Fat: 11
- Saturated Fat: 5
- Carbohydrates: 17
- Fiber: 1
- Protein: 10
Keywords: Italian sliders, Hawaiian roll sliders, party sandwiches, cheesy sliders, easy appetizer, deli meat sliders, garlic butter sliders, game day food


