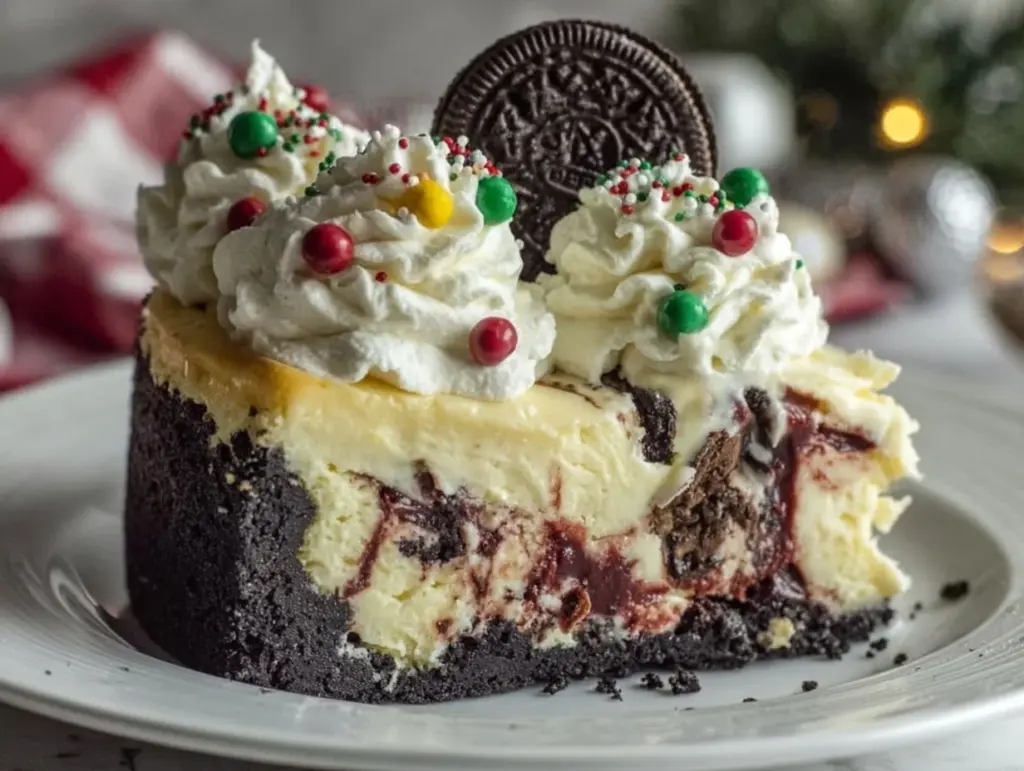
Let me tell you, the aroma of cocoa-rich red velvet and buttery Oreos swirling together in my kitchen is basically the smell of the holidays for me. Imagine the velvety, ruby-red filling meeting a pitch-black, crunchy chocolate crust – it’s a showstopper from the moment you pull it out of the oven. The first time I sliced into this red velvet cheesecake with Oreo crust, I was instantly hooked. You know those moments where you pause, take a deep breath, and just smile because you know you’re onto something truly special? That was me, standing over the cooling rack, fork in hand, completely smitten.
Honestly, my family couldn’t stop sneaking little bites off the edge (and I can’t really blame them). This cheesecake has roots in my grandma’s holiday table – she always made something red and festive, and years ago, I decided to give her tradition a chocolaty twist. Let’s face it, I wish I’d stumbled upon this combination sooner. The creamy cheesecake mingling with a dark Oreo base just feels like pure, nostalgic comfort in every bite.
It’s dangerously easy to make, too. One rainy weekend, I tried to recreate a bakery cheesecake I’d tasted at a holiday market – and now, this version is a staple for family gatherings, gifting, and brightening up my Pinterest cookie board. Perfect for potlucks, a sweet treat for your kids, or as the centerpiece of your holiday dessert spread, this red velvet cheesecake with Oreo crust isn’t just beautiful – it feels like a warm hug every single time. I’ve tested it (in the name of research, of course!) more times than I care to admit, and it always brings smiles. You’re going to want to bookmark this one!
Why You’ll Love This Red Velvet Cheesecake with Oreo Crust
After years spent fussing with finicky cheesecakes, I’ve settled on this recipe as my go-to for parties and family holidays. It’s chef-tested, family-approved, and honestly, it’s got a few tricks up its sleeve that make it stand out from the crowd.
- Quick & Easy: Comes together in under two hours (plus chilling time). No water bath, no complicated steps – just straight-up, reliable baking.
- Simple Ingredients: All pantry staples. You probably have everything you need – cream cheese, Oreos, cocoa, eggs, and a splash of red food color.
- Perfect for Festive Gatherings: This is the showpiece for holiday tables, Christmas brunches, or New Year’s Eve parties. It’s so pretty it begs to be photographed for Pinterest!
- Crowd-Pleaser: Adults rave, kids beg for seconds, and picky eaters never turn it down. I’ve brought this cheesecake to work potlucks and watched it disappear faster than anything else.
- Unbelievably Delicious: The texture is ultra-creamy, with that signature tang of red velvet, layered over a crunchy, chocolatey Oreo crust. The balance of flavors is just right – not too sweet, not too rich.
What makes this recipe different? I use a touch more cocoa than most red velvet recipes, making the flavor deep and chocolate-forward. Blending the cream cheese until perfectly smooth (seriously, don’t rush this) gives a silky texture you just can’t get with shortcuts. And the Oreo crust? It’s thicker than most, so every bite is a crunch-and-cream dream.
This cheesecake isn’t just good – it’s the kind of dessert that makes you close your eyes after the first bite. It’s comfort food, but with a dash of festive glamour. You’ll impress guests without breaking a sweat, and you’ll turn a regular dinner into something memorable. Trust me, it’s worth every second in the kitchen!
What Ingredients You Will Need
This red velvet cheesecake with Oreo crust uses simple, wholesome ingredients to deliver bold flavor and satisfying texture without the fuss. Most are pantry staples, and you’ll find plenty of room for easy swaps if needed.
- For the Oreo Crust:
- 24 Oreo cookies (classic chocolate, filling included)
- 6 tablespoons unsalted butter, melted (adds richness)
- For the Red Velvet Cheesecake Filling:
- 3 (8 oz / 225 g each) bricks full-fat cream cheese, softened
- 1 cup (200 g) granulated sugar
- 1/4 cup (22 g) unsweetened cocoa powder (Dutch-process for deeper color)
- 3 large eggs, room temperature
- 2/3 cup (160 ml) sour cream (for tangy flavor)
- 1/4 cup (60 ml) buttermilk (makes the filling tender – regular milk works if needed)
- 2 teaspoons vanilla extract (I love using Nielsen-Massey)
- 1 tablespoon red food coloring (liquid or gel – gel gives a brighter, deeper red)
- Pinch of salt
- For the Optional Topping:
- 1 cup (240 ml) heavy whipping cream, cold
- 2 tablespoons powdered sugar
- 1/2 teaspoon vanilla extract
- Crushed Oreos or white chocolate shavings (for garnish)
If you need to swap ingredients: use gluten-free Oreos for a GF crust, vegan cream cheese and coconut cream for dairy-free, or natural beet juice instead of food coloring for a more earthy red. In summer, I sometimes add fresh raspberries on top – it’s a bright, tart contrast.
For best texture, look for brick-style cream cheese (not whipped or tub). I personally recommend Philadelphia brand for consistency. If you can’t find buttermilk, mix 1/4 cup milk with a teaspoon of lemon juice and let it sit for 5 minutes. For cocoa, Dutch-process gives the deepest color, but natural cocoa works in a pinch.
Equipment Needed
You don’t need a ton of fancy equipment for this red velvet cheesecake with Oreo crust – just a few kitchen basics and a couple of handy tools.
- 9-inch (23 cm) springform pan (essential for easy release)
- Food processor or blender (for crushing Oreos – a ziplock bag and rolling pin work too!)
- Mixing bowls (one large, one medium)
- Electric mixer (hand or stand mixer – I use my trusty KitchenAid)
- Spatula (for scraping down the sides)
- Measuring cups and spoons (accuracy is key for cheesecake!)
- Aluminum foil (to wrap the pan for leak protection)
- Wire cooling rack
If you don’t have a springform pan, a deep cake pan lined with parchment will work, though unmolding is trickier. For crushing Oreos, I’ve tried everything from the food processor to the old rolling pin-in-a-bag trick – both work fine. If using a budget hand mixer, just take your time to avoid lumps. I always wrap my springform pan in foil to prevent butter leaks and keep cleanup easy. No need to overthink – use what you have!
Preparation Method
- Prep the Pan & Oven: Preheat your oven to 325°F (160°C). Lightly grease a 9-inch (23 cm) springform pan and wrap the bottom with aluminum foil (just in case your crust leaks a little butter).
- Make the Oreo Crust: Crush 24 Oreo cookies (including filling) into fine crumbs using a food processor or ziplock bag and rolling pin. Stir in the melted butter until evenly moistened. Press mixture firmly into the bottom of your prepared pan – use the bottom of a measuring cup for a flat, even surface. Bake crust for 10 minutes, then set aside to cool.
- Blend Cheesecake Filling: In a large bowl, beat softened cream cheese until smooth and creamy (about 2 minutes). Add sugar and beat until combined, scraping sides as needed. Mix in cocoa powder, then add eggs one at a time, beating well after each addition. Stir in sour cream, buttermilk, vanilla, red food coloring, and a pinch of salt. (It should be velvety and evenly colored.)
- Pour & Bake: Pour the red velvet cheesecake batter over the cooled Oreo crust. Smooth the top gently with a spatula. Bake in the center of the oven for 55–65 minutes, or until the edges are set but the center is still slightly wobbly. If it starts browning too quickly, loosely tent with foil at the 45-minute mark. Sensory cue: the cheesecake should jiggle like Jell-O when gently shaken.
- Cool Gradually: Turn off the oven and crack the door open. Let cheesecake cool inside for 1 hour – this helps prevent cracks. Then, transfer to a wire rack and cool to room temperature. Refrigerate at least 4 hours, or overnight if you can wait. (Patience pays off here!)
- Add Toppings & Serve: Whip cold heavy cream, powdered sugar, and vanilla until stiff peaks form. Spread or pipe over chilled cheesecake. Sprinkle with crushed Oreos or white chocolate shavings for extra flair. Slice with a warm, wet knife for clean edges.
Troubleshooting: If your cheesecake cracks, don’t sweat it – whipped cream covers a multitude of sins. Lumpy filling? Make sure cream cheese is fully softened. If crust sticks, run a thin knife around the pan before releasing. My tip: prep everything before you start (mise en place!), and don’t rush the cooling – it’s the secret to a smooth, creamy texture.
Cooking Tips & Techniques
I’ve made a lot of cheesecakes, and let’s just say I’ve learned a few tricks (the hard way). Here’s what makes this red velvet cheesecake with Oreo crust consistently perfect:
- Room Temperature Ingredients: Always start with softened cream cheese and room temp eggs. Cold cream cheese makes the filling lumpy (trust me, I’ve rushed this before and regretted it).
- No Water Bath Needed: The Oreo crust protects the filling, so you don’t need a complicated water bath. Just wrap the pan in foil for peace of mind.
- Don’t Overmix: Blend the filling until smooth, but stop once everything’s combined. Overmixing can add air, making the cheesecake puff and then collapse.
- Crack Prevention: Slow cooling is magic. Leave the cheesecake in the oven with the door cracked for an hour after baking. I used to skip this, and my cakes always cracked!
- Knife Warming Trick: For clean slices, dip your knife in hot water and wipe between cuts. It’s a little thing, but wow, does it make the slices Pinterest-worthy.
- Multitasking: While the crust is baking, prep your filling – saves time and keeps you organized. If you’re short on time, make the crust and filling a day ahead.
Consistency comes from measuring ingredients accurately and following the order of mixing. If you’re a perfectionist, weigh ingredients for the best results. Don’t be afraid to decorate the top with extra Oreos or a sprinkle of edible glitter for extra holiday cheer!
Variations & Adaptations
This red velvet cheesecake with Oreo crust is a chameleon – it adapts to just about any taste or dietary need. Here are some favorite tweaks:
- Gluten-Free Version: Use gluten-free chocolate sandwich cookies for the crust – everything else stays the same. No one will even notice the difference!
- Vegan/Dairy-Free: Substitute vegan cream cheese (like Daiya or Kite Hill), coconut cream for whipping, and plant-based butter. Swap eggs for a flaxseed mixture (1 tablespoon ground flax + 2.5 tablespoons water per egg).
- Seasonal Twist: In summer, add a layer of fresh raspberries or blueberries on top. For autumn, swirl in some pumpkin puree and add a dash of cinnamon to the filling.
- Flavor Boost: Mix in mini chocolate chips or swirl a tablespoon of Nutella into the batter for a deeper chocolate hit.
- Nut-Free/Allergen Friendly: Avoid any nut-based toppings and check labels on Oreos for cross-contamination.
One year, I swapped out the Oreos for gingersnap cookies during Christmas – the spicy kick was a huge hit. Don’t be afraid to get creative and make it your own. The base is so forgiving, you can experiment without fear!
Serving & Storage Suggestions
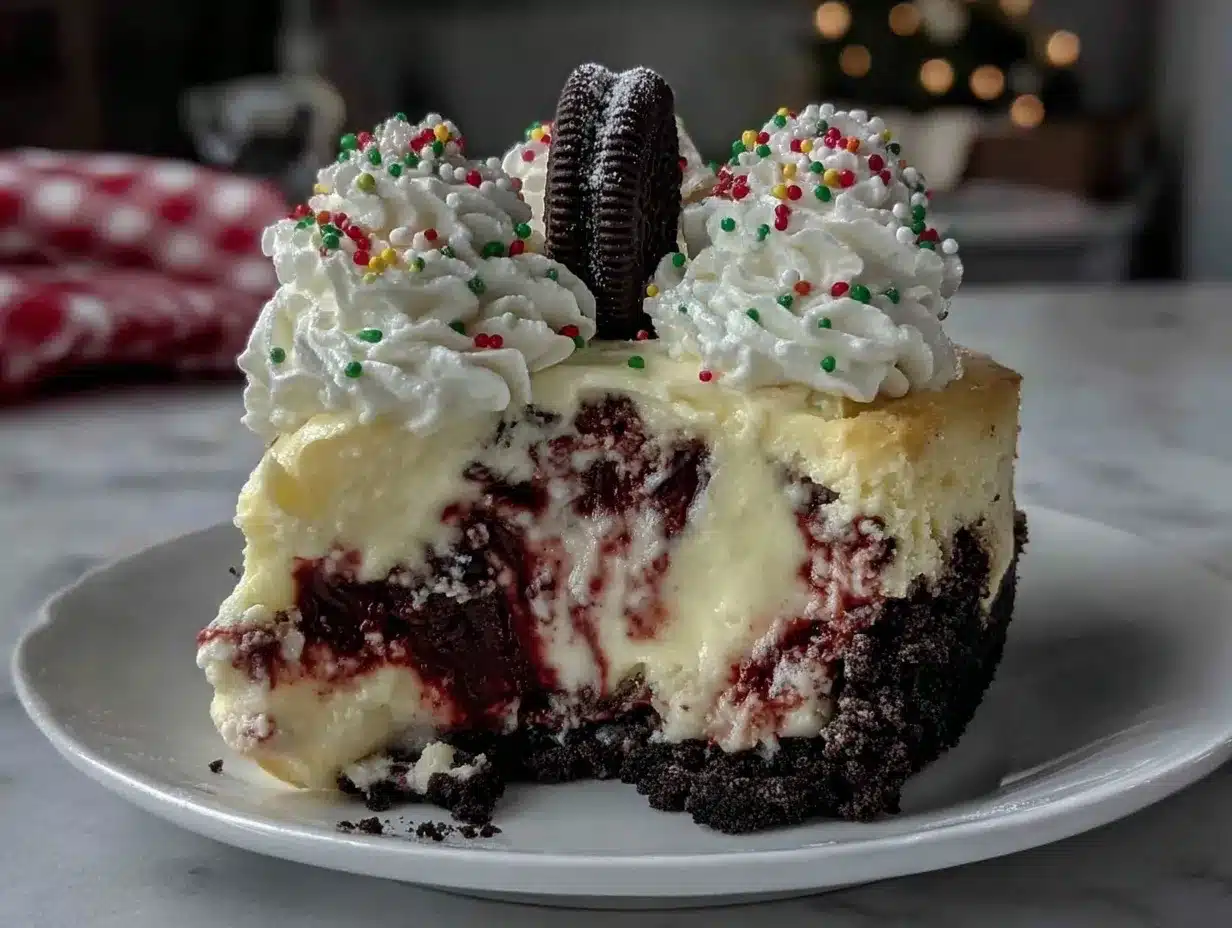
This cheesecake is best served cold, straight from the fridge. I like to slice it just before guests arrive – the dramatic red and black layers always get a “wow!” For presentation, pile whipped cream high, dust with cocoa, and scatter a few crushed Oreos or festive sprinkles.
Pair with hot coffee, spiced chai, or even a splash of dessert wine for a grown-up treat. Complementary sides? Fresh berries, chocolate sauce, or a scoop of vanilla ice cream work wonders.
For storage, wrap leftover cheesecake tightly in plastic wrap or transfer to an airtight container. It keeps beautifully in the refrigerator for up to five days. Freeze individual slices for up to two months – just thaw overnight in the fridge. To reheat, let slices come to room temp, but honestly, it’s best chilled. Flavors deepen after a day or two, so don’t be afraid to make it ahead. The crust stays crisp, and the filling just gets dreamier!
Nutritional Information & Benefits
Each slice of red velvet cheesecake with Oreo crust is estimated to have about 420 calories, 28g fat, 38g carbs, and 7g protein. Cream cheese provides a good dose of calcium and protein, while cocoa brings antioxidants. The recipe is naturally nut-free, and you can easily adapt for gluten-free or dairy-free diets as noted above.
Potential allergens include dairy, eggs, and gluten (from Oreos). If you need to avoid those, check the variations above! Personally, I love that you can make this dessert lighter by using reduced-fat cream cheese and swapping out some sugar for a natural sweetener. It’s indulgent, but you know what – it’s the holidays, and sometimes you just need a little comfort on your plate.
Conclusion
This red velvet cheesecake with Oreo crust is more than just a dessert – it’s a festive tradition, a little bit of nostalgia, and a whole lot of holiday magic. It’s easy enough for beginners, impressive enough for seasoned bakers, and endlessly customizable to suit your family’s taste. I love this recipe because it’s reliable, delicious, and always brings smiles (even after the last slice disappears faster than I’d like!).
Don’t be afraid to tweak it – add your favorite flavors, swap out toppings, or get creative with the crust. If you give it a try, let me know in the comments, share your photos, or tell me how you adapted it for your own holiday table. Baking should feel like a celebration, and this cheesecake is a slice of joy. Wishing you sweet treats and happy holidays!
Frequently Asked Questions
Can I make red velvet cheesecake with Oreo crust ahead of time?
Absolutely! It actually tastes better after chilling overnight. Make it a day or two before your event, and just keep it covered in the fridge until serving.
Do I need a water bath for this cheesecake?
Nope – the Oreo crust protects the filling, so just wrap your pan in foil and bake as directed. Slow cooling in the oven helps prevent cracks.
Can I freeze leftover cheesecake?
Yes, you can freeze individual slices for up to two months. Thaw overnight in the fridge – the texture stays creamy and delicious.
What if I don’t have a springform pan?
You can use a deep cake pan lined with parchment paper. Unmolding is a bit trickier, but chilling thoroughly helps.
How do I get that bright red color?
Gel food coloring gives the deepest, most vibrant red. If you prefer natural color, beet juice works, but the hue will be more subtle.
Pin This Recipe!
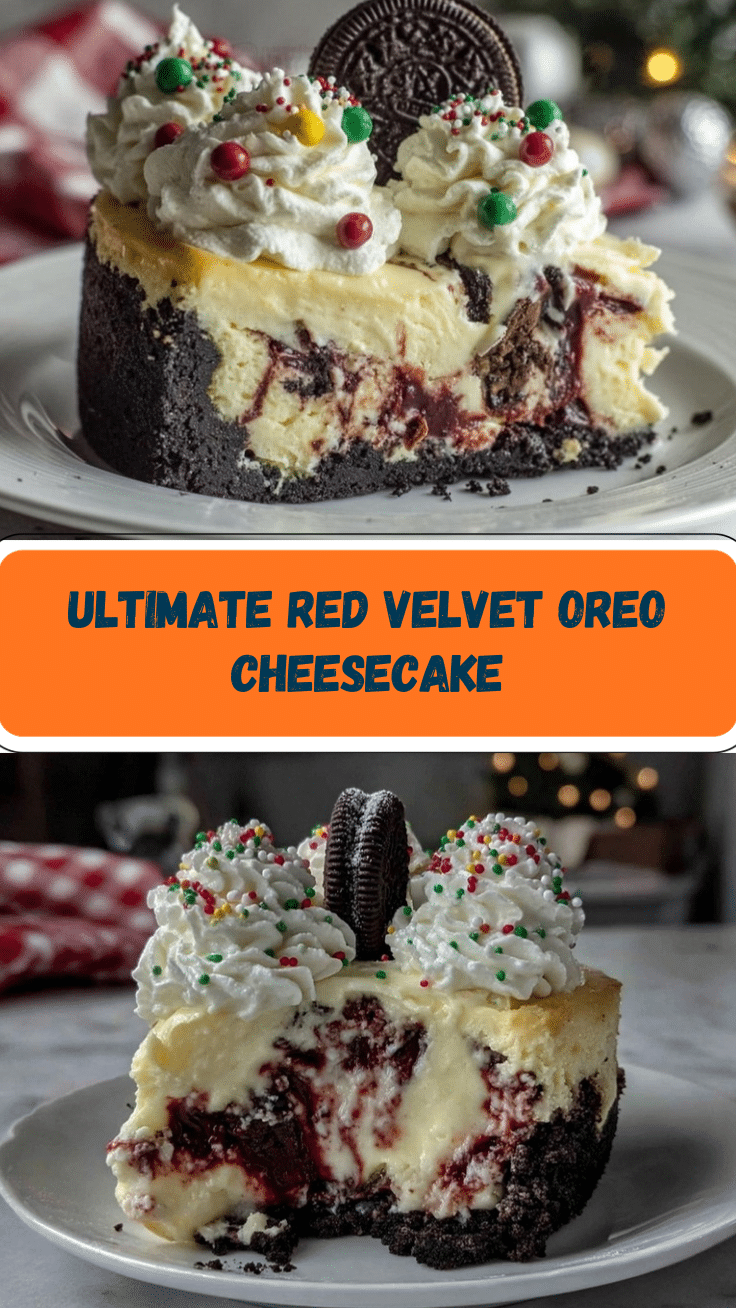
Red Velvet Cheesecake with Oreo Crust

This festive red velvet cheesecake features a creamy, cocoa-rich filling atop a thick, crunchy Oreo crust. It’s an easy, showstopping holiday dessert that’s perfect for gatherings and guaranteed to impress.
- Prep Time: 25 minutes
- Cook Time: 65 minutes
- Total Time: 6 hours (includes chilling)
- Yield: 12 servings 1x
- Category: Dessert
- Cuisine: American
Ingredients
- 24 Oreo cookies (classic chocolate, filling included)
- 6 tablespoons unsalted butter, melted
- 3 (8 oz) bricks full-fat cream cheese, softened
- 1 cup granulated sugar
- 1/4 cup unsweetened cocoa powder (Dutch-process preferred)
- 3 large eggs, room temperature
- 2/3 cup sour cream
- 1/4 cup buttermilk (or regular milk)
- 2 teaspoons vanilla extract
- 1 tablespoon red food coloring (liquid or gel)
- Pinch of salt
- 1 cup heavy whipping cream, cold (optional topping)
- 2 tablespoons powdered sugar (optional topping)
- 1/2 teaspoon vanilla extract (optional topping)
- Crushed Oreos or white chocolate shavings (for garnish, optional)
Instructions
- Preheat oven to 325°F (160°C). Lightly grease a 9-inch springform pan and wrap the bottom with aluminum foil.
- Crush 24 Oreo cookies (with filling) into fine crumbs using a food processor or ziplock bag and rolling pin. Stir in melted butter until evenly moistened. Press mixture firmly into the bottom of the prepared pan. Bake crust for 10 minutes, then set aside to cool.
- In a large bowl, beat softened cream cheese until smooth and creamy (about 2 minutes). Add sugar and beat until combined, scraping sides as needed. Mix in cocoa powder.
- Add eggs one at a time, beating well after each addition. Stir in sour cream, buttermilk, vanilla, red food coloring, and a pinch of salt. Mix until velvety and evenly colored.
- Pour the red velvet cheesecake batter over the cooled Oreo crust. Smooth the top gently with a spatula.
- Bake in the center of the oven for 55–65 minutes, or until the edges are set but the center is still slightly wobbly. If browning too quickly, loosely tent with foil at the 45-minute mark.
- Turn off the oven and crack the door open. Let cheesecake cool inside for 1 hour. Then transfer to a wire rack and cool to room temperature. Refrigerate at least 4 hours, or overnight.
- For the topping (optional): Whip cold heavy cream, powdered sugar, and vanilla until stiff peaks form. Spread or pipe over chilled cheesecake. Garnish with crushed Oreos or white chocolate shavings.
- Slice with a warm, wet knife for clean edges. Serve chilled.
Notes
For best results, use room temperature ingredients and brick-style cream cheese. No water bath is needed; the Oreo crust protects the filling. Cool the cheesecake slowly in the oven to prevent cracks. The recipe is easily adapted for gluten-free or dairy-free diets. Cheesecake slices freeze well for up to two months.
Nutrition
- Serving Size: 1 slice (1/12 of che
- Calories: 420
- Sugar: 28
- Sodium: 320
- Fat: 28
- Saturated Fat: 16
- Carbohydrates: 38
- Fiber: 2
- Protein: 7
Keywords: red velvet cheesecake, oreo crust, holiday dessert, Christmas cheesecake, easy cheesecake, festive dessert, chocolate cheesecake


