There was this one evening when I found myself rummaging through the fridge, half-expecting to find a forgotten slice of cake or some leftover dessert to satisfy my sweet tooth. Spoiler: there wasn’t. But what I did find was a lonely box of cream cheese and a bit of cocoa powder. Honestly, I wasn’t in the mood to bake a full cake—too much effort, too many dishes. So, on a whim, I mixed those ingredients with a few pantry staples and ended up rolling these rich, velvety little spheres that were pure magic. The recipe for these decadent red velvet truffles with a creamy, luscious center was born out of that simple, quiet moment of craving and creativity.
What really surprised me was how these truffles captured all the indulgence of a classic red velvet cake but in a bite-sized, melt-in-your-mouth form. The smooth, creamy center contrasts perfectly with the slightly firmer outer layer, making every bite feel like a tiny celebration. Since then, I’ve made these truffles countless times, sometimes tweaking the texture or adding a hint of spice, but the core recipe always stays the same—rich, creamy, and utterly satisfying. It’s funny how something so easy and unassuming turned into my go-to treat for both unexpected guests and quiet nights in.
They’re not just sweets; these truffles remind me that sometimes the best recipes come from the simplest moments. There’s a comfort in knowing you can whip up something so indulgent without much fuss. And honestly, that’s why this recipe stuck around in my kitchen—it’s a little secret weapon for whenever I need a quick, creamy pick-me-up that feels anything but ordinary.
Why You’ll Love This Recipe
- Quick & Easy: Comes together in under 30 minutes, perfect for those evenings when you want something sweet without the hassle.
- Simple Ingredients: Uses common pantry staples, so you won’t need a special trip to the store.
- Perfect for Gifting: These truffles make a thoughtful, homemade gift for holidays, birthdays, or just because.
- Crowd-Pleaser: Kids, adults, and even picky eaters tend to ask for seconds—there’s just something about that creamy center.
- Unbelievably Delicious: The balance of rich cocoa, tangy cream cheese, and silky texture feels like a slice of red velvet cake in every bite.
This recipe isn’t just another chocolate truffle. What sets it apart is the luscious cream cheese center that gives it that signature red velvet tang and creaminess—something I’ve found lacking in other recipes. Plus, the touch of vanilla and a hint of espresso powder (optional but highly recommended) really brings the depth of flavor alive without overpowering the sweet richness. It’s a little indulgence that feels both classic and fresh.
Whether you’re looking to impress friends with homemade candies or just want a decadent treat that’s easy to whip up, these truffles hit the spot every time. They’re the kind of dessert that makes you close your eyes and savor the moment, a comforting reminder that sweet simplicity can be utterly luxurious.
What Ingredients You Will Need
This recipe uses simple, wholesome ingredients to deliver bold flavor and satisfying texture without the fuss. Most of these are pantry staples or easy to find, and you can swap out a few to suit your needs.
- Unsalted butter, softened (adds richness and smoothness)
- Cream cheese, full fat, softened (the heart of the creamy center; I prefer Philadelphia brand for consistency)
- Powdered sugar, sifted (for sweetness and smooth texture)
- Cocoa powder, unsweetened (I like Valrhona for its deep chocolate flavor but any good-quality brand works)
- Red food coloring (gel-based preferred for vibrant color without extra liquid)
- Vanilla extract (pure vanilla adds warmth and depth)
- Espresso powder, optional (just a pinch to enhance chocolate notes without coffee flavor)
- White chocolate, for coating (adds sweetness and a creamy shell; use high-quality baking bars)
- Sprinkles or crushed freeze-dried raspberries, optional for garnish
Substitution tips: For a dairy-free version, swap cream cheese and butter with coconut cream and vegan butter respectively. Use dairy-free white chocolate for coating. If you want a darker coating, bittersweet chocolate works well, but it changes the flavor profile.
Seasonally, you could swap sprinkles for crushed peppermint in winter or finely chopped nuts for added texture. The ingredients keep it simple but flexible.
Equipment Needed
- Mixing bowls – at least two, for combining wet and dry ingredients separately
- Electric hand mixer or stand mixer – makes creaming butter and cream cheese a breeze
- Rubber spatula – for scraping bowls clean and folding ingredients gently
- Measuring cups and spoons – precise measurements matter for texture
- Small cookie scoop or melon baller – for uniformly sized truffles
- Baking sheet lined with parchment paper – for chilling the truffles before coating
- Double boiler or microwave-safe bowl – to melt white chocolate gently
- Cooling rack – optional, for letting coated truffles set without sticking
If you don’t have a mixer, a sturdy whisk can work, but expect a bit more arm workout. I’ve tried melting chocolate directly in a pan, but a double boiler keeps it from burning—worth the little extra effort. Parchment paper is a must; it keeps cleanup easy and stops the truffles from sticking.
Preparation Method
- Soften the butter and cream cheese: Leave them at room temperature for about 30 minutes, or microwave in 10-second bursts until soft but not melted.
- Cream butter and cream cheese: In a mixing bowl, beat ½ cup (115g) unsalted butter and 8 oz (225g) cream cheese with an electric mixer on medium speed until smooth and fluffy, about 3 minutes.
- Add powdered sugar gradually: Slowly add 2 cups (240g) sifted powdered sugar, beating on low speed to avoid a cloud of sugar, then increase to medium. The mixture should be thick but creamy.
- Mix in cocoa powder and flavorings: Add ½ cup (50g) unsweetened cocoa powder, 1 tsp vanilla extract, and ¼ tsp espresso powder (if using). Stir until fully combined and the color is evenly distributed.
- Add red food coloring: Carefully add red gel coloring a little at a time until you get that iconic deep red hue. Mix well to avoid streaks.
- Chill the mixture: Cover the bowl with plastic wrap and refrigerate for about 1 hour until firm enough to scoop.
- Form the truffles: Using a small cookie scoop or melon baller, scoop out tablespoon-sized portions and roll them quickly between your palms to form smooth balls. Place them on a parchment-lined baking sheet.
- Freeze truffles briefly: Pop the tray into the freezer for 15 minutes—this helps the coating stick better later.
- Melt white chocolate: Use a double boiler or microwave in 20-second intervals, stirring between each, until smooth.
- Coat the truffles: Using a fork or dipping tool, dip each truffle into the melted white chocolate, tap off excess gently, and return to the parchment paper.
- Decorate: Before the coating sets, sprinkle with crushed freeze-dried raspberries or festive sprinkles if desired.
- Set and store: Let the truffles sit at room temperature until the coating hardens, about 30 minutes, or refrigerate for quicker setting.
Tip: If the coating thickens as you dip, gently reheat it to keep it smooth. Also, keeping your hands cool while rolling prevents the truffles from melting too fast.
Cooking Tips & Techniques
One key to these truffles’ silky texture is not rushing the chilling step. I’ve tried skipping it, and the mixture was too soft to handle, resulting in misshapen truffles. So, patience really pays off here. Use a gel food coloring to avoid adding extra liquid that can throw off the mixture.
When melting white chocolate, keep the heat low and stir frequently. Chocolate burns easily, and burnt chocolate means bitter truffles. If your chocolate seizes, a tiny splash of vegetable oil can help smooth it out.
Rolling the truffles quickly is your friend. The warmth of your hands can soften the centers, so work fast or chill your hands with cold water between batches. It’s a little trick I picked up that made a huge difference in keeping the shape.
Lastly, to keep the coating crisp and the centers luscious, store the truffles in a cool place but not too cold—fridge temperatures can sometimes dull the flavor slightly. I usually let them rest at room temp for 10 minutes before serving to bring out their full flavor.
Variations & Adaptations
If you want to mix things up, here are a few variations I’ve enjoyed:
- Dark Chocolate Coating: Swap white chocolate for bittersweet or semi-sweet chocolate for a richer, less sweet finish.
- Spiced Red Velvet: Add a pinch of cinnamon or cayenne pepper to the truffle mixture for a subtle warmth that surprises the palate.
- Nutty Crunch: Roll the coated truffles in finely chopped toasted pecans or walnuts for texture contrast.
- Vegan Version: Use vegan cream cheese and vegan butter, and coat with dairy-free chocolate. I tried this once, and while the texture was slightly different, the flavor still shined.
- Mini Truffles: Make smaller, bite-sized balls for a party platter or to serve as part of a dessert sampler.
For seasonal twists, try adding a few drops of orange extract around the holidays or swap out the white chocolate coating for a pink or red-tinted candy melt coating for Valentine’s Day. The recipe adapts easily without losing its signature decadence.
Serving & Storage Suggestions
These red velvet truffles are best served at room temperature. The creamy center shines when the truffle isn’t too cold, letting the flavors bloom on your tongue. I like arranging them on a pretty platter with a dusting of cocoa powder or a sprinkle of edible glitter for special occasions.
They pair beautifully with a strong cup of coffee, a glass of cold milk, or even a light dessert wine if you’re feeling fancy. For a casual treat, just grab a few and savor slowly—no rush.
Store leftover truffles in an airtight container in the refrigerator for up to one week. If you want to keep them longer, freezing is an option—freeze on a tray first, then transfer to a freezer bag for up to three months. Thaw in the refrigerator overnight and bring to room temperature before serving to maintain that luscious texture.
Over time, the flavors deepen slightly, and the texture becomes even creamier, making them an excellent make-ahead treat for parties or gifts.
Nutritional Information & Benefits
Each decadent red velvet truffle contains approximately 90 calories, with 6 grams of fat, 8 grams of carbohydrates, and 1 gram of protein. While these are definitely a treat, the cream cheese adds a bit of calcium and vitamin A, making them a richer dessert option than plain chocolates.
The use of unsweetened cocoa powder brings antioxidants, and choosing quality ingredients means you’re indulging in something made with care. For those avoiding gluten or dairy, simple substitutions keep this recipe accessible without sacrificing flavor.
I often recommend enjoying these truffles in moderation as a satisfying way to curb sweet cravings without overindulging, offering a balance of creamy texture and just enough sweetness.
Conclusion
These decadent red velvet truffles with creamy, luscious centers are one of those rare desserts that feel both fancy and effortless. They’ve become a staple in my kitchen for when I want to treat myself or impress friends without hours of baking. The simplicity of ingredients paired with that rich, velvety texture keeps me coming back again and again.
Feel free to tweak the flavors or coatings to fit your mood and occasion—this recipe is forgiving but always delicious. Honestly, making these truffles is like finding a little moment of joy in an otherwise busy day.
I’d love to hear how you make them your own or any fun twists you try! Leave your thoughts and recipes in the comments, and let’s keep sharing the sweet love.
FAQs
Can I make these red velvet truffles ahead of time?
Yes! They store well in the refrigerator for up to a week or can be frozen for up to three months. Just thaw in the fridge overnight before serving.
What can I use instead of cream cheese for a dairy-free option?
Try vegan cream cheese made from cashews or coconut. Be sure to also use vegan butter and dairy-free chocolate for coating.
Why is my truffle mixture too soft to roll?
Chilling the mixture for at least an hour is crucial. If it’s still soft, refrigerate longer or add a bit more powdered sugar to firm it up.
Can I skip the white chocolate coating?
Absolutely. You can roll the truffles in cocoa powder, crushed nuts, or even dip them in melted dark chocolate for a different twist.
How do I get the vibrant red color without artificial food coloring?
Natural alternatives like beetroot powder can work, but they may alter the flavor slightly. Gel food coloring provides the best color without extra moisture.
Pin This Recipe!
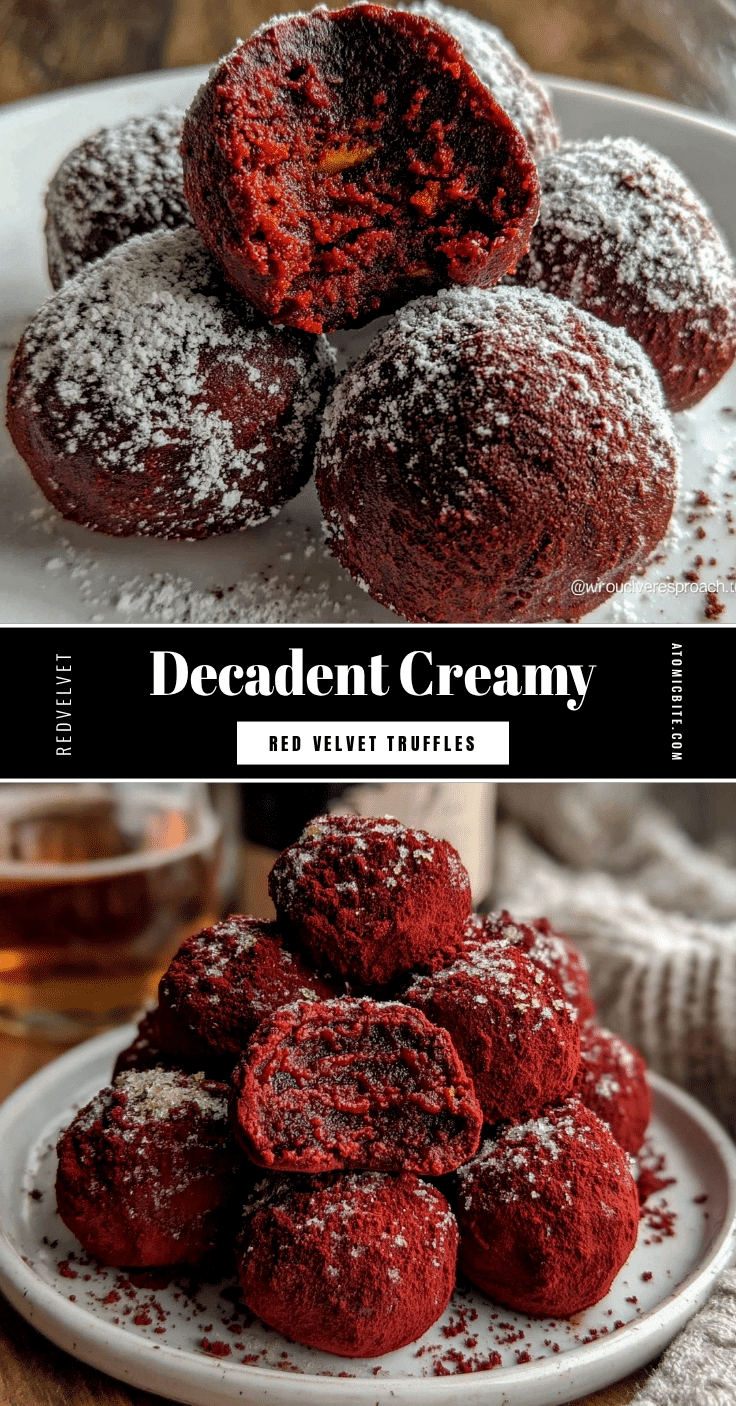
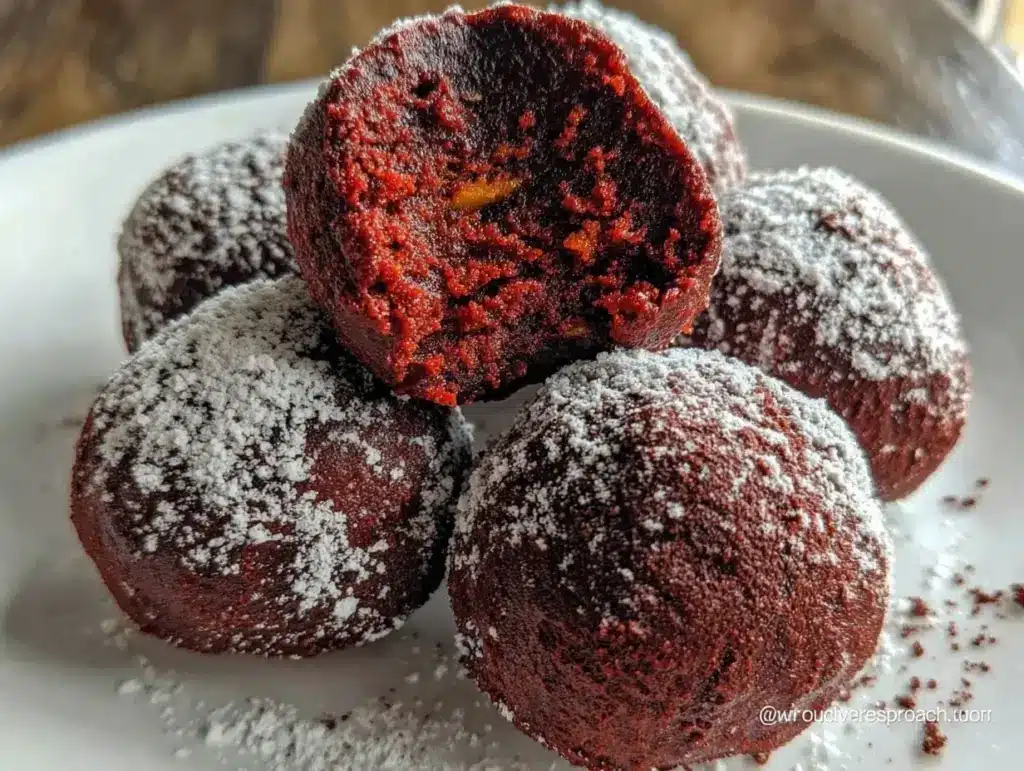
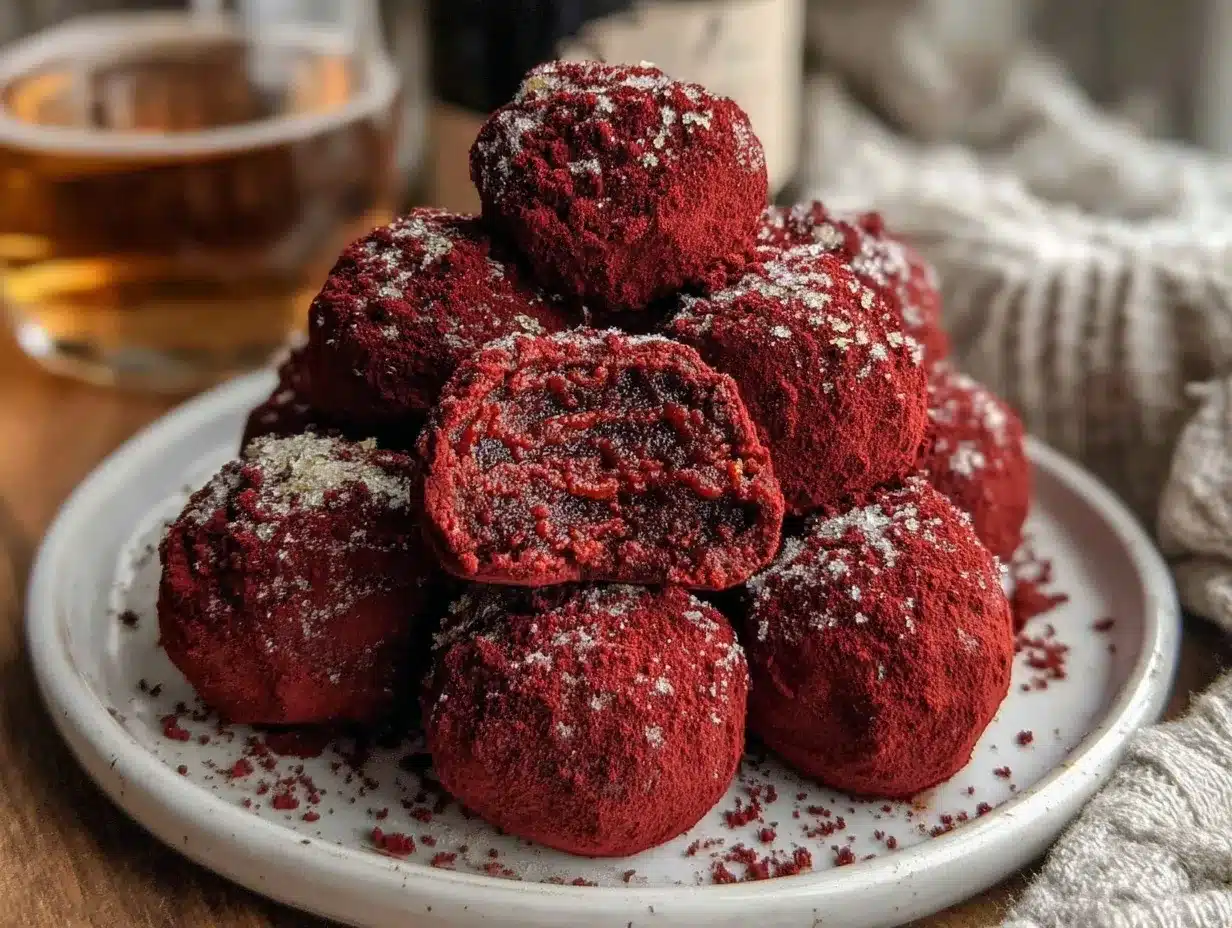
Decadent Red Velvet Truffles

These rich, creamy red velvet truffles capture the indulgence of classic red velvet cake in a bite-sized, melt-in-your-mouth form with a luscious cream cheese center and a smooth white chocolate coating.
- Prep Time: 15 minutes
- Cook Time: 15 minutes
- Total Time: 1 hour 30 minutes
- Yield: 24 truffles 1x
- Category: Dessert
- Cuisine: American
Ingredients
- ½ cup (115g) unsalted butter, softened
- 8 oz (225g) full-fat cream cheese, softened
- 2 cups (240g) powdered sugar, sifted
- ½ cup (50g) unsweetened cocoa powder
- Red gel food coloring
- 1 tsp vanilla extract
- ¼ tsp espresso powder (optional)
- White chocolate, for coating
- Sprinkles or crushed freeze-dried raspberries (optional for garnish)
Instructions
- Soften the butter and cream cheese by leaving them at room temperature for about 30 minutes or microwaving in 10-second bursts until soft but not melted.
- In a mixing bowl, beat the unsalted butter and cream cheese with an electric mixer on medium speed until smooth and fluffy, about 3 minutes.
- Slowly add sifted powdered sugar, beating on low speed to avoid a cloud of sugar, then increase to medium speed until the mixture is thick but creamy.
- Add unsweetened cocoa powder, vanilla extract, and espresso powder (if using). Stir until fully combined and color is evenly distributed.
- Carefully add red gel food coloring a little at a time until you achieve a deep red hue. Mix well to avoid streaks.
- Cover the bowl with plastic wrap and refrigerate for about 1 hour until firm enough to scoop.
- Using a small cookie scoop or melon baller, scoop tablespoon-sized portions and roll quickly between palms to form smooth balls. Place on a parchment-lined baking sheet.
- Freeze the truffles for 15 minutes to help the coating stick better.
- Melt white chocolate using a double boiler or microwave in 20-second intervals, stirring between each until smooth.
- Dip each truffle into the melted white chocolate using a fork or dipping tool, tap off excess gently, and return to the parchment paper.
- Before the coating sets, sprinkle with crushed freeze-dried raspberries or festive sprinkles if desired.
- Let the truffles sit at room temperature until the coating hardens, about 30 minutes, or refrigerate for quicker setting.
Notes
Use gel food coloring to avoid adding extra liquid. Chill the mixture for at least 1 hour to make rolling easier. Keep hands cool while rolling to prevent melting. Melt white chocolate gently to avoid burning; add a splash of vegetable oil if chocolate seizes. Store truffles at room temperature before serving for best flavor. For dairy-free version, substitute cream cheese and butter with coconut cream and vegan butter, and use dairy-free chocolate.
Nutrition
- Serving Size: 1 truffle
- Calories: 90
- Fat: 6
- Carbohydrates: 8
- Protein: 1
Keywords: red velvet truffles, cream cheese truffles, homemade truffles, easy dessert, chocolate truffles, holiday treats, bite-sized desserts


