One rainy afternoon, while the kids were busy bickering over screen time, I found myself rummaging through the pantry for something quick and sweet to lift the mood. Honestly, the idea of roasting marshmallows over a campfire was miles away, but the craving for that classic s’mores flavor lingered. That’s when these Gooey S’mores Bars with Crispy Graham Cracker Crust came to life—almost by accident. I wanted the toasted marshmallow’s melty goodness and the chocolate’s richness, but without the mess or waiting for the perfect fire.
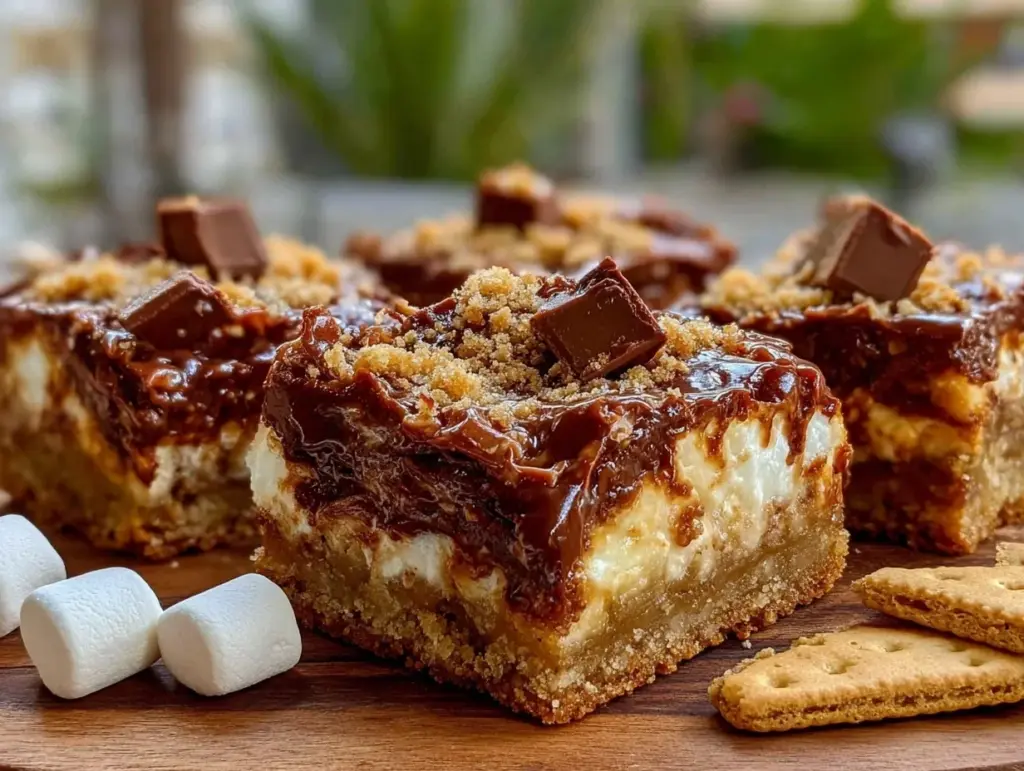
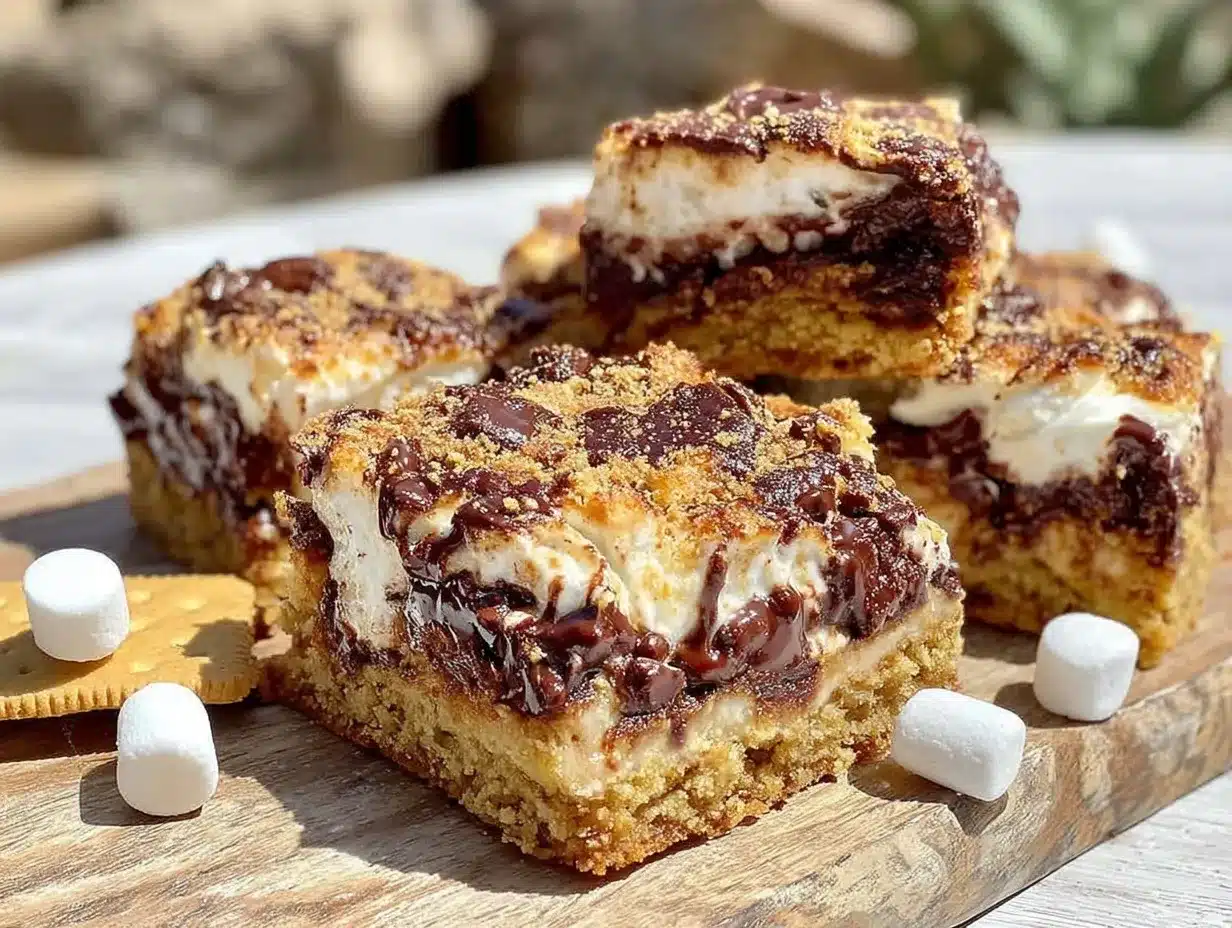
After a few tweaks and a couple of batches, I stumbled upon this easy recipe that nails the nostalgic campfire s’mores experience in a neat, handheld bar. The crispy graham cracker crust adds just the right amount of crunch, balancing the gooey marshmallow and silky chocolate layers. It’s become a sort of “go-to” whenever I need a quick pick-me-up or a dessert that disappears faster than I can slice it. The bars have this way of bringing everyone to the kitchen counter, drawn by the smell of toasted marshmallow and melted chocolate, no campfire required.
What’s funny is that I wasn’t sure how the crust would turn out at first—I’d been wary of soggy bottoms or a crust that crumbled too much. But, with some careful pressing and a simple trick during baking, the graham cracker crust gets perfectly crisp and sturdy. That balance is what makes these bars stick around in my rotation, and I’m pretty sure you’ll find the same comforting joy in them. It’s like camping memories, but without the bugs or the chilly nights.
Why You’ll Love This Recipe
This Gooey S’mores Bars recipe has been tested more times than I can count—and that’s coming from someone who’s only “sometimes” a baker. Here’s why it’s become such a favorite in my kitchen:
- Quick & Easy: You can whip these bars up in under 30 minutes, making them perfect for busy weeknights or surprise guests.
- Simple Ingredients: No need for a special trip to the store—just grab what’s already sitting in your pantry and fridge.
- Perfect for Gatherings: Whether it’s a casual potluck or an impromptu family dessert, these bars are always a hit.
- Crowd-Pleaser: Kids and adults alike rave about the gooey marshmallow and chocolate combo paired with that crisp crust.
- Unbelievably Delicious: The crispy graham cracker crust isn’t just a base; it’s a flavor player that adds texture and depth to every bite.
What sets this recipe apart from others is the special attention to the crust. Instead of just layering graham crackers, the crust is pressed and baked to a golden crisp, which keeps it from turning soggy under all that melty marshmallow and chocolate. Plus, the marshmallows get toasted just right in the oven, giving you that campfire char without needing a flame. Honestly, it’s the kind of recipe that brings back those sweet summer memories but in a way that fits perfectly in your busy life. It’s comfort food, no question—but one that feels effortless and a little bit special.
What Ingredients You Will Need
This recipe uses simple, wholesome ingredients to deliver bold flavor and satisfying texture without the fuss. Everything is pantry-friendly, and most of it you likely have on hand already.
- For the crust:
- Graham cracker crumbs (about 1 ½ cups) – I like using honey-flavored graham crackers for a touch of sweetness.
- Unsalted butter, melted (6 tablespoons) – adds richness and helps crisp the crust.
- Granulated sugar (2 tablespoons) – balances the butter and enhances browning.
- For the filling:
- Mini marshmallows (3 cups) – they toast beautifully and melt quickly.
- Milk chocolate chips or chopped milk chocolate (1 ½ cups) – I prefer using a good-quality brand like Ghirardelli for smooth melting.
- Optional Add-ins:
- Sea salt flakes (a pinch) – sprinkle on top to contrast the sweetness.
- Chopped nuts (¼ cup) – for added crunch, if desired.
For substitutions, feel free to swap the milk chocolate with dark chocolate if you prefer a richer, less sweet bar. You can also use dairy-free butter and chocolate to make these vegan-friendly. If you don’t have graham crackers, crushed digestive biscuits work just as well for the crust, though the flavor will shift slightly. The mini marshmallows are key to getting that classic gooey texture, but if you want to try with larger marshmallows, just chop them roughly to speed melting and achieve even coverage.
Equipment Needed
- 8×8-inch (20×20 cm) baking pan – I find glass pans work great for even baking, but metal pans are fine too.
- Mixing bowls – one for the crust mixture, another for assembling the bars.
- Measuring cups and spoons – precision here helps the crust hold up nicely.
- Rubber spatula or spoon – for pressing the crust evenly and mixing.
- Oven mitts and cooling rack – safety first when handling hot pans!
If you don’t have a baking pan this size, a slightly larger one will just make the bars a bit thinner and crispier. And while I usually use a food processor to crush graham crackers quickly, a rolling pin and zip-top bag work perfectly fine if you’re low on gadgets. Keeping your butter melted but not too hot is important too; I usually microwave it in short bursts and stir to avoid overheating.
Preparation Method
- Preheat your oven to 350°F (175°C). This sets the stage for the crust to crisp up nicely without burning the marshmallows later.
- Make the graham cracker crust. In a mixing bowl, combine 1 ½ cups of graham cracker crumbs, 6 tablespoons melted unsalted butter, and 2 tablespoons granulated sugar. Stir until the crumbs are evenly coated and the mixture looks like wet sand.
- Press the crust into the baking pan. Use the back of a spoon or your fingers to press the mixture firmly and evenly into the bottom of the 8×8-inch pan. Don’t be shy about pressing hard—this helps the crust hold together better once baked.
- Bake the crust for 8-10 minutes. Keep an eye on it—the edges should turn golden brown, and you’ll start to smell that buttery aroma. This step is crucial to prevent sogginess later.
- Remove the crust and immediately sprinkle 1 ½ cups of milk chocolate chips evenly over it. The residual heat will start melting the chocolate gently.
- Top the melted chocolate with 3 cups of mini marshmallows. Spread them out evenly for consistent toasting.
- Return the pan to the oven and bake for another 5-7 minutes. Watch closely as the marshmallows puff up and turn golden brown with tiny toasted spots. The sweet smell at this point is irresistible.
- Optional: Sprinkle a pinch of sea salt flakes or chopped nuts on top. This adds a lovely contrast and texture dimension.
- Allow the bars to cool completely in the pan on a wire rack. Cooling lets the chocolate set and the crust firm up even more.
- Slice into squares and enjoy! For clean cuts, use a sharp knife warmed under hot water and wiped dry before slicing.
Pro tip: If your marshmallows start to brown too quickly, lower the oven temperature by 25°F (about 15°C) and extend the baking time slightly. Also, don’t skip cooling; I learned the hard way that cutting too soon turns the bars into a sticky mess.
Cooking Tips & Techniques
Getting that perfect crispy graham cracker crust with gooey marshmallows takes a little finesse, but once you get the hang of it, it’s straightforward.
- Press the crust tightly. The more densely packed, the better it holds together. I sometimes press it down with a flat-bottomed measuring cup to get an even layer.
- Bake the crust first. This is a game-changer. Skipping this step results in a soggy crust that falls apart when you cut the bars.
- Watch the marshmallows carefully. They can go from perfectly toasted to burnt in no time. Stay nearby during the last few minutes of baking.
- Use mini marshmallows. They toast more evenly and melt into that soft gooey layer quicker than large ones.
- Cut with a warm knife. Run it under hot water and dry it before slicing to get neat bars without dragging melted chocolate and marshmallow.
One time, I left the bars in the oven too long and ended up with marshmallows that were crispy on top but dry inside—not quite the gooey texture I wanted. Since then, I set a timer and check early. Also, if you want an extra toasty flavor, you can pop the bars under the broiler for 15-20 seconds at the end, but watch like a hawk!
Variations & Adaptations
While this recipe nails the classic s’mores vibe, I love making little tweaks depending on mood and occasion.
- Peanut Butter Twist: Swirl ¼ cup creamy peanut butter into the graham cracker crust before baking for a nutty depth.
- Salted Caramel Addition: Drizzle salted caramel sauce over the marshmallows before the final bake for a decadent upgrade.
- Gluten-Free Version: Use gluten-free graham cracker crumbs or substitute with crushed gluten-free cookies to keep the crust crisp and safe for gluten-sensitive eaters.
- Vegan Adaptation: Swap butter for coconut oil, use dairy-free chocolate chips, and vegan marshmallows (like Dandies).
- Seasonal Berry Boost: Add a layer of fresh raspberries or sliced strawberries between the chocolate and marshmallows for a tangy counterpoint.
Personally, I once tried adding a sprinkle of cinnamon to the crust mixture for a subtle warmth—it was a happy accident that brought a cozy twist to the bars on a chilly evening.
Serving & Storage Suggestions
These Gooey S’mores Bars are best served at room temperature once cooled, letting the flavors really settle. They also taste fantastic slightly warmed—pop a bar in the microwave for 10-15 seconds to revive that melty goodness.
For presentation, I like stacking them on a rustic wooden board with a few extra marshmallows and graham crackers scattered around—simple but inviting. They pair beautifully with a cold glass of milk or a warm cup of coffee or hot cocoa, if you want to keep the cozy vibe going.
Store leftover bars in an airtight container at room temperature for up to 2 days. For longer storage, refrigerate them for up to a week, but keep in mind the crust might lose some crispness (still tasty though!). You can also freeze individual bars wrapped tightly in plastic wrap and placed in a freezer bag for up to 2 months. Thaw at room temperature before serving.
With time, the flavors meld and the bars become even more indulgent—but don’t wait too long; they tend to disappear fast around here!
Nutritional Information & Benefits
These bars are a treat, so moderation is key. An average serving (one 2-inch square) contains roughly:
| Calories | 220 kcal |
|---|---|
| Fat | 12g (mostly from butter and chocolate) |
| Carbohydrates | 26g (sugars and starches) |
| Protein | 2g |
Key ingredients like graham crackers provide whole grain carbs, and the butter adds richness, while chocolate contains antioxidants in small amounts. If you swap to dark chocolate, you get a slightly healthier profile with more polyphenols. The marshmallows are mostly sugar, so these bars are definitely a dessert indulgence rather than a health food.
For those with dietary restrictions, gluten-free and vegan options exist with simple ingredient swaps. Always check marshmallow ingredients if allergies are a concern, as some brands contain gelatin.
Conclusion
Gooey S’mores Bars with Crispy Graham Cracker Crust are one of those rare recipes that feel like a hug in dessert form. They bring together the nostalgia of campfire s’mores and the practicality of an easy oven dessert. Whether you’re a casual baker or just need a quick sweet fix, these bars deliver without fuss.
Feel free to make them your own—add nuts, switch up the chocolate, or sneak in some spices. I love how flexible they are, yet they always come out with that irresistible gooey center and crunchy crust combo that keeps everyone coming back for more.
Give them a try, and when you do, I’d love to hear how you tweaked the recipe or what memories they brought up for you. After all, food is about sharing stories and moments, and these bars have a way of sparking both.
FAQs
Can I make these bars ahead of time?
Absolutely! They store well at room temperature for a couple of days and can be refrigerated or frozen for longer. Just warm them slightly before serving for best texture.
What’s the best way to keep the crust crispy?
Baking the crust before adding the marshmallows is key. Press it firmly, bake until golden, then add the toppings. Avoid letting the bars sit too long without refrigeration if it’s warm, as the crust can soften.
Can I use jumbo marshmallows instead of mini marshmallows?
You can, but it’s best to chop them roughly to help them melt evenly. Mini marshmallows toast and melt much faster, which gives that classic gooey texture.
Is there an alternative to graham cracker crust?
Yes, crushed digestive biscuits or even crushed vanilla wafers can work. Just adjust the sugar and butter slightly to balance sweetness and binding.
How do I get the marshmallows nicely toasted without burning?
Keep a close eye during the final bake stage. You can lower the oven temperature a bit if they toast too fast. Alternatively, use the broiler for a few seconds but watch carefully to avoid burning.
Pin This Recipe!
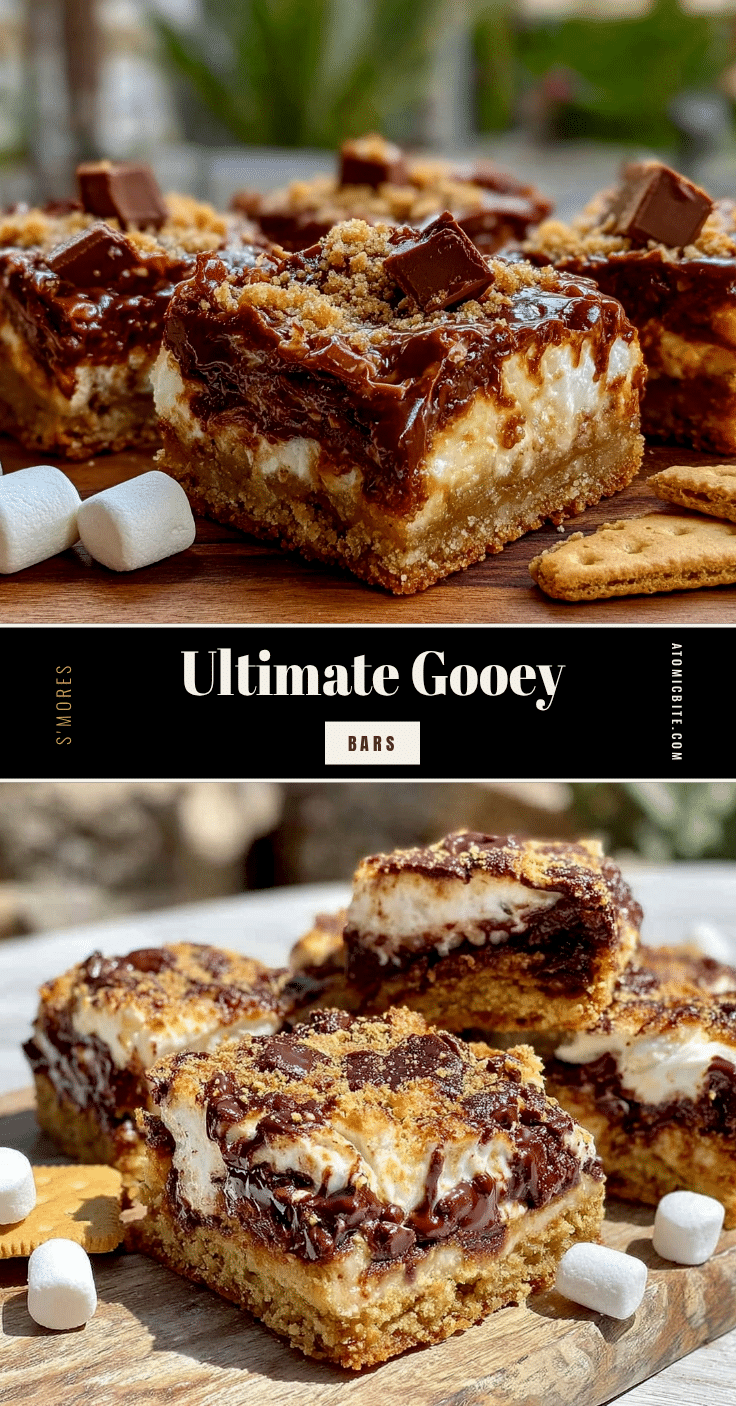
Gooey S’mores Bars

These Gooey S’mores Bars feature a crispy graham cracker crust with a gooey marshmallow and milk chocolate filling, delivering the nostalgic campfire s’mores flavor in an easy, handheld bar.
- Prep Time: 10 minutes
- Cook Time: 15 minutes
- Total Time: 25 minutes
- Yield: 16 servings 1x
- Category: Dessert
- Cuisine: American
Ingredients
- 1 ½ cups graham cracker crumbs (honey-flavored preferred)
- 6 tablespoons unsalted butter, melted
- 2 tablespoons granulated sugar
- 3 cups mini marshmallows
- 1 ½ cups milk chocolate chips or chopped milk chocolate
- Optional: pinch of sea salt flakes
- Optional: ¼ cup chopped nuts
Instructions
- Preheat your oven to 350°F (175°C).
- In a mixing bowl, combine graham cracker crumbs, melted unsalted butter, and granulated sugar. Stir until the mixture looks like wet sand.
- Press the crust mixture firmly and evenly into the bottom of an 8×8-inch baking pan.
- Bake the crust for 8-10 minutes until edges turn golden brown and smell buttery.
- Remove the crust from the oven and immediately sprinkle milk chocolate chips evenly over it.
- Top the melted chocolate with mini marshmallows, spreading them evenly.
- Return the pan to the oven and bake for another 5-7 minutes until marshmallows puff up and turn golden brown with toasted spots.
- Optionally sprinkle a pinch of sea salt flakes or chopped nuts on top.
- Allow the bars to cool completely in the pan on a wire rack to let the chocolate set and crust firm up.
- Slice into squares using a sharp knife warmed under hot water and dried before slicing.
Notes
Press the crust tightly to ensure it holds together. Bake the crust before adding toppings to prevent sogginess. Watch marshmallows closely during baking to avoid burning. Use mini marshmallows for even melting. Cut bars with a warm knife for clean slices. Optional broil for 15-20 seconds for extra toasty marshmallows but watch carefully.
Nutrition
- Serving Size: One 2-inch square ba
- Calories: 220
- Fat: 12
- Carbohydrates: 26
- Protein: 2
Keywords: s’mores bars, gooey marshmallow bars, graham cracker crust, easy dessert, chocolate marshmallow bars, campfire dessert, quick sweet treat


