Late one rainy Sunday afternoon, I found myself staring at my sad, deflated sourdough starter, wondering if I’d ever get that perfect loaf with a crispy crust I’d been dreaming about. Honestly, I wasn’t even sure if my kitchen skills could pull off a bakery-worthy bread. But with nothing but some flour, water, and patience, I gave it a shot. The first few attempts were… well, let’s just say the crust was more chewy than crispy, and the crumb was dense. Yet, after a couple of tries, a particular batch came out golden, crackly, and with that unmistakable sourdough tang that made me pause and savor each bite. That moment of biting into a crust so crisp it sang under my teeth—that’s when I realized I had stumbled on something special.
This isn’t just any bread recipe. It’s the kind that turns your kitchen into a cozy bakery corner, where the smell alone can quiet a hectic day. I’ve made this recipe so many times in the last few months that my neighbors started asking for slices, and my friends now expect me to bring it to every potluck. It’s simple, honest, and rewards you richly for your effort. I’m sharing this perfect crispy crust sourdough bread recipe so you can experience that satisfying crunch and tender crumb in your own home, without the guesswork and fuss.
You know, it’s funny how something as humble as bread can feel like a tiny victory. This recipe stuck with me because it’s reliable and comforting—kind of like a good friend who always shows up with a warm smile and something tasty. And if you’ve ever been intimidated by sourdough, this might just be the one that makes it all click.
Why You’ll Love This Recipe
- Quick & Easy: While sourdough takes time to ferment, the hands-on work is straightforward and comes together without complicated steps.
- Simple Ingredients: Flour, water, salt, and starter—that’s it. No fancy add-ins or hard-to-find components.
- Perfect for Cozy Dinners: Whether it’s a quiet night in or a casual gathering, this bread pairs beautifully with soups, cheeses, or just a smear of butter.
- Crowd-Pleaser: The crispy crust and tangy crumb always get compliments—even from those who say they “don’t like sourdough.”
- Unbelievably Delicious: The secret is in the slow fermentation and the baking technique that creates that crackling crust you can’t help but tap.
- Unique Touch: I’ve perfected a method where the dough rests overnight, giving it a depth of flavor and texture that sets it apart from the usual sourdough loaves.
This isn’t just another sourdough recipe floating around. It’s my go-to when I want that perfect balance of crunchy crust and soft, airy inside. Plus, it’s forgiving enough to make even if you’re still getting to know your starter. Once you try it, you’ll understand why it’s something I keep coming back to, loaf after loaf.
What Ingredients You Will Need
This recipe uses simple, wholesome ingredients to deliver bold flavor and satisfying texture without the fuss. Most of these are pantry staples, and if you have a lively sourdough starter, you’re halfway there!
- Active sourdough starter (100g, bubbly and at peak activity) — I prefer using a fed starter that’s about 4-6 hours past feeding for best results.
- All-purpose flour (400g / 3 1/4 cups) — King Arthur works great for me, but any unbleached all-purpose flour will do.
- Whole wheat flour (100g / 3/4 cup) — Adds a nice depth of flavor and helps with crust development. You can swap with rye for a different twist.
- Water (350g / 1 1/2 cups), lukewarm — Filtered if possible, helps the fermentation process go smoothly.
- Salt (10g / 2 tsp), fine sea salt — Essential for flavor and controlling yeast activity.
Optional:
- Rice flour (for dusting) — Prevents sticking without burning on the crust.
Ingredient tips: If you want to make this gluten-free, swapping all-purpose with a gluten-free blend won’t give the same crust, but you can experiment with oat or buckwheat flour blends. For dairy-free diets, this recipe is naturally free since it contains no milk or butter.
Equipment Needed
- Mixing bowls: Large and medium size, preferably glass or stainless steel to avoid flavor interference.
- Dutch oven or heavy oven-safe pot with a lid: This is the secret weapon for that crispy crust. If you don’t have one, a baking stone plus a pan of water for steam can work.
- Dough scraper or a bench scraper: Makes handling sticky dough much easier.
- Kitchen scale: For precise measurements — honestly, this saves so much guesswork.
- Proofing basket (banneton): Optional but recommended for shaping and creating the classic bread pattern.
- Sharp serrated knife or bread lame: For scoring the dough before baking.
If you’re on a budget, you can improvise a proofing basket with a bowl lined with a well-floured tea towel. For the Dutch oven, any heavy pot with a lid that can withstand high oven temperatures will do. I’ve used cast iron and even an enameled pot successfully.
Preparation Method

- Feed your starter about 4-6 hours before starting. It should be bubbly and doubled in size when you begin.
- Mix flours and water together in a large bowl (450g total flour and 350g water). Stir until there are no dry spots. The dough will look shaggy and sticky. Cover and let it rest for 45 minutes (this is called autolyse and helps gluten develop).
- Add sourdough starter and salt to the dough. Use your hands or a spatula to mix thoroughly. The dough will be sticky but should come together.
- Bulk fermentation: Let the dough rest at room temperature (around 70°F / 21°C) for 4-5 hours. Every 30 minutes for the first 2 hours, perform a set of stretch and folds (reach under the dough, stretch it up, and fold it over itself). This builds strength and structure without kneading.
- Shape the dough: Turn it out onto a lightly floured surface, fold it into a tight round loaf. Place it seam-side up in a well-floured banneton or bowl lined with a floured towel. Cover and refrigerate overnight (8-12 hours).
- Preheat your oven to 500°F (260°C) with the Dutch oven inside for at least 30 minutes before baking.
- Score the loaf: Carefully turn the dough out onto parchment paper, then use a sharp knife or lame to make 2-3 slashes on the surface. This helps the bread expand during baking.
- Bake: Transfer the loaf on parchment into the hot Dutch oven. Cover and bake for 20 minutes. Remove the lid and bake for another 20-25 minutes until the crust is deeply golden and crackly.
- Cool: Let the bread cool completely on a wire rack before slicing. The crust will harden as it cools, giving you that perfect crunch.
Pro tip: If the crust isn’t as crispy as you’d like, you can put the bread back in the oven at 450°F (230°C) uncovered for an extra 5-10 minutes. Just watch it closely!
Cooking Tips & Techniques
- Patience is key: Sourdough needs time to develop flavor and structure. Don’t rush the fermentation or proofing steps.
- Use a hot Dutch oven: Preheating your baking vessel traps steam, which is crucial for that blistered, crispy crust.
- Don’t skip scoring: It’s not just decorative—it controls how your bread expands and prevents random cracking.
- Water temperature matters: Lukewarm water helps activate your starter without killing it.
- Keep your starter lively: Feed it regularly and keep it at room temp for best bubbling action.
- Handling sticky dough: Flour your hands lightly and use a bench scraper to avoid frustration—sticky dough is normal.
- Watch your oven: Every oven bakes differently—take notes on what works for yours.
I remember the first time I tried baking without a Dutch oven. The crust was disappointingly soft. Switching to a lidded pot was a game-changer, and I never looked back. Also, don’t be discouraged by imperfect scores or slightly misshapen loaves—practice makes perfect, and the flavor always wins.
Variations & Adaptations
- Whole wheat sourdough: Swap out up to 50% of the all-purpose flour for whole wheat for a nuttier flavor and denser crumb.
- Rye sourdough: Replace 25-30% of your flour with rye flour to add complexity and a slightly earthy note.
- Herb-infused crust: Add fresh rosemary or thyme to the dough or sprinkle on top before baking for an aromatic twist.
- Gluten-free option: While traditional sourdough relies on gluten, experimenting with gluten-free blends and xanthan gum can yield interesting results but expect a different texture.
- Overnight no-knead: If you’re short on time, mix all ingredients the night before and let it ferment in the fridge for 12-16 hours, then shape and bake the next day.
Personally, I once added caramelized onions to the dough, and it was a hit—sweet, savory, and that crispy crust still stole the show. Feel free to get creative; sourdough is surprisingly versatile.
Serving & Storage Suggestions
Serve this sourdough bread at room temperature to enjoy the full crunch and flavor. It pairs beautifully with olive oil and balsamic for dipping, creamy cheeses, or hearty soups. Toasted slices with butter and jam make a simple but satisfying breakfast.
To store, keep the bread in a paper bag or wrapped loosely in a tea towel at room temperature for up to 3 days. Avoid plastic bags as they soften the crust. For longer storage, slice and freeze the bread in an airtight bag. Toast slices straight from the freezer for that fresh-baked taste.
Reheating in a 350°F (175°C) oven for 5-10 minutes helps revive the crust and crumb if the bread has softened. Over time, the flavors mellow and become even more nuanced, making day-old slices perfect for sandwiches or croutons.
Nutritional Information & Benefits
A standard slice (about 60g) of this sourdough bread provides approximately 150 calories, 5g protein, 30g carbohydrates, 1g fat, and 2g fiber. The long fermentation process breaks down gluten and phytic acid, making it easier to digest than many other breads.
Whole wheat and rye variations add extra fiber, vitamins, and minerals. Salt content is moderate, but you can adjust to taste. This recipe is naturally free from dairy and refined sugars, supporting a wholesome, balanced diet.
From a wellness standpoint, homemade sourdough feels good to eat because it’s made with simple ingredients and a lot of care. Plus, the act of baking your own bread is a rewarding ritual that connects you to a slower, more mindful way of living.
Conclusion
This perfect crispy crust sourdough bread recipe is more than just a loaf—it’s a little adventure in your kitchen, a comforting project that rewards you with golden, crackling crust and soft, tangy crumb every time. It’s flexible enough for you to tweak and make your own, whether you prefer a classic all-white loaf or a hearty whole wheat.
From my experience, once you get this one down, you’ll find yourself reaching for it again and again, sharing slices and stories with friends and family. So take your time, trust the process, and enjoy the simple pleasure of homemade sourdough. I can’t wait to hear what you think and how you make it yours.
Give it a go, and don’t hesitate to leave a comment or share your baking tales—I’m all ears and loaves!
FAQs
How do I know if my sourdough starter is ready to use?
Your starter should be bubbly, have doubled in size within 4-6 hours of feeding, and pass the “float test” (a spoonful floats in water).
Can I use bread flour instead of all-purpose flour?
Yes! Bread flour has more protein, which can give a chewier texture and better rise, but all-purpose works well too.
Why is my bread crust not crispy?
Make sure you preheat your Dutch oven thoroughly and bake with the lid on initially to trap steam. Also, avoid storing bread in plastic which softens crust.
Can I make this recipe without a Dutch oven?
You can bake on a baking stone or heavy tray, adding a pan of water to the oven for steam to help form the crust, but results may vary.
How long can I store sourdough bread?
At room temperature, up to 3 days is best. For longer storage, slice and freeze; toast slices directly from the freezer for fresh taste.
Pin This Recipe!

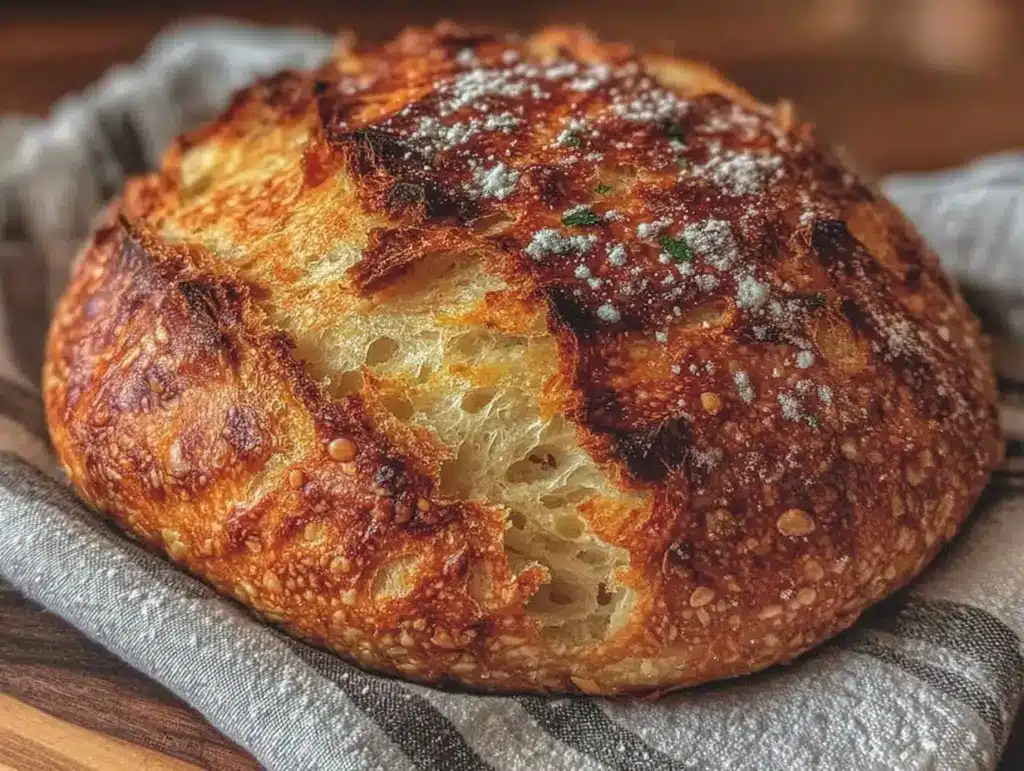
Perfect Crispy Crust Sourdough Bread Recipe Easy Homemade Step-by-Step Guide

A reliable and comforting sourdough bread recipe that yields a golden, crackly crust and a soft, tangy crumb. Perfect for cozy dinners and casual gatherings.
- Prep Time: 1 hour
- Cook Time: 45 minutes
- Total Time: 13-14 hours
- Yield: 1 loaf (about 1.5 lbs) 1x
- Category: Bread
- Cuisine: American
Ingredients
- 100g active sourdough starter (bubbly and at peak activity, about 4–6 hours past feeding)
- 400g (3 1/4 cups) all-purpose flour
- 100g (3/4 cup) whole wheat flour
- 350g (1 1/2 cups) lukewarm water
- 10g (2 tsp) fine sea salt
- Optional: rice flour for dusting
Instructions
- Feed your starter about 4-6 hours before starting. It should be bubbly and doubled in size when you begin.
- Mix flours and water together in a large bowl (450g total flour and 350g water). Stir until there are no dry spots. The dough will look shaggy and sticky. Cover and let it rest for 45 minutes (autolyse).
- Add sourdough starter and salt to the dough. Mix thoroughly by hand or spatula until the dough comes together.
- Let the dough rest at room temperature (around 70°F / 21°C) for 4-5 hours. Every 30 minutes for the first 2 hours, perform stretch and folds to build strength.
- Turn the dough onto a lightly floured surface, shape into a tight round loaf. Place seam-side up in a well-floured banneton or bowl lined with a floured towel. Cover and refrigerate overnight (8-12 hours).
- Preheat oven to 500°F (260°C) with Dutch oven inside for at least 30 minutes.
- Carefully turn dough onto parchment paper and score 2-3 slashes on the surface with a sharp knife or bread lame.
- Transfer the loaf on parchment into the hot Dutch oven. Cover and bake for 20 minutes. Remove lid and bake for another 20-25 minutes until crust is deeply golden and crackly.
- Cool bread completely on a wire rack before slicing to allow crust to harden.
- Optional: For extra crispiness, bake uncovered at 450°F (230°C) for an additional 5-10 minutes, watching closely.
Notes
[‘Use a hot Dutch oven to trap steam for a crispy crust.’, ‘Score the dough before baking to control expansion and prevent random cracking.’, ‘Lukewarm water helps activate the starter without killing it.’, ‘Flour hands lightly and use a bench scraper to handle sticky dough.’, ‘If crust is not crispy enough, bake uncovered at 450°F for 5-10 minutes.’, ‘Store bread in paper bag or loosely wrapped in tea towel to maintain crust.’, ‘Freeze sliced bread for longer storage and toast directly from freezer.’]
Nutrition
- Serving Size: 1 slice (about 60g)
- Calories: 150
- Sodium: 400
- Fat: 1
- Carbohydrates: 30
- Fiber: 2
- Protein: 5
Keywords: sourdough bread, crispy crust, homemade bread, easy sourdough, artisan bread, no-knead bread, baking bread


