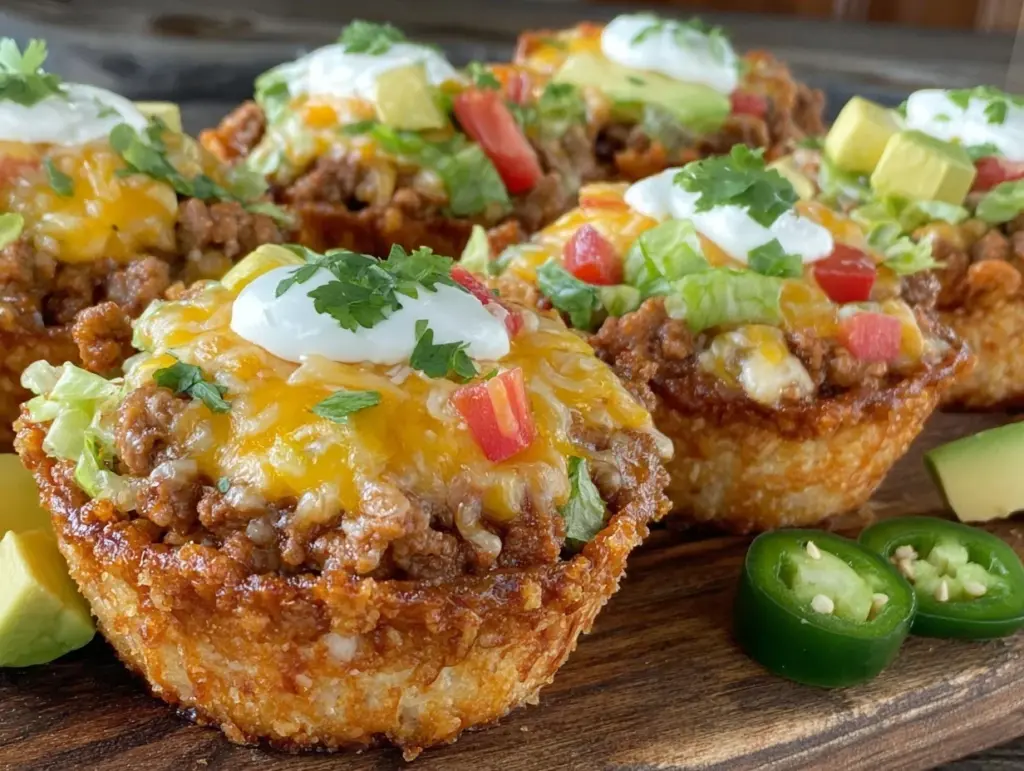
“Hey, did you bring the taco cups?” That question came up more times than I could count at graduation parties last year. Honestly, I wasn’t even planning to bring them at first. I remember rushing through the kitchen, trying to whip up something quick and tasty because the clock was ticking and the party was about to start. I grabbed some small tortillas, dumped in whatever taco meat was left from dinner, and popped them in the oven. I didn’t expect much, but the crispy mini taco cups turned out to be the surprise hit of the party.
What’s funny is that I wasn’t even sure if these little bites would hold up—they looked almost too fragile to handle. But each cup came out perfectly crisp, holding a juicy, flavorful filling that had everyone asking for the recipe. The crunch, the spice, the ease—it was the perfect snack for a laid-back celebration, where people want to mingle and snack without the mess. It stuck with me because it felt like one of those “happy accidents” that turned into a go-to for any casual get-together, especially graduation parties where finger foods are king.
Now, whenever I think about party snacks that combine ease, taste, and that satisfying crunch, these crispy mini taco cups come to mind. They’re small, packed with flavor, and just the right size to keep the party vibe flowing. No fuss, no fancy tools, just simple ingredients that you probably already have lying around. And that’s why I keep coming back to them season after season.
Why You’ll Love This Recipe
Honestly, this recipe has earned its spot as a party staple for so many reasons, but here’s what really sets these crispy mini taco cups apart:
- Quick & Easy: You can whip these up in under 30 minutes—perfect when you’re juggling last-minute party prep or unexpected guests.
- Simple Ingredients: No need for fancy trips to specialty stores; most of the ingredients are pantry staples like ground beef, shredded cheese, and tortillas.
- Perfect for Graduation Parties: Bite-sized and mess-free, these cups are ideal for mingling and celebrating without slowing down the fun.
- Crowd-Pleaser: Kids and adults alike go nuts for these. The crispy shell holds juicy, well-seasoned fillings that make everyone come back for seconds.
- Unbelievably Delicious: The contrast between the crunchy tortilla shell and the savory, cheesy filling hits all the right notes for a satisfying snack.
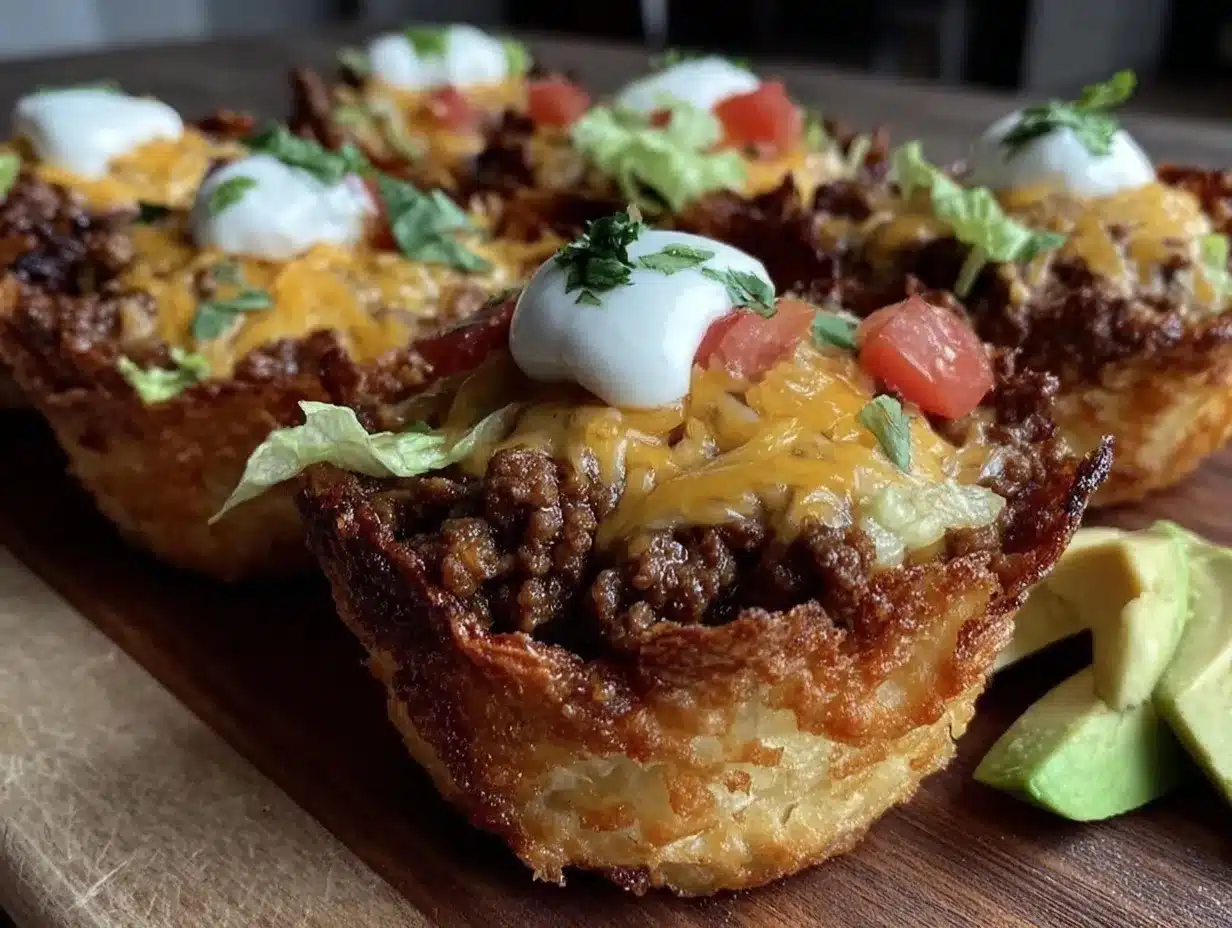
What really makes this recipe different? Well, it’s the way the tortillas get perfectly crisp in a muffin tin, creating sturdy little cups that can hold all sorts of fillings without getting soggy. Plus, the seasoning mix I use is balanced—not too spicy, but flavorful enough to keep things interesting. I’ve tried variations with ground turkey and even vegetarian fillings, but the classic beef version still wins every time.
It’s not just another taco cup recipe; it’s the one that makes you pause, savor, and maybe even close your eyes for a second after the first bite. If you want to impress guests without stress or just need a quick snack that feels special, these crispy mini taco cups are your answer.
What Ingredients You Will Need
This recipe uses simple, wholesome ingredients to deliver bold flavor and satisfying texture without the fuss. Most are everyday staples, and you can easily swap a few to suit your pantry or dietary needs.
- Small flour tortillas (6-inch size works best for mini cups; look for soft but sturdy ones to hold fillings)
- Ground beef (85% lean is my go-to for juicy, flavorful filling)
- Yellow onion, finely diced (adds sweetness and depth)
- Garlic cloves, minced (fresh is best, but jarred works too)
- Taco seasoning (I prefer homemade mix with chili powder, cumin, smoked paprika, and a hint of oregano)
- Shredded cheddar cheese (sharp cheddar gives a nice tang, but a Mexican blend is great too)
- Fresh cilantro, chopped (optional, for garnish and fresh flavor)
- Jalapeño, finely chopped (optional, if you want a bit of heat)
- Olive oil or melted butter (to brush the tortilla cups for crispiness)
- Salt and pepper, to taste
For substitutions, you can swap ground beef with ground turkey or even a plant-based crumbled meat for a vegetarian option. If you prefer corn tortillas, just be extra careful when shaping—they tend to be more fragile but add a nice corn flavor. When it comes to cheese, dairy-free alternatives work fine if you want to keep it vegan-friendly.
Seasoning-wise, I sometimes add a pinch of smoked chipotle powder for a smoky twist. Also, if fresh cilantro isn’t your thing, a squeeze of fresh lime after baking adds a bright pop that really wakes up the flavors.
Equipment Needed
- Muffin tin: Essential for shaping the mini taco cups. I’ve tried silicone and metal pans; metal gives a better crisp on the edges.
- Mixing bowls: For combining meat and seasoning, and for prepping cheese and garnishes.
- Skillet or frying pan: For cooking the ground beef mixture. A non-stick pan makes cleanup easier.
- Sharp knife and cutting board: For dicing onions, garlic, and any fresh toppings.
- Basting brush: Optional but helpful for brushing olive oil or melted butter on tortillas.
If you don’t have a muffin tin, mini tart pans or even a silicone cupcake tray can work, but you might lose some crispiness on the edges. I keep a budget-friendly muffin tin in my kitchen—it’s one of those tools that pays off over and over for snacks and desserts. Plus, cleaning a metal pan is quicker when you spray it with a bit of non-stick spray before using.
Preparation Method
- Preheat your oven to 375°F (190°C). This temperature crisps the tortilla shells nicely without burning. Grease your muffin tin lightly with cooking spray or brush with olive oil to prevent sticking.
- Prepare the tortilla cups: Cut each 6-inch tortilla into quarters. Gently press each quarter into the muffin tin cups, shaping them into little bowls. Brush the tops lightly with olive oil or melted butter for that golden crunch.
- Cook the filling: Heat a skillet over medium heat. Add a splash of olive oil and sauté diced onions until translucent (about 3 minutes). Add minced garlic and cook for another 30 seconds until fragrant.
- Add the ground beef: Crumble it into the pan, season with salt, pepper, and your taco seasoning mix (about 1 tablespoon). Cook, stirring occasionally, until the meat is browned and cooked through (about 7-8 minutes). Drain any excess fat if needed.
- Assemble the taco cups: Spoon a tablespoon of the beef mixture into each tortilla cup. Sprinkle shredded cheddar cheese generously over the top.
- Bake the cups: Place the muffin tin in the oven and bake for 12-15 minutes. You’re looking for crispy, golden edges on the tortillas and melted, bubbly cheese on top.
- Garnish and serve: Once out of the oven, let the cups cool for a couple of minutes (they’ll firm up). Top with chopped cilantro and jalapeños if you like a little heat. Serve warm or at room temperature.
Pro tip: Don’t overfill the cups; too much filling can make them soggy or harder to pick up. Also, if your tortillas feel dry or crackly, try warming them slightly in the microwave before cutting—they’re easier to shape that way.
Cooking Tips & Techniques
Here’s what I’ve learned from making these crispy mini taco cups countless times (and yes, a few burnt batches too):
- Use fresh tortillas when possible: Older tortillas can crack when shaping. If you only have day-old ones, warm them slightly to regain flexibility.
- Brush with fat: Olive oil or melted butter on the edges before baking makes a big difference in crispiness and flavor.
- Don’t skip draining fat: If your beef releases a lot of grease, drain it to keep the cups from getting greasy or soggy.
- Season well: Taco seasoning is the heart of the flavor. I usually tweak the mix to get it just right—adding a pinch of smoked paprika and a touch of sugar balances things out.
- Mind the bake time: Check the cups at 12 minutes. Ovens vary, and you want golden edges without burning.
- Multitasking tip: While the filling cooks, prep your toppings and shape the tortilla cups to save time.
- Leftovers reheat well: Pop them back in the oven for a few minutes to regain crispiness—microwaving can make the tortillas soggy.
Variations & Adaptations
These mini taco cups are super versatile. Here are some ways I’ve mixed it up or seen others customize for different tastes and occasions:
- Vegetarian: Swap the meat for seasoned black beans or lentils. I add a bit of cumin and smoked paprika to keep the flavor punchy.
- Cheese options: Try pepper jack for a spicy kick or mozzarella for a milder, gooey texture.
- Seafood twist: Use cooked, diced shrimp with a squeeze of lime and fresh cilantro for a fresh take.
- Spicy version: Add diced jalapeños or a dash of hot sauce to the filling. I’ve also sprinkled some crushed red pepper flakes on top before baking.
- Gluten-free: Use corn tortillas (handle carefully) or a gluten-free tortilla variety to accommodate dietary needs.
One variation I tried was adding a bit of sautéed bell pepper and corn to the beef mix—added sweetness and texture that everyone loved. For a more indulgent party snack, I sometimes drizzle sour cream or a creamy cilantro-lime sauce over the cups just before serving.
Serving & Storage Suggestions
These crispy mini taco cups are best served warm or at room temperature, so they keep their crunch but aren’t too hot to handle. I often arrange them on a platter garnished with fresh cilantro and lime wedges for a bright, festive look.
They go great alongside dips like guacamole, salsa, or a creamy hot salsa dip that I’ve made before for other parties. For a full spread, pair with other handheld favorites like crispy baked turkey sliders or crunchy taco cups for variety.
For storing, keep leftover cups in an airtight container in the refrigerator for up to 3 days. To reheat, pop them back in a 350°F (175°C) oven for 5-7 minutes to bring back that crisp texture. Avoid microwaving if you want to preserve crunchiness.
Flavors tend to deepen slightly after a day, so they’re actually pretty nice the next day if you want to prepare ahead for the party.
Nutritional Information & Benefits
Each mini taco cup packs a satisfying mix of protein, fat, and carbs, making it a more balanced snack than many typical party bites. Using lean ground beef keeps the fat content reasonable, while the cheese adds calcium and richness.
The fresh ingredients like onion, garlic, and cilantro bring antioxidants and vitamins to the mix. Plus, making these at home means you can control the salt and spice levels—good news if you’re watching sodium.
If you need to lower carbs, using smaller tortillas or swapping in whole wheat or low-carb tortillas helps. Gluten-free eaters can easily substitute corn or specialty tortillas to fit their needs.
Overall, these mini taco cups offer a satisfying snack that feels indulgent but can be part of a balanced party spread.
Conclusion
It’s funny how the simplest recipes sometimes become the most memorable. These crispy mini taco cups hit that sweet spot of being easy, tasty, and perfectly sized for celebrations, especially graduation parties where everyone’s hungry but no one wants to miss a moment of fun.
Feel free to tweak the fillings, spice levels, or cheese types to suit your crew’s taste buds. That’s part of what makes them so great—you can make them your own without fuss.
For me, they’re a reliable crowd-pleaser that brings people together around the snack table, no matter the occasion. If you try them out, I’d love to hear how you customize the recipe or what party they became your go-to for. Here’s to many more delicious celebrations!
FAQs
- Can I make these mini taco cups ahead of time?
Yes! You can prepare the filling and shape the tortilla cups a few hours before baking. Store the assembled but unbaked cups in the fridge and bake just before serving. - What’s the best way to keep the taco cups crispy?
Bake them just until golden and avoid microwaving leftovers. Reheating in the oven helps maintain crispiness. - Can I use corn tortillas instead of flour?
You can, but corn tortillas are more fragile. Warm them slightly before shaping, and be gentle when pressing into the muffin tin. - Is there a vegetarian version of this recipe?
Absolutely! Swap the beef with seasoned black beans, lentils, or a plant-based meat substitute. - How many mini taco cups does this recipe make?
Using 6-inch tortillas cut into quarters, you’ll get about 24 mini taco cups, perfect for parties and gatherings.
Pin This Recipe!
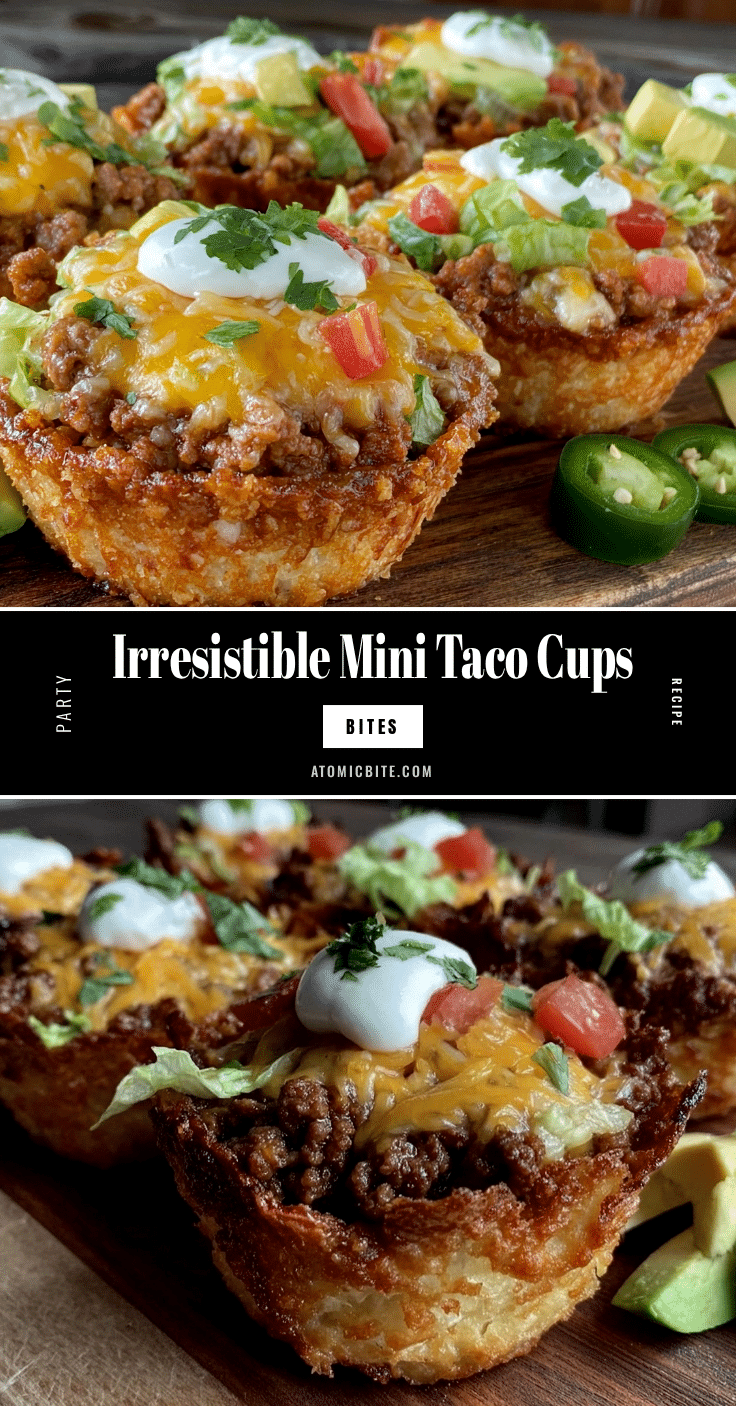
Crispy Mini Taco Cups

These crispy mini taco cups are a quick, easy, and crowd-pleasing snack perfect for graduation parties or casual get-togethers. Made with small tortillas filled with seasoned ground beef and cheese, they offer a satisfying crunch and bold flavor.
- Prep Time: 15 minutes
- Cook Time: 15 minutes
- Total Time: 30 minutes
- Yield: 24 mini taco cups 1x
- Category: Snack
- Cuisine: Mexican
Ingredients
- Small flour tortillas (6-inch size)
- 1 lb ground beef (85% lean)
- 1/2 cup yellow onion, finely diced
- 2 garlic cloves, minced
- 1 tablespoon taco seasoning (chili powder, cumin, smoked paprika, oregano)
- 1 cup shredded cheddar cheese
- Fresh cilantro, chopped (optional)
- 1 jalapeño, finely chopped (optional)
- Olive oil or melted butter (for brushing)
- Salt and pepper, to taste
Instructions
- Preheat your oven to 375°F (190°C). Lightly grease a muffin tin with cooking spray or brush with olive oil.
- Cut each 6-inch tortilla into quarters. Gently press each quarter into the muffin tin cups to form small bowls. Brush the tops lightly with olive oil or melted butter.
- Heat a skillet over medium heat. Add a splash of olive oil and sauté diced onions until translucent, about 3 minutes. Add minced garlic and cook for another 30 seconds until fragrant.
- Add ground beef to the skillet. Season with salt, pepper, and taco seasoning. Cook, stirring occasionally, until browned and cooked through, about 7-8 minutes. Drain excess fat if needed.
- Spoon about 1 tablespoon of the beef mixture into each tortilla cup. Sprinkle shredded cheddar cheese generously over the top.
- Bake the cups in the oven for 12-15 minutes until the edges are crispy and golden and the cheese is melted and bubbly.
- Let the cups cool for a couple of minutes to firm up. Garnish with chopped cilantro and jalapeños if desired. Serve warm or at room temperature.
Notes
Use fresh tortillas for easier shaping; warm day-old tortillas slightly before cutting. Brush tortillas with olive oil or melted butter for extra crispiness. Drain excess fat from beef to avoid soggy cups. Avoid microwaving leftovers to keep crispiness; reheat in oven instead. Don’t overfill cups to prevent sogginess. Corn tortillas can be used but are more fragile.
Nutrition
- Serving Size: 1 mini taco cup
- Calories: 80
- Sugar: 0.5
- Sodium: 150
- Fat: 5
- Saturated Fat: 2
- Carbohydrates: 6
- Fiber: 0.5
- Protein: 5
Keywords: mini taco cups, crispy taco cups, party snacks, graduation party food, easy taco recipe, finger foods, ground beef tacos


