Can you imagine that moment when you pull a tray of Crunchy Taco Cups from the oven and the golden tortilla shells are practically singing with that irresistible, toasty aroma? I swear, the sizzle and crunch hit your senses all at once. Every bite is a perfect mix of crispy shell, savory taco filling, and gooey melted cheese—exactly the kind of thing that makes you pause, grin, and maybe even do a happy dance right there in the kitchen.
The first time I whipped these up, it was on a rainy Saturday afternoon with my kids hovering nearby—hungry, curious, and a little impatient (as they usually are). I was trying to reinvent taco night with something easier to grab and more fun to eat. When those Crunchy Taco Cups came out, the whole crew went wild. My youngest, who’s usually picky, snagged three before I could even blink! I knew I’d stumbled onto something special, and honestly, I wish I’d discovered this party snack years ago.
These little cups have quickly become a staple at our family gatherings. They’re pure, nostalgic comfort—dangerously easy, totally customizable, and just plain addictive. Whether you’re hosting game night, needing a sweet treat for your kids after school, or looking to brighten up your Pinterest board (let’s face it, these Crunchy Taco Cups are photogenic!), you’re going to want to bookmark this recipe. I’ve tested them more times than I’d care to admit—in the name of research, of course—and they never last long. They feel like a warm hug in snack form, and if you’re anything like me, you’ll be making them again and again.
Why You’ll Love These Crunchy Taco Cups
Let me lay it out for you—these Crunchy Taco Cups are the kind of snack everyone talks about long after the party ends! From my kitchen experiments (and a few recipe flops), I’ve dialed in a version that’s reliable, flavorful, and absolutely irresistible.
- Quick & Easy: You’ll have a batch ready in under 30 minutes, which is perfect for those surprise guests or last-minute cravings.
- Simple Ingredients: No need for a fancy grocery run—you probably already have everything you need waiting in your pantry.
- Perfect for Parties: These Crunchy Taco Cups shine at birthday bashes, movie nights, tailgates, and potlucks. They’re basically built for sharing (though I won’t judge if you keep a few for yourself).
- Crowd-Pleaser: Kids, teens, adults—everyone grabs seconds. They’re finger food, so no forks or fuss.
- Unbelievably Delicious: Crispy shell on the outside, savory taco filling inside, and that gooey cheese pull—need I say more?
What sets this Crunchy Taco Cups recipe apart? For one, I use just five crispy tortilla shells, cut and molded so every cup is perfectly crunchy without getting soggy. Plus, the filling is seasoned just right—never bland or greasy. You can swap in ground turkey, chicken, or black beans (if you’re feeling veggie), and still get that classic taco taste.
This isn’t just good—it’s the kind of snack that makes your eyes close and your shoulders relax after the first bite. It’s comfort food, but lighter and quicker than traditional tacos. You can prep ahead, wow your friends, and clean up in a flash. Trust me, if you want a no-stress way to impress, these Crunchy Taco Cups are it.
What Ingredients You Will Need
Here’s what you’ll need to make these Crunchy Taco Cups shine. I love that nearly everything is a pantry staple, with easy swaps for whatever you have on hand. The combination of basic ingredients gives you bold flavor and that crispy bite—without any complicated steps.
For the Crunchy Shells:
- 5 small flour or corn tortillas (6-inch; flour gets extra crispy, corn adds classic flavor)
- Cooking spray or a drizzle of olive oil (helps those shells crisp up perfectly)
For the Taco Filling:

- 1/2 lb (225g) ground beef (or ground turkey/chicken for a lighter option)
- 1/2 small onion, finely chopped (adds sweetness and depth)
- 1 clove garlic, minced (a little kick!)
- 2 tbsp taco seasoning (store-bought or homemade; I love McCormick for classic flavor)
- 1/4 cup (60ml) tomato sauce or salsa (salsa gives a punch of freshness)
- Salt and pepper, to taste
For the Cheese & Toppings:
- 1/2 cup (60g) shredded cheddar cheese (or Monterey Jack for a creamier melt)
- 1/4 cup (60g) sour cream (for topping; swap with Greek yogurt for a lighter touch)
- 1/4 cup (30g) diced tomatoes or pico de gallo (for color and zing)
- 2 tbsp chopped fresh cilantro (optional, but highly recommended!)
- 1/4 cup shredded lettuce (adds crunch and freshness)
- Hot sauce, to taste (optional, for those who like a kick)
If you’re gluten-free, use corn tortillas. Dairy-free? Skip the cheese or use a plant-based alternative. For vegetarians, switch out the meat for black beans or lentils—trust me, it works. In summer, fresh diced avocado or grilled corn makes a great addition. You can always customize with your favorite taco fixings, just keep those shells crunchy!
Equipment Needed
- Muffin Tin (12-cup): This is the magic tool for shaping those Crunchy Taco Cups. I use a standard non-stick tin, but a silicone muffin pan also works (and cleanup’s a breeze).
- Cookie Cutter (3-4 inch round): For cutting tortillas into perfect circles. If you don’t have one, use a glass or even scissors (I’ve done both on lazy days).
- Non-stick Skillet: For browning the taco filling. Cast iron works, but any sturdy pan will do.
- Small Mixing Bowl: For tossing toppings or mixing taco seasoning.
- Measuring Cups & Spoons: For getting those ratios just right.
- Spatula or Wooden Spoon: For stirring your filling—nothing fancy needed.
If you’re short on tools, don’t stress. Muffin tins are cheap at most stores, and I’ve had good results with thrifted ones too. Just keep your equipment clean and dry for crispier shells. As for maintenance, a quick soak and gentle scrub keeps non-stick pans happy. If your cutter gets dull, sharpen it with a little foil—old-school trick from my grandma!
How to Make Crunchy Taco Cups – Step by Step
-
Prep the Tortilla Shells: Preheat your oven to 375°F (190°C). Coat your muffin tin with cooking spray. Use the cookie cutter (or glass) to cut 5 tortillas into rounds that fit snugly into the muffin cups. Press each tortilla round into the tin, making sure they form little cups—edges should stand up but not flop over.
Tip: If tortillas feel stiff, microwave them for 10 seconds to soften. This keeps them from cracking. -
Brush and Crisp: Lightly brush or spray the tortilla cups with olive oil. Bake for 7-8 minutes until lightly golden and starting to crisp. Keep an eye out—if edges brown too quickly, cover loosely with foil.
Sensory cue: Shells should smell toasty and feel firm to the touch. -
Prepare the Filling: While shells bake, heat a non-stick skillet over medium-high. Add ground beef and chopped onion. Cook for about 4-5 minutes, breaking up meat until browned and onions are translucent. Stir in garlic, taco seasoning, tomato sauce (or salsa), and a pinch of salt and pepper.
Note: If mixture seems dry, add a splash of water or extra salsa. -
Fill the Cups: Remove baked tortilla cups from oven. Spoon about 2 tablespoons (30g) of taco filling into each shell. Sprinkle shredded cheese on top.
Tip: Don’t overfill—leave a little space at the top for toppings. -
Bake Again: Return filled cups to oven and bake for 7-8 more minutes, until cheese is melted and shells are deeply golden.
Sensory cue: Cheese should bubble and shells should be crisp when tapped. -
Add Toppings: Cool cups slightly (about 5 minutes). Top each with a dollop of sour cream, tomatoes, lettuce, cilantro, and hot sauce if you like.
Warning: Cups will be hot—don’t burn your fingers! - Serve and Enjoy: Gently lift each Crunchy Taco Cup out of the tin (use a spoon if needed). Plate and serve immediately for best crunch. If you’re batch cooking, keep cups warm in a low oven.
Efficiency tip: Prep toppings while the shells bake to save time. If you’re making a double batch, stagger filling so nothing gets cold. For parties, line up all the ingredients and let guests top their own—makes things more interactive and fun!
Crunchy Taco Cup Cooking Tips & Techniques
I’ve made more than my share of Crunchy Taco Cups, and here’s what actually works (and what sometimes flops):
- Don’t Overfill: Too much filling makes the shells soggy and hard to remove. Less is more (trust me).
- Pre-bake Shells: This step is non-negotiable for crunch. If you skip it, you’ll end up with limp, chewy cups—learned that the hard way.
- Use Fresh Tortillas: Stale or dry tortillas crack and won’t mold well. If yours are stiff, a quick zap in the microwave fixes them right up.
- Even Cheese Distribution: Sprinkle cheese evenly so every bite melts just right. Clumped cheese can burn or turn rubbery.
- Watch Oven Times: Ovens vary—keep an eye on the first batch. If your cups brown too fast, lower the temp by 10°F (5°C).
- Multitask: Prep your toppings while the shells are baking to keep things moving. Kids can help with this part—mine love grating cheese.
- Consistency: Always use the same size tortillas and muffin cups for even results. If you swap in a jumbo muffin tin, increase cooking time by 2-3 minutes.
Honestly, I’ve forgotten the pre-bake step before and ended up with a mushy mess. Now I always set a timer. And if you want that signature crunch, don’t let the shells sit too long before serving. Serve them fresh and piping hot!
Variations & Adaptations
One of the best things about Crunchy Taco Cups is how flexible they are. You can play with flavors, fillings, and toppings to suit just about anyone’s taste buds (and dietary needs).
- Vegetarian Option: Swap ground beef for black beans, lentils, or a mix of sautéed mushrooms. Add corn and bell peppers for extra color.
- Spicy Kick: Add diced jalapeños to the filling or use pepper jack cheese. A drizzle of chipotle sauce on top is amazing.
- Low-Carb Swap: Use low-carb tortillas or even thinly sliced zucchini as your shell base. I’ve tried this for keto-friendly gatherings—surprisingly delicious!
- Seasonal Variation: In summer, top with fresh diced avocado and grilled corn. In winter, add a spoonful of warm queso or chili beans.
- Dairy-Free: Use a vegan cheese alternative and dairy-free yogurt instead of sour cream.
- Cooking Methods: For air fryer fans, you can crisp the tortilla shells in the basket at 375°F (190°C) for 5-6 minutes.
My personal favorite? Mixing ground turkey with black beans and topping with guacamole—makes a lighter, protein-packed version that still gets rave reviews. Don’t be afraid to experiment and make these Crunchy Taco Cups your own!
Serving & Storage Suggestions
Crunchy Taco Cups are best served fresh and hot—straight from the oven. That crunch is unbeatable! Arrange them on a colorful platter, sprinkle with extra cilantro, and watch them disappear at any gathering.
- Serving Temperature: Warm is ideal. If you’re prepping ahead, you can keep them in a low (200°F/90°C) oven for up to 30 minutes before serving.
- Presentation: For Pinterest-worthy style, top each cup with a swirl of sour cream, diced tomatoes, and a sprinkle of green onions.
- Pairings: Serve alongside salsa, guacamole, or a simple slaw. They go great with iced tea, margaritas, or even sparkling water with lime.
- Storage: Leftovers (if you have any!) keep in an airtight container in the fridge for up to 3 days. The shells soften but still taste great.
- Reheating: Pop them in a 350°F (175°C) oven for 6-8 minutes to revive some crunch. Avoid the microwave—it makes them chewy.
- Flavor Development: The taco filling deepens overnight, so you can prep the filling ahead and assemble just before baking.
Pro tip: If you’re making a big batch, keep toppings separate and let guests customize. Makes for a fun (and less soggy) party experience!
Nutritional Information & Benefits
Each Crunchy Taco Cup (with beef, cheese, and standard toppings) clocks in around 150-180 calories, with about 8g protein, 10g carbs, and 9g fat. If you use turkey or beans, you cut the fat and bump up fiber.
- Protein: Ground beef or turkey provides a solid protein punch.
- Whole Grains: Corn tortillas add fiber and classic flavor.
- Veggie Boost: Tomatoes, lettuce, and salsa give you vitamins A, C, and K.
- Customizable for Diets: Gluten-free with corn tortillas, dairy-free with vegan toppings, and low-carb with alternate shells.
- Allergens: Contains wheat and dairy (substitute as noted above for allergies).
From my perspective, these Crunchy Taco Cups let you sneak in veggies and control portion size—great for guilt-free snacking. I always feel good serving them because I know exactly what’s inside.
Conclusion
If you’re searching for the ultimate party snack, these Crunchy Taco Cups are a total winner. They’re easy, quick, and always a hit—whether you’re feeding picky kids or hungry adults. I love them because they bring everyone together, spark conversation, and taste like pure comfort in a crunchy shell.
Don’t be afraid to swap fillings or tweak toppings to match your cravings. That’s the beauty of this recipe—make it yours! Honestly, Crunchy Taco Cups have become a go-to in my house for every occasion, big or small.
I hope you give them a try and let me know how you customize yours. Drop a comment, share your photos, and tell me what you think. Happy snacking, and may your parties be extra crunchy!
Frequently Asked Questions
Can I make Crunchy Taco Cups ahead of time?
Yes! Prep the filling and shells separately, then assemble and bake right before serving for max crunch.
What’s the best way to reheat Crunchy Taco Cups?
Reheat in a 350°F (175°C) oven for 6-8 minutes. Avoid microwaving—the shells will get chewy.
Can I freeze Crunchy Taco Cups?
You can freeze the filling, but the shells don’t hold up well. If you must, wrap baked cups tightly and reheat in the oven.
Are Crunchy Taco Cups gluten-free?
Use corn tortillas for a gluten-free version. Double-check your taco seasoning for hidden wheat.
What fillings can I use besides beef?
Try ground turkey, shredded chicken, black beans, lentils, or sautéed veggies. The recipe is super flexible!
Pin This Recipe!

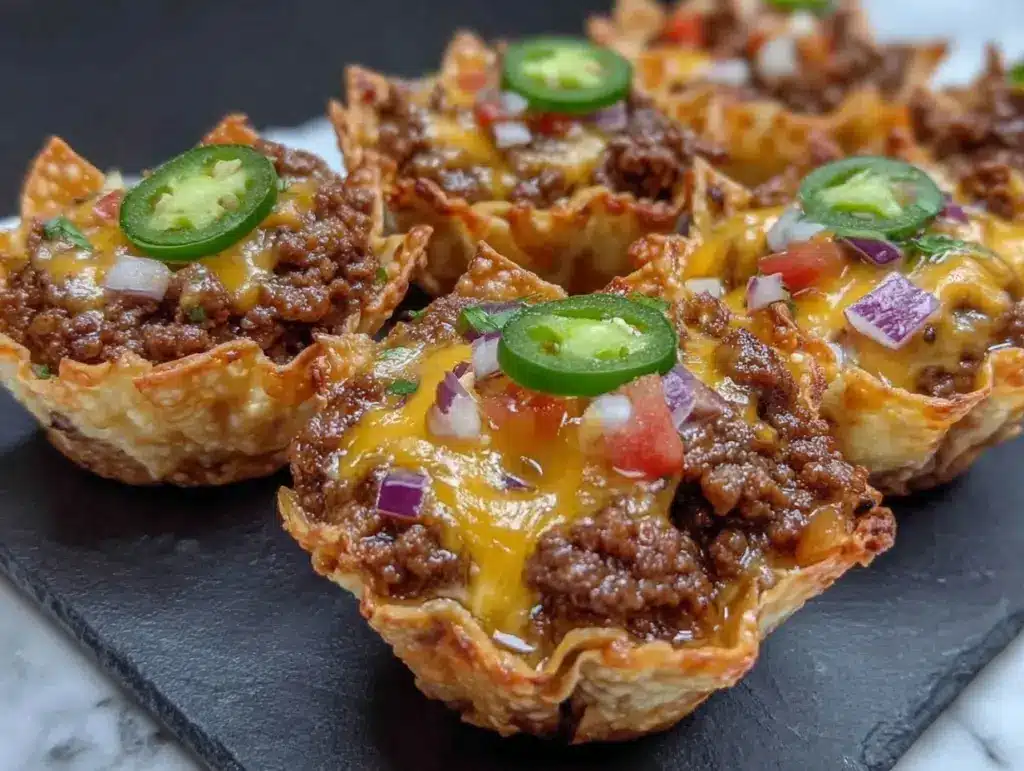
Crunchy Taco Cups

These Crunchy Taco Cups are a quick, easy, and crowd-pleasing party snack featuring crispy tortilla shells, savory taco filling, and gooey melted cheese. Perfect for gatherings, game nights, or a fun twist on taco night, they’re customizable and ready in under 30 minutes.
- Prep Time: 10 minutes
- Cook Time: 16 minutes
- Total Time: 26 minutes
- Yield: 10 taco cups (serves 4-5 as a snack or appetizer) 1x
- Category: Appetizer
- Cuisine: Mexican
Ingredients
- 5 small flour or corn tortillas (6-inch)
- Cooking spray or a drizzle of olive oil
- 1/2 lb ground beef (or ground turkey/chicken)
- 1/2 small onion, finely chopped
- 1 clove garlic, minced
- 2 tbsp taco seasoning
- 1/4 cup tomato sauce or salsa
- Salt and pepper, to taste
- 1/2 cup shredded cheddar cheese (or Monterey Jack)
- 1/4 cup sour cream (or Greek yogurt)
- 1/4 cup diced tomatoes or pico de gallo
- 2 tbsp chopped fresh cilantro (optional)
- 1/4 cup shredded lettuce
- Hot sauce, to taste (optional)
Instructions
- Preheat oven to 375°F (190°C). Coat a muffin tin with cooking spray.
- Use a 3-4 inch round cookie cutter or glass to cut tortillas into rounds that fit snugly into the muffin cups. Press each tortilla round into the tin to form cups.
- Lightly brush or spray the tortilla cups with olive oil. Bake for 7-8 minutes until lightly golden and starting to crisp. If edges brown too quickly, cover loosely with foil.
- While shells bake, heat a non-stick skillet over medium-high. Add ground beef and chopped onion. Cook for about 4-5 minutes, breaking up meat until browned and onions are translucent.
- Stir in garlic, taco seasoning, tomato sauce (or salsa), and a pinch of salt and pepper. If mixture seems dry, add a splash of water or extra salsa.
- Remove baked tortilla cups from oven. Spoon about 2 tablespoons of taco filling into each shell. Sprinkle shredded cheese on top.
- Return filled cups to oven and bake for 7-8 more minutes, until cheese is melted and shells are deeply golden.
- Cool cups slightly (about 5 minutes). Top each with a dollop of sour cream, tomatoes, lettuce, cilantro, and hot sauce if desired.
- Gently lift each Crunchy Taco Cup out of the tin and serve immediately.
Notes
For best results, pre-bake the shells to keep them crunchy. Don’t overfill the cups or they may get soggy. Use fresh tortillas for easy molding. Customize with your favorite fillings and toppings—try black beans for vegetarian, or low-carb tortillas for keto. Serve immediately for maximum crunch. Prep toppings while shells bake to save time.
Nutrition
- Serving Size: 1 taco cup
- Calories: 170
- Sugar: 1
- Sodium: 350
- Fat: 9
- Saturated Fat: 4
- Carbohydrates: 10
- Fiber: 1
- Protein: 8
Keywords: taco cups, party snack, crunchy tacos, easy appetizer, Mexican snack, kid-friendly, game day, finger food, muffin tin tacos