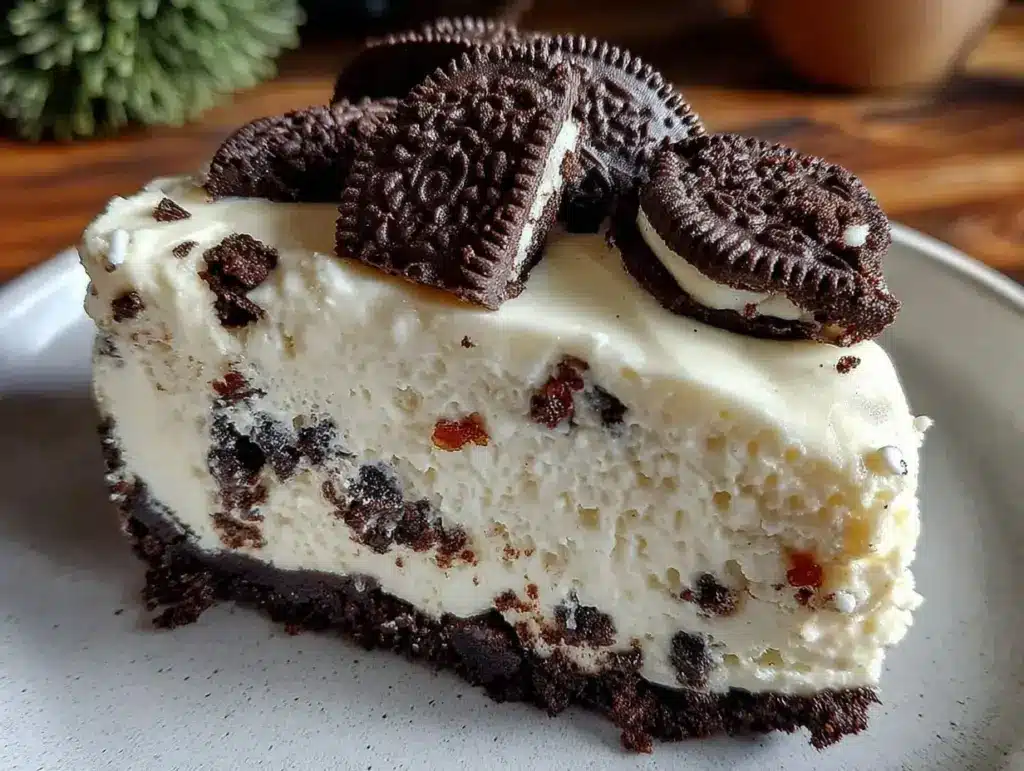
“You’ve got to try this,” my friend Sarah texted me late one Friday night, attaching a photo of a luscious, Oreo-studded cheesecake that looked way too good for a midnight craving. Honestly, I was skeptical at first—no-bake cheesecakes always sounded like a bit of a shortcut to me, something you whipped up when you didn’t have time or just didn’t want to deal with an oven. But that photo? The creamy texture, the perfect Oreo crunch, and that subtle sheen on top—it sparked something. So, I gave it a go.
What happened next was a bit of a revelation. The Creamy No-Bake Oreo Cheesecake Delight wasn’t just easy; it was downright addictive. I found myself making it a couple of times that week, tweaking a bit here and there, just to perfect that balance between smooth cheesecake filling and crunchy cookie crust. And you know, it’s funny how this recipe slipped right into my regular rotation, especially on evenings when I just wanted dessert without the fuss.
The whole process feels like a cozy little secret. No oven preheating, no anxiety about cracked tops or overbaking—just pure, creamy indulgence with the nostalgic crunch of Oreo cookies. Plus, it’s a dessert that never fails to draw compliments. I remember one afternoon, after bringing this cheesecake to a casual get-together, everyone kept asking if I’d baked it. When I said “no-bake,” jaws dropped. It’s one of those recipes that feels fancy but is honestly super chill.
That’s why this recipe stuck with me. It’s simple, satisfying, and has that kind of comfort-food charm that makes you pause and enjoy each bite. If you’re looking for a dessert that’s creamy and rich but doesn’t demand hours in the kitchen, this is a quiet little winner.
Why You’ll Love This Creamy No-Bake Oreo Cheesecake Delight Recipe
After testing countless cheesecake recipes, I can say this one hits the sweet spot between ease and indulgence. Here’s why I keep coming back to this Creamy No-Bake Oreo Cheesecake Delight:
- Quick & Easy: Ready in under 30 minutes, no oven needed—perfect for busy weeknights or last-minute dessert emergencies.
- Simple Ingredients: Uses everyday pantry staples like cream cheese and Oreos, so no last-minute grocery runs.
- Perfect for Gatherings: Whether it’s a birthday, potluck, or casual brunch, this cheesecake fits right in.
- Crowd-Pleaser: Kids, adults, even picky eaters ask for seconds (and thirds).
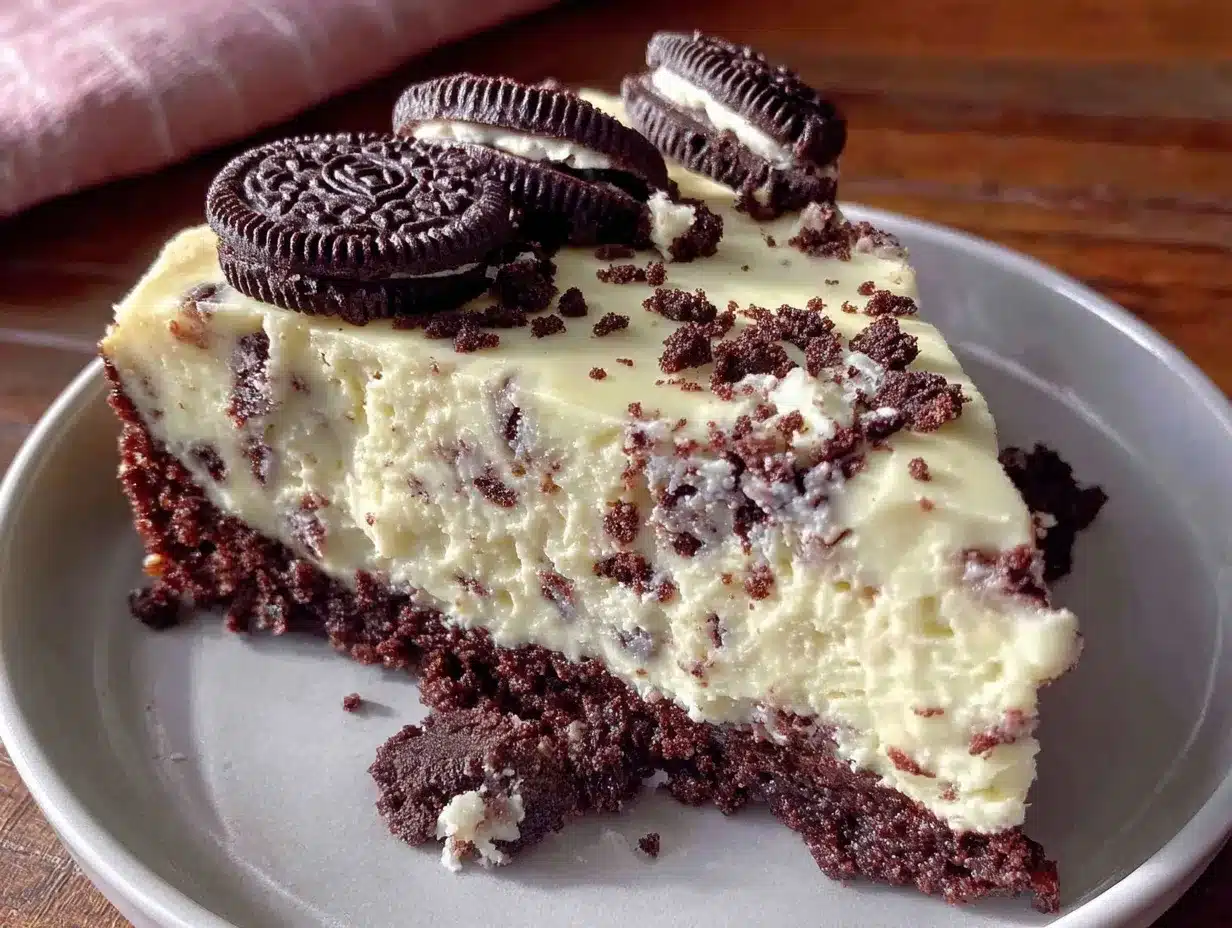
- Unbelievably Delicious: The creamy, velvety filling contrasts perfectly with the crunchy Oreo crust and bits throughout.
This recipe isn’t just another no-bake cheesecake. It’s the kind where the Oreo crust stays crisp yet melds beautifully with the filling, thanks to a special step of chilling that locks in that texture. Plus, blending the cream cheese just right gives you an ultra-smooth finish—no lumps, no weird graininess.
It’s comfort food in a dessert form—rich but not heavy, sweet but not cloying. If you want to impress without sweating the details, this cheesecake does exactly that. And if you ever need a break from baking, it’s a go-to that never disappoints.
What Ingredients You Will Need
This recipe calls for straightforward, wholesome ingredients that come together for bold flavor and that signature creamy texture. Most are pantry staples, and you might already have them on hand.
- Oreo Cookies (about 24 cookies, finely crushed for the crust plus some chopped for the topping) – I prefer the classic variety for that perfect chocolate-vanilla combo.
- Unsalted Butter (6 tablespoons / 85 grams, melted) – helps bind the crust and adds richness.
- Cream Cheese (16 ounces / 450 grams, softened) – use full-fat for best creaminess; brands like Philadelphia work well.
- Powdered Sugar (3/4 cup / 90 grams) – smooth sweetness that blends effortlessly.
- Heavy Whipping Cream (1 cup / 240 ml, cold) – whipped to soft peaks to fold into the filling for lightness.
- Vanilla Extract (1 teaspoon) – adds depth and rounds out the flavor.
- Optional: A pinch of salt to balance the sweetness.
Substitution tips: For a lighter option, swap heavy cream with full-fat coconut milk whipped until fluffy. If you want a gluten-free crust, substitute Oreo cookies with gluten-free chocolate sandwich cookies.
In summer, you might try adding fresh berries on top to brighten the flavor, or even swapping the crust for a graham cracker base if Oreos aren’t your thing. But honestly, the classic Oreo combo is hard to beat.
Equipment Needed
- 9-inch (23 cm) springform pan or pie dish – makes unmolding the cheesecake easier.
- Mixing bowls – medium and large sizes for crust and filling.
- Electric mixer or stand mixer – essential for whipping cream and creaming the cheese smooth.
- Spatula – for folding ingredients gently.
- Food processor or rolling pin and zip-top bag – to crush Oreo cookies finely for the crust.
- Measuring cups and spoons – accuracy helps with texture.
If you don’t have a stand mixer, a hand mixer works fine. For crushing Oreos, pounding with a rolling pin inside a sealed bag works just as well as a processor—just be careful not to pulverize into dust unless you want that!
Personally, I find a springform pan is a game-changer for no-bake cheesecakes because you can remove the sides and show off the layers without any mess. If you’re on a budget, a regular pie dish lined with parchment paper can do the trick, though serving might be a bit trickier.
Preparation Method
- Prepare the crust: Crush 20 Oreos finely using a food processor or by placing them in a zip-top bag and rolling with a pin until you have fine crumbs. Transfer to a bowl and mix with melted butter until the crumbs are evenly coated and look like wet sand. This should take about 5 minutes.
- Press the crust: Firmly press the Oreo mixture into the bottom of your springform pan (or pie dish), creating an even layer about 1/2 inch thick (about 1.25 cm). Use the bottom of a glass or measuring cup for an even finish. Chill in the fridge for at least 15 minutes to set the crust while preparing the filling.
- Make the filling: In a large bowl, beat the softened cream cheese until smooth and creamy, about 2-3 minutes on medium speed. Gradually add powdered sugar and vanilla extract, beating until fully combined and silky.
- Whip the cream: In a separate chilled bowl, whip the heavy cream until soft peaks form. This usually takes around 3-4 minutes with an electric mixer. Be careful not to overwhip—it should be light and airy.
- Fold whipped cream into cream cheese mixture: Gently fold the whipped cream into the cream cheese mixture in three additions. Use a spatula to fold carefully to keep the filling light and fluffy while fully blending the ingredients.
- Add chopped Oreos: Chop the remaining 4 Oreos into small chunks and fold them into the filling for bursts of cookie crunch throughout the cheesecake. This adds texture and surprise in every bite.
- Assemble and chill: Spoon the filling over the chilled crust, smoothing the top with a spatula. Cover with plastic wrap and refrigerate for at least 4 hours, ideally overnight, to allow the cheesecake to set fully.
- Serve: Before serving, garnish with extra Oreo pieces or whipped cream if desired. Run a warm knife around the edges of the pan to loosen the cheesecake for a clean release.
Pro tip: If your cream cheese is too cold, it can create lumps—so take it out and let it soften at room temperature for about 30 minutes before starting. Also, chilling the crust well before adding filling helps prevent sogginess. I learned the hard way that skipping this step leads to a less-than-ideal texture!
Cooking Tips & Techniques
Making a no-bake cheesecake sounds simple, but a few tricks can make all the difference. Here’s what experience has taught me:
- Softening cream cheese is key: It should be room temperature for a smooth, lump-free filling. If it’s too cold, beat it longer or briefly microwave (5 seconds at a time) to soften.
- Whip cream carefully: Stop at soft peaks. Overwhipping turns cream grainy and can deflate the mixture, losing that dreamy fluffiness.
- Folding technique: Use a gentle folding motion to combine whipped cream gently into the cream cheese base. No stirring or beating here—otherwise, the filling gets dense.
- Crust crushing: Aim for fine crumbs but not powdery dust. A few larger pieces add texture but too much can make the crust crumbly.
- Chilling time: Don’t rush! Letting the cheesecake chill overnight firms it up and deepens flavors.
- Prevent soggy crust: Press the crust firmly and chill before adding filling—this seals it and keeps texture intact.
My first attempt at this cheesecake was a bit runny because I didn’t whip the cream enough and skipped chilling the crust. Lesson learned: patience and technique matter, even for “easy” recipes.
Try multitasking by prepping the crust while the cream cheese softens, then whip cream and fold while crust chills—that way, you’re efficient and your cheesecake turns out perfect.
Variations & Adaptations
This Creamy No-Bake Oreo Cheesecake Delight is a flexible base that welcomes tweaks for different tastes or dietary needs:
- Chocolate lovers: Mix cocoa powder (about 2 tablespoons) into the cream cheese filling for a double chocolate treat.
- Fruit twist: Swirl in raspberry or strawberry jam into the filling before chilling for a fruity surprise.
- Gluten-free option: Use gluten-free chocolate sandwich cookies for the crust and mix-ins.
- Dairy-free alternative: Swap cream cheese and heavy cream with coconut cream and vegan cream cheese varieties.
- Mini cheesecakes: Make individual servings in muffin tins lined with cupcake papers for party-friendly bites.
I once swapped Oreos for crushed chocolate chip cookies and added a layer of peanut butter in the filling. It was a hit with my peanut butter obsessed friends! The key is to keep the creamy texture and balance of sweet and crunchy.
Serving & Storage Suggestions
This cheesecake is best served chilled, straight from the fridge. The creamy texture and Oreo crunch are at their peak when cold but not frozen solid.
For presentation, I like to garnish with extra crushed Oreos and a dollop of fresh whipped cream or even a drizzle of chocolate sauce. It pairs beautifully with a cup of rich coffee or a cold glass of milk.
Store leftovers covered tightly in the refrigerator for up to 4 days. If you want to keep it longer, freeze the cheesecake for up to one month—just thaw overnight in the fridge before serving.
Reheating isn’t recommended since the filling is best cold, but letting slices sit out for 10 minutes before eating softens the cream cheese just a bit, enhancing mouthfeel.
Flavors actually deepen after a day or two in the fridge, so if you can wait, it tastes even better the next day.
Nutritional Information & Benefits
Each serving of this Creamy No-Bake Oreo Cheesecake Delight offers a rich source of calcium and protein, thanks to the cream cheese and heavy cream. While it’s definitely an indulgence, it’s made with real ingredients—no artificial stabilizers or preservatives.
Per slice (1/12th of the cheesecake), you’re looking at approximately 350 calories, 25 grams of fat, 20 grams of sugar, and 6 grams of protein. This makes it a reasonable treat when balanced with an active lifestyle.
For those watching gluten intake, swapping to gluten-free cookies makes it suitable for gluten sensitivity. The recipe is naturally free from nuts, which is great for allergy-conscious gatherings.
From a wellness perspective, indulging in a dessert that feels homemade and wholesome adds satisfaction without guilt. I find that desserts like this, made from scratch, connect more with mindful eating habits than processed sweets.
Conclusion
The Creamy No-Bake Oreo Cheesecake Delight is a recipe that’s easy to fall in love with for good reason. It’s simple, delicious, and effortlessly impressive without the stress of baking. Whether you’re a seasoned dessert maker or someone looking for a quick treat, this cheesecake fits the bill.
Feel free to make it your own—add your favorite mix-ins, try different crusts, or serve it with fresh fruit. The best part is how reliably it turns out creamy and dreamy every single time.
Honestly, it’s become one of my go-to desserts for casual get-togethers, alongside crowd favorites like the crispy baked turkey sliders and the creamy dill pickle cheese ball. Each one brings something special to the table, but this cheesecake? It’s the sweet note that keeps the night going.
Try it out, and let me know how you customize your cheesecake delight. I’d love to hear your twist!
Frequently Asked Questions About Creamy No-Bake Oreo Cheesecake Delight
Can I use low-fat cream cheese or substitute ingredients to make it healthier?
Yes, you can use low-fat cream cheese, but the texture might be less creamy and a bit tangier. For a healthier spin, try Greek yogurt mixed with cream cheese to lighten the filling.
How long does it take for the cheesecake to set properly?
It needs at least 4 hours in the refrigerator to firm up, but overnight chilling gives the best texture and flavor.
Can I make this cheesecake ahead of time for a party?
Absolutely! It’s perfect for make-ahead dessert plans. Prepare it the day before, and keep it refrigerated until serving.
What if I don’t have a springform pan?
You can use a regular pie dish or any round baking dish lined with parchment paper for easy removal, but slicing and serving might be a little trickier.
Is it possible to freeze this no-bake Oreo cheesecake?
Yes, you can freeze it for up to a month. Wrap it well with foil or plastic wrap, then thaw it overnight in the fridge before serving.
Pin This Recipe!
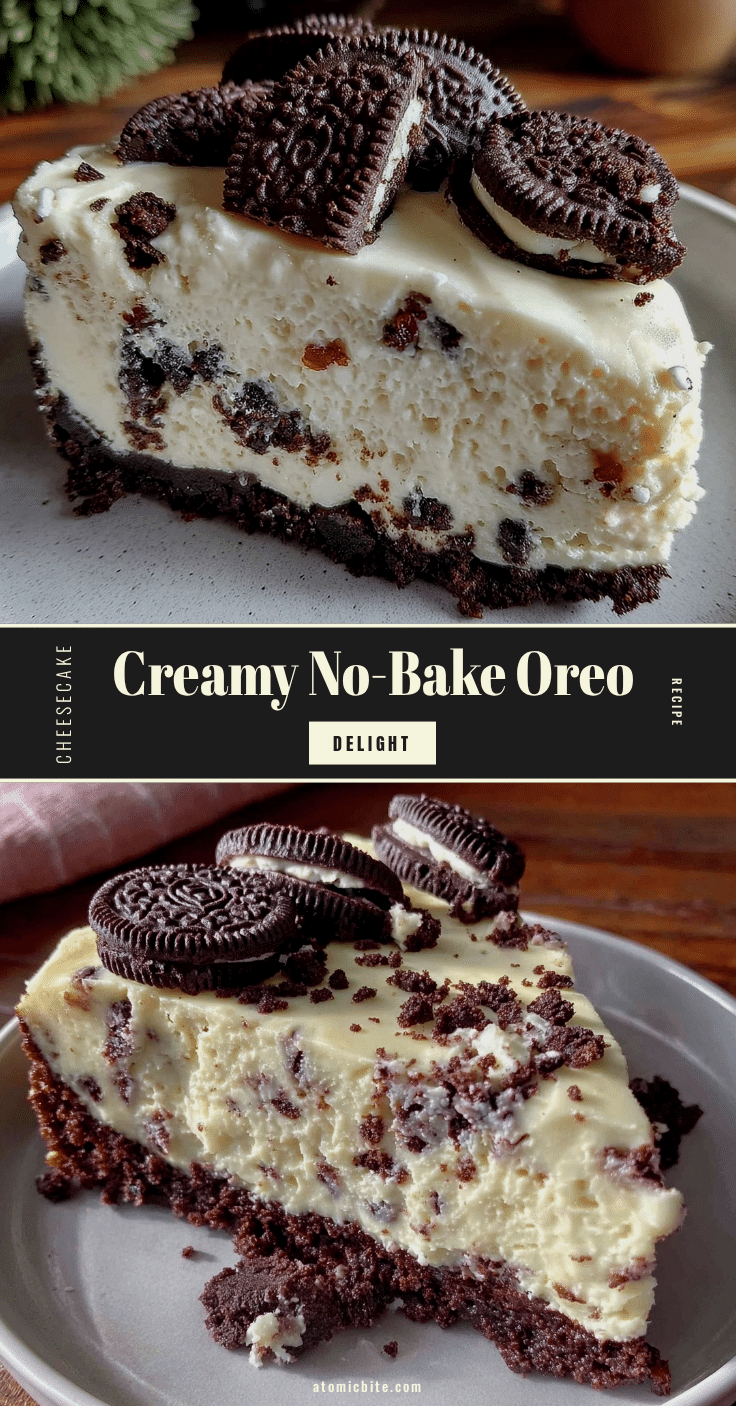
Creamy No-Bake Oreo Cheesecake Delight

A quick and easy no-bake cheesecake featuring a crunchy Oreo crust and a smooth, creamy filling, perfect for gatherings and last-minute desserts.
- Prep Time: 20 minutes
- Cook Time: 0 minutes
- Total Time: 4 hours 20 minutes
- Yield: 12 servings 1x
- Category: Dessert
- Cuisine: American
Ingredients
- 24 Oreo Cookies (finely crushed for crust plus some chopped for topping)
- 6 tablespoons (85 grams) unsalted butter, melted
- 16 ounces (450 grams) cream cheese, softened
- 3/4 cup (90 grams) powdered sugar
- 1 cup (240 ml) heavy whipping cream, cold
- 1 teaspoon vanilla extract
- Pinch of salt (optional)
Instructions
- Crush 20 Oreos finely using a food processor or by placing them in a zip-top bag and rolling with a pin until you have fine crumbs.
- Transfer crumbs to a bowl and mix with melted butter until evenly coated and resembling wet sand, about 5 minutes.
- Press the Oreo mixture firmly into the bottom of a 9-inch springform pan or pie dish, creating an even 1/2 inch thick layer.
- Chill the crust in the refrigerator for at least 15 minutes to set.
- In a large bowl, beat softened cream cheese until smooth and creamy, about 2-3 minutes on medium speed.
- Gradually add powdered sugar and vanilla extract, beating until fully combined and silky.
- In a separate chilled bowl, whip the heavy cream until soft peaks form, about 3-4 minutes.
- Gently fold the whipped cream into the cream cheese mixture in three additions using a spatula to keep the filling light and fluffy.
- Chop the remaining 4 Oreos into small chunks and fold them into the filling.
- Spoon the filling over the chilled crust and smooth the top with a spatula.
- Cover with plastic wrap and refrigerate for at least 4 hours, ideally overnight, to allow the cheesecake to set fully.
- Before serving, garnish with extra Oreo pieces or whipped cream if desired.
- Run a warm knife around the edges of the pan to loosen the cheesecake for a clean release.
Notes
Softening cream cheese to room temperature is key to avoid lumps. Chill the crust well before adding the filling to prevent sogginess. Whip cream to soft peaks only to maintain lightness. Folding whipped cream gently into the cream cheese mixture keeps the filling fluffy. Overnight chilling improves texture and flavor.
Nutrition
- Serving Size: 1 slice (1/12th of c
- Calories: 350
- Sugar: 20
- Fat: 25
- Protein: 6
Keywords: no-bake cheesecake, Oreo cheesecake, easy dessert, no oven dessert, creamy cheesecake, Oreo crust, quick dessert


