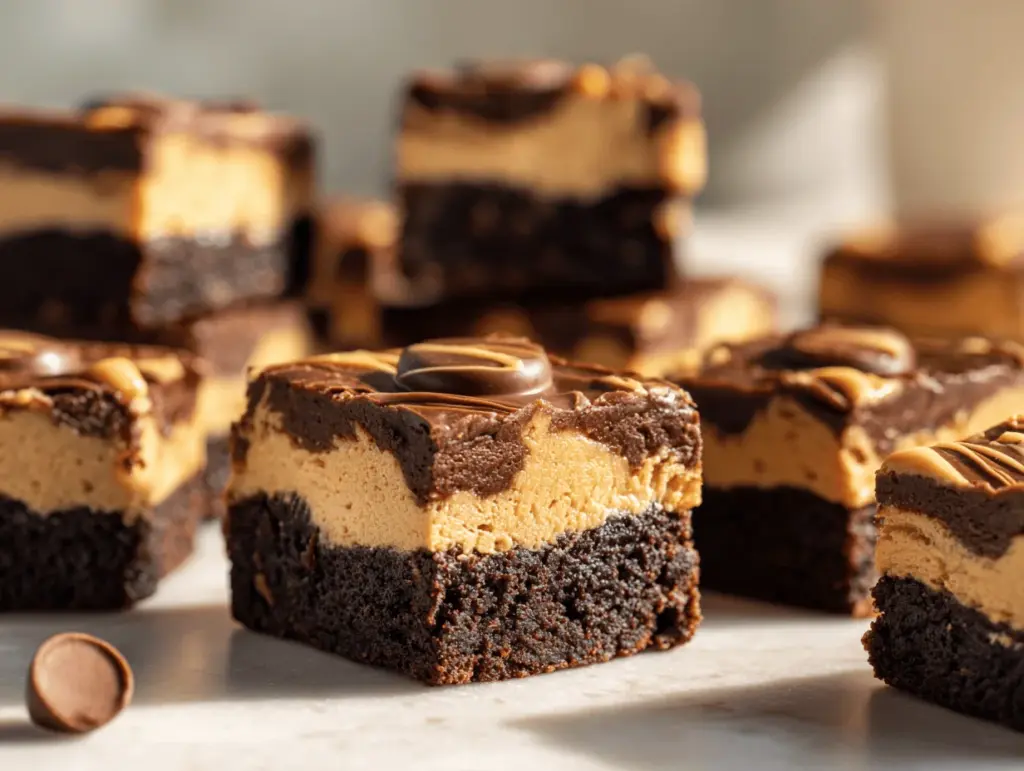
The first time I pulled a pan of these Buckeye Brownie Peanut Butter Blossom Bars from the oven, the aroma was pure magic—like walking into a chocolate shop with a peanut butter twist. My kitchen smelled like every birthday party and bake sale rolled into one. These aren’t just any peanut butter bars; they’re the sort of treat that makes you drop everything for a taste. You get the rich, fudgy base of a brownie, a creamy peanut butter layer, and a chocolatey “blossom” on top. Honestly, it’s the kind of dessert that disappears before it’s cool enough to slice. If you’re a fan of classic buckeye candies or peanut butter blossoms, you’re about to meet your new obsession.
Baking these bars started as a little experiment during a weekend baking spree. I wanted something with all the nostalgia of buckeye balls (that iconic Ohio treat) but with the simplicity of bar form—because, you know, not everyone has time to roll and dip dozens of candies. After tweaking the layers and testing a few different brownie bases, I landed on this recipe. It’s now my go-to for parties, potlucks, and, honestly, just for days when I need a little peanut butter-chocolate fix. These Buckeye Brownie Peanut Butter Bars are indulgent, crowd-pleasing, and so easy to make, you’ll find yourself whipping them up for any excuse.
What makes these bars so irresistible? It’s the perfect marriage of gooey chocolate, smooth peanut butter, and a melty chocolate “kiss” on top—every bite is a little slice of dessert heaven. Whether you’re baking for picky kids, chocolate lovers, or a big family gathering, these bars never disappoint. They’re the result of lots of kitchen trial and error and, honestly, I think you’ll fall in love after the very first bite.
Why You’ll Love This Recipe
- Quick & Easy: These Buckeye Brownie Peanut Butter Bars come together in under an hour, so even a last-minute dessert craving can be satisfied. No fancy equipment or complicated steps—just simple, straight-up goodness.
- Simple Ingredients: You probably already have everything you need: brownie mix, peanut butter, powdered sugar, and chocolate candies. No wild grocery runs required.
- Perfect for Any Occasion: Whether you need a bake sale winner, a holiday tray standout, or a sweet treat for movie night, these bars are always a hit. They travel well and slice up beautifully for sharing.
- Crowd-Pleaser: Kids, adults, picky eaters—everyone loves these. I’ve brought them to countless gatherings, and they always disappear fast. Even my “not-so-sweet-tooth” friends ask for the recipe.
- Unbelievably Delicious: The combination of deeply chocolatey brownie, creamy peanut butter, and a smooth chocolate blossom is pure comfort food. It’s rich, satisfying, and just a little bit nostalgic.
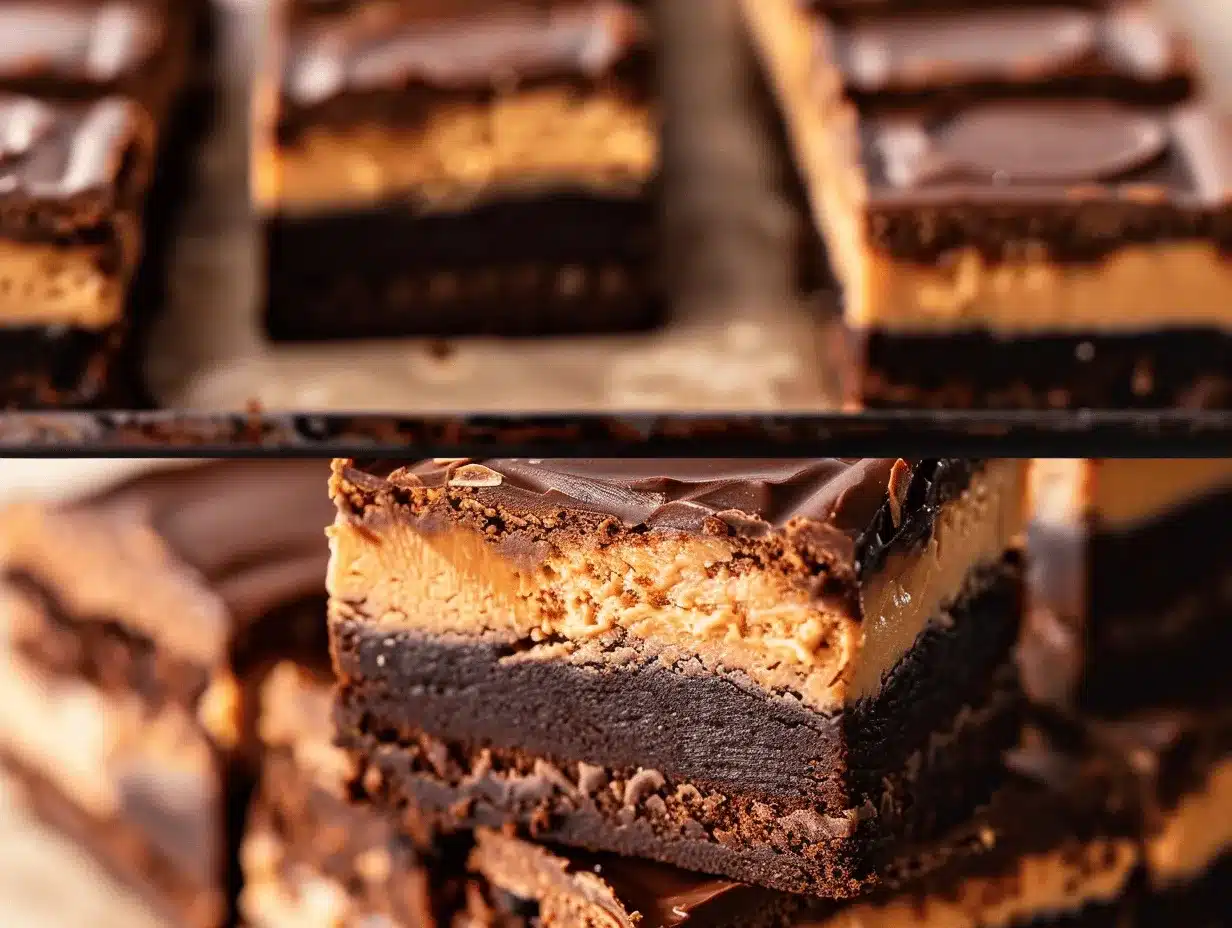
What sets this recipe apart from all the other peanut butter-chocolate desserts out there? For starters, the peanut butter layer is ultra-creamy—think classic buckeye filling, but easier. I blend the filling until it’s perfectly smooth, then layer it over a soft, chewy brownie. The “blossom” effect comes from pressing a chocolate candy into each bar while it’s still warm, giving you that iconic look and an extra hit of chocolate. It’s not just another brownie or peanut butter bar—this is the kind of treat you make when you want to impress without breaking a sweat.
Honestly, this recipe is a little slice of happiness. It’s the one I make when I want to feel like a baking superstar, even if I just threw it together between Zoom meetings. If you’re after a dessert that checks all the boxes (easy, indulgent, and totally delicious), this is it.
What Ingredients You Will Need
This recipe uses simple, wholesome ingredients to create seriously bold flavor and that crave-worthy texture. You won’t need anything fancy—just pantry staples and a couple of sweet additions.
- For the Brownie Base:
- 1 box (18-19 oz / 510-540 g) brownie mix (plus eggs, oil, and water as directed on the box)
- OR make your favorite homemade brownie recipe for a from-scratch option
- For the Peanut Butter Layer:
- 1 cup (240 g) creamy peanut butter (I like Jif or Skippy for best texture)
- 1 cup (120 g) powdered sugar (sifted for smoothness)
- 4 tablespoons (56 g) unsalted butter, melted and slightly cooled
- 1 teaspoon pure vanilla extract
- Pinch of fine sea salt (balances the sweetness and makes the peanut butter flavor pop)
- For the Blossom Topping:
- 24 chocolate kiss candies (like Hershey’s Kisses, unwrapped)
- OR 24 mini peanut butter cups for an extra peanut-buttery twist
- Optional: 1/3 cup (60 g) mini chocolate chips for scattering over the top
Ingredient Tips & Substitutions:
- You can use natural peanut butter, but the filling will be softer and slightly more rustic looking. Stir well if using the drippy kind.
- For a gluten-free version, choose a gluten-free brownie mix and check your chocolates.
- Dairy-free? Swap butter for plant-based margarine and use dairy-free chocolates.
- If you don’t have powdered sugar, blend granulated sugar in a blender until powdery—works in a pinch!
- Swap in almond butter or sunflower seed butter if you’re working around peanut allergies, just note the flavor will change a bit.
Honestly, you can mix and match the chocolate topping too. I’ve tried these with dark chocolate squares, peanut butter chips, and even caramel-filled chocolates—so fun! Just use what you have, and don’t stress if you’re missing one thing. These bars are super forgiving.
Equipment Needed
- 9×13-inch (23×33 cm) baking pan: Glass or metal both work. If you only have an 8×8-inch (20×20 cm) pan, halve the recipe and adjust baking time a bit.
- Parchment paper or nonstick spray: For easy lifting and cleanup. Parchment is my go-to for bars—it makes slicing so much neater!
- Mixing bowls: One large for the brownie batter, one medium for the peanut butter filling.
- Hand mixer or sturdy whisk: For blending the peanut butter layer. A stand mixer works but is totally optional—hand mixing is just fine.
- Rubber spatula: To scrape every bit of batter and filling from the bowl. (Trust me, you’ll want it all in the pan…)
- Measuring cups and spoons: Both dry and liquid. Accuracy matters, especially for the peanut butter layer.
- Offset spatula or butter knife: For smoothing the peanut butter layer evenly over the brownies. I use my old offset cake spatula for this—works like a charm and cleans up fast.
- Wire rack: For cooling bars evenly. If you don’t have one, just cool on a heatproof surface.
Budget tip: Most of these are basic tools, but if you’re missing the offset spatula, a butter knife or even the back of a spoon works. I’ve made these bars at friends’ houses with just a bowl, fork, and a cheap baking dish—no problem! Just grease it well if you’re skipping parchment paper.
For easy cleanup, soak bowls right after mixing so the peanut butter doesn’t harden. And if your pan is old, line it with parchment so nothing sticks. After years of baking, I promise those little steps make life easier!
Preparation Method
- Preheat and Prep: Preheat your oven to 350°F (175°C). Line a 9×13-inch (23×33 cm) baking pan with parchment paper, leaving a little overhang for easy lifting. Lightly spray with nonstick spray if you like.
-
Mix Brownie Batter: Prepare the brownie batter according to the box or your homemade recipe. This usually means whisking eggs, oil, and water (or butter) with the brownie mix until just combined. Don’t overmix—stop when there are no flour pockets left. Pour into your prepared pan and smooth the top.
Tip: For extra fudgy brownies, underbake by 2-3 minutes, or add a handful of chocolate chips to the batter.
-
Bake Brownie Base: Bake for 22-25 minutes (check your box instructions), just until the center is set and a toothpick comes out with a few moist crumbs. Don’t bake too long—overbaked brownies get dry! Cool completely in the pan on a rack.
Warning: If you add the peanut butter layer while the brownies are too hot, it’ll melt and slide around. Wait until they’re barely warm or fully cooled.
-
Make Peanut Butter Layer: In a medium bowl, combine 1 cup (240 g) creamy peanut butter, 1 cup (120 g) powdered sugar, 4 tablespoons (56 g) melted butter, 1 teaspoon vanilla extract, and a pinch of salt. Beat with a hand mixer (or whisk really well!) until smooth and creamy. The mixture should hold its shape but be easy to spread.
Prep Note: If the mixture is too thick, add a splash of milk. If too thin, add a bit more powdered sugar.
- Spread Peanut Butter Layer: Dollop the peanut butter mixture over the cooled brownies. Gently spread with an offset spatula or butter knife to cover the entire surface evenly. Take your time—thick layers are the dream!
-
Add Chocolate Blossoms: Gently press unwrapped chocolate kisses or mini peanut butter cups into the peanut butter layer, spacing them evenly so each bar gets a “blossom.” Press just deep enough to stick, but don’t submerge them completely.
Personal Tip: Sometimes I scatter a handful of mini chocolate chips in between for extra chocolatey bites.
- Chill to Set: Place the pan in the fridge for 30-60 minutes to set the peanut butter layer and chocolates. This makes slicing super easy and helps the layers stay neat.
-
Slice and Serve: Lift the whole slab out using the parchment overhang. Cut into 24 bars (4 rows by 6 columns works well). Wipe your knife between cuts for picture-perfect slices.
Sensory Cue: The bars should be firm but fudgy, and the peanut butter layer creamy—not dry or crumbly.
Troubleshooting: If your brownie base cracks when spreading the peanut butter, it’s probably overbaked or not cooled enough. Just go slowly—it’ll still taste amazing. If the chocolate kisses start to melt, the base was too warm. Chill the pan for a few minutes and try again.
My efficiency tip: Make the peanut butter layer while the brownies are baking. That way, as soon as the base is cool, you’re ready to go! This recipe is all about simple steps for maximum reward.
Cooking Tips & Techniques
- Use Room-Temperature Ingredients: This helps the peanut butter layer blend smoothly and spread easily. Cold butter or peanut butter can make the filling lumpy.
- Don’t Overbake the Brownies: I’ve definitely left brownies in too long before—don’t do it! Pull them out when the center is just set, and a toothpick comes out with a few moist crumbs. Perfect fudgy texture, every time.
- Chill for Clean Slices: If you’ve ever tried to cut gooey bars and ended up with a mess (been there!), chilling the pan is the secret. A sharp knife run under warm water between cuts helps too.
- Press Chocolates Gently: If you press the kisses in too hard or while the base is hot, they’ll melt or sink. Wait until the peanut butter layer is just set, then add the chocolates and chill again.
- Batch Multitasking: While the brownies bake, get the peanut butter layer ready and unwrap your chocolates. This makes everything move smoothly and saves time.
I learned (the hard way) that warm brownies melt the peanut butter and chocolate, making a sticky mess. Don’t rush the cooling step—patience pays off! Over time, I also realized that parchment paper is worth its weight in gold for bar cookies—no more digging stuck brownies from the pan. Trust me, it makes a difference.
How do I keep my bars from sticking to the pan?
Always line your pan with parchment paper, leaving a little overhang on the sides. If you don’t have parchment, a generous layer of nonstick spray works, but parchment gives the cleanest results. Let the bars cool fully before lifting out.
Can I freeze Buckeye Brownie Peanut Butter Bars?
Yes! These bars freeze beautifully. Slice them first, then layer with parchment paper in an airtight container. Thaw in the fridge, or at room temperature for 20-30 minutes before serving.
What’s the best way to store these bars?
Store cut bars in an airtight container at room temperature for up to 3 days, or in the fridge for up to a week. I like them cold, but if you prefer a softer bite, just let them sit out for 10 minutes before serving.
Can I make these gluten-free or dairy-free?
Absolutely. Use a gluten-free brownie mix and check that your chocolates are gluten-free. For dairy-free, swap butter for a plant-based alternative and use dairy-free chocolates.
How do I get smooth, even peanut butter layers?
Use room-temperature ingredients, and beat the peanut butter filling until creamy. If it’s too thick, add a tablespoon of milk; too thin, add a little extra powdered sugar. An offset spatula makes spreading easier—but a butter knife works if needed!
Variations & Adaptations
- Gluten-Free: Use a certified gluten-free brownie mix and check your chocolate candies for hidden gluten. The rest of the ingredients are naturally gluten-free!
- Dairy-Free: Swap the butter for vegan margarine or coconut oil, and use dairy-free chocolate candies. I’ve made these with Earth Balance and Enjoy Life chocolates—still delicious.
- Nut-Free: Substitute sunflower seed butter or Wowbutter for the peanut butter, and use nut-free chocolates. The flavor will be a little different, but kids with allergies love this version.
- Flavor Twists: Mix in 1/2 teaspoon cinnamon or espresso powder to the brownie batter for flavor depth. Or, swirl a spoonful of raspberry jam into the peanut butter layer for a PB&J vibe—so good in summer!
- Different Chocolate Toppings: Instead of kisses, try peanut butter cups, dark chocolate squares, or caramel-filled chocolates. I once used chocolate-covered pretzels for a salty-sweet crunch, and it was a hit.
One of my favorite personal twists was adding a layer of chopped roasted peanuts on top of the peanut butter before pressing in the chocolates. That salty crunch is amazing! You can really make these bars your own depending on what you have or what you’re craving. Don’t be afraid to experiment.
Serving & Storage Suggestions
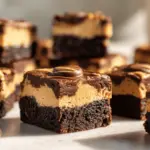
Serving: These Buckeye Brownie Peanut Butter Bars are best served at room temperature, so the brownie is fudgy and the peanut butter layer is creamy. For parties, I like to cut them into small squares and stack them on a pretty plate, with the chocolate blossoms pointing up—so cute for dessert tables or holiday trays.
Pairings: Serve with cold milk, hot coffee, or even a scoop of vanilla ice cream if you’re really going for it. They’re lovely alongside fresh berries or a mug of hot cocoa, especially in winter.
Storage: Keep bars in an airtight container at room temperature for up to 3 days. If your kitchen is warm or you want firmer layers, store them in the fridge for up to a week. The flavors meld and get even richer after a day (if they last that long!).
Freezing: Freeze bars in a single layer, or separated by parchment, in an airtight container for up to 2 months. Thaw at room temp or in the fridge; the texture stays surprisingly perfect.
Reheating: If you like a slightly gooier bar, microwave for 5-10 seconds before eating. The chocolate and peanut butter get just a little melty—so good!
Nutritional Information & Benefits
Each bar (based on 24 servings) contains approximately:
- Calories: 240
- Fat: 13g
- Carbs: 30g
- Protein: 4g
- Sugar: 20g
Health Highlights: Peanut butter adds protein and healthy fats, which help you feel full and satisfied. If you use a brownie mix with whole grains or less sugar, you can make these bars a little more wholesome. They’re naturally high in energy—great for a special treat or sharing during busy holidays.
Dietary Notes: Easy to adapt for gluten-free, dairy-free, or nut-free diets (see variations above). Contains peanuts, dairy, and gluten in the basic version—always double-check labels for allergies!
From a wellness view, I love that these bars satisfy a sweet tooth with a dose of nostalgia and comfort. They’re definitely an indulgence, but one that brings everyone together around the kitchen table.
Conclusion
There are desserts, and then there are desserts you remember. These Buckeye Brownie Peanut Butter Bars are the kind I make when I want to treat myself and my loved ones to something truly special—without spending hours in the kitchen. Rich, fudgy, creamy, and chocolatey, they hit every craving and make any occasion feel like a celebration.
Don’t be afraid to make these bars your own! Try different nut butters, throw in some chopped nuts, or mix up the chocolates on top. I promise, every batch brings its own little surprises and memories. For me, these bars are a reminder that baking doesn’t have to be complicated to be absolutely delicious.
If you bake these Buckeye Brownie Peanut Butter Bars, let me know how they turn out! Share your creative twists, leave a comment below, or tag me if you post a photo. I love seeing how others enjoy this recipe. Happy baking—may your kitchen always smell like chocolate and peanut butter!
Frequently Asked Questions
Can I use homemade brownie batter instead of a mix?
Absolutely! Your favorite homemade brownie recipe works perfectly as the base. Just bake until set and follow the same layering steps.
What if I don’t have chocolate kisses?
Any chocolate candy works—mini peanut butter cups, chocolate chunks, or even chocolate chips will do the trick. Use what you have on hand.
How do I keep the peanut butter layer from being too sticky?
Chilling the bars helps set the peanut butter layer. If it’s still sticky, add a bit more powdered sugar to firm it up next time.
Can I make these bars ahead of time?
Yes, these bars are perfect for making ahead. Store in the fridge, and slice just before serving for the best texture.
Do these bars need to be refrigerated?
They don’t have to be, but refrigeration keeps the layers firmer, especially in warm weather. I like them chilled, but room temperature is just as delicious!
Pin This Recipe!
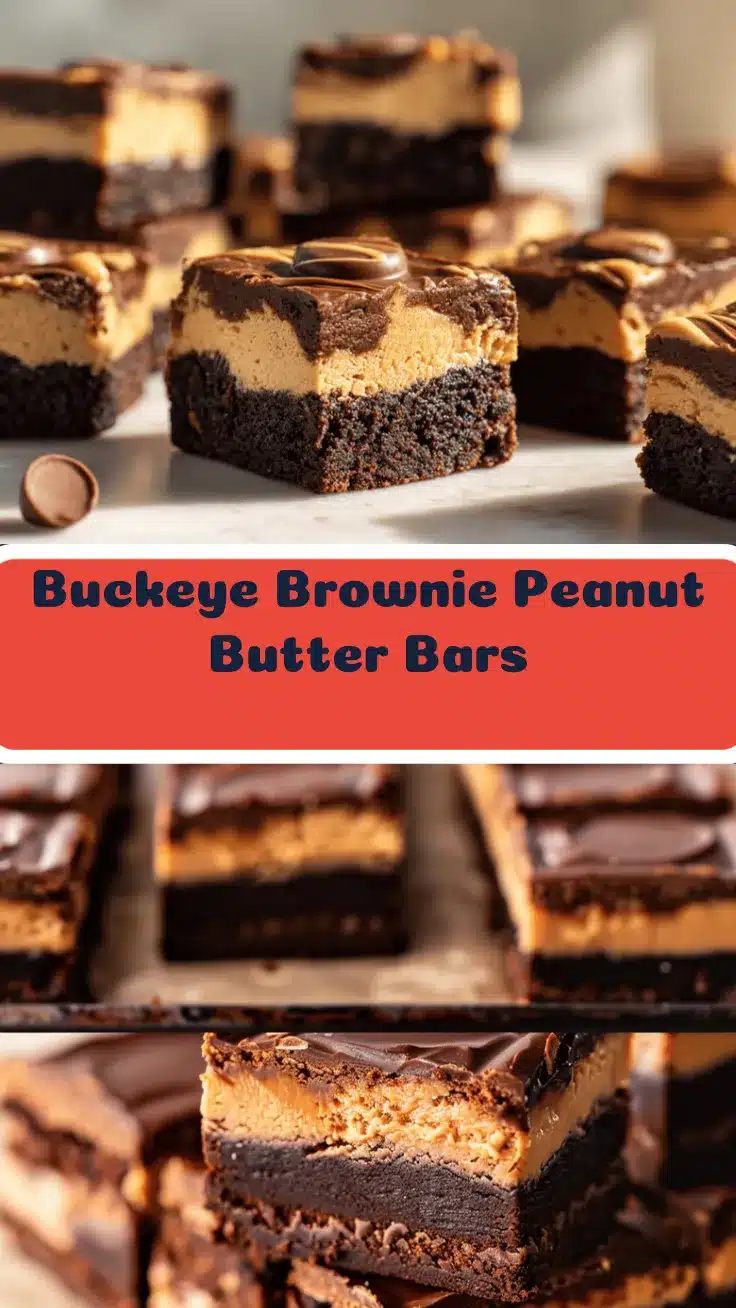
Buckeye Brownie Peanut Butter Bars
These Buckeye Brownie Peanut Butter Bars combine a rich, fudgy brownie base with a creamy peanut butter layer and a chocolate ‘blossom’ on top. They’re easy to make, crowd-pleasing, and perfect for any occasion when you need an indulgent treat.
- Prep Time: 20 minutes
- Cook Time: 25 minutes
- Total Time: 1 hour 15 minutes
- Yield: 24 bars 1x
- Category: Dessert
- Cuisine: American
Ingredients
- 1 box (18-19 oz) brownie mix (plus eggs, oil, and water as directed on the box) OR homemade brownie batter
- 1 cup creamy peanut butter
- 1 cup powdered sugar, sifted
- 4 tablespoons unsalted butter, melted and slightly cooled
- 1 teaspoon pure vanilla extract
- Pinch of fine sea salt
- 24 chocolate kiss candies (such as Hershey’s Kisses), unwrapped OR 24 mini peanut butter cups
- Optional: 1/3 cup mini chocolate chips for scattering over the top
Instructions
- Preheat your oven to 350°F (175°C). Line a 9×13-inch baking pan with parchment paper, leaving overhang for easy lifting. Lightly spray with nonstick spray if desired.
- Prepare the brownie batter according to the box or your homemade recipe. Pour into the prepared pan and smooth the top.
- Bake for 22-25 minutes, or until the center is set and a toothpick comes out with a few moist crumbs. Cool completely in the pan on a rack.
- In a medium bowl, combine peanut butter, powdered sugar, melted butter, vanilla extract, and a pinch of salt. Beat with a hand mixer or whisk until smooth and creamy.
- Dollop the peanut butter mixture over the cooled brownies. Gently spread with an offset spatula or butter knife to cover the entire surface evenly.
- Gently press unwrapped chocolate kisses or mini peanut butter cups into the peanut butter layer, spacing them evenly. Optionally, scatter mini chocolate chips over the top.
- Place the pan in the fridge for 30-60 minutes to set the peanut butter layer and chocolates.
- Lift the slab out using the parchment overhang. Cut into 24 bars (4 rows by 6 columns). Wipe your knife between cuts for clean slices.
Notes
For gluten-free bars, use a gluten-free brownie mix and check your chocolates. For dairy-free, substitute butter with plant-based margarine and use dairy-free chocolates. Chill bars before slicing for clean cuts. Bars freeze well; store in an airtight container with parchment between layers.
Nutrition
- Serving Size: 1 bar
- Calories: 240
- Sugar: 20
- Sodium: 120
- Fat: 13
- Saturated Fat: 5
- Carbohydrates: 30
- Fiber: 1
- Protein: 4
Keywords: buckeye bars, peanut butter brownies, chocolate peanut butter bars, easy dessert, potluck bars, bake sale, fudgy brownies, peanut butter blossom bars