
The sizzle of beef, the ooze of melted cheese, and a golden, garlicky crust—these cheeseburger bombs with garlic parmesan are pure comfort food magic. You know that feeling when you bite into something so warm and cheesy it makes you close your eyes for a second? Yep, that’s exactly what’s waiting for you here.
Honestly, I stumbled upon this cheeseburger bombs recipe on a frantic weeknight when my kids were “starving” (their words, not mine). Burgers were on the brain, but I didn’t want the mess of grilling or the same old burger routine. Instead, I wrapped all those classic flavors in soft dough, brushed them with a buttery garlic parmesan topping, and—well—let’s just say dinner disappeared faster than I could put down my spatula.
It’s become a quick dinner favorite around here because, let’s face it, who can resist a gooey cheeseburger in hand-held form? The best part is how customizable these are—add your favorite toppings, swap in turkey or plant-based meat, or make them mini for parties. I’ve made these cheeseburger bombs for family movie nights, potlucks, and even tailgates. Each time, someone asks for the recipe (and a second helping!).
If you’re craving a cozy, crowd-pleasing meal that’s big on flavor and short on fuss, give these irresistible cheeseburger bombs with garlic parmesan a try. They’re perfect for busy families, picky eaters, or anyone who loves a good twist on classic comfort food. I’ve tested and tweaked this recipe more times than I can count—so you can be sure it’s as reliable as it is delicious.
Why You’ll Love This Cheeseburger Bombs Recipe
- Quick & Easy: Ready in under 40 minutes, these cheeseburger bombs are a life-saver for hectic weeknights. No need to heat the grill or dirty a bunch of pans!
- Simple Ingredients: Pantry staples and fridge basics—ground beef, cheese, biscuit dough, and a dash of garlic. No fancy shopping trips necessary (you probably have everything sitting in your kitchen right now).
- Perfect for Any Occasion: These are a hit for family dinners, game day snacking, or even as a fun appetizer at parties. I’ve even packed leftovers in lunchboxes—huge win!
- Crowd-Pleaser: Kids, adults, even the picky eaters—everyone loves the combination of juicy burger, gooey cheese, and that golden crust. My husband calls them “dangerously addictive.”
- Unbelievably Delicious: The garlic parmesan topping takes these from good to “wow.” Every bite is buttery, garlicky, and packed with melty cheese and savory beef.
What sets this cheeseburger bombs recipe apart is the garlic parmesan finish. I blend real butter, fresh garlic, and a shower of parmesan to brush over the dough before baking. The result? Each bomb comes out with a crispy, fragrant shell that’s almost as good as what’s inside. I’ve tried other versions, but none had that all-in-one flavor punch. Plus, wrapping the filling in dough keeps everything perfectly contained—no mess, just cheesy, beefy happiness.
Honestly, it’s more than just a meal—it’s the kind of food that makes you pause, savor, and maybe sneak one more before anyone notices. It’s comfort food, but with a playful twist and a boost of flavor from the garlic parmesan. Whether you want to impress guests without the stress, or just turn a Tuesday into something special, these cheeseburger bombs are the answer. Trust me, after making these a dozen times, I wouldn’t steer you wrong.
What Ingredients You Will Need
This cheeseburger bombs recipe relies on simple, hearty ingredients that come together for bold flavor—and let’s be honest, a little indulgence too. Most are pantry staples or easy-to-find groceries. Let’s break it down so you can double-check your kitchen before heading out!
- For the Cheeseburger Filling:
- 1 lb (450 g) ground beef (80/20 for juiciness; turkey or plant-based ground also work)
- ½ small onion, finely diced (sweet or yellow onion for classic flavor)
- 1 clove garlic, minced (adds a savory note—use jarred if in a pinch)
- 1 tsp yellow mustard (classic burger tang; Dijon or spicy brown are fine)
- 1 tbsp ketchup (balances the richness; skip or sub tomato paste if desired)
- ½ tsp salt (I use kosher salt for even seasoning)
- ¼ tsp black pepper (freshly cracked is best)
- 1 cup (100 g) shredded cheddar cheese (sharp cheddar melts beautifully; swap for mozzarella or a blend if you like)
- 2 tbsp chopped dill pickles (optional, but I love the tang)
- For the Dough:
- 1 can (16 oz/450 g) refrigerated biscuit dough (like Pillsbury Grands, 8 pieces; crescent roll dough also works)
- For the Garlic Parmesan Topping:
- 3 tbsp (45 g) unsalted butter, melted
- 2 cloves garlic, minced (or 1 tsp garlic powder if you want milder flavor)
- 3 tbsp (18 g) grated parmesan cheese (fresh is best, but pre-grated works in a pinch)
- 1 tbsp fresh parsley, chopped (optional for color and freshness)
Ingredient Tips & Substitutions:
- Meat: For a lighter version, use ground turkey or chicken. Plant-based crumbles also work for a vegetarian twist (just watch the moisture).
- Cheese: American, pepper jack, or Swiss all melt nicely. For extra gooeyness, add a cube of cheese in the center of each bomb.
- Dough: Crescent dough or pizza dough can be swapped in if biscuits aren’t available. For gluten-free, use your favorite gluten-free biscuit dough (I’ve had good luck with King Arthur brand).
- Toppings: Add chopped cooked bacon, sautéed mushrooms, or jalapeños to the filling for extra flavor.
- Pickles: Not a fan? Leave them out or swap with sweet relish for a different vibe.
Honestly, this recipe is forgiving—use what you have, and don’t stress if you need to make a swap. The magic is in the cheese, beef, and that glorious garlic parmesan crust!
Equipment Needed
You don’t need a fancy kitchen setup for these cheeseburger bombs. Here’s what I use every time (with a few humble tips):
- Large skillet or frying pan: For browning the beef mixture. If you have a cast iron pan, even better for flavor, but any nonstick will do.
- Baking sheet: A rimmed sheet protects your oven from melty cheese overflow. Line with parchment for easy cleanup.
- Mixing bowls: One medium for the filling, one small for the garlic butter.
- Pastry brush: For brushing the garlic parmesan butter onto each bomb. If you don’t have one, a spoon or your (clean) fingers work in a pinch.
- Knife and cutting board: For chopping onions, garlic, and parsley.
- Measuring spoons and cups: For precision, though I admit to eyeballing the cheese sometimes.
- Optional: A cheese grater for fresh parmesan, and a food scale if you like to be super precise.
If you’re short on equipment, don’t sweat it—use a pizza pan for baking, or even an oven-safe skillet. The biscuit dough is forgiving, so you don’t need a rolling pin. Just flatten by hand. For budget options, I’ve used dollar-store baking sheets and silicone brushes—they work just fine. Just avoid anything too flimsy, or you might lose a cheeseburger bomb to the oven floor (it’s happened to me once—lesson learned!).
How to Make Cheeseburger Bombs with Garlic Parmesan
-
Preheat the oven and prep the pan (5 minutes):
Heat your oven to 375°F (190°C). Line a rimmed baking sheet with parchment paper for easy cleanup. If you don’t have parchment, give the sheet a light grease with butter or spray. -
Brown the beef and aromatics (8 minutes):
In a large skillet over medium heat, add the ground beef and diced onion. Cook, breaking up the meat with a spatula, until the beef is no longer pink and onions are soft—about 5-6 minutes. Spoon off excess grease. Add minced garlic and cook for 1 minute, just until fragrant.
Tip: Don’t rush—the onions should smell sweet, not burnt. If the pan looks dry, add a splash of water. -
Season and finish the filling (2 minutes):
Stir in mustard, ketchup, salt, and pepper. Cook for 1 more minute to blend flavors. Remove from heat. Let the mixture cool slightly (so it won’t melt the dough later).
Warning: If the filling is too hot, it can make the dough sticky and hard to seal. -
Mix in cheese and pickles (2 minutes):
Once the beef mixture is warm but not hot, stir in the shredded cheddar and chopped pickles. The cheese will melt a bit, making it extra gooey. -
Prepare the biscuit dough (3 minutes):
Open the can of biscuit dough and separate the rounds. Flatten each round into a disk about 4-5 inches (10-12 cm) across with your hands or the bottom of a glass.
Note: If the dough is sticky, dust your hands with a little flour. -
Fill and shape the bombs (8 minutes):
Place 2-3 tablespoons (30-45 g) of filling in the center of each dough round. Gather the edges and pinch tightly to seal, forming a ball. Place seam-side down on the baking sheet.
Tip: Don’t overfill, or the cheese will escape. If a bomb splits, patch with a bit of extra dough. -
Mix and brush the garlic parmesan butter (2 minutes):
In a small bowl, combine melted butter, minced garlic, and half the parmesan. Brush generously over each bomb. -
Bake (13-15 minutes):
Bake in the preheated oven for 13-15 minutes, until golden brown and puffed. The tops should be lightly crisp and fragrant.
Sensory cue: The kitchen will smell like garlic bread and burgers had a baby—trust your nose! -
Finish and serve (2 minutes):
Brush the hot bombs with any remaining garlic butter. Sprinkle with remaining parmesan and fresh parsley. Let cool for 3-5 minutes (the filling is lava-hot at first!). -
Enjoy:
Serve warm. Watch for happy faces and cheesy grins!
Personal tips: Work in batches if your baking sheet is small. If you’re making ahead, assemble and chill the bombs, then bake just before serving. Don’t stress if a few leak—those crispy cheese bits are the cook’s treat!
Cooking Tips & Techniques
Let’s be real—my first batch of cheeseburger bombs? A few split open, and the cheese oozed everywhere. But through trial and error (and more than a few cheesy “mistakes”), I’ve picked up some wisdom:
- Don’t Overfill: It’s tempting to stuff them to the brim, but a heaping tablespoon or two is plenty. If the dough can’t fully close, the filling will escape.
- Seal Well: Pinch the seams together like you mean it. Wet your fingers slightly if the dough isn’t sticking. Place seam-side down to help keep everything contained.
- Cool the Filling: Hot filling makes the dough sticky and hard to work with. Let it cool for a couple minutes before assembling.
- Bake on the Middle Rack: This helps the bottoms cook evenly and keeps the tops from getting too brown before the centers are done.
- Brush Butter Twice: For maximum garlic parmesan flavor, brush before and after baking. But don’t drown the dough or it’ll get soggy.
- Multi-task: While the beef cools, prep your dough. If making a double batch, set up a little assembly line—it’s actually kind of fun.
- Watch for Golden Brown: Ovens run hot and cold, so start checking at 12 minutes. The bombs should be firm, golden, and sizzling at the edges.
My biggest lesson? Don’t panic if a few bombs burst or get a little messy. Those crispy cheese bits are unbelievably tasty, and the rustic look just adds to their charm. After making these a bunch, I’ve learned that a little imperfection is all part of the fun (and flavor!).
Variations & Adaptations
One of my favorite things about this cheeseburger bombs recipe is how easy it is to tweak for your crew or dietary needs. Here are a few fun twists I’ve tried (or plan to!):
- Bacon Cheeseburger Bombs: Add 1/3 cup (40 g) cooked, crumbled bacon to the filling—total game changer for bacon lovers.
- Spicy Jalapeño Bombs: Stir in 2 tablespoons diced pickled jalapeños and a dash of hot sauce. Pepper jack cheese works great here!
- Vegetarian Version: Swap the beef for plant-based crumbles or sautéed mushrooms and onions. Use your favorite dairy-free cheese to make it vegan-friendly.
- Gluten-Free Option: Use gluten-free biscuit or pizza dough (I’ve had success with King Arthur’s blend). Watch bake time—gluten-free doughs can brown faster.
- Mini Bombs for Appetizers: Divide dough into 16 pieces and use a teaspoon of filling each. Perfect for parties or snack boards!
- Different Cooking Methods: Air fryer? Yes! Place bombs in a single layer and air fry at 350°F (175°C) for 8-10 minutes. Or bake in a toaster oven if you’re short on space.
Personally, I love tossing in a handful of sautéed mushrooms for a “steakhouse” vibe. You do you—customize with your favorite burger toppings, or let everyone add their own! The possibilities really are endless.
Serving & Storage Suggestions
For the best experience, serve these cheeseburger bombs hot and fresh from the oven—the cheese will be gooey, and the garlic parmesan topping at its crispiest. I like to arrange them on a big platter with a sprinkle of parsley and a little bowl of ketchup or burger sauce for dipping (ranch or spicy mayo is fun too!).
Pairing ideas: These are rich, so I keep sides simple—think a crisp green salad, roasted veggies, or classic fries. For drinks, a frosty soda or a cold beer pairs perfectly, especially for game night.
Storage: Leftover cheeseburger bombs keep well in an airtight container in the fridge for up to 3 days. For longer storage, wrap individually and freeze for up to 2 months. To reheat, pop them in a 350°F (175°C) oven for 8-10 minutes (longer if frozen), or microwave for 30-45 seconds. The oven method keeps the crust crispier, but honestly, my kids don’t mind the microwave version at all.
If you make them ahead, let them cool completely before storing. The flavors actually deepen after a day—so don’t be surprised if they taste even better the next day (if you have any left, that is!).
Nutritional Information & Benefits
Estimated per bomb (based on 8 servings): 320 calories, 18g fat, 22g carbs, 16g protein.
This cheeseburger bombs recipe offers a good dose of protein from the beef and cheese, while the biscuit dough keeps things satisfyingly filling. If you use leaner beef or a plant-based option, you can shave off some fat. Add extra veggies to the filling for a fiber and vitamin boost. The garlic and parsley add antioxidants and freshness, and you can easily adapt for gluten-free or lower-carb diets by swapping the dough.
Allergens to note: contains wheat, dairy, and possibly eggs (check biscuit dough label). Always double-check for store-bought doughs if you have sensitivities. For me, it’s the balance of comfort and nutrition—these bombs hit the spot without feeling too heavy, and they’re easy to adapt for different health goals.
Conclusion
If you’re searching for a dinner idea that’s quick, fun, and guaranteed to make everyone smile, this cheeseburger bombs recipe with garlic parmesan is the answer. It’s got all the juicy, cheesy goodness of your favorite burger, wrapped up in a garlicky, golden crust—no forks or plates required!
I love how easy it is to swap the fillings, play with flavors, or make a big batch for parties or meal prep. Every time I make these, I’m reminded how satisfying it is to bring a little joy to the dinner table—especially on those crazy weeknights when you just need something that works.
Give these a shot, make them your own, and let me know how it went! Leave a comment with your favorite twist, share with a friend, or tag me if you post a photo. Trust me, once you try them, you’ll be hooked—just like we are. Happy cooking, and here’s to more cozy, delicious dinners ahead!
Frequently Asked Questions
Can I make cheeseburger bombs ahead of time?
Yes! You can assemble them up to a day ahead, cover, and refrigerate. Bake just before serving for best results. They also freeze well after baking—just reheat in the oven for crispy tops.
What’s the best cheese to use for cheeseburger bombs?
Sharp cheddar is classic, but American, mozzarella, or pepper jack all work. For extra gooeyness, tuck a small cube of cheese inside each bomb before sealing.
Can I use homemade dough instead of canned biscuit dough?
Absolutely! Any soft roll, pizza, or biscuit dough works. Just divide and flatten into rounds as directed. You may need to adjust baking time slightly based on thickness.
How do I keep the cheeseburger bombs from bursting open?
Don’t overfill, and pinch the seams tightly. Let the filling cool before assembling. Place the seam side down on the baking sheet for extra insurance.
Are cheeseburger bombs kid-friendly?
Definitely! They’re hand-held, cheesy, and fun to eat. You can skip the onions or pickles if you have picky eaters, or even make mini versions for little hands.
Pin This Recipe!

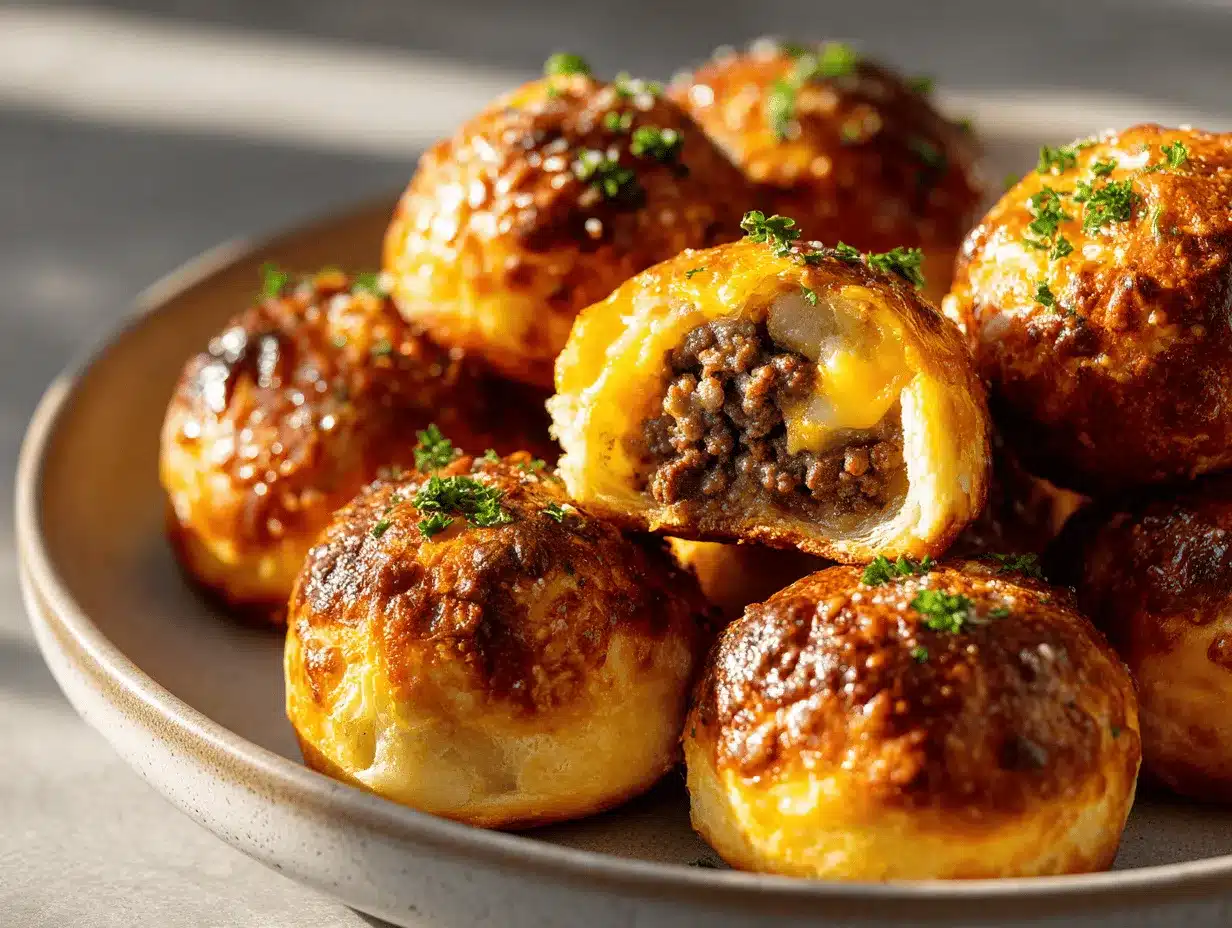
Cheeseburger Bombs with Garlic Parmesan

These cheeseburger bombs are a fun, hand-held twist on classic burgers, featuring juicy beef, gooey cheese, and a golden garlic parmesan crust. Perfect for busy weeknights, parties, or family dinners, they’re quick, customizable, and irresistibly delicious.
- Prep Time: 15 minutes
- Cook Time: 20 minutes
- Total Time: 35 minutes
- Yield: 8 servings 1x
- Category: Main Course
- Cuisine: American
Ingredients
- 1 lb ground beef (80/20 for juiciness; turkey or plant-based ground also work)
- 1/2 small onion, finely diced
- 1 clove garlic, minced
- 1 tsp yellow mustard
- 1 tbsp ketchup
- 1/2 tsp salt
- 1/4 tsp black pepper
- 1 cup shredded cheddar cheese
- 2 tbsp chopped dill pickles (optional)
- 1 can (16 oz) refrigerated biscuit dough (8 pieces, like Pillsbury Grands; crescent roll dough also works)
- 3 tbsp unsalted butter, melted
- 2 cloves garlic, minced (or 1 tsp garlic powder)
- 3 tbsp grated parmesan cheese
- 1 tbsp fresh parsley, chopped (optional)
Instructions
- Preheat oven to 375°F (190°C). Line a rimmed baking sheet with parchment paper or lightly grease.
- In a large skillet over medium heat, cook ground beef and diced onion, breaking up the meat, until beef is no longer pink and onions are soft (about 5-6 minutes). Drain excess grease. Add minced garlic and cook for 1 minute until fragrant.
- Stir in mustard, ketchup, salt, and pepper. Cook for 1 more minute to blend flavors. Remove from heat and let cool slightly.
- Once the beef mixture is warm but not hot, stir in shredded cheddar cheese and chopped pickles.
- Open the can of biscuit dough and separate the rounds. Flatten each round into a disk about 4-5 inches across.
- Place 2-3 tablespoons of filling in the center of each dough round. Gather the edges and pinch tightly to seal, forming a ball. Place seam-side down on the baking sheet.
- In a small bowl, combine melted butter, minced garlic, and half the parmesan. Brush generously over each bomb.
- Bake for 13-15 minutes, until golden brown and puffed.
- Brush hot bombs with any remaining garlic butter. Sprinkle with remaining parmesan and fresh parsley. Let cool for 3-5 minutes before serving.
- Serve warm with your favorite dipping sauces.
Notes
Don’t overfill the dough to prevent bursting. Let the filling cool before assembling. For a vegetarian version, use plant-based crumbles and dairy-free cheese. These can be made ahead and reheated. Customize with bacon, mushrooms, or jalapeños for extra flavor.
Nutrition
- Serving Size: 1 cheeseburger bomb
- Calories: 320
- Sugar: 3
- Sodium: 670
- Fat: 18
- Saturated Fat: 8
- Carbohydrates: 22
- Fiber: 1
- Protein: 16
Keywords: cheeseburger bombs, garlic parmesan, easy dinner, kid-friendly, party food, comfort food, stuffed biscuits, ground beef, quick meal, hand-held