“Are you sure this’ll work?” my friend Lisa asked, eyeing the lumpy, half-mixed dough on the counter. Honestly, I wasn’t entirely sure either. I’d never tried making a pot pie crust with buttermilk before, but I’d been craving that perfect flaky, buttery crust to match a warm chicken filling. That night, fueled by a bit of skepticism and a desperate need for comfort food after a long day, I threw together this Cozy Chicken Pot Pie with Flaky Buttermilk Crust. The smell as it baked? Pure therapy.
Lisa’s doubts melted away after the first bite—she said it reminded her of those classic pot pies you get at the diner, but somehow better, lighter, and with a crust that practically melted in your mouth. I couldn’t stop making it that week, and it quickly became my go-to after chaotic days when I just wanted something warm, filling, and a little bit special. You know that feeling when a recipe just clicks? That quiet moment when you realize it’s worth every bit of the effort? That’s this chicken pot pie for me.
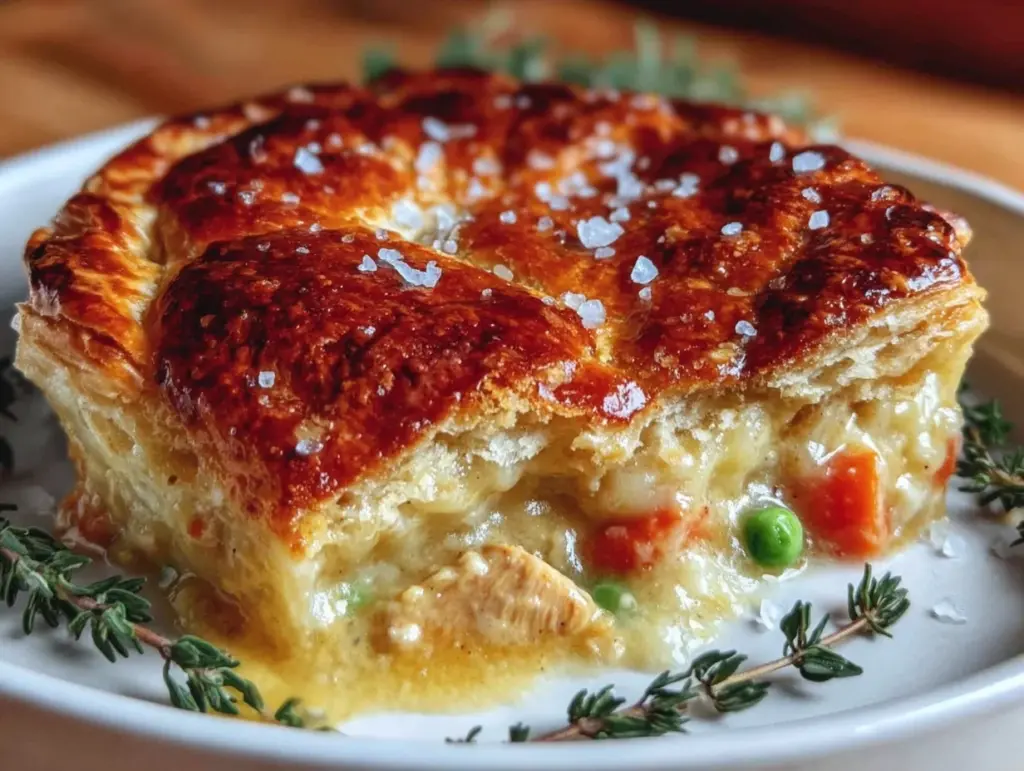
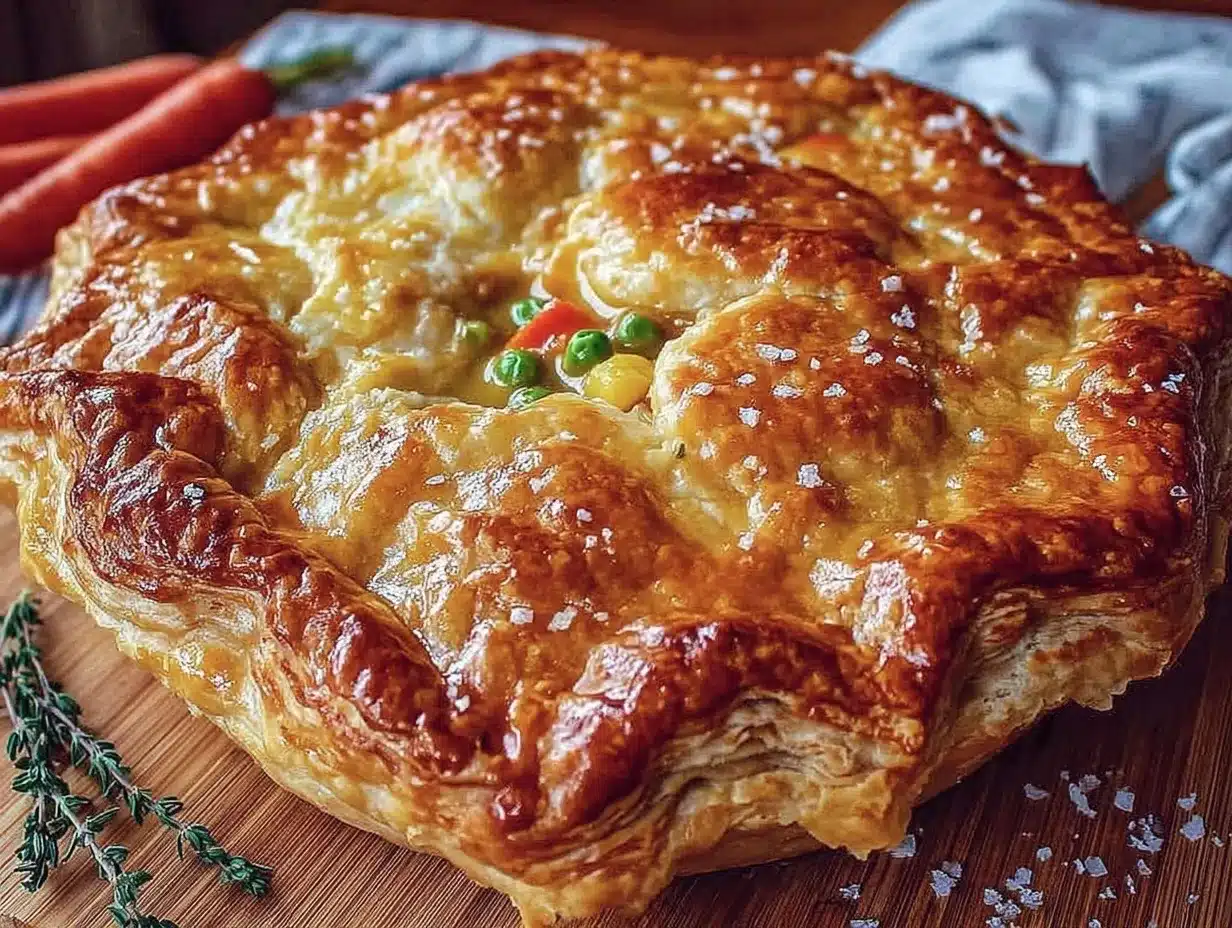
What makes this pot pie stand out isn’t just the creamy filling or the tender chicken—it’s the flaky buttermilk crust that’s surprisingly easy to pull off. It’s a bit of an old-school twist that I learned from my grandmother’s cookbook (she swore by buttermilk for pie crusts), but with a few tweaks that make it perfect for today’s kitchens. The crust browns beautifully, with those tender layers you want, and the buttermilk adds a gentle tang that balances the rich filling.
Whether you’re chasing comfort after a tough day or just want to impress your family with something cozy and homemade, this recipe fits the bill without fuss. And if you’ve ever been intimidated by making pie crust from scratch, trust me—you’ll find it approachable here. After all, the best comfort food feels like a warm hug, and this pot pie wraps you up just right.
Why You’ll Love This Cozy Chicken Pot Pie Recipe
Having tested this recipe dozens of times (seriously—I made it three times last week alone), I can say with confidence it ticks all the boxes for home cooks craving a hearty, satisfying meal without spending hours in the kitchen. Here’s why it’s earned a permanent spot in my recipe rotation:
- Quick & Easy: Ready in under 90 minutes, perfect for busy weeknights or lazy weekends when you want comfort food without the wait.
- Simple Ingredients: No fancy or hard-to-find items here. You probably already have most in your pantry or fridge, which makes it a breeze to throw together.
- Perfect for Cozy Dinners: This pot pie is the ultimate comfort food, great for chilly evenings or when you need a little culinary TLC.
- Crowd-Pleaser: Kids, picky eaters, and grown-ups alike give this recipe rave reviews—something about the flaky crust and creamy filling just hits the spot.
- Unbelievably Delicious: The flaky buttermilk crust is a game-changer—it’s buttery, tender, and has just the right amount of tang to balance the rich chicken and veggies.
What sets this recipe apart? It’s not just any chicken pot pie. The crust’s subtle tang from buttermilk and the perfectly seasoned filling make it feel homemade in a way that frozen or takeout just can’t match. I love how the filling thickens just right without being gluey, and the crust holds up beautifully without getting soggy.
For a meal that’s both nostalgic and fresh, this pot pie makes you want to slow down and savor every bite. It’s comfort food that feels thoughtful and cozy, without being complicated. And if you’re curious how to pair it with other easy, crowd-pleasing dishes, you might enjoy the crispy baked turkey sliders recipe for a fun family meal or the sticky garlic chicken noodles for another cozy dinner idea.
What Ingredients You Will Need
This recipe uses simple, wholesome ingredients to deliver bold flavors and a satisfying texture without the fuss. Most are pantry or fridge staples, and the buttermilk crust gives it that special homemade touch. Here’s what you’ll gather:
- For the filling:
- 2 cups cooked chicken, shredded or diced (rotisserie chicken works great here)
- 1 cup carrots, diced (fresh or frozen)
- 1 cup frozen peas
- 1/2 cup celery, diced
- 1/3 cup unsalted butter (adds richness)
- 1/3 cup all-purpose flour (for thickening)
- 1 3/4 cups chicken broth (preferably low sodium)
- 2/3 cup whole milk or cream (for creaminess)
- 1 small onion, finely chopped
- 1 tsp fresh thyme leaves or 1/2 tsp dried thyme (adds subtle earthiness)
- Salt and freshly ground black pepper, to taste
- For the flaky buttermilk crust:
- 2 1/2 cups all-purpose flour (I use King Arthur for best texture)
- 1 tsp salt
- 1 cup cold unsalted butter, cubed (the cold butter is key for flakiness)
- 1 cup cold buttermilk (adds tang and tenderizes the crust)
If you want to make this gluten-free, almond flour crusts tend to get crumbly, but you can try a gluten-free all-purpose blend instead. For dairy-free, swap the butter with vegan margarine and use coconut milk mixed with lemon juice as a buttermilk substitute. Fresh veggies can be swapped for frozen if you’re in a pinch, and in winter, frozen peas and carrots work just as well.
Equipment Needed
- Large mixing bowl – for combining crust ingredients and filling.
- Medium saucepan – to cook the filling and thicken the sauce.
- Rolling pin – essential for rolling out that flaky buttermilk crust evenly.
- 9-inch pie dish or deep baking dish – holds the pie perfectly, but a cast iron skillet can also work for a rustic touch.
- Pastry cutter or two forks – to cut the cold butter into the flour for the crust.
- Measuring cups and spoons – accuracy matters for the crust texture and filling consistency.
- Optional: pastry brush – for egg wash if you want a golden crust finish (I usually skip this to keep it simple).
If you don’t have a pastry cutter, two forks or your fingers work just fine—just be careful not to warm the butter. Rolling pins vary widely; I like a medium-weight wooden one for control. For budget-friendly options, silicone baking mats can prevent sticking when rolling out the crust. And if you’re short on time, a food processor can speed up the crust-making step, but I find the hands-on method more satisfying.
Preparation Method
- Make the Buttermilk Crust: In a large bowl, whisk together 2 1/2 cups flour and 1 teaspoon salt. Add the cold butter cubes. Using a pastry cutter or two forks, cut the butter into the flour until the mixture resembles coarse crumbs with some pea-sized bits. (This texture is what gives you those flaky layers.) Slowly pour in 1 cup cold buttermilk while stirring gently with a fork until the dough just comes together. Avoid overmixing! Form the dough into a ball, flatten into a disk, wrap in plastic, and refrigerate for at least 30 minutes.
- Prepare the Filling: While the dough chills, melt 1/3 cup butter in a medium saucepan over medium heat. Add the chopped onion, diced carrots, and celery. Cook for 5 minutes until softened and fragrant. Stir in 1/3 cup flour and cook for 1-2 minutes, stirring constantly to avoid lumps.
- Gradually whisk in 1 3/4 cups chicken broth and 2/3 cup milk. Bring to a gentle boil, stirring frequently, until the mixture thickens to a creamy consistency (about 4-5 minutes). Add the shredded chicken, frozen peas, thyme, salt, and pepper. Stir to combine and remove from heat.
- Assemble the Pot Pie: Preheat your oven to 400°F (200°C). Remove the dough from the fridge. Divide it into two parts—about two-thirds for the bottom crust and one-third for the top.
- On a lightly floured surface, roll out the larger portion into a circle slightly bigger than your pie dish. Carefully transfer to the dish and gently press it into the bottom and sides.
- Pour the warm chicken filling into the crust-lined dish.
- Roll out the remaining dough to cover the pie. You can do a full crust, lattice, or even cut out fun shapes. Press the edges together to seal, trimming any excess dough. If you want, poke a few small slits in the top crust to allow steam to escape.
- Bake for 35-40 minutes, or until the crust is golden brown and the filling is bubbling. If the edges brown too quickly, cover them loosely with foil halfway through baking.
- Let the pot pie rest for 10 minutes before serving. This helps the filling thicken further and makes slicing neater.
Pro tip: If your filling seems too runny, mix a teaspoon of cornstarch with a bit of cold water and stir it in during step 3 before removing from heat. Also, keep an eye on the crust color; ovens vary, so adjust baking time accordingly.
Cooking Tips & Techniques
One of the trickiest parts of chicken pot pie is getting the crust just right. Here are some lessons I’ve learned the hard way:
- Keep ingredients cold: Cold butter and buttermilk slow down gluten development and create flaky layers. Don’t skip chilling the dough; it’s worth the wait.
- Don’t overwork the dough: Mixing too much warms the butter and makes the crust tough. Stir just until it holds together.
- Use a gentle thickener: Cooking the flour in butter before adding liquids avoids lumps and gives a silky sauce.
- Roll dough evenly: Uneven crust can lead to undercooked or burnt spots. A rolling pin with thickness guides helps if you have one.
- Seal edges well: Press edges firmly but gently to prevent filling leaks during baking.
- Let the pie rest: Cutting too soon causes the filling to spill. Ten minutes is just right.
When I first tried a buttermilk crust, I was worried it might taste sour, but the tang is subtle and adds depth. Also, multitasking is key—chilling the dough while prepping the filling saves time. And if you want to speed things up, using pre-cooked rotisserie chicken is a lifesaver.
Variations & Adaptations
This Cozy Chicken Pot Pie is a flexible recipe that you can tweak easily based on what you have or prefer:
- Vegetarian version: Swap chicken for hearty mushrooms, potatoes, and extra veggies like corn or green beans. Use vegetable broth instead of chicken broth.
- Gluten-free crust: Use a gluten-free all-purpose flour blend in place of regular flour in the crust and filling. Add a little xanthan gum if your blend doesn’t contain it for better texture.
- Herb variations: Try rosemary or sage instead of thyme for a different flavor profile. Fresh herbs always add a nice brightness.
- Spicy twist: Add a pinch of cayenne pepper or smoked paprika to the filling for warmth and depth.
- Mini pot pies: Use muffin tins to make individual servings with the same filling and crust. Great for parties or kids’ lunches.
I once swapped the buttermilk crust for a quick puff pastry top when I was pressed for time—it was tasty, but honestly, nothing beats that tender, tangy crust here. For a breezier weeknight, the mini pot pies are a fun way to serve cozy comfort in bite-sized portions.
Serving & Storage Suggestions
Serve this pot pie warm, ideally fresh from the oven, with a simple side salad or steamed green beans to balance the richness. A crisp white wine or a light beer pairs nicely if you’re thinking drinks. For a casual twist, it goes great alongside the crispy baked ham and cheese croissants for a hearty brunch or cozy weekend meal.
To store leftovers, cover tightly and refrigerate for up to 3 days. Reheat individual slices in the oven at 350°F (175°C) for 15-20 minutes to keep the crust crisp. Avoid microwaving if you want to preserve flakiness.
This pot pie also freezes well. Wrap it tightly in foil and freeze for up to 2 months. Thaw overnight in the fridge before reheating gently in the oven. Over time, the flavors meld beautifully, making it even more comforting the next day.
Nutritional Information & Benefits
This Cozy Chicken Pot Pie provides a balanced mix of protein, veggies, and carbs. Each serving (about one-eighth of the pie) contains approximately:
| Calories | 400-450 kcal |
|---|---|
| Protein | 25g |
| Fat | 20g (mostly from butter) |
| Carbohydrates | 35g |
| Fiber | 4g (from veggies) |
The buttermilk crust adds calcium and vitamin B12, while the chicken offers lean protein essential for muscle repair. The mix of carrots, peas, and celery provides fiber and antioxidants. For those watching gluten, the recipe can be adapted as noted. Note: Contains dairy and gluten unless modified.
Conclusion
This Cozy Chicken Pot Pie with Flaky Buttermilk Crust combines the best of comfort food with a homemade touch that’s surprisingly easy to achieve. It’s the kind of dish that invites you to slow down, savor each bite, and feel a little warmer inside. Whether it’s a weeknight reset or a weekend treat, I hope you find as much comfort in this recipe as I have.
Don’t be afraid to adapt it to your taste or pantry—there’s room here for creativity without losing that cozy soul. If you try it, I’d love to hear how it turns out, or if you’ve added your own twist. After all, every kitchen has its own way of making a classic shine.
Warm meals bring people together, and this pie does just that with less fuss and plenty of flavor.
Frequently Asked Questions
Can I use store-bought pie crust instead of making the buttermilk crust?
Yes, you can substitute with store-bought crust for convenience, but you’ll miss out on the unique tang and flaky texture the buttermilk crust provides. If you’re short on time, it’s a solid option.
How do I prevent the crust from getting soggy?
Make sure to pre-cook and thicken the filling well, and bake the pie until the crust is golden. Also, sealing the edges properly helps keep moisture inside the filling, not under the crust.
Can I prepare this pot pie ahead of time?
Absolutely. You can assemble the pie and refrigerate it unbaked for up to 24 hours. Just bring it to room temperature before baking to ensure even cooking.
What’s the best way to reheat leftover pot pie?
Reheat in a 350°F (175°C) oven for 15-20 minutes to keep the crust flaky. Avoid microwaving if you want to maintain texture.
Can I add other vegetables to the filling?
Yes! Feel free to add corn, green beans, or even diced potatoes. Adjust cooking times accordingly to ensure everything is tender.
Pin This Recipe!
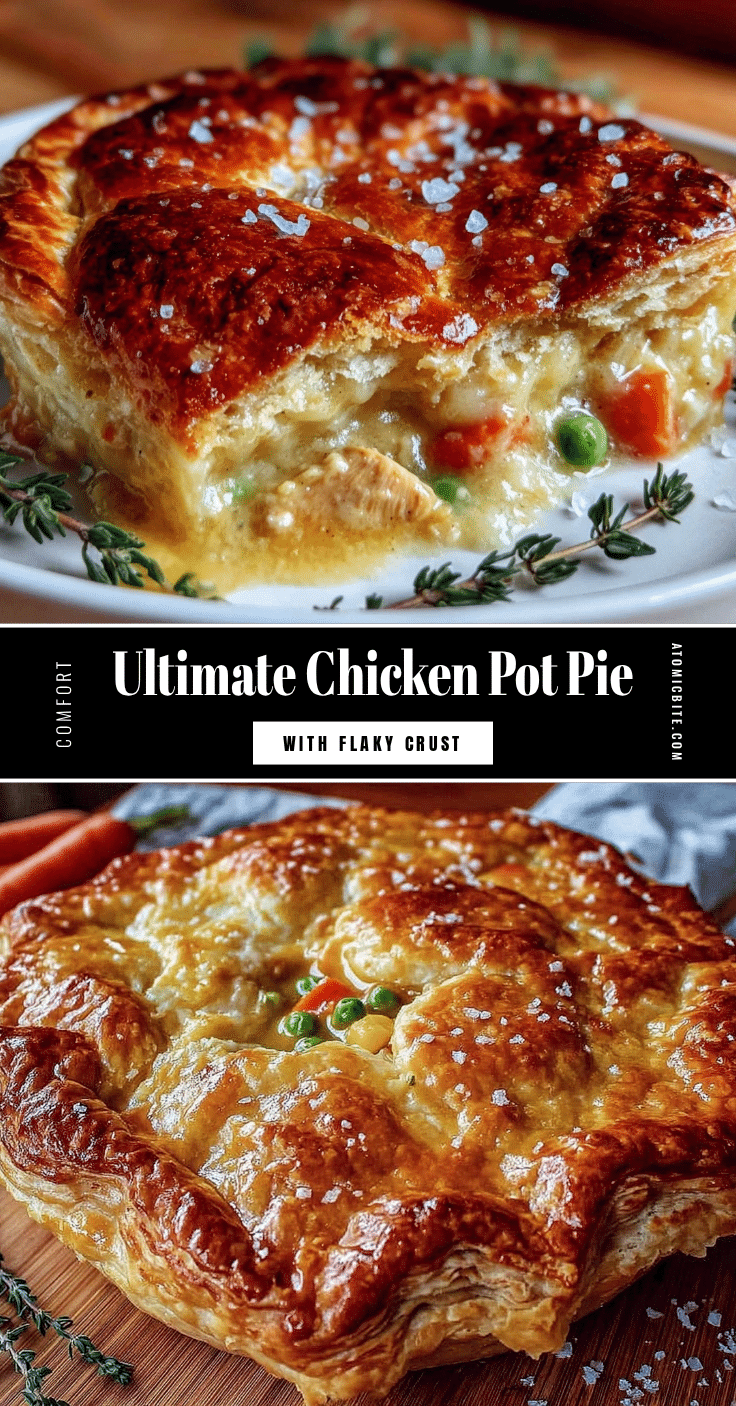
Cozy Chicken Pot Pie with Flaky Buttermilk Crust

A comforting chicken pot pie featuring a tender, flaky buttermilk crust and a creamy, seasoned chicken and vegetable filling. Perfect for cozy dinners and easy to make from scratch.
- Prep Time: 40 minutes
- Cook Time: 40 minutes
- Total Time: 1 hour 20 minutes
- Yield: 8 servings 1x
- Category: Main Course
- Cuisine: American
Ingredients
- 2 cups cooked chicken, shredded or diced (rotisserie chicken works great)
- 1 cup carrots, diced (fresh or frozen)
- 1 cup frozen peas
- 1/2 cup celery, diced
- 1/3 cup unsalted butter
- 1/3 cup all-purpose flour
- 1 3/4 cups chicken broth (preferably low sodium)
- 2/3 cup whole milk or cream
- 1 small onion, finely chopped
- 1 tsp fresh thyme leaves or 1/2 tsp dried thyme
- Salt and freshly ground black pepper, to taste
- 2 1/2 cups all-purpose flour
- 1 tsp salt
- 1 cup cold unsalted butter, cubed
- 1 cup cold buttermilk
Instructions
- Make the Buttermilk Crust: In a large bowl, whisk together 2 1/2 cups flour and 1 teaspoon salt. Add the cold butter cubes. Using a pastry cutter or two forks, cut the butter into the flour until the mixture resembles coarse crumbs with some pea-sized bits. Slowly pour in 1 cup cold buttermilk while stirring gently with a fork until the dough just comes together. Avoid overmixing! Form the dough into a ball, flatten into a disk, wrap in plastic, and refrigerate for at least 30 minutes.
- Prepare the Filling: While the dough chills, melt 1/3 cup butter in a medium saucepan over medium heat. Add the chopped onion, diced carrots, and celery. Cook for 5 minutes until softened and fragrant. Stir in 1/3 cup flour and cook for 1-2 minutes, stirring constantly to avoid lumps.
- Gradually whisk in 1 3/4 cups chicken broth and 2/3 cup milk. Bring to a gentle boil, stirring frequently, until the mixture thickens to a creamy consistency (about 4-5 minutes). Add the shredded chicken, frozen peas, thyme, salt, and pepper. Stir to combine and remove from heat.
- Assemble the Pot Pie: Preheat your oven to 400°F (200°C). Remove the dough from the fridge. Divide it into two parts—about two-thirds for the bottom crust and one-third for the top.
- On a lightly floured surface, roll out the larger portion into a circle slightly bigger than your pie dish. Carefully transfer to the dish and gently press it into the bottom and sides.
- Pour the warm chicken filling into the crust-lined dish.
- Roll out the remaining dough to cover the pie. You can do a full crust, lattice, or even cut out fun shapes. Press the edges together to seal, trimming any excess dough. If you want, poke a few small slits in the top crust to allow steam to escape.
- Bake for 35-40 minutes, or until the crust is golden brown and the filling is bubbling. If the edges brown too quickly, cover them loosely with foil halfway through baking.
- Let the pot pie rest for 10 minutes before serving.
Notes
Keep ingredients cold to ensure a flaky crust. Do not overmix the dough to avoid toughness. Use a gentle thickener by cooking flour in butter before adding liquids. Seal edges well to prevent leaks. Let the pie rest 10 minutes before slicing. Use pre-cooked rotisserie chicken to save time. For gluten-free, use a gluten-free flour blend with xanthan gum. For dairy-free, substitute butter with vegan margarine and buttermilk with coconut milk plus lemon juice.
Nutrition
- Serving Size: About one-eighth of
- Calories: 425
- Sugar: 4
- Sodium: 450
- Fat: 20
- Saturated Fat: 12
- Carbohydrates: 35
- Fiber: 4
- Protein: 25
Keywords: chicken pot pie, buttermilk crust, flaky crust, comfort food, easy dinner, homemade pot pie, creamy chicken filling


