Let me tell you, the moment that nutty-sweet scent of crushed Butterfinger bars mixed with whipped cream first hit my kitchen, I practically stopped in my tracks. It’s that kind of aroma—rich, chocolatey, with a hint of roasted peanut—that makes your mouth water before you even see the finished pie. The first time I made this creamy Butterfinger Pie, I had no idea how much it would transform a simple evening into a celebration. I remember standing over the mixing bowl, tasting a spoonful (in the name of research, of course), and thinking, “This is the kind of dessert that could win over even the toughest critics.”
Honestly, this pie takes me right back to being knee-high to a grasshopper, sneaking extra bites of candy bars from my grandma’s pantry. She used to make a mean peanut butter pie, but when I stumbled on this Butterfinger version at a neighbor’s potluck years ago, I knew I had to recreate it with my own twist. It’s got that pure, nostalgic comfort, but with a creamy texture and signature crunch that just works. My family couldn’t stop sneaking slices off the cooling rack (and I can’t really blame them). My youngest declared it “the best pie ever,” and my husband—who’s usually a pie skeptic—went back for seconds without hesitation.
Whether you’re looking for an easy homemade dessert for parties, a sweet treat for your kids, or something that’ll brighten up your Pinterest dessert board, this creamy Butterfinger Pie recipe is a staple for family gatherings, gifting, and, honestly, anytime you want a dessert that feels like a warm hug. Trust me, after testing this recipe more times than I care to admit, you’re going to want to bookmark this one. It’s dangerously easy, wildly delicious, and perfect for sharing (or not—I won’t judge!).
Why You’ll Love This Creamy Butterfinger Pie Recipe
Let’s face it—you want a dessert that’s more than just “good.” You want a showstopper. After countless batches, taste tests, and plenty of honest feedback from hungry friends and neighbors, I can say with confidence this creamy Butterfinger Pie recipe delivers, every time. Here’s why:
- Quick & Easy: Comes together in under 30 minutes (plus chilling). Perfect for busy weeknights, last-minute party prep, or when you just need something sweet, fast.
- Simple Ingredients: No fancy grocery trips required. You likely have everything you need in your kitchen right now.
- Perfect for Parties: This pie is made for birthdays, potlucks, holiday gatherings, and backyard BBQs. It travels well and slices beautifully.
- Crowd-Pleaser: Kids love the candy crunch, adults can’t resist the creamy filling. It always gets rave reviews (my grandma even asked for the recipe, and she’s picky!).
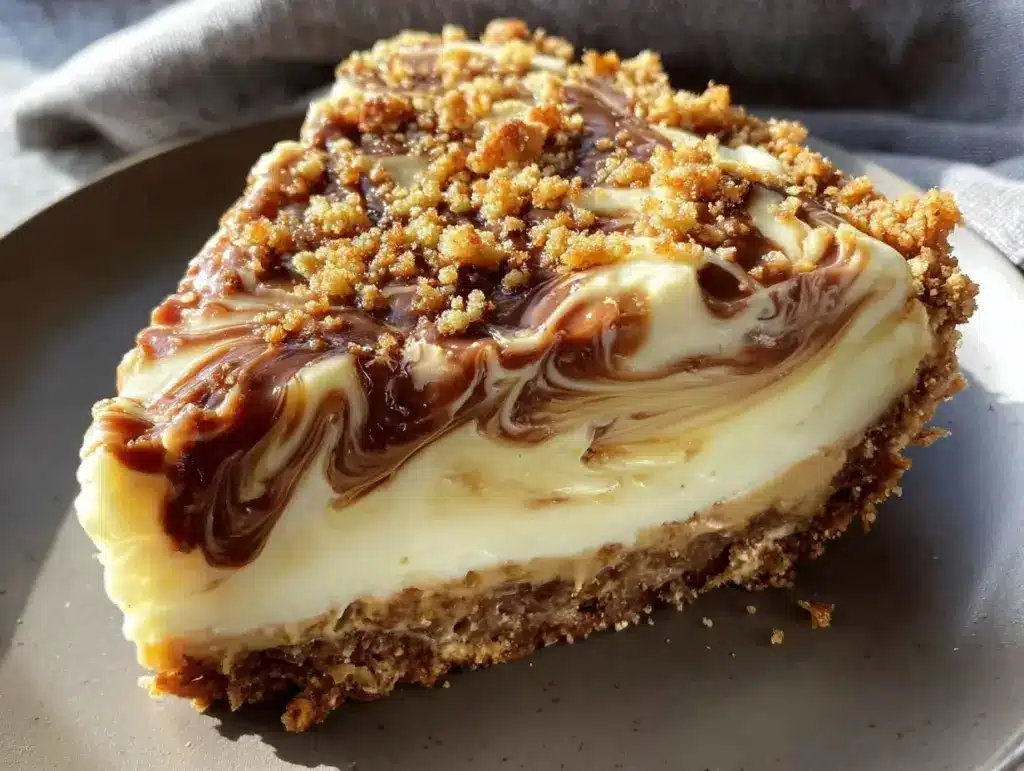
- Unbelievably Delicious: The blend of smooth cream cheese, whipped topping, and crunchy Butterfinger bits is pure comfort food magic. Each bite is creamy, crunchy, and just the right amount of sweet.
This creamy Butterfinger Pie recipe stands out because it’s not just another candy bar dessert. The special technique—crushing the Butterfingers just right so you get little pockets of crunch in every bite—makes a huge difference. Plus, blending the cream cheese with powdered sugar (instead of granulated) keeps the filling ultra-smooth and never gritty. I’ve tested gluten-free cookie crusts, swapped in homemade whipped cream, and tried low-sugar variations, but this version hits that perfect sweet spot: easy, rich, and absolutely irresistible.
Honestly, it’s the kind of dessert that makes you pause after the first bite, close your eyes, and just savor the moment. It turns a regular Tuesday into something memorable, and best of all, you don’t need to be a pastry chef to pull it off. Whether you’re impressing guests or just treating yourself, this creamy Butterfinger Pie is your ticket to instant dessert success.
What Ingredients You Will Need
This creamy Butterfinger Pie recipe uses simple, wholesome ingredients to deliver bold flavor and satisfying texture without the fuss. Most of these are pantry staples or easy to find at your local grocery store, so you won’t have to hunt for anything exotic. Let’s break it down:
- For the Crust:
- Chocolate sandwich cookies (about 24 cookies, crushed) – Adds a rich, chocolatey base with a little crunch.
- Unsalted butter (6 tbsp / 85g, melted) – Helps bind the crust and brings creamy flavor.
- For the Filling:
- Cream cheese (8 oz / 225g, softened) – Creates the creamy, tangy backbone of the filling. I swear by Philadelphia for best texture.
- Powdered sugar (1 cup / 120g) – Dissolves easily into the cream cheese, giving a smooth sweetness.
- Vanilla extract (1 tsp / 5ml) – Adds warmth and depth. Nielsen-Massey is my go-to brand.
- Peanut butter (1/2 cup / 120g, creamy) – Optional but adds an extra layer of nutty flavor.
- Butterfinger candy bars (6 regular bars, crushed, about 1 1/2 cups / 150g) – These are the star! Crush them into small bite-size pieces for best texture.
- Whipped topping or whipped cream (8 oz / 225g, thawed if using frozen) – Folds into the filling for a light, fluffy texture. Cool Whip works well, but you can use homemade if you prefer.
- For Garnish (Optional):
- Extra crushed Butterfinger bars (2 bars, for topping) – Gives that tempting “wow” factor.
- Chocolate drizzle (2 oz / 60g, melted) – Totally optional, but adds a professional touch.
- Whipped cream rosettes – For serving, if you want to get fancy.
Ingredient Tips & Substitutions:
- Use gluten-free sandwich cookies for a GF crust.
- Swap peanut butter with almond butter for a twist (or omit altogether).
- If you’re dairy-free, use vegan cream cheese and coconut whipped topping.
- In summer, swap Butterfinger for other crunchy candy bars—Heath or Snickers work surprisingly well.
- For a lower sugar version, use Monkfruit powdered sweetener and sugar-free whipped topping.
If you’re picky about candy bars, I recommend splurging on full-size Butterfingers rather than the fun-size (the texture is just better!). And if you’re making this pie for a crowd, double the recipe—it disappears fast.
Equipment Needed
You don’t need much for this creamy Butterfinger Pie recipe, which is part of its charm. Here’s what’s essential:
- 9-inch (23cm) pie pan: Glass or metal works—just make sure it’s deep enough for all that creamy filling.
- Food processor or Ziploc bag & rolling pin: For crushing the cookies and Butterfingers. I’ve used both; honestly, banging away at cookies in a bag is kind of fun.
- Mixing bowls: One large, one medium. Stainless steel bowls make cleanup easy.
- Electric mixer (handheld or stand): For whipping the cream cheese and sugar. If you’re using a stand mixer, use the paddle attachment.
- Measuring cups & spoons: Accuracy matters, especially for pies.
- Rubber spatula: To scrape the bowl clean—trust me, you’ll want every last bit.
- Offset spatula or spoon: For smoothing out the filling.
If you don’t have a food processor, crushing cookies and candy bars in a sturdy bag works perfectly. For mixing, a strong whisk can substitute for an electric mixer in a pinch (just takes a little elbow grease). If you’re budget-minded, most tools can be found at big box stores or thrift shops—I still use my grandma’s old spatula. Keep your pie pan clean and dry to avoid soggy crust, and if you make pies often, invest in a sturdy metal pan for best results.
Preparation Method
- Make the Crust:
- Crush 24 chocolate sandwich cookies (about 250g) in a food processor or place in a Ziploc bag and smash with a rolling pin until fine crumbs form.
- Mix crumbs with 6 tbsp (85g) melted unsalted butter until evenly moistened.
- Press mixture firmly into the bottom and sides of a 9-inch (23cm) pie pan. Use a flat-bottomed glass for an even layer.
- Chill crust in the freezer for 15 minutes while you prep the filling.
- Prepare the Filling:
- In a large bowl, beat 8 oz (225g) softened cream cheese with 1 cup (120g) powdered sugar until smooth—about 2 minutes. Scrape down the sides as needed.
- Add 1 tsp (5ml) vanilla extract and 1/2 cup (120g) creamy peanut butter (if using). Beat until well combined—another minute or so.
- Fold in 8 oz (225g) whipped topping gently with a rubber spatula until no streaks remain. The filling should be light and fluffy.
- Stir in 6 crushed Butterfinger bars (about 1 1/2 cups / 150g) until evenly distributed. Mixture will be speckled with crunchy bits.
- Assemble the Pie:
- Remove crust from freezer. Spoon filling into crust, spreading evenly with an offset spatula.
- Top with extra crushed Butterfinger bars (2 bars, for garnish) and drizzle with 2 oz (60g) melted chocolate if desired.
- Smooth top and add whipped cream rosettes around the edge for a fancier look.
- Chill and Serve:
- Cover pie loosely with plastic wrap and refrigerate for at least 4 hours, or overnight. This helps firm up the filling—don’t rush it!
- Slice with a sharp knife (wipe between cuts for clean slices) and serve chilled.
- If you notice the filling is too soft, pop it in the freezer for 30 minutes before slicing.
Troubleshooting Tips:
- If your crust seems crumbly, add another tablespoon of melted butter.
- If cream cheese is lumpy, beat longer or let it come to room temperature first.
- For ultra-smooth filling, sift powdered sugar before mixing.
- If you’re short on time, freeze the pie for 2 hours to speed up chilling.
Personal Notes: I always chill my mixing bowl before whipping the cream cheese—makes everything blend super smooth. And don’t be afraid to taste as you go (it’s half the fun!).
Cooking Tips & Techniques
I’ve made this creamy Butterfinger Pie recipe more times than I can count, and trust me, a few little tricks make a big difference:
- Use room temperature cream cheese: Cold cream cheese clumps up and makes the filling grainy. Let it sit out for 30-45 minutes before mixing.
- Don’t overmix: Once you fold in the whipped topping, mix gently to keep the filling light and airy.
- Crush Butterfinger bars carefully: You want small pieces—not dust—so you get that signature crunch.
- Layer flavors: Try adding a thin spread of peanut butter under the filling for extra depth.
- Chill, chill, chill: The pie needs time to set. If you’re in a rush (been there), use the freezer for a quick chill but don’t leave it too long or the texture gets icy.
Mistakes I’ve made? Oh, plenty. Once I tried using granulated sugar instead of powdered, and the filling turned out gritty. Another time, I rushed the chilling—big mistake. The pie was delicious but impossible to slice cleanly. So don’t skip the chilling step, and always taste as you go.
If you’re multitasking, make the crust and filling at the same time—crust in the food processor, filling in the mixer. Saves a few precious minutes. Wiping your knife between slices gives you those bakery-perfect wedges. And if you want consistency, measure everything carefully and use full-fat cream cheese for the creamiest results.
Variations & Adaptations
One of the best things about this creamy Butterfinger Pie recipe is how easy it is to adapt. Here are some tried-and-true variations:
- Gluten-Free Version: Swap out the regular chocolate sandwich cookies for gluten-free ones. The pie tastes just as good, and no one will know the difference.
- Peanut-Free Adaptation: Use Wowbutter or SunButter in place of peanut butter, and swap Butterfinger bars for a nut-free crunchy candy (like Crunch bars).
- Seasonal Twists: In autumn, add a pinch of cinnamon to the crust and filling. For summer parties, stir in chopped fresh strawberries or raspberries with the Butterfinger bits.
- Low-Sugar Option: Use sugar-free whipped topping and Monkfruit powdered sweetener. The filling is still creamy and sweet but with less sugar.
- Different Cooking Method: If you don’t want to fuss with a cookie crust, use a store-bought graham cracker crust. It’s a time-saver and tastes great.
Personally, I love making a peanut butter swirl in the filling—just drop spoonfuls and swirl with a knife before chilling. And don’t be afraid to experiment! I’ve tried mini pies in muffin tins for parties, and they’re adorable and easy to serve.
Serving & Storage Suggestions
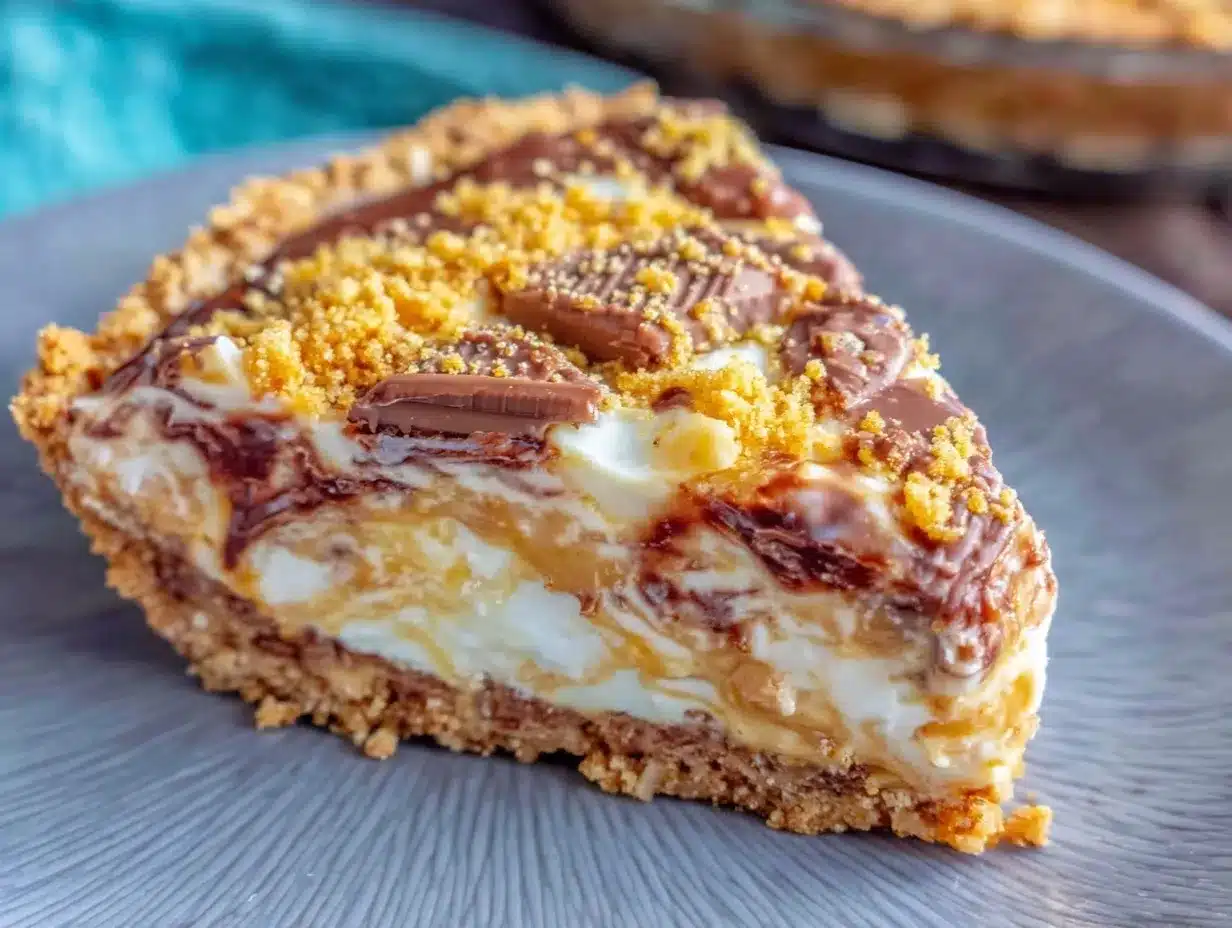
This creamy Butterfinger Pie recipe is best served chilled, straight from the fridge. The filling holds together beautifully, and the crust stays crisp. For parties, garnish with whipped cream rosettes and extra Butterfinger bits—it looks gorgeous and gives a little extra crunch.
- Serving Temperature: Cold is best. If you’re prepping ahead, slice and plate just before serving for clean wedges.
- Presentation: Add a drizzle of melted chocolate or caramel sauce, and a sprinkle of crushed candy on top for Pinterest-worthy photos.
- Complementary Dishes: Serve with hot coffee, cold milk, or a scoop of vanilla ice cream. For a party spread, pair with salty snacks—pretzels or mixed nuts balance out the sweetness.
- Storage: Cover leftover pie tightly with plastic wrap and store in the refrigerator for up to 4 days. For longer storage, wrap well and freeze for up to 1 month. Thaw overnight in the fridge before serving.
- Reheating: No need! This pie is meant to be enjoyed cold. If it’s slightly frozen, let sit on the counter for 15-20 minutes before slicing.
- Flavor Development: The flavors deepen over time. Honestly, day two pie is even better than day one—the Butterfinger bits soften a little and meld with the creamy filling.
Nutritional Information & Benefits
For the health-conscious (or just curious), here’s what you need to know about this creamy Butterfinger Pie recipe:
- Estimated Nutrition (per slice, 1/8 pie): Calories: ~420, Fat: 26g, Carbs: 45g, Protein: 7g.
- Key Ingredients: Cream cheese adds calcium and protein, and peanut butter (if using) gives a little extra healthy fat.
- Dietary Considerations: Easily made gluten-free and nut-free with ingredient swaps. For lower sugar, use sugar-free whipped topping and sweetener.
- Potential Allergens: Contains dairy, peanuts (if using peanut butter), and wheat unless adapted.
Personally, I love that this pie can be tweaked for different dietary needs without sacrificing flavor. It’s not a health food, but it’s a treat worth enjoying in moderation! If you’re watching calories, serve smaller slices or swap in some lighter ingredients—you’ll still get all the creamy, crunchy goodness.
Conclusion
There’s just something magical about a pie that brings together creamy filling, crunchy candy, and a chocolatey crust. This creamy Butterfinger Pie recipe is worth making for its pure comfort, easy prep, and crowd-pleasing flavor. It’s become a favorite in my house for parties, birthdays, and honestly—just because.
Don’t be afraid to make it your own. Tweak the crust, mix up the candy bars, or play with the filling flavors. That’s the beauty of homemade dessert—it’s all about what makes you smile. I love this recipe because it’s simple, nostalgic, and always delivers smiles (and second helpings).
Give it a try, share your tweaks, and let me know how it turns out! Drop a comment below with your favorite variation or share your photos on Pinterest. And most importantly—enjoy every creamy, crunchy bite!
FAQs About Creamy Butterfinger Pie Recipe
Can I make Creamy Butterfinger Pie ahead of time?
Absolutely! You can prepare it up to 24 hours in advance. Just keep it covered in the fridge until you’re ready to serve.
What if I can’t find Butterfinger bars?
No worries—try using Heath bars, Snickers, or even Reese’s Cups. The pie will taste different but still delicious!
Can I use homemade whipped cream instead of Cool Whip?
Yes! Whip 1 cup (240ml) heavy cream with 2 tbsp (15g) powdered sugar until stiff peaks form, then use in place of whipped topping.
How do I make this pie gluten-free?
Just substitute the chocolate sandwich cookies for a gluten-free version. Everything else stays the same!
Does Creamy Butterfinger Pie freeze well?
It freezes beautifully. Wrap tightly and freeze for up to a month. Thaw overnight in the refrigerator for best texture.
Pin This Recipe!
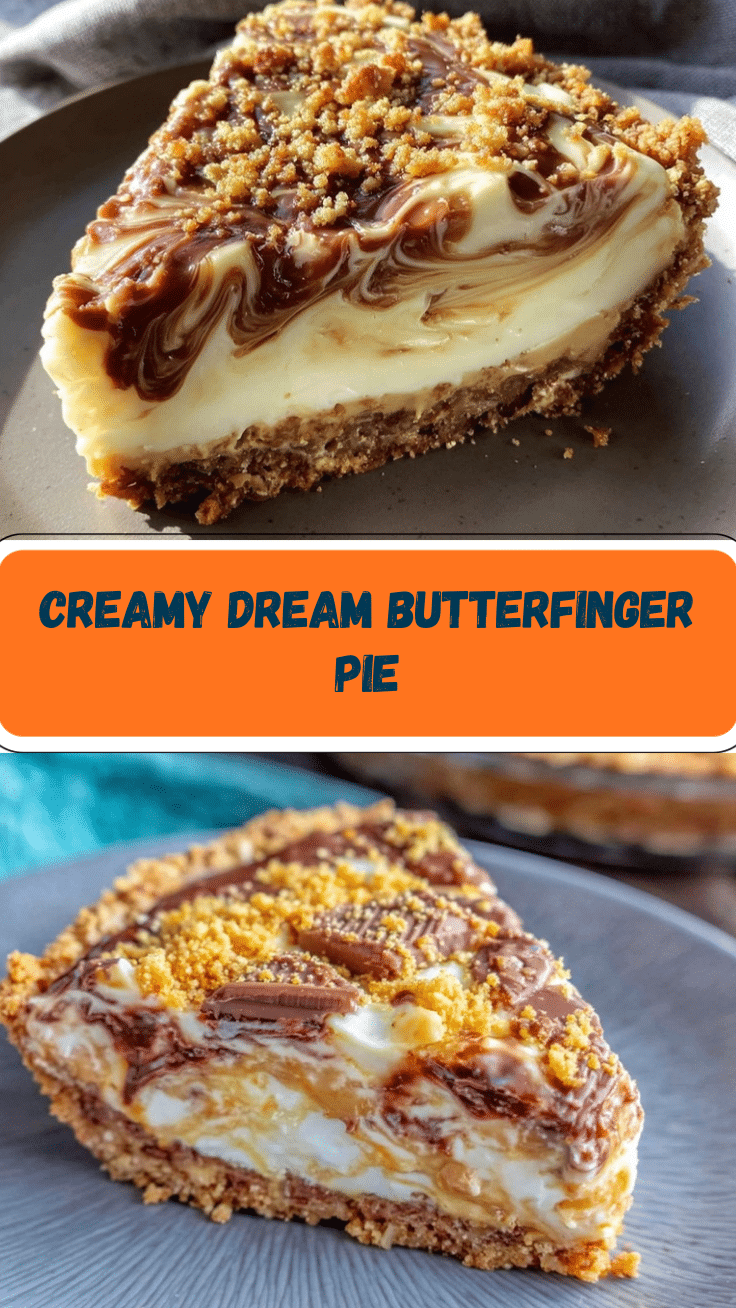
Creamy Butterfinger Pie

This easy homemade Butterfinger Pie features a chocolate cookie crust, creamy filling, and crunchy Butterfinger bits—perfect for parties, family gatherings, or anytime you want a nostalgic, crowd-pleasing dessert.
- Prep Time: 15 minutes
- Cook Time: 0 minutes
- Total Time: 4 hours 15 minutes (includes chilling)
- Yield: 8 servings 1x
- Category: Dessert
- Cuisine: American
Ingredients
- 24 chocolate sandwich cookies (about 250g), crushed
- 6 tablespoons unsalted butter (85g), melted
- 8 ounces cream cheese (225g), softened
- 1 cup powdered sugar (120g)
- 1 teaspoon vanilla extract (5ml)
- 1/2 cup creamy peanut butter (120g, optional)
- 6 regular Butterfinger candy bars, crushed (about 1 1/2 cups / 150g)
- 8 ounces whipped topping or whipped cream (225g), thawed if using frozen
- 2 extra Butterfinger bars, crushed (for garnish)
- 2 ounces melted chocolate (60g, for drizzle, optional)
- Whipped cream rosettes (for serving, optional)
Instructions
- Crush 24 chocolate sandwich cookies in a food processor or Ziploc bag until fine crumbs form.
- Mix crumbs with 6 tablespoons melted unsalted butter until evenly moistened.
- Press mixture firmly into the bottom and sides of a 9-inch pie pan. Chill crust in the freezer for 15 minutes.
- In a large bowl, beat softened cream cheese with powdered sugar until smooth (about 2 minutes).
- Add vanilla extract and creamy peanut butter (if using). Beat until well combined.
- Fold in whipped topping gently with a rubber spatula until no streaks remain.
- Stir in crushed Butterfinger bars until evenly distributed.
- Remove crust from freezer. Spoon filling into crust, spreading evenly.
- Top with extra crushed Butterfinger bars and drizzle with melted chocolate if desired.
- Smooth top and add whipped cream rosettes around the edge for garnish.
- Cover pie loosely with plastic wrap and refrigerate for at least 4 hours, or overnight.
- Slice with a sharp knife (wipe between cuts for clean slices) and serve chilled.
- If filling is too soft, freeze pie for 30 minutes before slicing.
Notes
For gluten-free, use GF sandwich cookies. Peanut butter is optional for extra flavor. Chill pie thoroughly for clean slices. Substitute Butterfinger with other crunchy candy bars if desired. For a lighter version, use sugar-free whipped topping and sweetener. Pie freezes well for up to 1 month.
Nutrition
- Serving Size: 1 slice (1/8 of pie)
- Calories: 420
- Sugar: 32
- Sodium: 320
- Fat: 26
- Saturated Fat: 13
- Carbohydrates: 45
- Fiber: 2
- Protein: 7
Keywords: Butterfinger Pie, creamy pie, easy dessert, party dessert, chocolate pie, no bake, candy bar pie, homemade pie, family recipe


