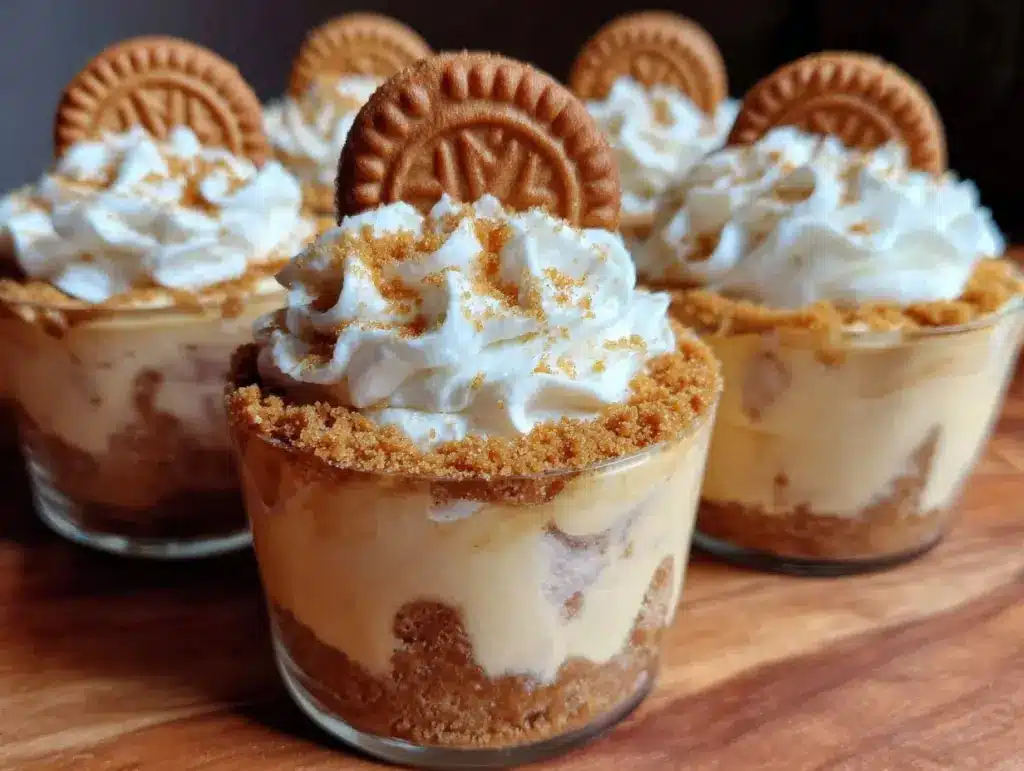
Let me set the scene: the aroma of warm, spiced cookie butter swirling with tangy cream cheese fills my kitchen, and honestly, it’s impossible not to sneak a taste before the cups even hit the fridge. The first time I whipped up these Creamy Cookie Butter Cheesecake Cups, I had no idea they’d become such a hit—one bite and I was instantly hooked. There’s this moment when you spoon into the silky, cookie-infused filling and hit that buttery, crumbly base…everything slows down, and you just savor the pure, nostalgic comfort it delivers. (It’s the kind of moment where you pause, take a deep breath, and smile because you know you’re onto something truly special.)
Years ago, back when I was knee-high to a grasshopper, my grandma used to make little cheesecake cups for family gatherings, but she never thought to add cookie butter. One rainy weekend, I tried blending that classic base with a generous dollop of cookie butter—and, you know what, I wish I’d stumbled on this combo years ago! My family couldn’t stop sneaking them off the cooling rack (and I can’t really blame them). Even my picky eater declared, “These taste like heaven in a cup!” and let’s face it, that’s some high praise in my house.
Honestly, these Creamy Cookie Butter Cheesecake Cups are dangerously easy to assemble. They’re perfect for potlucks, sweet treats for your kids, or just to brighten up your Pinterest dessert board. I’ve tested them more times than I care to admit (in the name of research, of course), and now they’re a staple for family gatherings, gifting, and those nights when you need a little something that feels like a warm hug. If you’re searching for a dessert that’s as charming as it is satisfying, you’re going to want to bookmark this one—trust me.
Why You’ll Love These Creamy Cookie Butter Cheesecake Cups
If you’ve ever craved a dessert that checks all the boxes—easy, delicious, and just a little bit fancy—these Creamy Cookie Butter Cheesecake Cups are about to be your new go-to. Having made more cheesecake recipes than I can count (some more successful than others!), I can tell you firsthand that this one stands out for all the right reasons.
- Quick & Easy: Comes together in under 30 minutes (plus chilling!), so it’s perfect for busy weeknights or last-minute cravings.
- Simple Ingredients: No fancy grocery trips needed; you likely already have everything in your kitchen.
- Perfect for Any Occasion: Great for brunch, potlucks, cozy dinners, or holiday mornings—these cheesecake cups steal the show.
- Crowd-Pleaser: Always gets rave reviews from kids and adults alike. Even non-cheesecake lovers can’t resist!
- Unbelievably Delicious: The texture is creamy and luscious, while the cookie butter brings a caramel-like warmth that’s next-level comfort food.
What really sets this recipe apart is the blending technique—by whipping the cream cheese and cookie butter together until silky-smooth, you get a filling that’s light, yet satisfyingly rich. No water baths, no fuss. The combination of buttery cookie crumbs and the creamy filling is downright addictive. It’s not just another cheesecake—it’s a portable, personal-sized treat that’s perfect for impressing guests without any stress, or for turning a simple meal into something memorable.
If you ask me, this recipe isn’t just good—it’s the kind that makes you close your eyes after the first bite. It’s comfort food, but with a twist that feels modern and fun. There’s a reason it’s become a staple in my house: it’s just that good.
What Ingredients You Will Need
This recipe uses simple, wholesome ingredients to deliver bold flavor and satisfying texture without the fuss. Most of these are pantry staples, and a few can be easily swapped to suit what you have on hand. Here’s what you’ll need for these Creamy Cookie Butter Cheesecake Cups:
- For the Base:
- 1 cup (100g) crushed speculoos cookies or graham crackers (for classic cookie butter flavor)
- 3 tablespoons (40g) unsalted butter, melted (adds richness)
- 1 tablespoon (12g) granulated sugar (optional, boosts sweetness)
- For the Creamy Filling:
- 8 ounces (225g) cream cheese, softened (full-fat works best for creaminess)
- 1/2 cup (120g) cookie butter (I recommend Lotus Biscoff for the boldest taste)
- 1/3 cup (80ml) sour cream (adds tang and smoothness)
- 1/3 cup (40g) powdered sugar (for a smooth, sweet finish)
- 1 teaspoon vanilla extract (pure, if possible)
- 1/8 teaspoon salt (balances flavors)
- For the Whipped Topping (Optional):
- 1/2 cup (120ml) heavy whipping cream
- 1 tablespoon (8g) powdered sugar
- 1/4 teaspoon vanilla extract
Ingredient Notes & Substitutions:
- You can use graham crackers if speculoos cookies aren’t available, but the flavor will be milder.
- Swap in dairy-free cream cheese and coconut cream for a lactose-friendly option—I’ve tried it, and it works!
- Want it gluten-free? Use gluten-free cookies for the base.
- If you prefer a less sweet dessert, reduce the powdered sugar in the filling by half.
- For a seasonal twist, add a pinch of cinnamon or nutmeg to the crust.
- When berries are in season, top with fresh raspberries or strawberries for a burst of color and tartness.
- If you’re out of cookie butter, you can substitute with peanut butter or almond butter, but the flavor profile will shift.
Honestly, you don’t need anything fancy, but picking a high-quality cream cheese does make a noticeable difference in texture. I usually go with Philadelphia brand, but any brick-style cream cheese will do. If you’re feeling adventurous, add a swirl of melted chocolate or caramel on top!
Equipment Needed
Here’s the lineup for kitchen tools to make your Creamy Cookie Butter Cheesecake Cups:
- Muffin Tin or Ramekins: I love using a standard 12-cup muffin tin for perfect portions, but individual ramekins work great too.
- Paper Liners: These make for easy removal and a cute presentation. If you don’t have liners, just grease your tin or ramekins well.
- Mixing Bowls: You’ll need two—one for the crust, one for the filling.
- Electric Mixer or Whisk: A hand mixer makes the filling ultra-smooth, but a sturdy whisk and some elbow grease do the trick too.
- Spatula: For scraping every last bit of creamy filling. Trust me, you don’t want to waste any.
- Measuring Cups & Spoons: Precise measurements mean predictable results.
- Small Spoon: For pressing the crust into the cups—use your fingers if you’re feeling rustic!
If you don’t have an electric mixer, a food processor can help blend the filling to silkiness. When I first started, I used a wooden spoon and a lot of patience—totally doable! For budget-friendly options, check local discount stores for muffin tins and spatulas. Ramekins can be found at thrift shops (I’ve found some cute ones for pennies). Just make sure to clean your equipment well after each use—especially those mixing tools, since cookie butter can get sticky!
Preparation Method
Ready to whip up these Creamy Cookie Butter Cheesecake Cups? Here’s the step-by-step process, with all the tips I’ve learned along the way:
- Make the Cookie Crust:
- In a medium bowl, combine 1 cup (100g) crushed speculoos cookies or graham crackers with 3 tablespoons (40g) melted butter and 1 tablespoon (12g) sugar (if using).
- Mix until the crumbs are evenly moistened and resemble wet sand.
- Spoon about 1 tablespoon of mixture into each lined muffin cup or ramekin. Press firmly using the back of a spoon or your fingers. The crust should feel compact and hold together when gently pressed.
- Prep Tip: If the crust looks dry, add an extra teaspoon of melted butter.
- Set aside while you prepare the filling.
- Prepare the Creamy Filling:
- In a large bowl, beat 8 ounces (225g) softened cream cheese until fluffy (about 1-2 minutes).
- Add 1/2 cup (120g) cookie butter and mix until fully incorporated (the mixture should be creamy and light tan).
- Mix in 1/3 cup (80ml) sour cream, 1/3 cup (40g) powdered sugar, 1 teaspoon vanilla extract, and 1/8 teaspoon salt.
- Continue beating until smooth and lump-free (2-3 minutes). If you notice tiny lumps, keep mixing—they’ll smooth out!
- Sensory Cue: The filling should be glossy, thick, and smell sweetly spiced.
- Assemble the Cheesecake Cups:
- Spoon about 2 tablespoons of filling onto each prepared crust.
- Use a spatula or the back of a spoon to smooth the tops (I like to swirl the tops for a pretty finish).
- Warning: Don’t overfill—the cups should be about 3/4 full to avoid overflow.
- Chill to Set:
- Place the assembled cups in the refrigerator for at least 2 hours (overnight for best texture).
- The filling firms up and the flavors meld together beautifully.
- If you’re in a hurry, pop them in the freezer for 30 minutes, but don’t let them freeze solid!
- Efficiency Note: Make these ahead for parties—they hold up great overnight.
- Whip Up the Topping (Optional):
- In a cold bowl, whip 1/2 cup (120ml) heavy cream with 1 tablespoon (8g) powdered sugar and 1/4 teaspoon vanilla extract until stiff peaks form (about 2-3 minutes).
- Dollop or pipe onto each cheesecake cup just before serving.
- Sensory Cue: The cream should be fluffy and hold its shape.
I’ve learned the hard way that rushing the chilling step leads to soupy cups—so, patience pays off! For extra efficiency, prep the crusts while the cream cheese softens. If your kitchen is warm, refrigerate the crusts before adding the filling. If you want to get fancy, sprinkle extra cookie crumbs or drizzle melted cookie butter on top before serving.
Cooking Tips & Techniques
Here are a few pro tips (learned through trial, error, and plenty of taste-testing) to guarantee your Creamy Cookie Butter Cheesecake Cups turn out perfect every time:
- Room Temperature Ingredients: Make sure your cream cheese and sour cream are at room temperature. Cold ingredients lead to lumpy filling, and trust me, nobody wants that.
- Don’t Overmix: Whip the filling until just smooth—overmixing can trap too much air and cause the cups to collapse.
- Firm Crust: Press the cookie crumbs down firmly. If you don’t, the crust will crumble and make a mess.
- Chilling is Key: Under-chilling results in runny cups. Always give them at least two hours to set up (overnight is even better).
- Batch Prep: Make the crusts and filling ahead and assemble right before serving for freshest flavor.
- Topping Tricks: For extra flair, use a piping bag for whipped cream, or sprinkle cookie crumbs for crunch.
Common mistakes? Skipping the chill time, using cold cream cheese, or adding too much filling. (Been there, done that!) If your filling looks grainy, it probably needs a bit more mixing. If you’re multitasking, get the crusts ready while the cream cheese softens—saves a few precious minutes. For consistency, measure ingredients carefully and use the same brand of cookie butter each time.
When I first started making these, my crusts were too thick and the filling overflowed—now I stick to the measurements above for perfect results. If you ever end up with extra filling, just spoon it into a bowl and eat it with a cookie (no shame!).
Variations & Adaptations
One of the best parts about these Creamy Cookie Butter Cheesecake Cups is how easily you can customize them. Here are a few of my favorite twists:
- Gluten-Free: Use gluten-free cookies for the base and make sure your cream cheese and cookie butter are gluten-free certified. (I’ve done this for friends, and it’s always a hit!)
- Dairy-Free: Swap dairy cream cheese and sour cream for coconut-based alternatives, and use coconut cream for the topping—still creamy, just a little lighter.
- Chocolate Swirl: Melt 1/4 cup (40g) chocolate chips and swirl into the filling before chilling. Adds a rich, decadent note.
- Seasonal Fruit: Top the cups with fresh berries, sliced bananas, or stewed apples for a burst of color and flavor.
- Nutty Crunch: Sprinkle chopped toasted pecans or almonds on top for texture.
- Spiced Pumpkin: Add 2 tablespoons (30g) pumpkin puree and a pinch of cinnamon to the filling for a fall-inspired twist.
If you want to bake the cups for a slightly firmer texture, bake them at 325°F (160°C) for 12-15 minutes, then chill to set (just don’t bake the whipped topping!). For those with nut allergies, stick to the classic speculoos or graham base and skip any nut toppings. My personal favorite? Adding a layer of caramel sauce under the filling—sweet, gooey, and totally irresistible.
Serving & Storage Suggestions
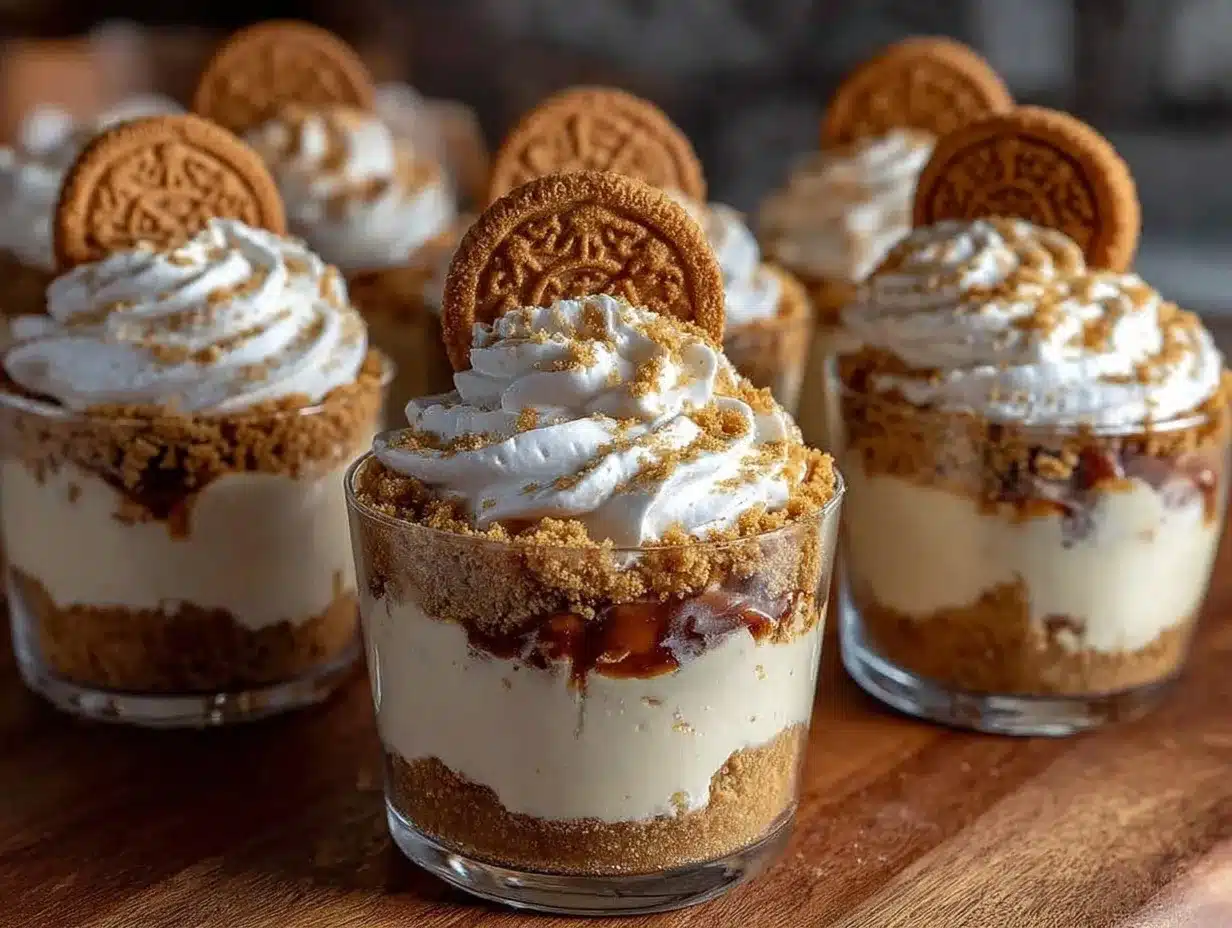
Serve these Creamy Cookie Butter Cheesecake Cups chilled, straight from the fridge. They’re perfect for dessert platters, after-school snacks, or midnight treats (not that I’m judging!). Present them in colorful cupcake liners or ramekins for a Pinterest-worthy look.
- Serving: Top with whipped cream, fresh berries, or a drizzle of melted cookie butter. Pair with coffee, milk, or a glass of dessert wine for an extra-special experience.
- Storage: Store in an airtight container in the refrigerator for up to 4 days. The flavors get even better as they meld together.
- Freezing: Freeze the un-topped cups for up to 2 months. Thaw overnight in the fridge and add toppings just before serving.
- Reheating: These cups are meant to be enjoyed cold, but if you want to take the chill off, let them sit at room temperature for 10 minutes before serving.
- Flavor Development: The cookie butter flavor intensifies after a day or two in the fridge—so if you can resist, wait before digging in!
Honestly, these are just as good after a couple days as they are fresh. Perfect for making ahead for parties or keeping on hand for impromptu cravings.
Nutritional Information & Benefits
Here’s a quick look at what you’re getting in each Creamy Cookie Butter Cheesecake Cup (approximate values for one cup):
- Calories: 230
- Fat: 15g
- Carbohydrates: 20g
- Protein: 4g
- Fiber: 1g
- Sugar: 14g
Health Highlights: Cream cheese supplies calcium and a little protein, while cookie butter brings iron and a touch of fiber. If you use gluten-free or dairy-free alternatives, these cups can fit into various dietary needs. Just watch out for nuts (in some cookie butter brands).
From my wellness perspective, a single-serving dessert like this helps with portion control—satisfying your sweet tooth without going overboard. They’re not low-calorie, but they’re a fun, shareable treat made with real ingredients. Always check labels if you’re avoiding allergens like gluten, dairy, or nuts.
Conclusion
If you’re hunting for a dessert that’s easy, crowd-pleasing, and a little bit indulgent, these Creamy Cookie Butter Cheesecake Cups are absolutely worth a try. They bring together rich, creamy flavors and a buttery crunch that feels like pure comfort in every bite. Plus, you can tweak them however you like to suit your taste or dietary needs.
I keep coming back to this recipe because it’s just so reliable—always a hit at family gatherings, a sweet surprise for friends, or a special treat for myself after a long day. I hope you love these as much as my family does! Try them out, make them your own, and don’t forget to share your twists below—maybe you’ll discover a new favorite.
Drop a comment if you try the recipe, share with friends (especially fellow cookie butter fanatics), or pin it for your next dessert inspiration. Happy baking—and may your cheesecake cups always be creamy!
Frequently Asked Questions
Can I make Creamy Cookie Butter Cheesecake Cups ahead of time?
Absolutely! Prepare and chill them up to 24 hours in advance. They hold up beautifully and taste even better the next day.
What if I don’t have cookie butter?
You can substitute with peanut butter or almond butter, but the flavor will be different. For best results, use speculoos cookie butter.
Can I freeze these cheesecake cups?
Yes! Freeze the un-topped cups for up to 2 months. Thaw overnight in the fridge and add your favorite toppings before serving.
How do I make these gluten-free?
Just use gluten-free cookies for the base and double-check your cream cheese and cookie butter are gluten-free certified.
Can I use low-fat cream cheese?
You can, but the texture may be slightly less creamy. Full-fat cream cheese gives the best results for these cheesecake cups.
Pin This Recipe!
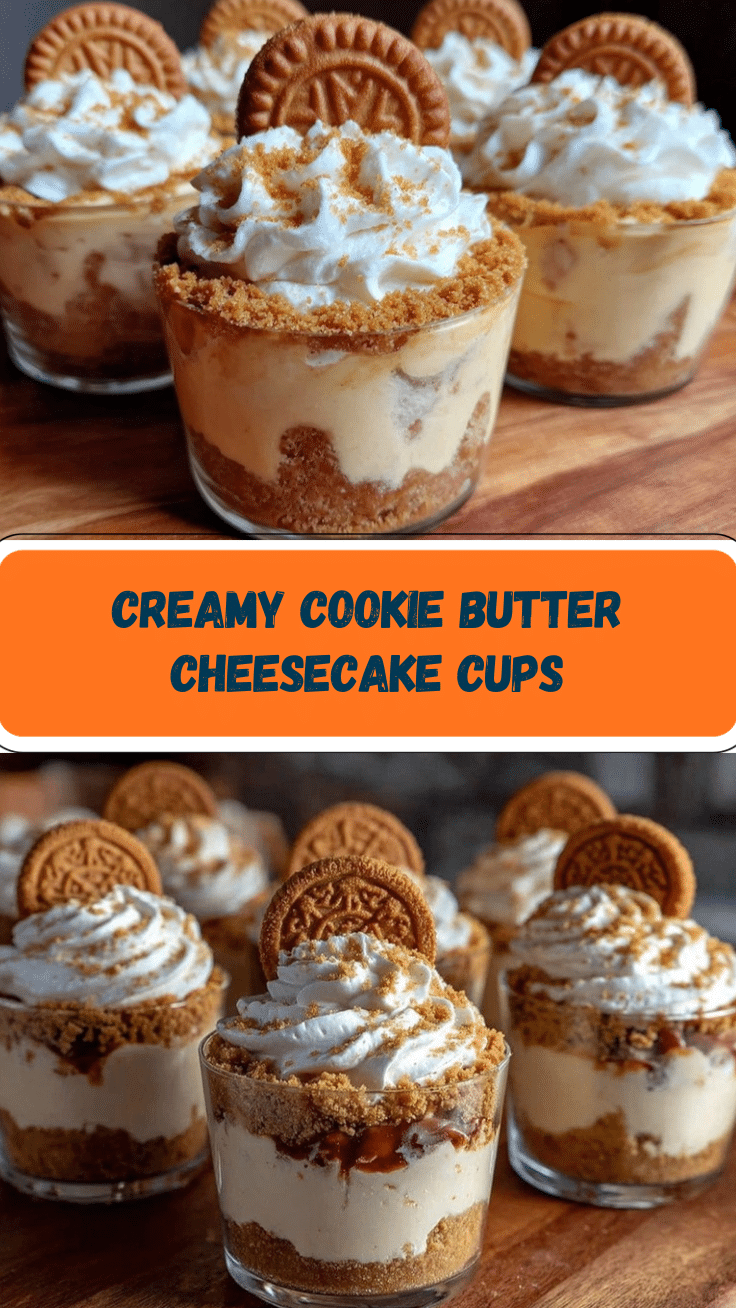
Creamy Cookie Butter Cheesecake Cups

These Creamy Cookie Butter Cheesecake Cups are a quick, easy, and indulgent personal dessert featuring a buttery cookie crust and a silky, spiced cookie butter cheesecake filling. Perfect for parties, gifting, or a comforting treat, they come together in just five simple steps and can be customized for gluten-free or dairy-free diets.
- Prep Time: 15 minutes
- Cook Time: 0 minutes
- Total Time: 2 hours 15 minutes (includes chilling)
- Yield: 12 cups 1x
- Category: Dessert
- Cuisine: American
Ingredients
- 1 cup (100g) crushed speculoos cookies or graham crackers
- 3 tablespoons (40g) unsalted butter, melted
- 1 tablespoon (12g) granulated sugar (optional)
- 8 ounces (225g) cream cheese, softened
- 1/2 cup (120g) cookie butter (such as Lotus Biscoff)
- 1/3 cup (80ml) sour cream
- 1/3 cup (40g) powdered sugar
- 1 teaspoon vanilla extract
- 1/8 teaspoon salt
- 1/2 cup (120ml) heavy whipping cream (optional, for topping)
- 1 tablespoon (8g) powdered sugar (optional, for topping)
- 1/4 teaspoon vanilla extract (optional, for topping)
Instructions
- Make the Cookie Crust: In a medium bowl, combine crushed speculoos cookies or graham crackers with melted butter and sugar (if using). Mix until evenly moistened. Spoon about 1 tablespoon of mixture into each lined muffin cup or ramekin and press firmly. Set aside.
- Prepare the Creamy Filling: In a large bowl, beat softened cream cheese until fluffy (1-2 minutes). Add cookie butter and mix until fully incorporated. Mix in sour cream, powdered sugar, vanilla extract, and salt. Beat until smooth and lump-free (2-3 minutes).
- Assemble the Cheesecake Cups: Spoon about 2 tablespoons of filling onto each prepared crust. Smooth the tops with a spatula or spoon. Do not overfill; cups should be about 3/4 full.
- Chill to Set: Refrigerate the assembled cups for at least 2 hours (overnight for best texture). For a quick set, freeze for 30 minutes but do not freeze solid.
- Whip Up the Topping (Optional): In a cold bowl, whip heavy cream with powdered sugar and vanilla extract until stiff peaks form (2-3 minutes). Dollop or pipe onto each cheesecake cup just before serving.
Notes
For best results, use room temperature cream cheese and sour cream. Do not skip the chilling step for proper texture. For gluten-free, use gluten-free cookies. For dairy-free, substitute with coconut-based cream cheese and cream. Top with whipped cream, berries, or extra cookie crumbs for added flair. Store in the fridge for up to 4 days or freeze (without topping) for up to 2 months.
Nutrition
- Serving Size: 1 cheesecake cup
- Calories: 230
- Sugar: 14
- Sodium: 120
- Fat: 15
- Saturated Fat: 8
- Carbohydrates: 20
- Fiber: 1
- Protein: 4
Keywords: cookie butter, cheesecake cups, no bake, easy dessert, personal dessert, speculoos, Biscoff, party dessert, make ahead, creamy cheesecake


