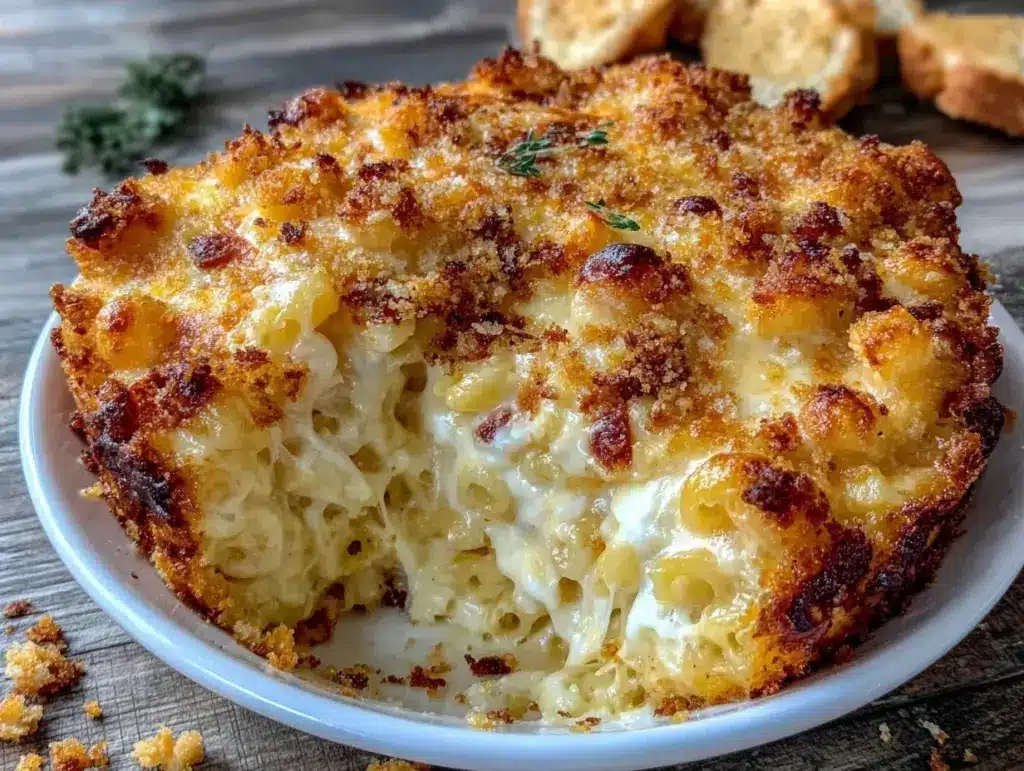
“Hey, are you seriously making mac and cheese again?” my roommate teased one evening as I pulled the bubbling dish from the oven, golden crust gleaming under the kitchen light. Honestly, I didn’t blame her for the eye-roll — I’d made this baked mac and cheese three times in less than a week. But here’s the thing: this recipe isn’t like the usual creamy stovetop versions I’ve done before. The crust cracks just right, and that creamy cheese underneath could practically make you close your eyes in pure comfort. It all started on a particularly hectic night when I had zero energy to cook but desperately wanted something homemade and satisfying.
I had about 15 minutes before my friend was due to visit, and digging through recipes, I stumbled on this method that promised a crispy baked top without drying out the inside. Skeptical but hopeful, I gave it a shot. The result? Unexpectedly perfect. The crunchy topping was a nice contrast to the rich, velvety cheese sauce that clung to every macaroni piece. Since then, it quietly became my go-to, especially on those nights when I want a little indulgence but no fuss. The magic really lies in the balance — not too dry, not overly saucy, and just the right amount of crisp.
What’s funny is how it’s turned into a bit of a crowd-pleaser, with friends nudging me for the recipe after sharing it alongside a batch of crispy baked turkey sliders at our last get-together. It feels like comfort food that’s been thoughtfully refined to hit all the right notes. And honestly, once you’ve had this version, going back to the plain old creamy mac feels almost like settling for less.
So, if you’re craving a mac and cheese that’s both decadently creamy and satisfyingly crispy, this recipe might just be the quiet little secret you didn’t know you needed — the kind you’ll find yourself making over and over again, too.
Why You’ll Love This Recipe
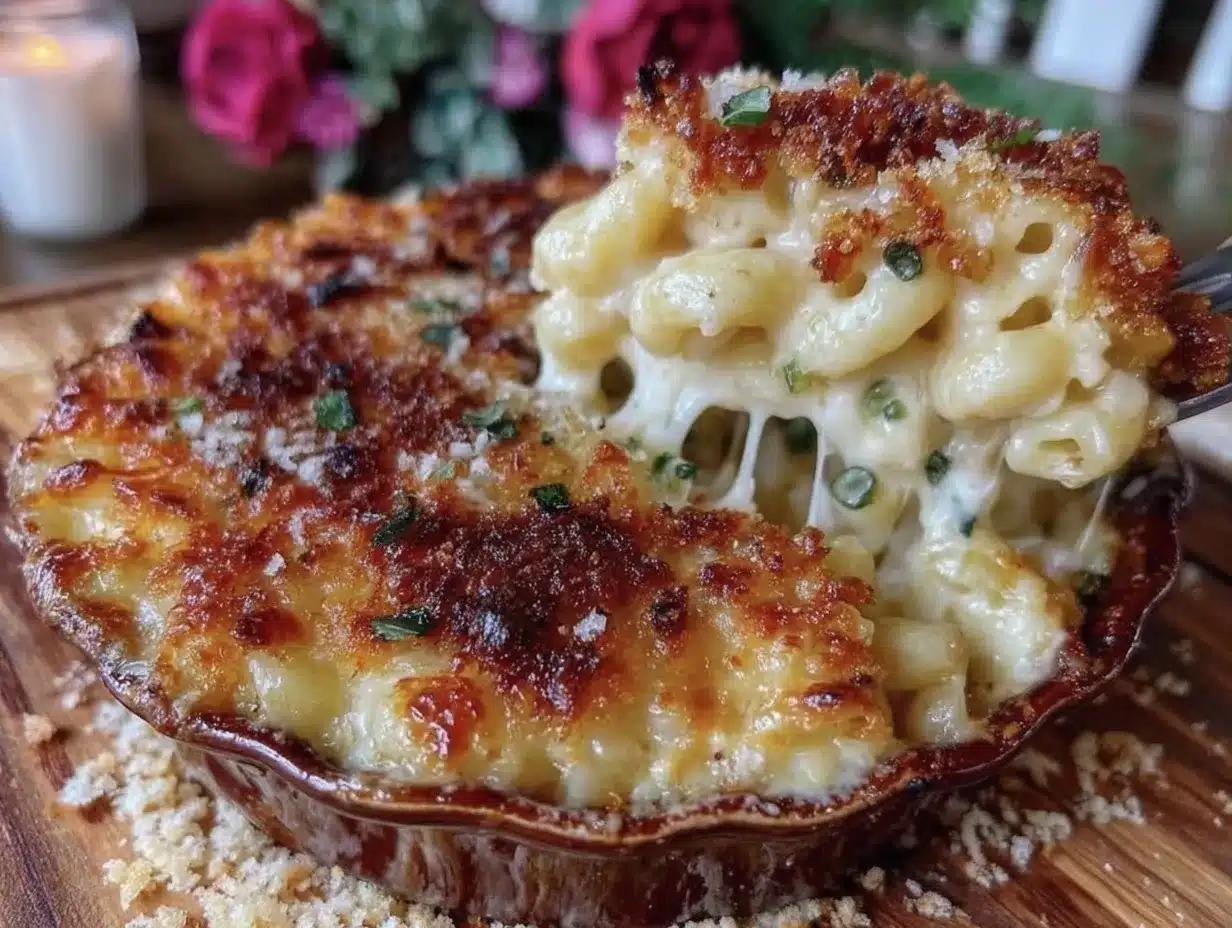
This crispy baked mac and cheese recipe isn’t just another version tossed around online. It’s been tested through several real kitchen experiments, tweaked for texture and flavor, and honestly, it’s one of those dishes that has that perfect balance between creamy indulgence and crispy satisfaction. From the melty cheese to the golden crust, every bite feels like a little celebration of comfort food done right.
- Quick & Easy: Ready in about 45 minutes, making it ideal for busy weeknights or last-minute cravings.
- Simple Ingredients: No need for specialty cheeses or obscure spices — most are pantry staples or easy to find at any grocery store.
- Perfect for Cozy Dinners: Whether you’re settling in for a solo night or feeding a small crowd, this dish hits the spot.
- Crowd-Pleaser: Kids, adults, picky eaters — everyone seems to ask for seconds (and sometimes thirds).
- Unbelievably Delicious: The creamy sauce is made with a blend of sharp cheddar and creamy mozzarella, giving you both flavor depth and that luscious melt.
What sets this recipe apart is the layering technique in the sauce — starting with a roux that’s cooked just right to avoid any graininess, and blending in cheeses slowly to get that ultra-smooth texture. Plus, the breadcrumb topping isn’t just any crumb mix; it’s seasoned and toasted lightly beforehand, so it crisps up beautifully without burning. This isn’t just baked mac and cheese; it’s the version I trust when comfort food needs a little extra punch.
It’s a dish that invites you to slow down and savor, whether you’re cozying up with a book or hosting a casual dinner with friends. And if you’re already a fan of creamy, cheesy dishes, you might appreciate how this pairs with savory sides like creamy ground beef and potatoes casserole or even some crispy baked ham and cheese croissants for brunch.
What Ingredients You Will Need
This recipe uses simple, wholesome ingredients to deliver bold flavor and satisfying texture without the fuss. Most of these are kitchen staples, and if you want to tweak things a bit, there are plenty of easy substitutions that won’t compromise the texture or taste.
- Elbow Macaroni: 12 ounces (340 grams), cooked al dente — the classic shape that holds sauce well.
- Unsalted Butter: 4 tablespoons (56 grams), for the roux and topping (adds richness and helps crisp up crumbs).
- All-Purpose Flour: 1/4 cup (30 grams), to make the roux and thicken the cheese sauce.
- Whole Milk: 3 cups (720 ml), warmed — full-fat for creaminess, but you can swap with 2% if needed.
- Sharp Cheddar Cheese: 2 cups shredded (about 8 ounces or 225 grams), the backbone of flavor here.
- Mozzarella Cheese: 1 cup shredded (about 4 ounces or 115 grams), for that stretchy, creamy texture.
- Parmesan Cheese: 1/2 cup grated (about 50 grams), adds a nutty sharpness to the topping.
- Breadcrumbs: 1 cup (about 100 grams), preferably panko for extra crunch; toasted with butter for better flavor.
- Garlic Powder: 1/2 teaspoon, gives a subtle savory lift.
- Onion Powder: 1/2 teaspoon, deepens the flavor without overpowering.
- Salt and Black Pepper: To taste, essential for seasoning every layer.
- Optional: A pinch of smoked paprika or cayenne for a gentle kick (try it if you want a little heat!).
For best results, I like to use a trusted brand like Cabot for the cheddar — it melts beautifully and has a great sharp bite. If you’re dairy-free, swapping the milk and cheeses with plant-based alternatives works fine, but the texture will shift a bit (still tasty, though!). Also, if gluten is a concern, you can replace the all-purpose flour with gluten-free flour blends and use gluten-free breadcrumbs.
Equipment Needed
- Large Pot: For boiling the macaroni — a heavy-bottomed pot helps prevent sticking.
- Medium Saucepan: For making the roux and cheese sauce; a non-stick pan can make cleanup easier.
- Whisk: Essential for stirring the roux and milk to avoid lumps.
- Baking Dish: A 9×13-inch (23×33 cm) casserole dish works perfectly for baking the mac and cheese.
- Mixing Bowls: For combining the cooked pasta and sauce, plus mixing the topping.
- Cheese Grater: Freshly shredding cheese makes a big difference in melt and flavor.
If you don’t have a whisk, a sturdy spoon works, but whisking helps keep the sauce silky. For breadcrumbs, I like to toast them in the same saucepan after making the roux — keeps things simple and adds flavor. Budget-wise, most of these are standard kitchen items, and investing in a good baking dish pays off for other recipes like hobo casserole ground beef.
Preparation Method
- Cook the Macaroni: Bring a large pot of salted water to a boil. Add 12 ounces (340 grams) elbow macaroni and cook until just al dente, about 7 minutes. Drain and set aside. (Don’t overcook — the pasta will finish cooking in the oven.)
- Make the Roux: In a medium saucepan, melt 4 tablespoons (56 grams) unsalted butter over medium heat. Once melted, whisk in 1/4 cup (30 grams) all-purpose flour. Stir constantly for about 2 minutes until the mixture is bubbly and golden, but not browned. This cooks out the raw flour taste.
- Add Warm Milk: Slowly pour in 3 cups (720 ml) whole milk while whisking vigorously to keep the sauce smooth. Continue cooking and whisking until the sauce thickens and coats the back of a spoon — about 5 to 7 minutes.
- Season the Sauce: Remove from heat and stir in 1/2 teaspoon garlic powder, 1/2 teaspoon onion powder, and salt and black pepper to taste. Optionally, add a pinch of smoked paprika or cayenne for a touch of heat.
- Incorporate the Cheeses: Gradually mix in 2 cups (225 grams) shredded sharp cheddar and 1 cup (115 grams) shredded mozzarella, stirring gently until melted and creamy. The sauce should be smooth and velvety — if it feels grainy, keep stirring over low heat until melted fully.
- Combine Pasta and Cheese Sauce: Transfer the cooked macaroni to a large mixing bowl. Pour the cheese sauce over the pasta and fold gently until every piece is coated. Taste and adjust seasoning if needed.
- Prepare the Topping: In the same saucepan (wipe it out if needed), melt 2 tablespoons (28 grams) butter over medium heat. Add 1 cup (100 grams) panko breadcrumbs and 1/2 cup (50 grams) grated Parmesan cheese. Stir frequently until the breadcrumbs turn golden and toasted, about 3-4 minutes. Remove from heat.
- Assemble the Dish: Pour the mac and cheese mixture into a greased 9×13-inch (23×33 cm) baking dish. Evenly sprinkle the toasted breadcrumb topping over the surface.
- Bake: Place in a preheated oven at 350°F (175°C) for 20 to 25 minutes, until the top is crispy and golden, and the cheese sauce is bubbling around the edges.
- Rest and Serve: Let the dish cool for 5 minutes before serving. This helps the sauce thicken slightly and makes it easier to portion.
If you notice the sauce is too thick before baking, just stir in a splash of milk to loosen it. Also, keep an eye on the breadcrumbs during baking; if they start to burn, tent a sheet of foil loosely over the dish. This method works wonders for making a creamy baked mac like the kind I always wanted but never quite nailed until now.
Cooking Tips & Techniques
Here’s what I learned after a few rounds of trial and error to get this mac and cheese just right:
- Don’t Skip the Roux: It’s the foundation for a silky cheese sauce. Cooking the flour and butter until bubbly and pale golden makes a big flavor difference.
- Warm Milk Matters: Adding cold milk to the roux can cause lumps. Warming it slightly before adding helps keep the sauce smooth.
- Shred Cheese Yourself: Pre-shredded cheese often contains anti-caking agents that can affect melting. Freshly shredded cheese melts creamier.
- Cook Pasta Al Dente: Since it bakes again, pasta that’s too soft turns mushy. A firm bite keeps the texture balanced.
- Toast Breadcrumbs First: This little step prevents sogginess and adds a deeper nutty flavor to the topping.
- Season at Every Stage: Don’t just rely on cheese saltiness. Season your roux and sauce carefully for layers of flavor.
- Watch the Oven Time: Baking too long dries out the creamy sauce. 20-25 minutes is usually perfect for a bubbly, golden finish.
Oh, and a lesson learned the hard way — I once skipped the breadcrumb topping and just sprinkled plain cheese on top. The texture was good but missed that crispy crackle I now crave. Also, multitasking on busy nights, I like to prep the cheese sauce while the pasta boils, saving massive time.
Variations & Adaptations
This crispy baked mac and cheese is versatile and welcomes tweaks for different tastes and diets.
- Gluten-Free Version: Use gluten-free pasta, substitute the flour in the roux with a gluten-free flour blend, and swap breadcrumbs with crushed gluten-free crackers or almond meal.
- Spicy Kick: Add diced jalapeños or a pinch of cayenne pepper to the cheese sauce for some heat. You can also top with crushed red pepper flakes.
- Veggie Boost: Stir in steamed broccoli, spinach, or roasted red peppers before baking for extra color and nutrition.
- Different Cheeses: Swap mozzarella for Gruyère or fontina for a nuttier profile. Smoked cheddar works well for a deeper flavor.
- Vegan Adaptation: Use plant-based milk, vegan butter, and dairy-free cheese shreds. Nutritional yeast can add cheesiness to the sauce.
One personal variation I tried was folding in caramelized onions and crispy bacon before baking — it made the dish feel more like a full meal and was a hit at a casual weekend dinner. For a lighter take, mixing in some Greek yogurt before baking adds creaminess without extra fat.
Serving & Storage Suggestions
This mac and cheese is best served warm, right out of the oven when the top is crunchy and the interior is meltingly creamy. I like to plate it with a crisp green salad or some garlicky roasted vegetables to cut through the richness.
If you want to turn it into a meal, pairing with a protein like grilled chicken or even a side of crispy baked ham and cheese croissants works wonderfully for brunch or casual dinner.
To store leftovers, cover tightly and refrigerate for up to 3 days. Reheat in a 350°F (175°C) oven for 15 minutes to restore the crispy topping and creamy interior. Avoid microwaving if you want to keep the crust intact, but if pressed for time, a quick zap with a splash of milk can help loosen the sauce.
Flavors actually deepen after a day, so sometimes I make it ahead and bake just before serving — perfect for gatherings or meal prep.
Nutritional Information & Benefits
Per serving (based on 6 servings): approximately 450 calories, 22g fat, 40g carbohydrates, 18g protein.
The combination of sharp cheddar and mozzarella provides calcium and protein, while whole milk adds vitamin D and healthy fats. Using butter and cheese does increase saturated fat, so this dish is best enjoyed as an occasional indulgence.
For a slightly healthier option, swapping half the butter for olive oil or using 2% milk can reduce fat content. Adding veggies like broccoli boosts fiber and vitamins.
This recipe is naturally gluten-containing unless adaptations are made, and it contains dairy, so it’s important to consider allergies or dietary restrictions when serving.
Conclusion
This crispy baked mac and cheese with ultimate creamy texture has quietly become one of those dishes that I make when I want comfort food that feels a little special. It’s easy enough to whip up on a busy night but impressive enough to serve guests without stress. The balance of creamy sauce and crunchy topping somehow brings it all together — the kind of recipe that invites you to linger over your plate.
Feel free to play with cheeses, add a dash of spice, or toss in your favorite veggies to make it your own. That’s what I love most — how this recipe gives a solid base for creativity while delivering that classic cozy feeling.
Whether you’re feeding a crowd or just craving a bowl for yourself, this baked mac and cheese stands ready to comfort and satisfy. I’d love to hear how you put your spin on it or what add-ins become your favorite — drop a comment or share your twists!
Frequently Asked Questions
Can I use different pasta shapes for baked mac and cheese?
Yes! While elbow macaroni is traditional, small shells, cavatappi, or penne all work well because they hold onto the sauce nicely.
How do I prevent the mac and cheese from becoming too dry when baking?
Make sure not to overcook the pasta initially and avoid overbaking. Also, keep an eye on the breadcrumb topping and tent with foil if it browns too fast.
Can I prepare this recipe ahead of time?
Absolutely! Assemble the dish and refrigerate it uncovered for up to 24 hours, then bake just before serving. This helps the flavors meld and saves time on busy days.
What’s the best way to get a crispy topping without burning?
Toasting the breadcrumbs in butter before sprinkling on top adds flavor and helps crisp without burning. Also, bake at a moderate temperature (350°F/175°C) and watch the last few minutes closely.
Is this recipe freezer-friendly?
You can freeze baked mac and cheese, but the topping may lose some crunch. Freeze before baking, thaw overnight in the fridge, then bake fresh for best results.
Pin This Recipe!
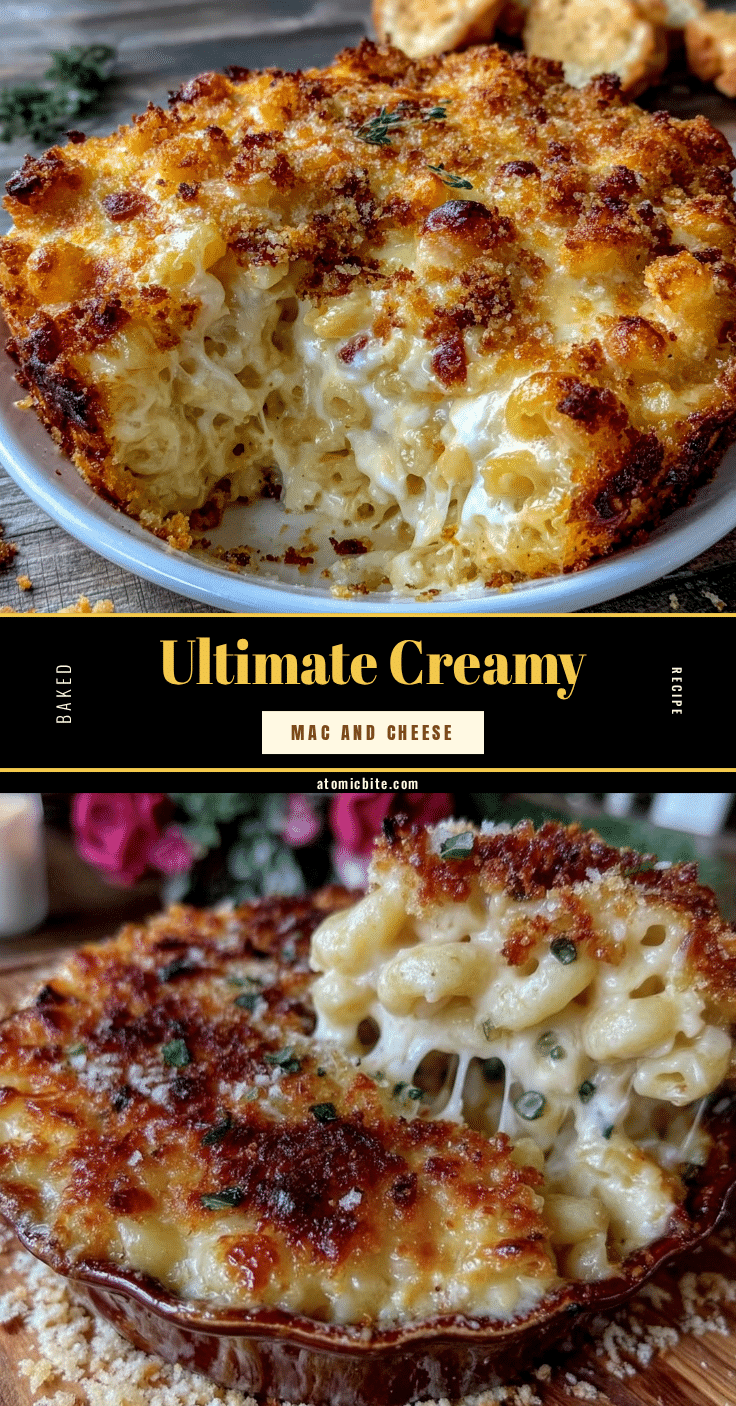
Crispy Baked Mac and Cheese Recipe with Ultimate Creamy Texture Easy and Perfect

A baked mac and cheese recipe featuring a perfectly crispy breadcrumb topping and a rich, creamy cheese sauce made with sharp cheddar and mozzarella. Ideal for cozy dinners and crowd-pleasing comfort food.
- Prep Time: 15 minutes
- Cook Time: 30 minutes
- Total Time: 45 minutes
- Yield: 6 servings 1x
- Category: Main Course
- Cuisine: American
Ingredients
- 12 ounces (340 grams) elbow macaroni, cooked al dente
- 4 tablespoons (56 grams) unsalted butter, divided
- 1/4 cup (30 grams) all-purpose flour
- 3 cups (720 ml) whole milk, warmed
- 2 cups shredded sharp cheddar cheese (about 8 ounces or 225 grams)
- 1 cup shredded mozzarella cheese (about 4 ounces or 115 grams)
- 1/2 cup grated Parmesan cheese (about 50 grams)
- 1 cup panko breadcrumbs (about 100 grams)
- 1/2 teaspoon garlic powder
- 1/2 teaspoon onion powder
- Salt and black pepper to taste
- Optional: pinch of smoked paprika or cayenne pepper
Instructions
- Bring a large pot of salted water to a boil. Add 12 ounces elbow macaroni and cook until just al dente, about 7 minutes. Drain and set aside.
- In a medium saucepan, melt 4 tablespoons unsalted butter over medium heat. Whisk in 1/4 cup all-purpose flour and stir constantly for about 2 minutes until bubbly and golden but not browned.
- Slowly pour in 3 cups warmed whole milk while whisking vigorously to keep the sauce smooth. Continue cooking and whisking until the sauce thickens and coats the back of a spoon, about 5 to 7 minutes.
- Remove from heat and stir in 1/2 teaspoon garlic powder, 1/2 teaspoon onion powder, salt, and black pepper to taste. Optionally add a pinch of smoked paprika or cayenne.
- Gradually mix in 2 cups shredded sharp cheddar and 1 cup shredded mozzarella, stirring gently until melted and creamy.
- Transfer the cooked macaroni to a large mixing bowl. Pour the cheese sauce over the pasta and fold gently until every piece is coated. Adjust seasoning if needed.
- In the same saucepan, melt 2 tablespoons butter over medium heat. Add 1 cup panko breadcrumbs and 1/2 cup grated Parmesan cheese. Stir frequently until breadcrumbs are golden and toasted, about 3-4 minutes. Remove from heat.
- Pour the mac and cheese mixture into a greased 9×13-inch baking dish. Evenly sprinkle the toasted breadcrumb topping over the surface.
- Bake in a preheated oven at 350°F (175°C) for 20 to 25 minutes until the top is crispy and golden and the cheese sauce is bubbling around the edges.
- Let the dish cool for 5 minutes before serving to allow the sauce to thicken slightly.
Notes
Do not overcook the pasta initially; it will finish cooking in the oven. Toast breadcrumbs in butter before topping to prevent sogginess and add flavor. If sauce is too thick before baking, stir in a splash of milk. Tent with foil if breadcrumbs brown too quickly. Freshly shred cheese for best melt and flavor.
Nutrition
- Serving Size: 1/6 of the recipe (a
- Calories: 450
- Sugar: 6
- Sodium: 600
- Fat: 22
- Saturated Fat: 13
- Carbohydrates: 40
- Fiber: 1
- Protein: 18
Keywords: baked mac and cheese, crispy mac and cheese, creamy mac and cheese, comfort food, easy dinner, cheesy pasta, baked pasta


