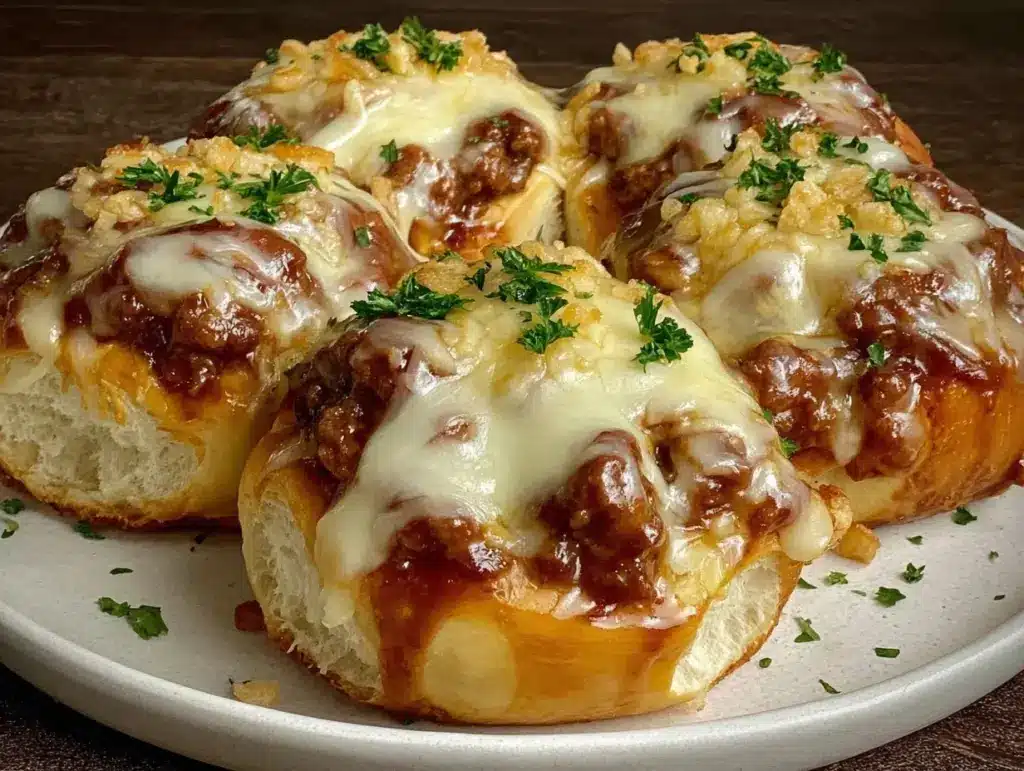
Let me tell you, the aroma of sizzling beef, garlicky butter, and bubbling parmesan wafting from my oven is pure magic. It’s the kind of smell that makes the whole house feel like the coziest diner you’ve ever wandered into on a cold evening. The first time I pulled these Crispy Garlic Parmesan Cheeseburger Bombs from my oven, I swear I paused—just to savor that moment. That buttery, savory scent? It’s dangerously good. The golden crust crackled as I bit in, and the gooey cheese and juicy burger filling made me grin like a kid at a county fair.
Honestly, I wish I’d found this dough dinner trick years ago! My grandma used to make something similar with leftover meatloaf and biscuits when I was knee-high to a grasshopper. Fast forward to a rainy weekend—trying to recreate her comfort food magic—I stumbled onto the idea of stuffing rich cheeseburger filling into pillowy dough and crisping it with garlic parmesan butter. I was instantly hooked (and so was my family, who couldn’t stop sneaking “just one more” from the cooling rack).
These cheeseburger bombs have become a staple for family gatherings, quick weeknight dinners, and even game-day snacks. You know what? They’re perfect for potlucks, after-school treats, or just to brighten up your Pinterest board with a drool-worthy photo. If you’re craving something that’s easy, comforting, and a little bit impressive, you’re going to want to bookmark this one. I’ve tested and tweaked this recipe so many times—in the name of research, of course—and it never fails to deliver that warm hug feeling every time.
Why You’ll Love These Crispy Garlic Parmesan Cheeseburger Bombs
Let’s face it, you don’t need a culinary degree to whip up something that tastes this good. After countless kitchen trials (and more than a few burned fingers—occupational hazard!), I can confidently say these are a guaranteed crowd-pleaser. Here’s why you’ll keep coming back to this recipe:
- Quick & Easy: Ready in about 30 minutes, so you can satisfy burger cravings in a flash—no drive-thru required.
- Simple Ingredients: Everything is easy to find at any grocery store. Most of it’s probably already lurking in your fridge or pantry, waiting for its moment to shine.
- Perfect for Every Occasion: Whether it’s a cozy family dinner, a potluck, or a Pinterest-worthy snack plate, these bombs fit right in.
- Crowd-Pleaser: Kids love the cheesy filling, adults love the crispy garlic parmesan coating. Honestly, you should make a double batch.
- Unbelievably Delicious: The melt-in-your-mouth texture and savory flavor combo are pure comfort food—think cheeseburger meets garlic bread.
What truly sets these cheeseburger bombs apart? It’s the buttery dough, crisped with garlic parmesan, and the gooey cheese-to-beef ratio inside. I use a simple blending technique for the garlic butter (learned from a chef friend) that makes the coating extra flavorful—no bland bites here. You can swap in turkey or chicken if you want a lighter twist, or play with seasoning to make it uniquely yours.
This isn’t just another stuffed bread recipe. It’s my best version—tested, tasted, and family-approved. Every bite takes you back to those classic diner flavors, only you get to enjoy them fresh from your kitchen. It’s the kind of recipe that makes you close your eyes and savor every bite. Comfort food, but faster and fresher. Perfect for impressing guests or turning a simple Tuesday night into something memorable.
What Ingredients You Will Need
This recipe uses simple, wholesome ingredients to deliver bold flavor and satisfying texture without the fuss. Most of what you need is probably already in your kitchen, and you can easily swap things out for what you have on hand. Here’s the rundown:
- For the cheeseburger filling:
- Ground beef (about 1 lb / 450g; I use 80/20 for juiciness, but lean works too)
- Yellow onion, finely chopped (1 small; adds sweetness and moisture)
- Garlic cloves, minced (2 cloves; or use garlic powder for convenience)
- Salt (1/2 tsp / 3g) and black pepper (1/2 tsp / 2g)
- Worcestershire sauce (1 tbsp / 15ml; for depth—optional but recommended)
- Ketchup (2 tbsp / 30ml; adds that classic burger tang)
- Shredded cheddar cheese (1 cup / 120g; or mix with mozzarella for extra gooeyness)
- Pickles, chopped (1/4 cup / 30g; optional, but adds a zesty crunch)
- For the dough:
- Refrigerated biscuit dough (1 can, 8 pieces; I use Pillsbury Grands, but any brand works)
- OR homemade pizza dough (about 1 lb / 450g; for a more rustic flavor)
- For the garlic parmesan coating:
- Unsalted butter, melted (1/4 cup / 60g)
- Garlic powder (1 tsp / 5g; or fresh minced garlic for punchier flavor)
- Fresh parsley, chopped (2 tbsp / 8g; for color and freshness)
- Grated parmesan cheese (1/3 cup / 30g; use freshly grated for best flavor)
- Crushed red pepper flakes (a pinch; optional for a kick)
You can swap the beef for ground turkey, chicken, or even a plant-based alternative. For gluten-free needs, just use gluten-free biscuit or pizza dough. Dairy-free? Go with vegan butter and cheese. I’ve tried it with all sorts of cheese blends—Monterey Jack, pepper jack, even Swiss. If you want to get fancy, toss in a slice of bacon for smoky goodness. In summer, fresh herbs like basil or oregano are game-changers. I always recommend using sharp cheddar for bold flavor (Cabot or Tillamook are my go-tos). If you’re feeling extra, sprinkle some smoked paprika into the filling for a little surprise.
Equipment Needed
- Baking sheet: A sturdy, rimmed sheet helps keep any melted cheese or butter from making a mess. If you have a nonstick one, cleanup is a breeze.
- Parchment paper: For easy release and less scrubbing (honestly, this saves my sanity).
- Mixing bowls: You’ll want at least two—one for the burger filling, one for the garlic butter.
- Skillet: Cast iron is best for browning the beef, but any heavy pan works.
- Measuring cups and spoons: Precision helps, especially with the seasoning.
- Pastry brush: For slathering on that garlic butter. If you don’t have one, a spoon works (just go slow).
- Knife and cutting board: For onions, garlic, and any add-ins.
- Optional: Stand mixer with dough hook (if you make homemade dough). I’ve found budget-friendly manual dough kneaders work in a pinch, too.
If you’re just starting out, don’t sweat the fancy gear. I’ve made these with nothing but a basic baking sheet and my trusty wooden spoon. Just make sure your pan is thick enough to avoid burning the bottoms. For maintenance, wash your pans with warm, soapy water and dry right away to keep them from warping (learned that the hard way!).
Preparation Method
- Preheat your oven: Set to 400°F (200°C). Line a baking sheet with parchment paper for easy cleanup.
- Prepare the cheeseburger filling: Heat your skillet over medium-high and add the ground beef. Break it up with a spoon and cook for 3-5 minutes until browned. Toss in chopped onion and minced garlic; cook another 2 minutes until onions soften. Season with salt, pepper, and Worcestershire sauce. Stir in ketchup and cook for 1 minute, then remove from heat. Let the mixture cool for 3-5 minutes (warm filling can melt the dough—trust me, I’ve had leaks!). Stir in shredded cheddar and pickles if using.
- Prep the dough: If using biscuit dough, separate into individual pieces and flatten each into a 4-inch (10cm) circle. Homemade pizza dough? Divide into 8 balls and roll out to similar size. Try to keep the edges just a bit thicker than the center—this prevents splits when baking.
- Assemble the bombs: Spoon 2 tablespoons (about 30g) of the filling onto the center of each dough round. Pull edges up and pinch tightly to seal—roll gently into a ball. Place seam-side down on your prepared sheet. Don’t overfill or the bombs will burst (I learned the hard way—less is more!).
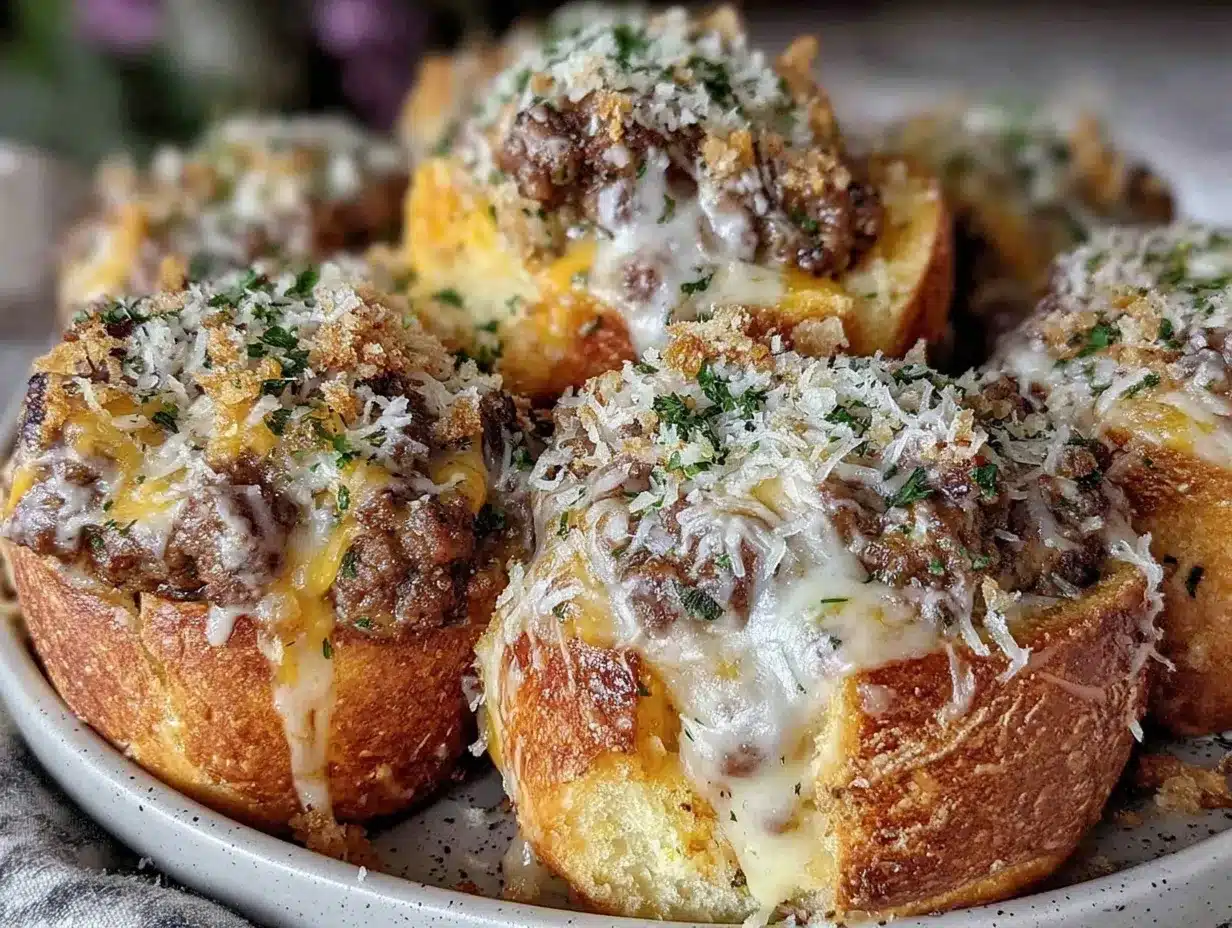
- Make the garlic parmesan butter: In a bowl, mix melted butter, garlic powder, chopped parsley, and red pepper flakes. Brush each bomb generously with the mixture. Sprinkle grated parmesan over the tops.
- Bake: Slide the pan into the oven and bake for 15-18 minutes. Keep an eye on them after 12 minutes—the tops should be golden, and you might catch a whiff of toasted parmesan. If some cheese oozes out, don’t sweat it—those crispy bits are a bonus!
- Finishing touches: When done, let the bombs cool for 3-5 minutes. Brush on any remaining garlic butter for extra shine (and flavor!). Serve warm, and enjoy the gooey, crispy magic.
If bombs look pale after baking, broil for 1 minute—watch closely, they brown fast. If dough splits, pinching again before baking usually helps. For batch prepping, you can assemble ahead and chill for up to 8 hours before baking. I sometimes freeze unbaked bombs for a quick dinner later; just bake straight from frozen, adding 5 minutes to the cook time.
Cooking Tips & Techniques
There’s a bit of magic in the details. Here are my go-to tips (learned through lots of trial and error):
- Don’t overfill: It’s tempting to stuff in extra cheese or beef, but trust me—the dough needs room to seal. Overfilled bombs will burst or leak.
- Seal tightly: Pinch edges firmly, then roll the balls gently in your hands. This helps prevent splits and keeps the filling inside.
- Use cool filling: Hot filling will soften the dough too much and cause leaks. Let it rest a few minutes after cooking.
- Brush with butter twice: Once before baking, and once after for maximum flavor and shine.
- Watch the oven: Baking time can vary based on dough thickness. Once the tops are golden and cheese is bubbly, they’re ready. If unsure, gently lift one—bottoms should be crisp, not soggy.
My first few batches were a bit messy—cheese everywhere, uneven browning. I learned to rotate the pan halfway for even crisping. If you want super-crispy bottoms, preheat your pan before placing the bombs on it. Multitasking? Prepare the filling while the oven preheats and mix the butter while bombs bake. For consistency, use the same size dough rounds and filling amounts each time. If you’re cooking for a crowd, double the recipe and use two sheets—just swap their positions halfway through baking.
Variations & Adaptations
One of my favorite things about these cheeseburger bombs is how easily you can make them your own. Here are a few tasty twists:
- Dietary swaps: Use gluten-free biscuit dough or pizza dough for a celiac-friendly version. Swap regular cheese for vegan shreds and use plant-based meat for a dairy-free, meatless option.
- Seasonal flavors: In summer, add fresh chopped tomatoes or swap cheddar for pepper jack. In winter, try a sprinkle of smoked paprika or add sautéed mushrooms to the filling.
- Different cooking methods: Air fryer fans, rejoice—these bake up crispy in about 10-12 minutes at 375°F (190°C). Just don’t crowd the basket.
- Flavor boosts: Add a slice of cooked bacon or caramelized onions to each bomb for extra richness. Try mixing in a spoonful of BBQ sauce to the beef for smoky flavor.
- Personal twist: I’ve tried a jalapeño popper version—stuffing in diced jalapeños and cream cheese alongside the beef. Spicy, creamy, and absolutely addictive!
For allergen needs, skip the parmesan or use a nut-based vegan cheese. Kids love it with a little sweet pickle relish mixed in. You can even swap beef for shredded rotisserie chicken and use ranch seasoning for a fun change. The sky’s the limit—just use your imagination (and what’s in your fridge)!
Serving & Storage Suggestions
These cheeseburger bombs are best served fresh and warm, right out of the oven when the cheese is gooey and the crust is crispy. I love piling them high on a platter with a sprinkle of extra parsley and a small bowl of ketchup or ranch for dipping—makes them perfect for sharing or snacking.
Pair with a crisp green salad, sweet potato fries, or even a big bowl of tomato soup for a cozy meal. For drinks, cold lemonade or root beer makes it feel like a retro diner night. They’re also great for picnic baskets or potlucks—just wrap in foil and go.
To store, let bombs cool completely, then place in an airtight container. Refrigerate for up to 4 days or freeze for up to 2 months. Reheat in a 350°F (175°C) oven for 10 minutes (or microwave for 30 seconds, but they won’t be as crispy). Honestly, the flavors deepen overnight, making leftovers even tastier! If freezing, wrap each bomb individually for easy grab-and-go meals.
Nutritional Information & Benefits
Each crispy garlic parmesan cheeseburger bomb packs about 210-250 calories, with 12g protein, 15g fat, and 18g carbohydrates (estimates vary based on dough and cheese choices). The beef filling offers iron and B vitamins, while cheddar brings calcium and protein. Using fresh parsley adds antioxidants and a vitamin boost.
For gluten-free and dairy-free adaptations, use alternative dough and cheese. Note: Contains wheat, dairy, and may contain soy (check biscuit dough labels). If you’re watching sodium, reduce added salt or use low-sodium cheese. From a wellness perspective, these bombs are an occasional treat—pair with veggies and fruit for a balanced meal. For me, they’re pure soul food—warm, satisfying, and perfect for a pick-me-up meal.
Conclusion
These Crispy Garlic Parmesan Cheeseburger Bombs aren’t just another dinner recipe—they’re a comfort food experience, packed with flavor and nostalgia. They’re quick to make, easy to customize, and guaranteed to bring smiles around your table. Whether you swap the filling, change up the cheese, or try a new dipping sauce, you’ll find ways to make these bombs your own.
I love this recipe because it reminds me of family gatherings, childhood treats, and cozy nights in. It’s simple, satisfying, and a little bit fun—plus, you’ll have people asking for seconds (and the recipe!).
If you try these cheeseburger bombs, I’d love to hear how you make them yours—drop a comment, share your photos on Pinterest, or let me know your favorite twist. Bookmark this for your next busy night, and don’t forget to share it with friends who love easy, delicious comfort food!
Frequently Asked Questions
Can I make crispy garlic parmesan cheeseburger bombs ahead of time?
Absolutely! You can assemble the bombs, cover, and refrigerate for up to 8 hours before baking. They’re also freezer-friendly—just bake straight from frozen, adding a few extra minutes.
What kind of dough works best for cheeseburger bombs?
Refrigerated biscuit dough is quickest, but homemade pizza dough gives a more rustic flavor. Gluten-free dough works well too—just make sure it’s sturdy enough to hold the filling.
How can I prevent the bombs from leaking cheese?
Let the filling cool before stuffing, and pinch the dough edges tightly. If you see splits before baking, pinch again or patch with a small piece of dough.
Can I use different cheeses in this recipe?
Definitely! Cheddar is classic, but mozzarella, pepper jack, and Swiss all work great. For a spicy twist, try adding a slice of pepper jack inside each bomb.
Do I need to use parmesan in the coating?
Parmesan gives the best crispy, savory finish, but you can swap it for romano or even a vegan cheese. If you skip it, add an extra sprinkle of garlic powder for flavor.
Pin This Recipe!
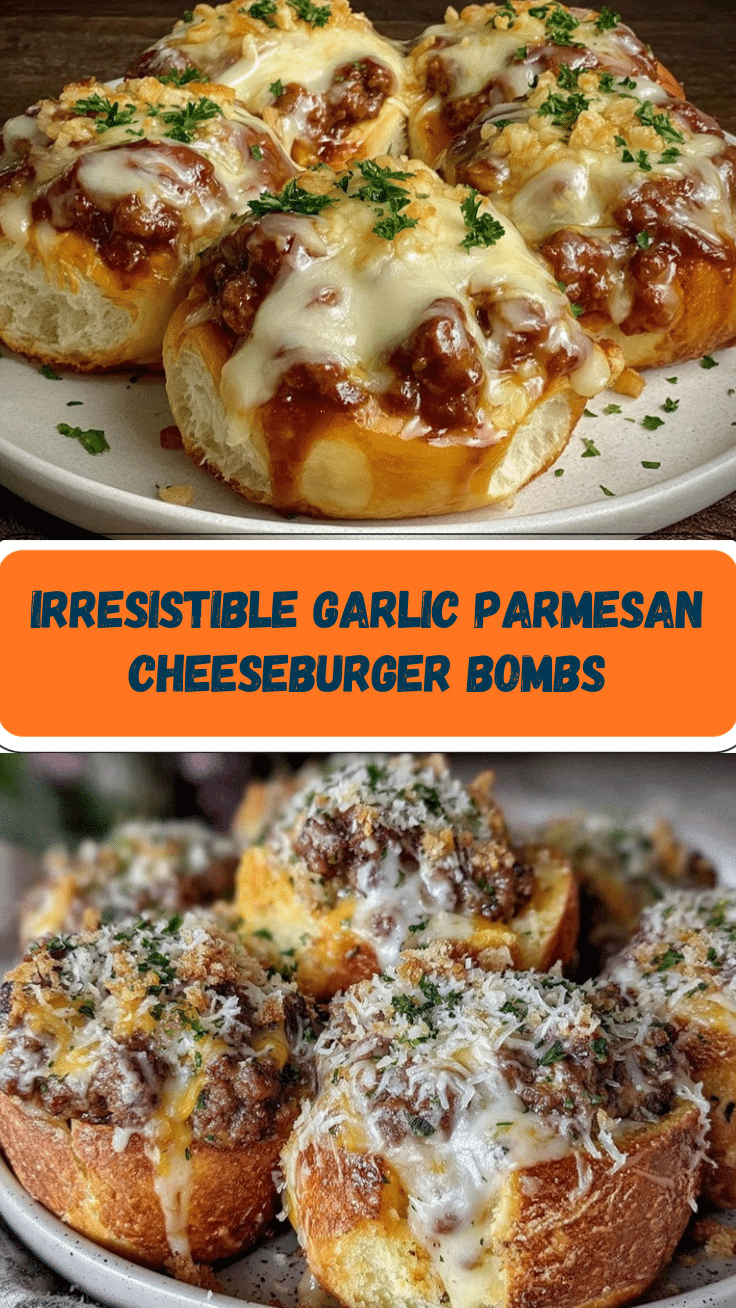
Crispy Garlic Parmesan Cheeseburger Bombs

These Crispy Garlic Parmesan Cheeseburger Bombs are a quick, comforting dinner featuring juicy cheeseburger filling wrapped in pillowy dough and crisped with garlic parmesan butter. Ready in just 30 minutes, they’re perfect for family dinners, parties, or game-day snacks.
- Prep Time: 12 minutes
- Cook Time: 18 minutes
- Total Time: 30 minutes
- Yield: 8 cheeseburger bombs 1x
- Category: Main Course
- Cuisine: American
Ingredients
- 1 lb ground beef (80/20 preferred, but lean works too)
- 1 small yellow onion, finely chopped
- 2 garlic cloves, minced (or 1 tsp garlic powder)
- 1/2 tsp salt
- 1/2 tsp black pepper
- 1 tbsp Worcestershire sauce (optional, but recommended)
- 2 tbsp ketchup
- 1 cup shredded cheddar cheese (or mix with mozzarella for extra gooeyness)
- 1/4 cup chopped pickles (optional)
- 1 can refrigerated biscuit dough (8 pieces, such as Pillsbury Grands) OR 1 lb homemade pizza dough
- 1/4 cup unsalted butter, melted
- 1 tsp garlic powder (or fresh minced garlic)
- 2 tbsp fresh parsley, chopped
- 1/3 cup grated parmesan cheese
- Pinch of crushed red pepper flakes (optional)
Instructions
- Preheat oven to 400°F (200°C). Line a baking sheet with parchment paper.
- Heat a skillet over medium-high heat. Add ground beef and cook for 3-5 minutes, breaking up with a spoon until browned.
- Add chopped onion and minced garlic; cook another 2 minutes until onions soften.
- Season with salt, pepper, and Worcestershire sauce. Stir in ketchup and cook for 1 minute. Remove from heat and let cool for 3-5 minutes.
- Stir in shredded cheddar cheese and pickles (if using) into the cooled beef mixture.
- Separate biscuit dough into 8 pieces and flatten each into a 4-inch circle (or divide pizza dough into 8 balls and roll out).
- Spoon about 2 tablespoons of filling onto the center of each dough round. Pull edges up and pinch tightly to seal, rolling gently into a ball. Place seam-side down on the prepared baking sheet.
- In a bowl, mix melted butter, garlic powder, chopped parsley, and red pepper flakes. Brush each bomb generously with the mixture. Sprinkle grated parmesan over the tops.
- Bake for 15-18 minutes, until golden brown. If desired, broil for 1 minute for extra color (watch closely).
- Let cool for 3-5 minutes. Brush with any remaining garlic butter and serve warm.
Notes
Let the filling cool before stuffing to prevent dough from splitting. Pinch dough edges tightly to seal. For gluten-free or dairy-free, use alternative dough and cheese. Can be assembled ahead and refrigerated up to 8 hours or frozen before baking. Reheat leftovers in the oven for best texture.
Nutrition
- Serving Size: 1 cheeseburger bomb
- Calories: 230
- Sugar: 2
- Sodium: 480
- Fat: 15
- Saturated Fat: 7
- Carbohydrates: 18
- Fiber: 1
- Protein: 12
Keywords: cheeseburger bombs, garlic parmesan, stuffed biscuits, easy dinner, comfort food, kid-friendly, party snack, ground beef, quick meal


