There was this one chilly Sunday afternoon when I found myself standing in front of a nearly empty fridge, wondering how to pull together something comforting without a long grocery run. Honestly, I wasn’t expecting much, but then I spotted a half bag of spinach wilting quietly in the back. That’s when the idea of crispy spanakopita with flaky phyllo and creamy spinach filling popped into my head, almost as a last-ditch effort to save dinner. I’d always admired spanakopita but never really tried making it myself—mostly because the phyllo dough seemed intimidating. But that day, I grabbed a pack of phyllo from the freezer, rolled up my sleeves, and gave it a shot.
What happened next surprised me: the kitchen filled with the buttery scent of baking phyllo, the spinach and feta mixture came together so smoothly, and the final golden-brown triangles were a total hit with everyone around the table. It wasn’t just the crispy, flaky layers or the creamy, tangy filling—it was the way the whole thing felt like a little homemade treasure, somehow both rustic and elegant. After making it several times that week (yes, I went through a bit of a spanakopita obsession phase), I realized this recipe wasn’t just a quick fix but a keeper.
Now, whenever I make this crispy spanakopita with flaky phyllo and creamy spinach filling, it brings that cozy, “I-can-do-this” feeling back—perfect for days when you want something impressive but fuss-free. It’s the kind of recipe that sneaks up on you, turning from a simple snack to a beloved classic in the rotation. And honestly, that’s why it’s stuck around my kitchen for good.
Why You’ll Love This Recipe
- Quick & Easy: Comes together in about 45 minutes, perfect for busy weeknights or unexpected guests.
- Simple Ingredients: Uses pantry staples and fresh spinach—no need for specialty stores.
- Perfect for Entertaining: Great finger food for parties, brunches, or casual dinners.
- Crowd-Pleaser: Kids and adults alike rave about the crispy, flaky texture combined with the creamy filling.
- Unbelievably Delicious: The buttery phyllo layers paired with the tangy feta and spinach create a flavor and texture combo that feels like a warm hug.
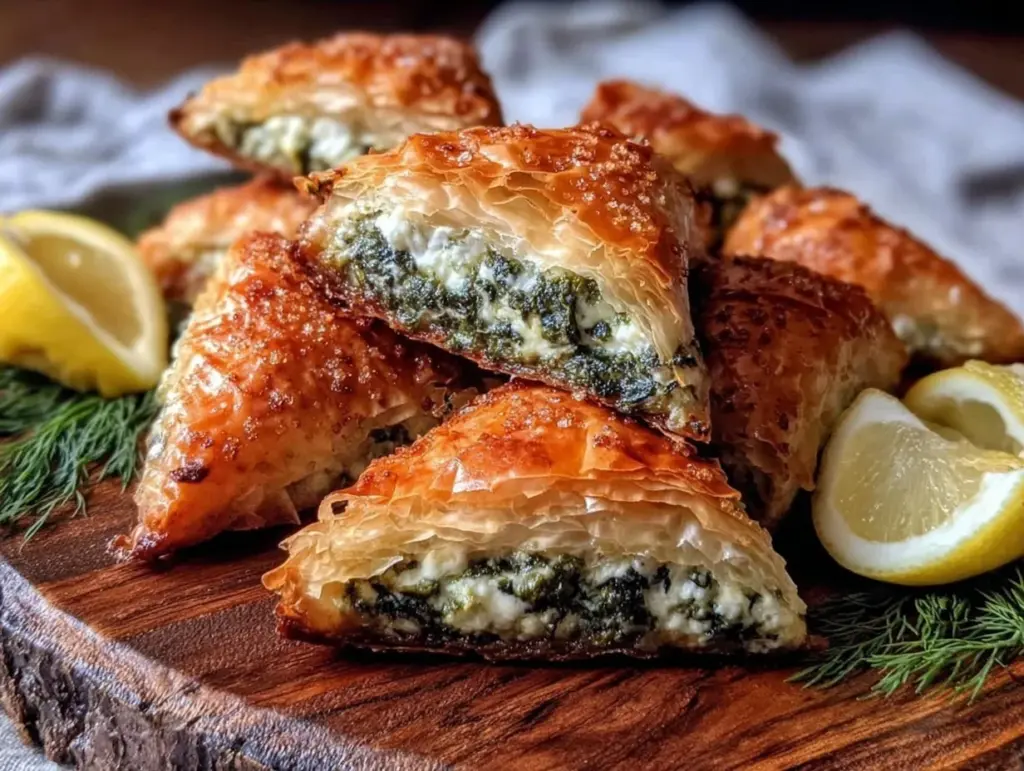
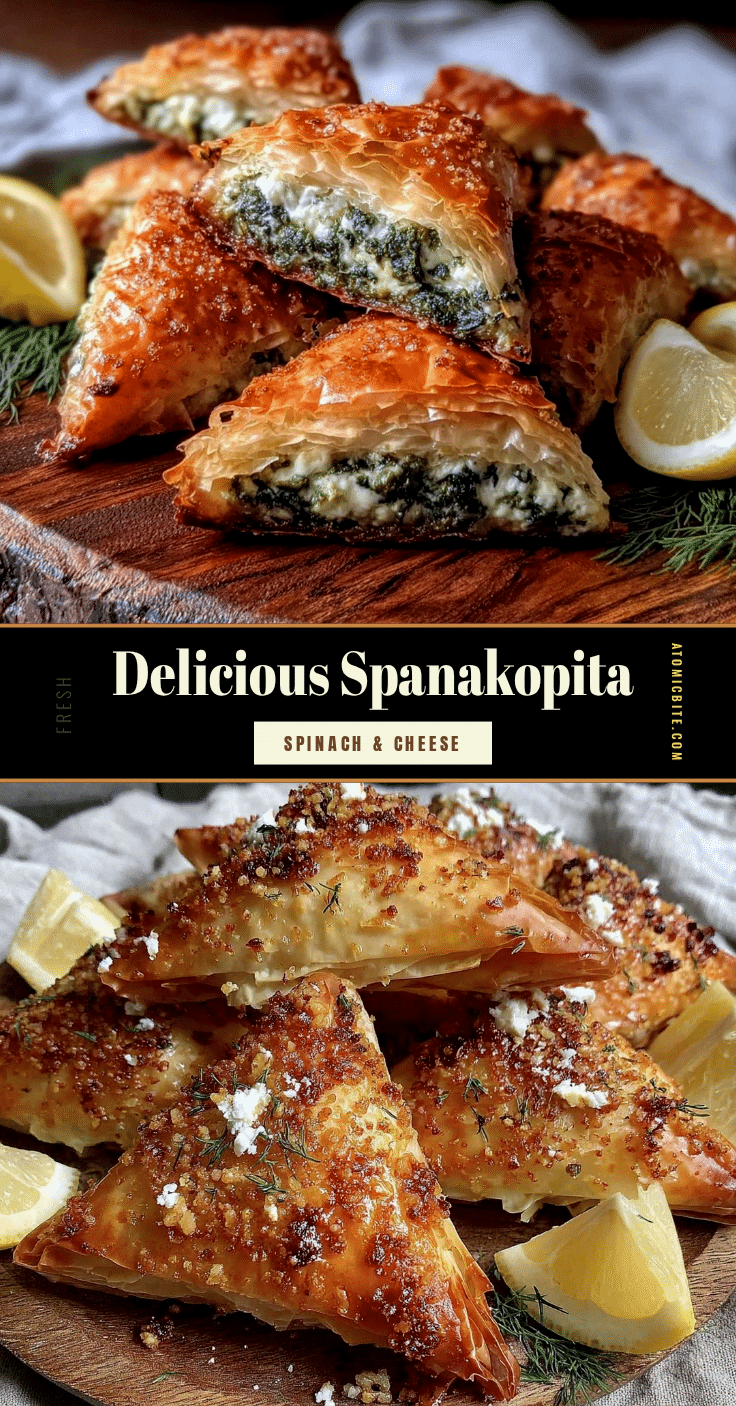
This version of spanakopita stands out because of the way the phyllo is handled—brushed generously with butter in every layer to ensure that perfect shatteringly crisp texture. The spinach filling is also whipped just right, with a touch of lemon zest to brighten the earthy greens and a generous helping of feta for creaminess and salt balance. No soggy bottoms here, just pure flaky goodness.
And here’s the real charm: this recipe invites you to flex your kitchen skills a bit without overwhelming you. It’s a recipe that makes you feel like you’ve got this, even if you’re not usually the “phyllo dough” type. It’s comfort food redefined—somewhere between rustic and elegant, simple yet impressive.
What Ingredients You Will Need
This recipe relies on simple, wholesome ingredients to deliver bold flavor and satisfying texture without fuss. Most of these are pantry staples or easy to find in your local market.
- Phyllo dough: 1 package (about 16 oz / 450 g), thawed according to package instructions (I prefer Boboli brand for consistent flakiness)
- Fresh spinach: 1 lb (450 g), washed and roughly chopped (you can substitute with frozen, but fresh gives the best texture)
- Feta cheese: 8 oz (225 g), crumbled (choose a block-style feta for creamier texture)
- Ricotta cheese: ½ cup (120 ml), for extra creaminess
- Onion: 1 medium, finely chopped (yellow or sweet onion works well)
- Garlic: 2 cloves, minced (adds a subtle depth)
- Olive oil: 3 tbsp, for sautéing
- Butter: ½ cup (115 g), melted (unsalted, for brushing phyllo)
- Eggs: 2 large, lightly beaten (helps bind filling)
- Lemon zest: 1 tsp, fresh (brightens the spinach flavor)
- Dill or parsley: 2 tbsp fresh, chopped (optional but adds herbal freshness)
- Salt and black pepper: to taste
If you’re aiming for a gluten-free twist, almond flour crusts can be used, but the texture won’t be quite as flaky. For dairy-free versions, swap ricotta and feta with a firm tofu blend seasoned with nutritional yeast and lemon juice.
Equipment Needed
- Baking sheet or rectangular baking dish: About 9×13 inches (23×33 cm) works perfectly for layering your spanakopita.
- Large skillet or sauté pan: For wilting spinach and cooking the onion and garlic.
- Mixing bowls: One large for mixing the filling and one for brushing butter on phyllo sheets.
- Pastry brush: Essential for applying melted butter evenly over phyllo layers; a silicone brush works great and cleans easily.
- Sharp knife: For chopping and cutting the baked spanakopita into portions.
If you don’t have a pastry brush, a spoon and gentle fingers can do the trick, but the brushing technique really helps with that signature crispiness. I’ve also found that using a rimmed baking sheet prevents buttery drips from making a mess in your oven.
Preparation Method

- Prepare the spinach filling (about 20 minutes): Heat 2 tablespoons of olive oil in a large skillet over medium heat. Add the chopped onion and cook until translucent, about 4-5 minutes. Add the garlic and cook for another minute until fragrant.
- Wilt the spinach: Add the chopped spinach in batches, stirring until it’s fully wilted and any excess moisture evaporates—this usually takes about 6-8 minutes. Season with salt and pepper. Remove from heat and transfer to a colander or fine mesh sieve to drain for 10 minutes, pressing gently to remove as much liquid as possible. This step is key to avoid soggy spanakopita.
- Mix the filling: In a large bowl, combine the drained spinach mixture with crumbled feta, ricotta, beaten eggs, lemon zest, and chopped dill or parsley if using. Taste and adjust seasoning—remember, feta adds salt, so go easy on additional salt.
- Preheat the oven: Set your oven to 350°F (175°C) and prepare your baking dish by brushing it lightly with melted butter.
- Handle the phyllo dough: Carefully unroll the phyllo sheets on a clean, dry surface. Cover with a slightly damp kitchen towel to prevent drying out, working with one sheet at a time.
- Layering: Place one sheet of phyllo in the baking dish, brushing it generously with melted butter. Repeat layering 6-8 sheets, buttering each one. Then spread half of the spinach filling evenly over the phyllo base.
- Repeat layering: Add another 6-8 phyllo sheets on top, buttering each one, then spread the remaining filling. Finish with a final 6-8 phyllo sheets, buttering every layer as before.
- Score before baking: Using a sharp knife, lightly score the top layers of phyllo into squares or triangles—this helps with even baking and easier serving.
- Bake: Place the spanakopita in the preheated oven and bake for 40-45 minutes, or until the top is golden brown and crisp. The filling should be set but still moist inside.
- Cool and serve: Let the spanakopita rest for about 10 minutes before cutting completely along the scored lines. This helps the filling settle and prevents it from falling apart.
Pro tip: If the edges brown too quickly, cover loosely with foil halfway through baking. The key sign of doneness is that irresistible crunch and a filling that’s cooked through but still creamy.
Cooking Tips & Techniques
Working with phyllo dough can feel intimidating at first, but here are some lessons I learned the hard way. Always keep the dough covered with a damp towel while you work to prevent it from drying out—that’s the number one killer of flaky layers. Also, don’t skimp on the butter; each layer needs a generous brush to create those signature crispy, golden sheets.
When sautéing spinach and onions, draining the mixture thoroughly is crucial. Excess moisture leads to soggy spanakopita, which nobody wants. I usually press the spinach in a colander with the back of a spoon and then wrap it in cheesecloth to squeeze out any leftover water.
Another tip: scoring the top before baking isn’t just for looks—it helps the heat penetrate evenly and makes serving a breeze. If you forget, the phyllo can crack in unexpected spots. Lastly, don’t rush the resting time after baking. Letting it cool a bit keeps the filling from oozing out when you cut it.
Multitasking can save time here: prep the filling while the oven preheats and brush the phyllo sheets quickly but carefully. I’ve found that a silicone brush holds butter better and spreads it more evenly than an old-fashioned natural bristle one.
Variations & Adaptations
- Vegetarian with a twist: Add sautéed mushrooms or finely chopped artichokes to the spinach filling for extra earthiness and texture.
- Gluten-free option: Use gluten-free phyllo alternatives or try making a crust with almond flour and eggs, though the texture will be less flaky.
- Vegan adaptation: Replace feta and ricotta with seasoned tofu or cashew cream, and use olive oil instead of butter for brushing the phyllo.
I once experimented by adding a pinch of nutmeg and a little grated Parmesan for a nuttier, richer filling—totally delicious and worth trying if you want to shake things up. Another variation is folding the spanakopita into individual triangles rather than a casserole, which makes for great portable snacks.
For seasonal flair, try mixing in fresh herbs like mint or oregano in spring and summer. You can also swap spinach with Swiss chard or kale, but just remember to cook and drain them thoroughly to avoid sogginess.
Serving & Storage Suggestions
Spanakopita is best served warm or at room temperature, allowing the buttery phyllo to stay crisp and the filling to remain creamy. It’s a fantastic appetizer or side dish alongside a simple Greek salad or tzatziki sauce.
Leftovers keep well in the fridge for up to 3 days, stored in an airtight container. Reheat gently in a 325°F (160°C) oven for 10-15 minutes to revive the crisp texture—microwaving tends to make the phyllo soggy, so avoid that if you can.
For longer storage, spanakopita freezes beautifully. Wrap individual portions tightly in plastic wrap and aluminum foil, then freeze for up to 2 months. Thaw overnight in the fridge before reheating as above. Over time, the flavors meld nicely, making leftovers even more delicious the next day.
Nutritional Information & Benefits
This crispy spanakopita with flaky phyllo and creamy spinach filling offers a balanced mix of nutrients. Spinach provides a good dose of vitamins A, C, and K, plus iron and fiber. Feta cheese adds calcium and protein, while the phyllo dough keeps things light compared to heavier pastry options.
One serving (about 1/8 of the recipe) contains approximately 250-300 calories, making it a reasonable indulgence when paired with a fresh salad. It’s naturally vegetarian and can be adapted for gluten-free or vegan diets with simple swaps.
From a wellness perspective, this recipe strikes a nice balance between satisfying comfort food and nourishing ingredients—something I appreciate on those days when I want to treat myself without feeling heavy afterward.
Conclusion
This crispy spanakopita with flaky phyllo and creamy spinach filling recipe has truly earned a special spot in my kitchen routine. It’s approachable, rewarding, and a genuine crowd-pleaser without requiring hours of prep. Whether you’re making it for a casual family meal or to impress friends at a gathering, it delivers flaky, buttery layers and a luscious filling that’s hard to beat.
Feel free to tweak the herbs or cheeses to suit your taste, and don’t shy away from experimenting with the phyllo layering technique—it’s surprisingly forgiving once you get the hang of it. I love how this recipe brings a little taste of Greece to my table with minimal fuss.
If you try it, I’d love to hear how it turned out or what variations you came up with. Happy cooking, and here’s to many crispy, creamy bites ahead!
Frequently Asked Questions
Can I use frozen spinach for spanakopita?
Yes, but be sure to thaw and squeeze out as much water as possible to avoid soggy filling.
How should I store leftover spanakopita?
Store leftovers in an airtight container in the fridge for up to 3 days. Reheat in the oven to keep the phyllo crispy.
Is it necessary to use both feta and ricotta cheese?
Using both creates a creamier, balanced filling, but you can use only feta for a tangier, firmer texture.
Can I make spanakopita ahead of time?
Absolutely! Assemble it and refrigerate for a few hours before baking, or freeze it for longer storage.
What’s the best way to handle phyllo dough?
Keep it covered with a damp towel while working to prevent drying, and brush each layer generously with melted butter for crispiness.
Pin This Recipe!
Crispy Spanakopita Recipe Easy Homemade Flaky Phyllo Spinach Filling

A quick and easy recipe for crispy spanakopita with flaky phyllo layers and a creamy spinach and feta filling, perfect for a comforting snack or elegant appetizer.
- Prep Time: 25 minutes
- Cook Time: 45 minutes
- Total Time: 1 hour 10 minutes
- Yield: 8 servings 1x
- Category: Appetizer
- Cuisine: Greek
Ingredients
- 1 package phyllo dough (about 16 oz / 450 g), thawed
- 1 lb fresh spinach (450 g), washed and roughly chopped
- 8 oz feta cheese (225 g), crumbled
- ½ cup ricotta cheese (120 ml)
- 1 medium onion, finely chopped
- 2 cloves garlic, minced
- 3 tbsp olive oil
- ½ cup unsalted butter (115 g), melted
- 2 large eggs, lightly beaten
- 1 tsp fresh lemon zest
- 2 tbsp fresh dill or parsley, chopped (optional)
- Salt and black pepper to taste
Instructions
- Heat 2 tablespoons of olive oil in a large skillet over medium heat. Add the chopped onion and cook until translucent, about 4-5 minutes. Add the garlic and cook for another minute until fragrant.
- Add the chopped spinach in batches, stirring until fully wilted and excess moisture evaporates, about 6-8 minutes. Season with salt and pepper. Remove from heat and transfer to a colander or fine mesh sieve to drain for 10 minutes, pressing gently to remove as much liquid as possible.
- In a large bowl, combine the drained spinach mixture with crumbled feta, ricotta, beaten eggs, lemon zest, and chopped dill or parsley if using. Taste and adjust seasoning.
- Preheat the oven to 350°F (175°C) and brush a 9×13 inch baking dish lightly with melted butter.
- Carefully unroll the phyllo sheets on a clean, dry surface. Cover with a slightly damp kitchen towel to prevent drying out, working with one sheet at a time.
- Place one sheet of phyllo in the baking dish, brushing it generously with melted butter. Repeat layering 6-8 sheets, buttering each one. Spread half of the spinach filling evenly over the phyllo base.
- Add another 6-8 phyllo sheets on top, buttering each one, then spread the remaining filling. Finish with a final 6-8 phyllo sheets, buttering every layer.
- Using a sharp knife, lightly score the top layers of phyllo into squares or triangles.
- Bake in the preheated oven for 40-45 minutes, or until the top is golden brown and crisp and the filling is set but still moist.
- Let the spanakopita rest for about 10 minutes before cutting completely along the scored lines to help the filling settle.
Notes
Keep phyllo dough covered with a damp towel to prevent drying out. Brush each phyllo layer generously with melted butter for crispiness. Drain spinach thoroughly to avoid soggy filling. Score the top before baking for even cooking and easier serving. Let spanakopita rest before cutting to prevent filling from oozing out. If edges brown too quickly, cover loosely with foil halfway through baking.
Nutrition
- Serving Size: About 1/8 of the rec
- Calories: 275
- Sugar: 2
- Sodium: 450
- Fat: 18
- Saturated Fat: 8
- Carbohydrates: 18
- Fiber: 2
- Protein: 8
Keywords: spanakopita, spinach pie, phyllo dough, feta cheese, Greek appetizer, crispy spanakopita, homemade spanakopita, flaky phyllo, vegetarian


