One late Saturday morning, my phone buzzed with a text from my best friend: “Spur-of-the-moment brunch at mine—think you can bring something fun?” Honestly, I was half-asleep, thinking maybe a quick coffee run would do. But then, a spark hit me—a mimosa bar! Not just any mimosa bar, but one that’s simple, elegant, and totally doable without the fuss of fancy bartending skills. I’d seen these setups online, but they often looked a bit over-the-top or intimidating. So, I rolled up my sleeves and started experimenting with easy, stylish ways to bring that celebratory sparkle to life without turning the kitchen into a mess.
What surprised me was how quickly the idea turned into the highlight of the day. People kept circling back for more, chatting over the colorful juice options and garnishes, making it feel like a real party—even though it was just a casual hangout. That first mimosa bar setup stuck with me, not because it was perfect, but because it was approachable and felt personal. It’s the kind of thing that lifts a gathering from ordinary to memorable with very little effort.
Since then, I’ve found myself setting up mimosa bars for birthdays, showers, and even quiet Sunday celebrations at home. There’s something about the bubbly, the fresh fruit, and the vibrant colors that just makes you pause and savor the moment—like a little celebration within the celebration. If you’re curious how to create your own easy elegant mimosa bar that fits any occasion, you’re in the right place. This isn’t about complicated recipes or weird ingredients—it’s about simple pleasures, shared with the people you care about.
Why You’ll Love This Recipe
- Quick & Easy: You can pull together a beautiful mimosa bar in under 20 minutes, which is great when you’re juggling guests, last-minute plans, or just want to keep things low-key.
- Simple Ingredients: No need for fancy or hard-to-find items — just classic sparkling wine, a few fresh juices, and some easy garnishes your local store will have.
- Perfect for Any Occasion: Whether it’s a bridal shower, birthday brunch, holiday party, or casual weekend get-together, this mimosa bar setup fits right in without feeling overdone.
- Crowd-Pleaser: Guests love customizing their own drinks, and the colorful display makes it feel festive and inviting for everyone—kids and adults alike (just swap out the bubbles for sparkling water for little ones!).
- Unbelievably Delicious: The combination of chilled sparkling wine with fresh, vibrant juices and zesty garnishes creates a refreshing balance of flavors that’s just right—not too sweet, not too tart.
- Unique Personal Touches: What sets this mimosa bar apart is the ease of mixing your own favorite juices and fresh fruit combos, plus subtle styling tips that turn a simple setup into something elegant without a ton of effort.
This isn’t just a drink station—it’s a way to make your celebration feel thoughtful and special, without the stress or the need for expert bartending skills. Plus, it’s a fun activity for guests, encouraging mingling and conversation.
What Ingredients You Will Need
This mimosa bar uses simple, wholesome ingredients to deliver bright flavor and a festive vibe without any fuss. Most are pantry staples or items easy to pick up fresh at your local market.
- Sparking Wine or Champagne – Choose a dry brut or extra dry style for the best balance. I usually go with Veuve Clicquot or La Marca Prosecco for a reliable and crisp finish.
- Orange Juice – Freshly squeezed is ideal for that bright zing, but high-quality store-bought works in a pinch.
- Other Fresh Juices – Consider cranberry, peach nectar, pomegranate, or blood orange juice for fun variety and color. You can even add sparkling lemonade for a sweeter option.
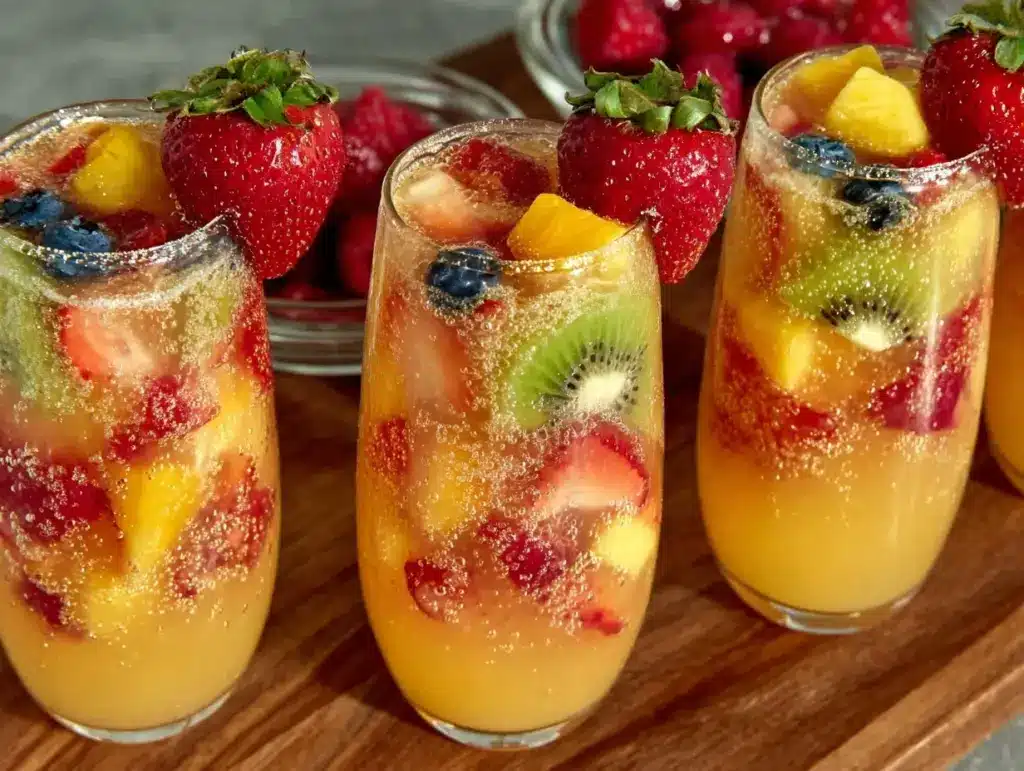
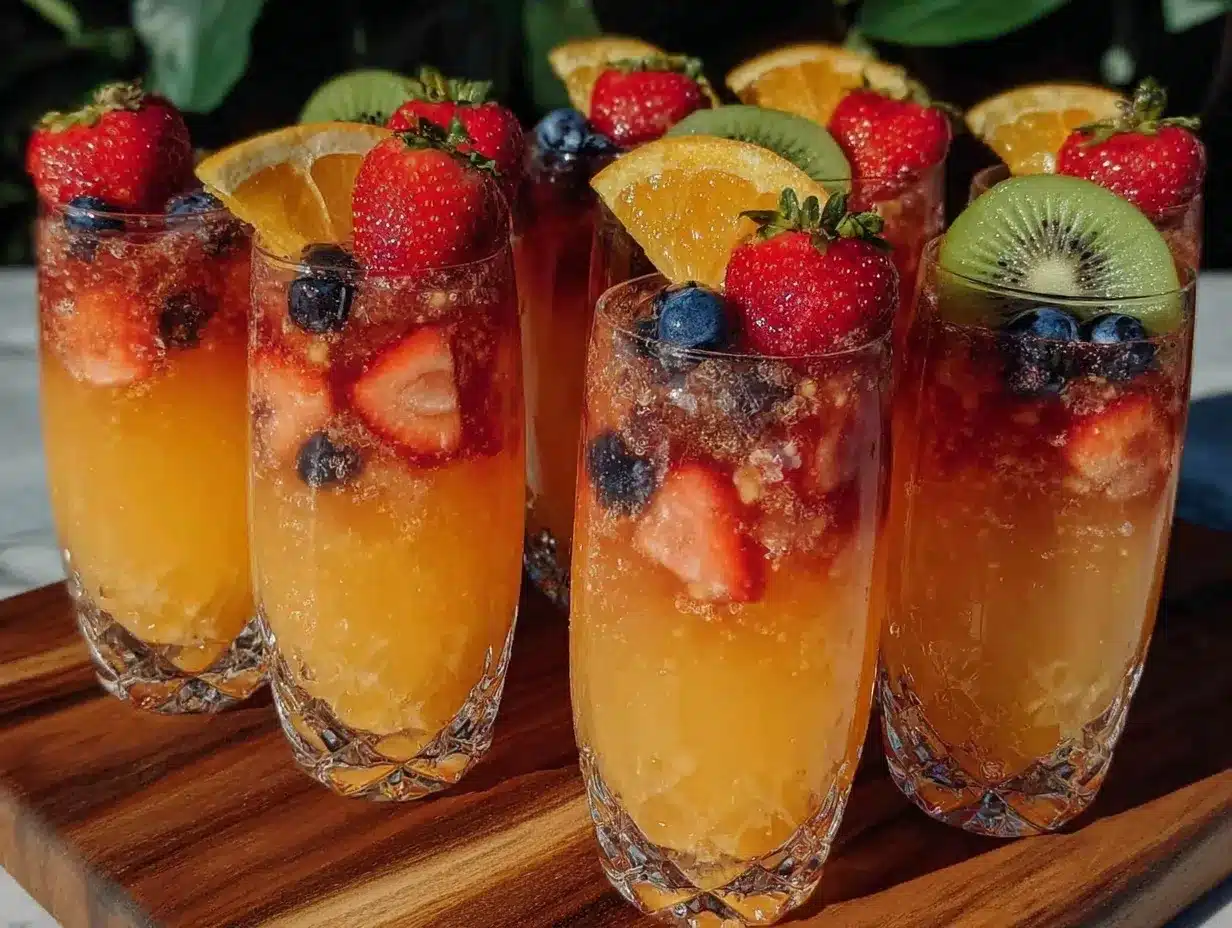
- Fresh Fruit Garnishes – Thinly sliced oranges, strawberries, raspberries, blueberries, kiwi rounds, and pomegranate seeds add flair and flavor. Use seasonal fruit when possible for freshness and color.
- Herbs – Fresh mint or basil leaves provide a lovely aromatic touch and a bit of green contrast.
- Ice Bucket or Chiller – To keep the bubbly perfectly cold throughout the party.
- Optional Sweeteners – Simple syrup or flavored liqueurs like elderflower or triple sec for guests who want to jazz up their drinks.
For a non-alcoholic option, sparkling water or a high-quality soda like ginger ale can stand in for the wine, keeping the vibe festive for everyone. When picking your ingredients, I recommend choosing the freshest produce you can find and the best sparkling wine your budget allows—because those bubbles really are what make the mimosa sing.
Equipment Needed
- Glassware: Flute glasses are classic, but you can also use coupe glasses or even pretty stemless glasses for a modern twist. Make sure you have enough for your guest count.
- Pitchers or Carafes: For holding different juice options—clear glass pitchers work great so guests can see the colors.
- Ice Bucket or Wine Chiller: Essential for keeping your sparkling wine cold during the event. A simple bucket with ice works perfectly.
- Spoons and Tongs: Small spoons for stirring and tongs or forks for picking up garnishes.
- Cutting Board and Sharp Knife: For prepping fruit garnishes fresh before the party.
- Small Bowls or Ramekins: To display smaller garnishes like berries or pomegranate seeds neatly.
If you don’t have specialized bar equipment, don’t stress. I’ve often set this up with what I had on hand—mason jars for juices, dessert plates for fruit, and regular ice buckets. The key is making everything accessible and visually appealing, not perfectly uniform.
Preparation Method
- Chill Your Sparkling Wine: Place bottles in the fridge for at least 3 hours before your event. If you’re short on time, an ice bucket filled with ice and water can chill bottles in about 20 minutes.
- Prepare the Juices: If you’re using fresh oranges, squeeze them just before guests arrive to keep the flavor bright. Pour each juice into separate clear pitchers or carafes for easy serving.
- Slice the Fruit Garnishes: Thinly slice oranges, kiwis, and strawberries. Wash berries and pat dry. Arrange the fruit on pretty plates or small bowls, grouping by type for easy picking.
- Set Up Your Station: Arrange the sparkling wine bottles in the ice bucket or chiller. Place juice pitchers, glasses, and garnish bowls neatly on a table or countertop with plenty of space. Add small spoons and tongs for guests to use.
- Add Optional Extras: If you want, include small pitchers of simple syrup or flavored liqueurs nearby, plus fresh herb sprigs for guests to add a little something special.
- Label the Options: Use small chalkboards, tags, or cards to name each juice and garnish. It’s helpful and adds a cute, personal touch.
- Final Check: Make sure your glasses are clean and dry, the table is inviting, and there’s a trash bin nearby for used fruit picks or napkins.
- Invite Guests to Mix & Match: Show them how to pour sparkling wine first, then add juice and garnishes to taste. Remind everyone to pour slowly to keep the bubbles lively!
One trick I’ve learned: pour the sparkling wine first, then add juice gently. It keeps the fizz from going flat too quickly. Also, prepping fruit right before the party keeps everything fresh-looking and juicy. Nothing kills the vibe like soggy or brown fruit.
Cooking Tips & Techniques
Setting up a mimosa bar might seem straightforward, but a few small details make a big difference. For starters, always pick a sparkling wine that’s dry or extra dry. Sweet champagne can turn your mimosa too sugary, especially if your juices are on the sweeter side.
When slicing fruit, aim for thin, even pieces so they float nicely on top of the drink without sinking rapidly. Also, rinse fruit well but dry thoroughly—wet fruit leads to watery drinks and dull presentation.
Another tip: keep your juices chilled in the fridge until just before serving. Room temperature juices can dull the refreshing contrast with the cold bubbles, and nobody wants a warm mimosa (trust me on this one).
Multitasking helps here—while bottles chill, prepare your garnishes and set the table. I usually prep fruit an hour before guests arrive to avoid last-minute scrambling. And if you’re short on time, pre-slicing fruit the night before and storing it in airtight containers lined with paper towels keeps it from getting mushy.
Be mindful of your glassware too. Flute glasses are classic, but if you’re worried about spills or breakage, stemless glasses work just fine and feel more casual. And don’t forget to have plenty of napkins handy—mimosas can get sticky if you’re not careful!
Variations & Adaptations
- Seasonal Twists: In spring and summer, swap in fresh berries, watermelon cubes, or even edible flowers for a light, colorful vibe. In fall, try apple cider or pear nectar instead of orange juice for a cozy twist.
- Non-Alcoholic Version: Use sparkling water, club soda, or non-alcoholic sparkling grape juice as the base. Add the same fresh juices and garnishes for a festive, inclusive option.
- Flavor Infusions: Add a splash of flavored liqueurs like elderflower, peach schnapps, or Grand Marnier for an adult twist. Alternatively, infuse your juices with fresh herbs like rosemary or thyme for a subtle herbal note.
- Diet-Friendly Options: For a low-sugar mimosa, choose unsweetened juices or dilute sweeter ones with sparkling water. Gluten-free sparkling wines are widely available, making this bar friendly for many dietary needs.
- Personal Favorite: I once tried a tropical mimosa bar with pineapple juice, coconut water, and mango slices. It was a hit for a summer pool party—refreshing and unexpected!
Serving & Storage Suggestions
Serve your mimosa bar chilled and encourage guests to customize their drinks. Flute glasses keep the bubbles lively and look elegant, but stemless glasses add a modern, relaxed feel. Arrange garnishes so they’re easy to reach and visually appealing—stacked citrus slices, colorful berries in bowls, and herbs in small jars all help.
For storage, keep unopened sparkling wine bottles in the fridge or an ice bucket until ready to serve. Fresh juices last 2-3 days refrigerated; if you’re prepping early, store juices in airtight containers to preserve freshness. Cut fruit should be refrigerated and consumed within 24 hours for best quality.
If you have leftovers, store mixed mimosas in sealed containers in the fridge for up to a day, but keep in mind the bubbles will dissipate. When reheating, avoid microwave—simply let chilled mimosas come to a cool room temperature or add fresh sparkling water to revive fizz.
Over time, the flavors meld nicely if you prepare in advance, but fresh is always best for the crisp, bubbly experience. Setting up your mimosa bar just before guests arrive keeps everything lively and bright.
Nutritional Information & Benefits
A classic mimosa is relatively light, with roughly 100-120 calories per serving depending on juice type and amount. Using fresh juices adds vitamin C and antioxidants without extra sugars found in cocktail mixers. Sparkling wine itself is low in carbs and fat, making it a lighter cocktail choice.
Fresh fruit garnishes contribute small amounts of vitamins and fiber, plus natural sweetness without processed sugars. If you swap to non-alcoholic versions, you reduce calories and alcohol intake while keeping the festive feel.
For those mindful of dietary restrictions, most sparkling wines are gluten-free, and using natural juices helps avoid additives and preservatives. This setup is friendly for most diets and makes a balanced, celebratory drink option that’s both refreshing and fun.
Conclusion
This easy elegant mimosa bar setup is the kind of recipe that invites you to slow down and enjoy simple moments with friends and family. It’s approachable, colorful, and adaptable—perfect if you want to add a splash of celebration without the fuss. I love how it turns a casual gathering into something a little more special, without pressure or stress.
Feel free to tweak the juices, garnishes, and glassware to match your style and occasion. Whether you’re hosting a big party or just treating yourself on a quiet weekend morning, this mimosa bar setup brings a little sparkle to the table.
Give it a try, and I’d love to hear how you make it your own—drop a comment or share your variations. Here’s to many joyful celebrations ahead!
FAQs About Easy Elegant Mimosa Bar Setup Ideas
What sparkling wine is best for a mimosa bar?
Choose a dry or extra dry sparkling wine like Brut Champagne or Prosecco. These styles balance well with juice and keep the mimosa from being too sweet.
Can I prepare the mimosa bar in advance?
Yes! Chill your sparkling wine and juices beforehand, slice fruit close to serving time for freshness, and set up the station about 30 minutes before guests arrive.
What are some good non-alcoholic alternatives?
Use sparkling water, club soda, or non-alcoholic sparkling grape juice as a bubbly base, paired with fresh juices and garnishes for a festive feel.
How do I keep the sparkling wine from going flat?
Pour sparkling wine first, then add juice gently. Keep bottles chilled in an ice bucket during the event, and avoid stirring too vigorously.
What are easy garnish ideas for a mimosa bar?
Fresh citrus slices, berries, pomegranate seeds, kiwi rounds, and fresh herbs like mint or basil are simple, beautiful options that add flavor and color.
Pin This Recipe!
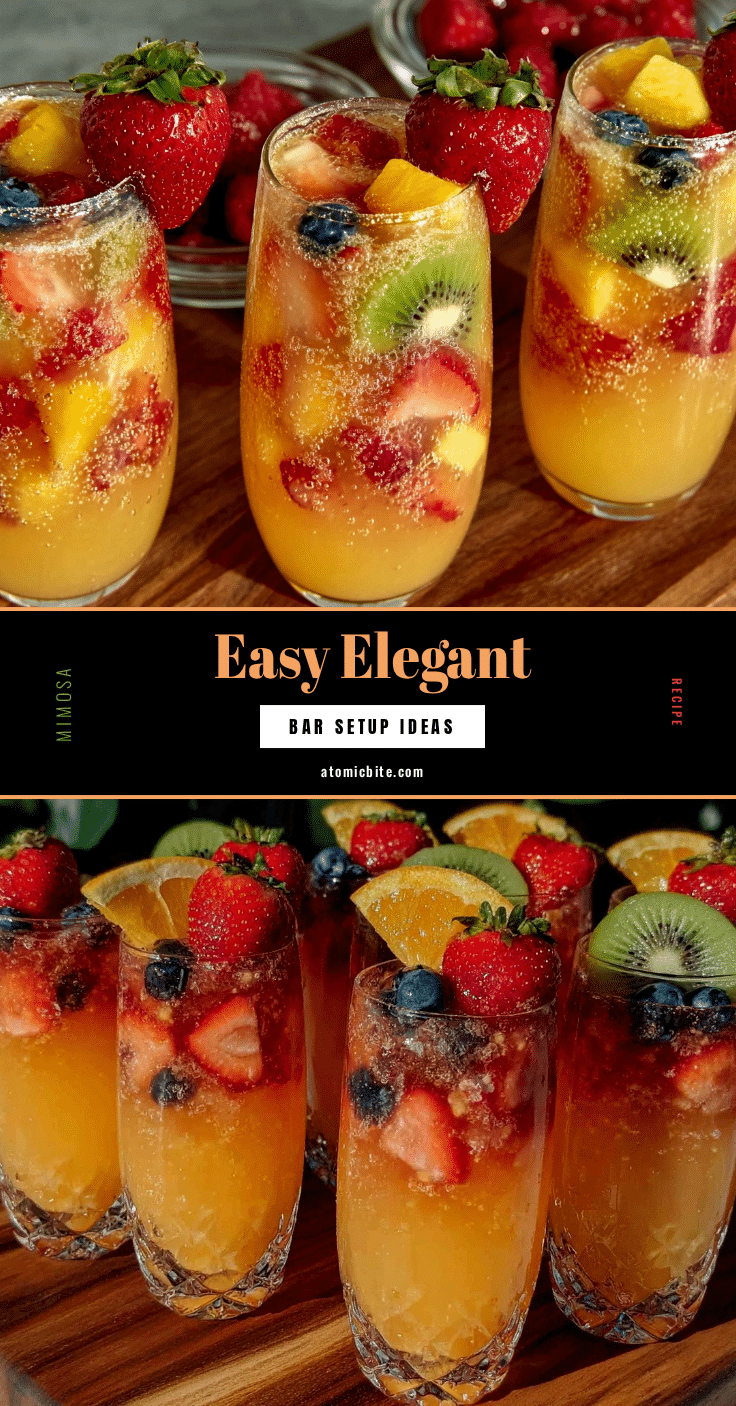
Easy Elegant Mimosa Bar Setup Ideas for Perfect Celebration Drinks

Create a simple, stylish mimosa bar perfect for any celebration with easy-to-find ingredients and minimal fuss. This setup invites guests to customize their drinks, making any gathering feel festive and memorable.
- Prep Time: 15 minutes
- Cook Time: 0 minutes
- Total Time: 15 minutes
- Yield: 8 servings
- Category: Beverage
- Cuisine: American
Ingredients
- Sparkling wine or Champagne (dry brut or extra dry style, e.g., Veuve Clicquot or La Marca Prosecco)
- Orange juice (freshly squeezed or high-quality store-bought)
- Other fresh juices (cranberry, peach nectar, pomegranate, blood orange juice, sparkling lemonade)
- Fresh fruit garnishes (thinly sliced oranges, strawberries, raspberries, blueberries, kiwi rounds, pomegranate seeds)
- Fresh herbs (mint or basil leaves)
- Ice bucket or chiller
- Optional sweeteners (simple syrup or flavored liqueurs like elderflower or triple sec)
- Non-alcoholic alternatives (sparkling water, club soda, or non-alcoholic sparkling grape juice)
Instructions
- Chill your sparkling wine by placing bottles in the fridge for at least 3 hours before the event or use an ice bucket filled with ice and water to chill in about 20 minutes.
- Prepare the juices by squeezing fresh oranges just before guests arrive and pour each juice into separate clear pitchers or carafes for easy serving.
- Slice the fruit garnishes thinly and wash berries, then arrange all fruit on plates or small bowls grouped by type.
- Set up your station by arranging sparkling wine bottles in the ice bucket or chiller, placing juice pitchers, glasses, and garnish bowls neatly on a table or countertop with plenty of space. Add small spoons and tongs for guests to use.
- Add optional extras like small pitchers of simple syrup or flavored liqueurs and fresh herb sprigs for guests to add to their drinks.
- Label the juice and garnish options with small chalkboards, tags, or cards for a personal touch.
- Ensure glasses are clean and dry, the table is inviting, and a trash bin is nearby for used picks or napkins.
- Invite guests to mix and match by pouring sparkling wine first, then adding juice and garnishes to taste, pouring slowly to keep bubbles lively.
Notes
Pour sparkling wine first, then add juice gently to keep bubbles lively. Prepare fruit garnishes close to serving time for freshness. Use dry or extra dry sparkling wine to avoid overly sweet mimosas. Keep juices chilled until serving. Pre-slice fruit the night before and store in airtight containers lined with paper towels to prevent mushiness.
Nutrition
- Serving Size: 1 glass (about 6-8 o
- Calories: 110
- Sugar: 4
- Sodium: 5
- Carbohydrates: 5
- Fiber: 0.5
Keywords: mimosa bar, celebration drinks, brunch drinks, sparkling wine cocktails, easy mimosa, party drinks, non-alcoholic mimosa, festive drinks


