Let me tell you, the moment you catch a whiff of sweet vanilla and rich chocolate mingling together, all rolled into tiny, bite-sized Diploma Cake Pops, you just know you’re in for a treat. The first time I made these little gems, it was for my niece’s graduation party—a proud moment made even sweeter by these charming, edible diplomas. I was instantly hooked, the kind of moment where you pause, take a deep breath, and just smile because you know you’re onto something truly special.
Years ago, when I was knee-high to a grasshopper, celebrations meant simple cookies and cupcakes. But stumbling upon this recipe changed the game for me. It combines fun, creativity, and deliciousness all in one bite. My family couldn’t stop sneaking them off the cooling rack (and honestly, I can’t really blame them). These Diploma Cake Pops bring pure, nostalgic comfort but with a clever twist that’s perfect for graduation celebrations.
Honestly, these cake pops are dangerously easy to make and bring a smile to any party guest’s face. Whether you’re brightening up a graduation party, looking for a sweet treat for your kids, or just want to add a personalized touch to your dessert table, these Diploma Cake Pops are your go-to. After testing this recipe multiple times (in the name of research, of course), it’s become a staple for family gatherings, gifting, and making those special moments even sweeter.
Why You’ll Love This Recipe
You know what makes these Diploma Cake Pops stand out? It’s not just the fun look—it’s the way they blend simplicity with show-stopping flair. I’ve spent countless afternoons perfecting this recipe, and here’s why it’s a winner for you:
- Quick & Easy: Comes together in under an hour, perfect for last-minute party prep or weekend fun.
- Simple Ingredients: You likely have everything in your pantry already—no fancy shopping trips required.
- Perfect for Graduation Celebrations: Adds that special personalized touch to any party, school event, or milestone.
- Crowd-Pleaser: Kids and adults alike rave about these—there’s something about cake pops that just brings smiles.
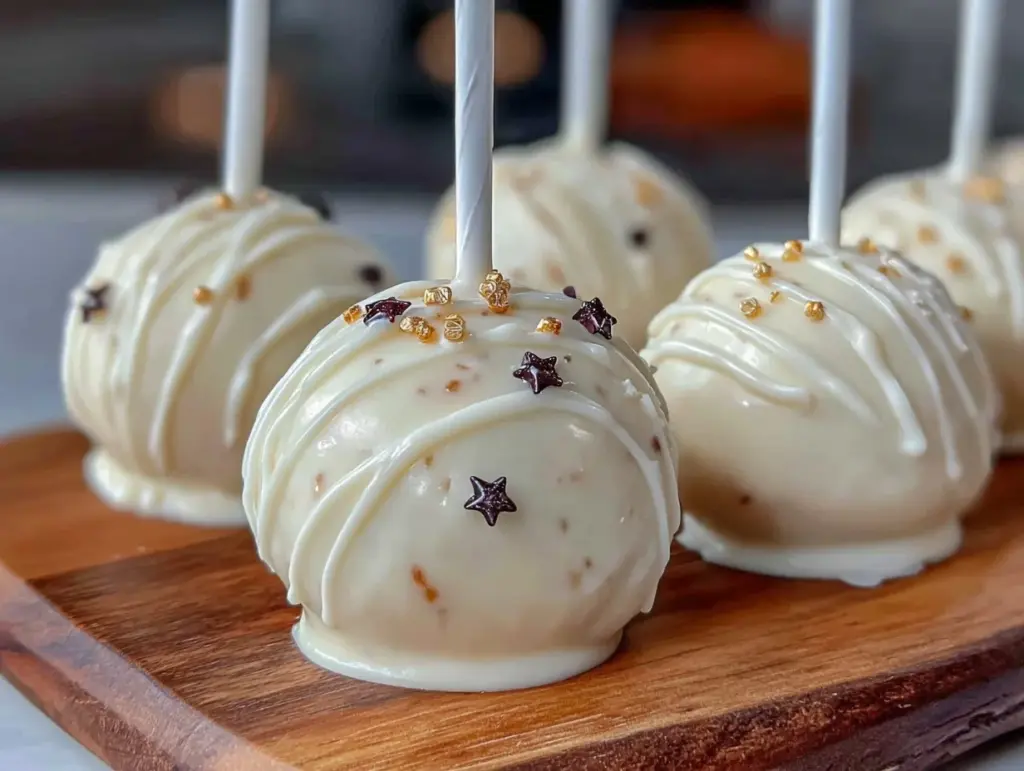
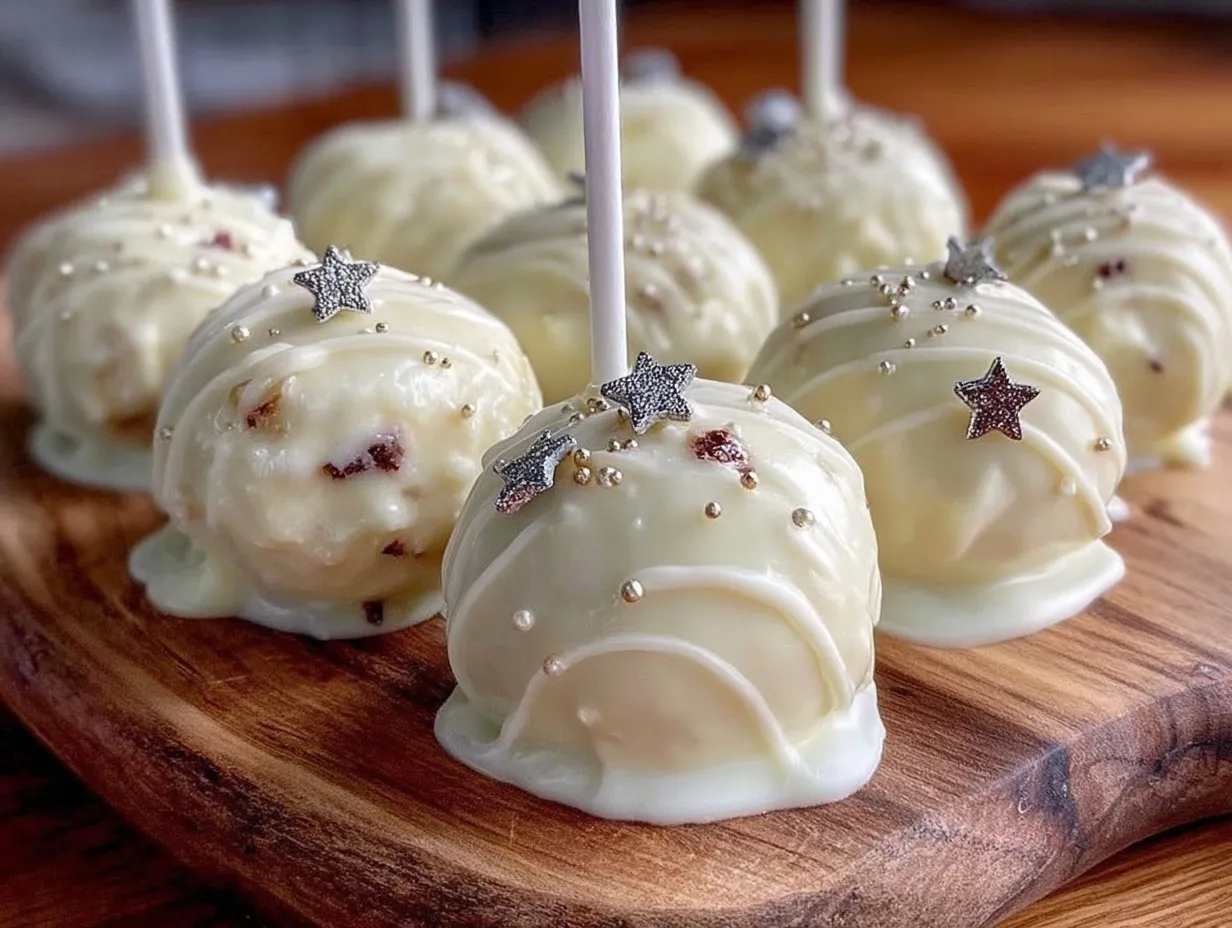
- Unbelievably Delicious: Moist cake mixed with creamy frosting, dipped in chocolate, and finished with a sweet ribbon—pure magic.
This isn’t just any cake pop recipe. For instance, blending the cake crumbs with just the right amount of frosting gives these pops a perfectly soft texture that melts in your mouth. The diploma shape, rolled and tied with a little edible ribbon or icing, adds that extra wow factor that makes guests pause. Honestly, it’s the kind of recipe that makes you close your eyes after the first bite and think, “Yep, this is celebration food done right.”
Whether you’re impressing guests without breaking a sweat or turning a simple dessert into a keepsake moment, these Diploma Cake Pops deliver fun, flavor, and festivity all at once.
What Ingredients You Will Need
This recipe uses simple, wholesome ingredients to deliver bold flavor and satisfying texture without the fuss. Most of these are pantry staples, and you can easily swap a few depending on what you have on hand.
- For the Cake Base:
- 1 box of vanilla or chocolate cake mix (or your favorite homemade cake recipe) – I like Duncan Hines for best texture
- Ingredients required for the cake mix (usually eggs, oil, and water)
- For the Frosting Mixture:
- 1 cup (240g) cream cheese, softened (adds richness and moisture)
- 1/2 cup (113g) unsalted butter, softened
- 1 1/2 cups (180g) powdered sugar, sifted
- 1 tsp vanilla extract
- For the Coating & Decoration:
- 2 cups (340g) white chocolate chips or candy melts (for dipping)
- Black or dark chocolate for piping the diploma details
- Thin edible ribbon or colored icing for tying the diploma “scrolls”
Ingredient Tips: For a dairy-free version, swap cream cheese and butter with coconut-based alternatives. If you want a gluten-free option, use a gluten-free cake mix and check your chocolate melts for gluten content. Seasonal twist? Use strawberry cake mix in spring or pumpkin spice in fall to match the mood.
Equipment Needed
- Cake pop sticks or sturdy lollipop sticks
- Mixing bowls (medium and large)
- Electric mixer or sturdy whisk (a stand mixer helps but isn’t necessary)
- Baking pans (usually 9×13 inches for the cake)
- Microwave-safe bowl or double boiler for melting chocolate
- Styrofoam block or cake pop stand for drying and setting the pops
- Piping bags with fine tips for drawing diploma details (a toothpick can work in a pinch)
If you don’t have cake pop sticks, sturdy wooden skewers trimmed to size work well. For dipping, a tall glass or deep bowl is perfect for swirling the pops in chocolate. I’ve tried silicone mats for drying, but a Styrofoam block gives the best hold without smudging your designs.
Preparation Method
- Bake the Cake: Prepare your cake mix according to package instructions (or your homemade recipe). For example, mix 1 box cake mix with 3 eggs, 1/2 cup vegetable oil, and 1 cup water. Bake at 350°F (175°C) for about 30-35 minutes until a toothpick comes out clean. Let cool completely (about 1 hour).
- Crumble the Cake: Once cooled, crumble the cake into a large bowl using your hands or a fork. It should be fine crumbs but not powdery.
- Make the Frosting Mixture: Beat together softened cream cheese and butter until smooth. Add powdered sugar and vanilla extract, mixing until creamy and spreadable.
- Combine Cake and Frosting: Add the frosting mixture to the cake crumbs, mixing gently but thoroughly until the batter holds together when pressed. It should feel like soft dough (about 1-2 minutes of mixing). If too wet, add a little more powdered sugar; if too dry, a small dab of cream cheese.
- Shape the Diploma Cake Pops: Take about 2 tbsp (30g) of the mixture and roll it into a small log shape, roughly 3 inches (7.5 cm) long and 1 inch (2.5 cm) thick. Repeat until all mixture is used.
- Insert Sticks and Chill: Dip each stick into melted chocolate and insert halfway into each cake log (this helps the stick stay put). Place on a baking sheet lined with parchment and refrigerate for at least 1 hour to firm up.
- Coat the Pops: Melt white chocolate chips in microwave-safe bowl in 20-second bursts, stirring until smooth. Dip each chilled cake pop into the melted chocolate, letting excess drip off. Place back on Styrofoam block to set.
- Decorate Your Diplomas: Once coating is set, use melted dark chocolate in a piping bag to draw diploma lines and details. Tie a small edible ribbon or pipe a “ribbon” with colored icing around the center to mimic a tied diploma.
- Let Set Completely: Allow pops to dry fully at room temperature or in the fridge for about 30 minutes before serving.
Pro tip: If your coating is too thick, thin it with a little vegetable oil or shortening for a smoother dip. Also, don’t rush chilling, or the pops might fall apart when dipped.
Cooking Tips & Techniques
Let’s face it, cake pops can be a bit tricky if you don’t know what you’re doing, but here are some pro tips I’ve learned the hard way:
- Don’t Overmix: When combining cake crumbs and frosting, mix just enough to hold together. Overmixing leads to dense pops.
- Chill Thoroughly: Chill your shaped pops well before dipping. This keeps the chocolate from cracking or sliding off.
- Temper Your Chocolate: If possible, temper your chocolate for a shinier, sturdier coating. If not, just be gentle and patient with cooling.
- Stick Stability: Dipping the stick end in chocolate before inserting helps secure it, preventing pops from falling off.
- Use a Styrofoam Block: For drying, a Styrofoam block keeps your pops upright and prevents smudging.
- Personal Touch: Use edible markers or colored gel icing for extra flair—hand-drawn names or graduation years add charm.
My first batch was a bit crumbly because I skipped chilling, so don’t rush this step! Also, I learned that dipping quickly but steadily gives the smoothest coat without lumps.
Variations & Adaptations
These Diploma Cake Pops are surprisingly flexible, so feel free to tweak the recipe to fit your needs:
- Flavor Variations: Swap vanilla cake for chocolate, red velvet, or even lemon for a zingy twist. Change the frosting flavor by adding cocoa powder or citrus zest.
- Dietary Adaptations: Use gluten-free cake mix and dairy-free frosting to accommodate allergies. Coconut-based cream cheese works well for dairy-free.
- Seasonal Themes: For spring graduations, add pastel-colored candy melts or edible glitter. In fall, try caramel drizzle instead of white chocolate.
- Cooking Method: While baking the cake is standard, you could use leftover cake or even store-bought cake crumbs to speed things up.
- Personalized Decorations: Use edible gold dust for a luxe touch or pipe fun messages directly onto the diploma scrolls.
One time, I tried using peanut butter frosting mixed with chocolate cake crumbs—dangerously good! Just be mindful of peanut allergies if you try that.
Serving & Storage Suggestions
Serve your Diploma Cake Pops chilled or at room temperature for the best texture and flavor. They look fantastic arranged standing up in a decorated Styrofoam block or in a festive basket lined with tissue paper.
Pair them with light beverages like lemonade, iced tea, or coffee for a balanced party spread. They’re also great alongside fresh fruit or a light cheese platter to give guests a little variety.
Store leftover cake pops in an airtight container in the refrigerator for up to 5 days. For longer storage, freeze them wrapped individually in plastic wrap and stored in a freezer-safe container for up to 1 month.
To reheat, simply let frozen pops thaw in the fridge overnight. Avoid microwaving, as it can ruin the coating.
Keep in mind, the flavors meld and deepen after a day or two, so these cake pops sometimes taste even better the next day—if they last that long!
Nutritional Information & Benefits
Each Diploma Cake Pop contains roughly 150-180 calories, depending on size and ingredients used. They provide a sweet treat rather than a health food, but you can boost nutrition by using whole grain or nut-based cake mixes.
The cream cheese adds a bit of protein and calcium, while the white chocolate coating is rich in sugars and fats. For a lighter version, consider using low-fat frosting and dark chocolate with higher cacao content.
This recipe can be adapted for gluten-free, dairy-free, and vegan diets, making it accessible to many. Just be mindful of nut allergies if you add personal twists.
From a wellness perspective, these cake pops are a joyful celebration food that brings people together, which is just as important as any nutrient count!
Conclusion
Perfect Diploma Cake Pops are a fun, festive way to celebrate graduation milestones with a personal touch. They’re simple enough for even novice bakers but impressive enough to wow your guests. I love how they combine nostalgic cake flavors with playful presentation, making every bite feel like a mini celebration.
Feel free to customize these pops to fit your flavor preferences, dietary needs, or party theme. Whether you stick to the basic recipe or get creative with decorations and flavors, these Diploma Cake Pops are sure to be a hit.
Give this recipe a try and let me know how your graduation fun went! I’d love to hear your adaptations or see your decorated diplomas. Don’t forget to share with friends or family who need a sweet graduation treat—they’re going to want to bookmark this one, trust me.
Happy celebrating and happy baking!
FAQs About Diploma Cake Pops
How long do Diploma Cake Pops last?
Stored in an airtight container in the refrigerator, they last up to 5 days. You can freeze them for up to 1 month if wrapped well.
Can I make these ahead of time?
Absolutely! You can prepare and freeze the cake pops before dipping or after decorating. Just thaw in the fridge before serving.
What’s the best way to store and transport cake pops?
Keep them upright in a sturdy container with plenty of padding. Using a Styrofoam block inside a box is ideal for preventing damage during transport.
Can I use homemade cake instead of box mix?
Yes! Homemade cake works beautifully, just ensure it’s fully cooled and moist but not too dense.
How do I prevent the chocolate coating from cracking?
Chill the cake pops well before dipping, and avoid sudden temperature changes. Tempering the chocolate also helps create a smooth, stable coating.
Pin This Recipe!
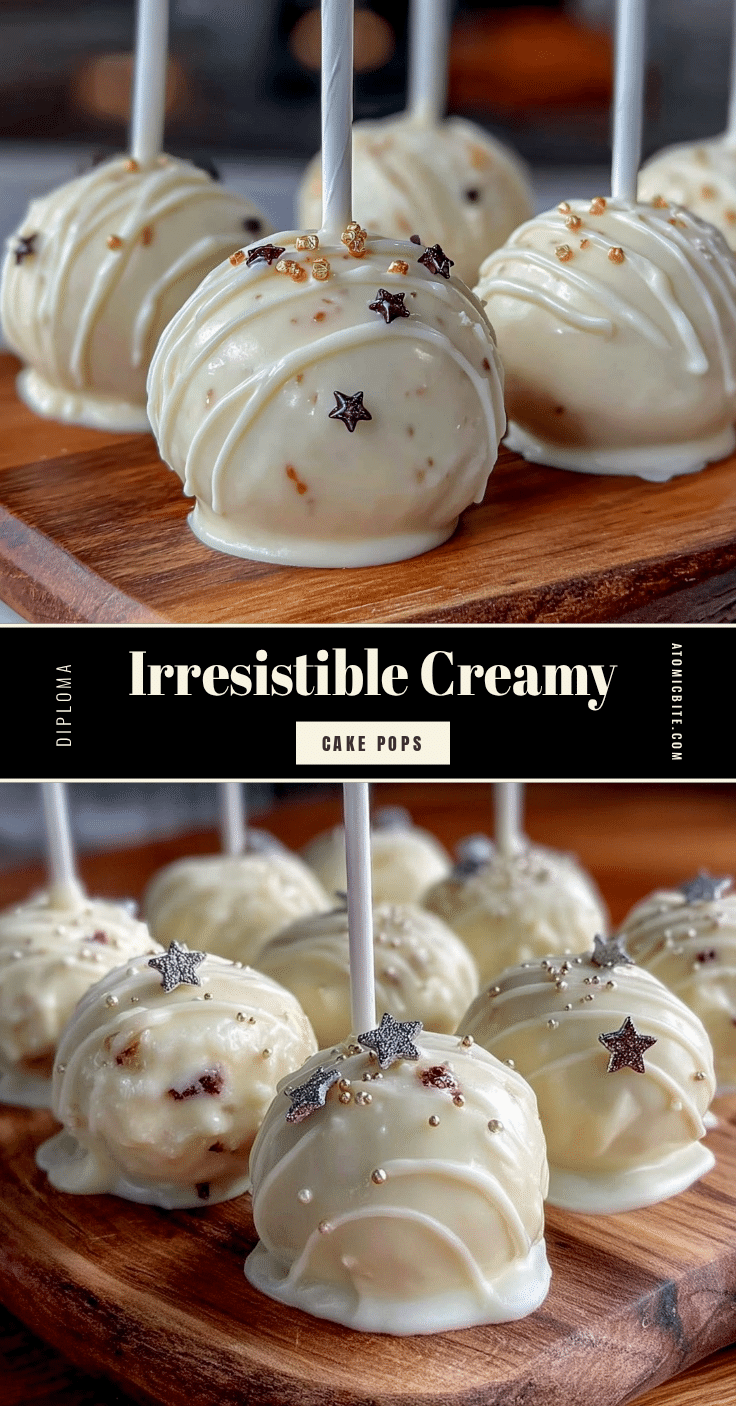
Perfect Diploma Cake Pops

Delicious and charming diploma-shaped cake pops perfect for graduation celebrations, combining moist cake with creamy frosting and a smooth chocolate coating.
- Prep Time: 20 minutes
- Cook Time: 35 minutes
- Total Time: 1 hour 45 minutes
- Yield: 24 cake pops 1x
- Category: Dessert
- Cuisine: American
Ingredients
- 1 box vanilla or chocolate cake mix (or your favorite homemade cake recipe)
- Ingredients required for the cake mix (usually 3 eggs, 1/2 cup vegetable oil, 1 cup water)
- 1 cup (240g) cream cheese, softened
- 1/2 cup (113g) unsalted butter, softened
- 1 1/2 cups (180g) powdered sugar, sifted
- 1 tsp vanilla extract
- 2 cups (340g) white chocolate chips or candy melts
- Black or dark chocolate for piping diploma details
- Thin edible ribbon or colored icing for tying the diploma scrolls
Instructions
- Prepare your cake mix according to package instructions or your homemade recipe. For example, mix 1 box cake mix with 3 eggs, 1/2 cup vegetable oil, and 1 cup water. Bake at 350°F (175°C) for about 30-35 minutes until a toothpick comes out clean. Let cool completely (about 1 hour).
- Once cooled, crumble the cake into a large bowl using your hands or a fork until fine crumbs form but not powdery.
- Beat together softened cream cheese and butter until smooth. Add powdered sugar and vanilla extract, mixing until creamy and spreadable.
- Add the frosting mixture to the cake crumbs, mixing gently but thoroughly until the batter holds together when pressed, about 1-2 minutes. Adjust consistency with more powdered sugar or cream cheese if needed.
- Take about 2 tablespoons (30g) of the mixture and roll it into a small log shape, roughly 3 inches (7.5 cm) long and 1 inch (2.5 cm) thick. Repeat until all mixture is used.
- Dip each stick into melted chocolate and insert halfway into each cake log to secure the stick. Place on a baking sheet lined with parchment and refrigerate for at least 1 hour to firm up.
- Melt white chocolate chips in a microwave-safe bowl in 20-second bursts, stirring until smooth. Dip each chilled cake pop into the melted chocolate, letting excess drip off. Place back on a Styrofoam block or cake pop stand to set.
- Once coating is set, use melted dark chocolate in a piping bag to draw diploma lines and details. Tie a small edible ribbon or pipe a ribbon with colored icing around the center to mimic a tied diploma.
- Allow pops to dry fully at room temperature or in the fridge for about 30 minutes before serving.
Notes
Dip sticks in melted chocolate before inserting to secure. Chill cake pops thoroughly before dipping to prevent cracking. Temper chocolate if possible for a shinier coating. Use a Styrofoam block for drying to avoid smudging. Customize decorations with edible markers or colored icing. Store in airtight container refrigerated up to 5 days or freeze up to 1 month.
Nutrition
- Serving Size: 1 cake pop
- Calories: 165
- Sugar: 16
- Sodium: 110
- Fat: 9
- Saturated Fat: 5
- Carbohydrates: 20
- Fiber: 0.5
- Protein: 2
Keywords: cake pops, diploma cake pops, graduation dessert, party treats, chocolate cake pops, cream cheese frosting, easy cake pops


