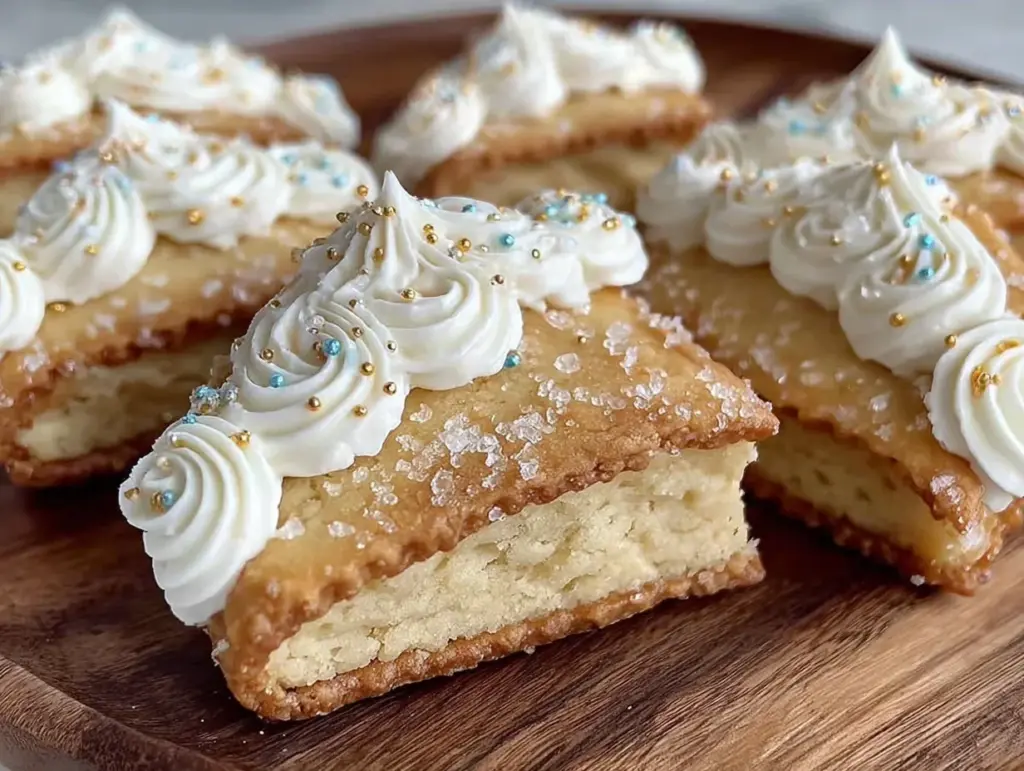
“Can you believe I actually pulled this off?” I breathed out, clutching the tray of diploma-shaped sugar cookies fresh from the oven. It started as a last-minute idea—I had promised a batch of unique treats for a friend’s graduation party but realized I had zero fancy molds or cutters. So, I improvised with a simple rectangle cookie cutter and a steady hand, sketching the diploma details with royal icing. Honestly, I wasn’t sure it would look right, but the crisp edges and smooth icing turned out better than I’d hoped.
There’s something oddly satisfying about baking these sugar cookies shaped like diplomas—maybe it’s the way the neat icing ribbons bring a little elegance to a simple cookie, or how the buttery sweetness feels like a little celebration in every bite. I found myself making them again and again that week, tweaking the icing consistency and practicing my piping skills. This recipe became more than just a dessert; it was a quiet way to honor milestones, one perfect bite at a time.
What stuck with me most was how approachable this recipe is. You don’t need special tools or expensive ingredients—just a bit of patience and a few simple steps to create cookies that look like they belong at a fancy ceremony. It’s that balance of effortless charm and taste that makes these diploma-shaped sugar cookies a dependable favorite for celebrations big and small.
Why You’ll Love This Recipe
After baking and decorating these perfect diploma-shaped sugar cookies more times than I can count, here’s why I think you’ll want this recipe in your arsenal:
- Quick & Easy: The dough comes together in about 15 minutes, and baking takes less than 10. Ideal for last-minute celebrations or when you’re juggling a million things.
- Simple Ingredients: No need to hunt down fancy items. Pantry staples like all-purpose flour, sugar, and butter create the perfect base.
- Perfect for Graduation Parties: These cookies double as edible keepsakes—so fun for marking achievements and milestones.
- Crowd-Pleaser: The classic buttery sugar cookie flavor appeals to both kids and adults, making them a hit at any gathering.
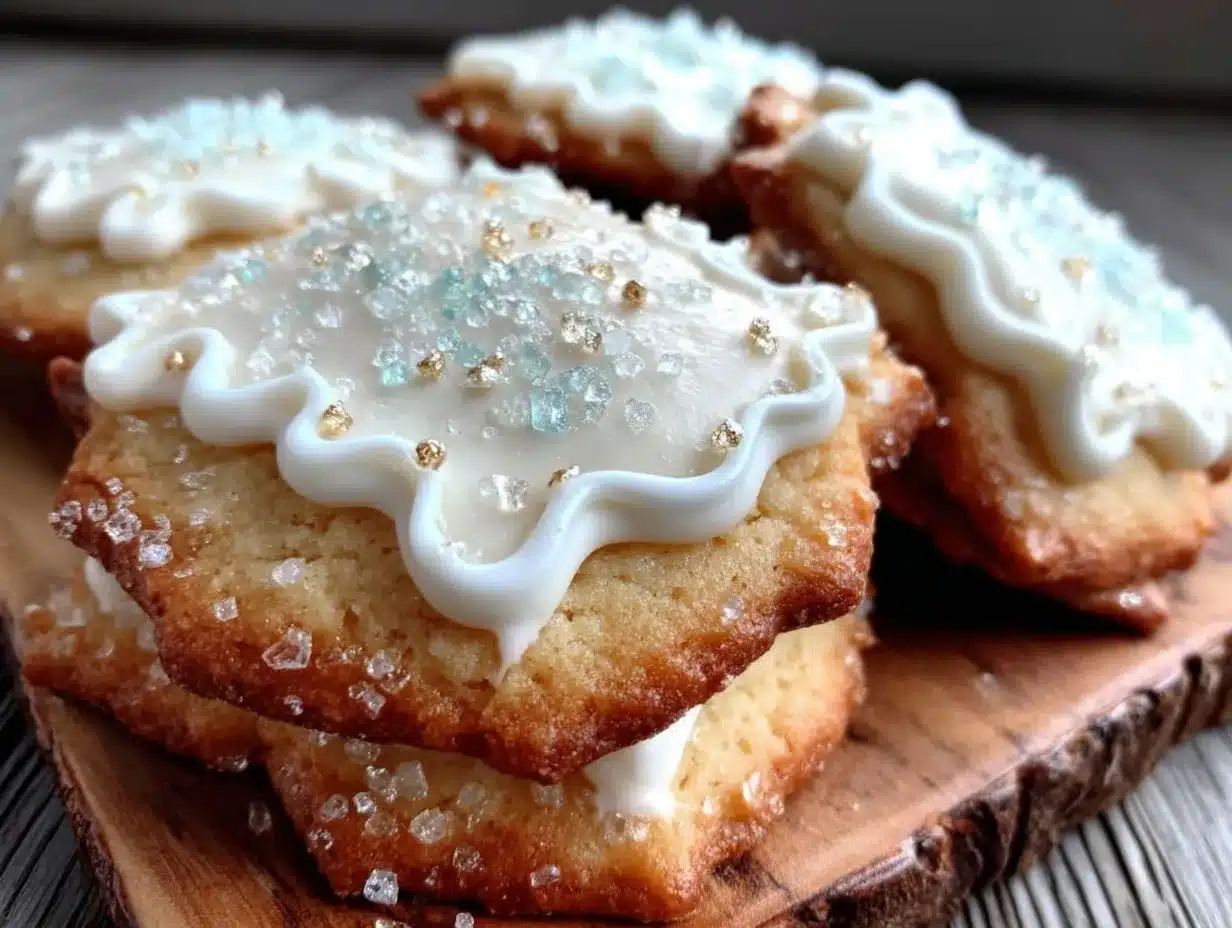
- Elegant Royal Icing Finish: The smooth, glossy icing adds sophistication without being intimidating to pipe, thanks to user-friendly tips.
What makes this recipe stand apart is the balance it strikes between simplicity and style. The icing isn’t just a decorative afterthought—it’s thoughtfully designed to mimic the look of a diploma ribbon, with just the right thickness and sheen. Plus, I’ve included tricks to keep the icing from cracking or smudging, which honestly saved me from a lot of stress during my early attempts.
It’s not just about the looks, either. This recipe delivers that satisfying snap of a well-baked sugar cookie while staying tender enough to melt in your mouth. And if you’re interested in other crowd-pleasing snacks that pair well with celebrations, you might enjoy my crispy baked turkey sliders or the easy creamy dill pickle cheese ball for savory options.
What Ingredients You Will Need
This recipe uses simple, wholesome ingredients to deliver buttery, tender sugar cookies with a smooth royal icing finish. Most are pantry staples, and substitutions are easy if needed.
- For the Sugar Cookie Dough:
- 2 ¾ cups (345g) all-purpose flour – I prefer King Arthur for consistent texture
- 1 teaspoon baking powder – for slight lift
- ½ teaspoon salt
- 1 cup (227g) unsalted butter, softened – room temperature for easier creaming
- 1 ½ cups (300g) granulated sugar – adds sweetness and slight crunch
- 1 large egg, room temperature – binds dough
- 2 teaspoons pure vanilla extract – for warm flavor depth
- 2 tablespoons whole milk – adds moisture, can swap with almond milk if dairy-free
- For the Royal Icing:
- 3 cups (360g) powdered sugar, sifted – for smooth texture
- 2 large egg whites or 4 tablespoons meringue powder with 6 tablespoons water – meringue powder is a safe alternative
- ½ teaspoon cream of tartar – stabilizes the icing
- 1 teaspoon vanilla or almond extract – optional for flavor
- Food coloring gels (optional) – I use AmeriColor gels for vibrant, consistent color
For the diploma look, the white royal icing acts as the “paper,” and a golden yellow or rich red works beautifully for the ribbon detail. If you want to switch up the flavors, adding a hint of almond extract to the dough is a subtle but lovely twist. Also, for a gluten-free option, almond flour can work but expect a softer, more delicate cookie.
Equipment Needed
- Mixing bowls (medium and large) – glass or stainless steel work well
- Electric mixer or stand mixer – makes creaming butter and sugar easier
- Measuring cups and spoons – accurate measurements are key
- Rolling pin – essential for even dough thickness
- Diploma-shaped cookie cutter or a rectangular cutter with a sharp knife for detail
- Baking sheets lined with parchment paper or silicone mats – prevents sticking and promotes even baking
- Cooling racks – allows cookies to cool completely before icing
- Piping bags and small round piping tips (size #1 or #2) – for precise royal icing decoration
- Toothpicks or scribe tools – handy for smoothing icing edges or fixing tiny mistakes
If you don’t have a diploma-shaped cutter, you can easily create a template from cardboard and cut around it with a knife or use a rectangular cutter and add the ribbon with icing. I’ve used disposable piping bags with great success, but reusable silicone ones work just as well and cut down on waste. For those on a budget, a clean sandwich bag with a tiny corner snipped off can stand in for piping bags during decoration.
Preparation Method
- Mix Dry Ingredients: In a medium bowl, whisk together 2 ¾ cups all-purpose flour, 1 teaspoon baking powder, and ½ teaspoon salt. Set aside. (This step ensures even distribution of leavening and salt.) Time: 5 minutes.
- Cream Butter and Sugar: Using an electric mixer, beat 1 cup softened unsalted butter with 1 ½ cups granulated sugar on medium speed until light and fluffy, about 3–4 minutes. Scrape down the sides occasionally. (You’ll notice the mixture lighten in color—that’s the air getting in.) Time: 5 minutes.
- Add Egg and Vanilla: Beat in 1 large egg and 2 teaspoons vanilla extract until combined. Then add 2 tablespoons milk and mix just until blended. (Avoid overmixing to keep cookies tender.) Time: 2 minutes.
- Incorporate Dry Ingredients: Gradually add the flour mixture to the wet ingredients, mixing on low speed until just combined. Dough will be slightly sticky but should hold together. If too sticky, add a tablespoon of flour at a time. Time: 3 minutes.
- Chill the Dough: Shape dough into a disk, wrap in plastic wrap, and chill in the fridge for at least 1 hour. (This prevents spreading and makes rolling easier.) Time: 1 hour.
- Roll and Cut: Preheat oven to 350°F (175°C). On a lightly floured surface, roll dough to about ¼ inch (6 mm) thickness. Using your diploma-shaped cookie cutter, cut out cookies and transfer to baking sheets lined with parchment paper. Leave 1 inch (2.5 cm) between cookies. (If you don’t have the cutter, cut rectangles 3×1.5 inches and plan to pipe the ribbon.) Time: 15 minutes.
- Bake: Bake cookies for 8–10 minutes, until edges are just starting to turn golden. (Don’t overbake or they’ll dry out.) Remove and cool on baking sheets for 5 minutes, then transfer to wire racks to cool completely. Time: 10 minutes baking + cooling.
- Prepare Royal Icing: In a clean bowl, beat 3 cups sifted powdered sugar with 2 egg whites (or meringue powder and water), and ½ teaspoon cream of tartar on medium speed until glossy and stiff peaks form (about 5–7 minutes). Add extract if desired. Divide and tint portions with gel food coloring. (Consistency should be like thick glue for piping.) Time: 10 minutes.
- Decorate: Fill piping bags with white icing for the diploma base. Outline and flood each cookie, then let dry for 20 minutes. Use a smaller tip with colored icing to pipe ribbon details and “seal” lines. Use toothpicks to smooth edges or create texture. Let dry completely, preferably overnight. Time: 30+ minutes decorating and drying.
Pro tip: Work on a cool surface and keep icing covered with a damp cloth when not in use to prevent drying out. If your icing gets too stiff, add a few drops of water to loosen. For tidier edges, outline cookies first and wait a few minutes before flooding.
Cooking Tips & Techniques
Royal icing can be intimidating, but a few tricks helped me nail these diploma cookies every time.
- Consistency is Crucial: For piping outlines, the icing should hold its shape but still pipe smoothly. For flooding (filling in), thin the icing with water to a syrupy consistency that spreads with a slight tilt of the cookie.
- Practice Piping: If you’re new to royal icing, practice on parchment paper first. It helps build confidence before decorating the actual cookies.
- Control Drying Time: Let each layer dry thoroughly before adding details to avoid colors bleeding into each other.
- Keep Tools Clean: Wipe piping tips and toothpicks regularly to maintain sharp, clean lines.
- Don’t Skip Chilling: Chilling the dough is key to preventing spreading and maintaining crisp edges that look polished.
- Storage Matters: Store iced cookies in an airtight container with parchment layers to protect decorations.
One mistake I made early on was rushing the drying phase—cookies looked great but the icing cracked later. Patience really pays off. Also, I found that using meringue powder instead of raw egg whites takes some pressure off for food safety and keeps the icing stable for days.
Variations & Adaptations
These diploma-shaped sugar cookies can be customized to fit your occasion or dietary needs:
- Flavor Twists: Add lemon zest or almond extract to the dough for a fresh, nutty note. I’ve tried a cinnamon version that pairs wonderfully with fall graduations.
- Color & Theme: Change the royal icing colors to match school colors or party themes. Use edible glitter or metallic food pens to add shimmer to the ribbon.
- Gluten-Free: Substitute all-purpose flour with a gluten-free blend (like Bob’s Red Mill 1-to-1) for a safe option. The texture will be slightly softer but still delicious.
- Vegan Adaptation: Use vegan butter and aquafaba (chickpea water) instead of eggs. For royal icing, powdered sugar with aquafaba can mimic the texture but requires more drying time.
- Alternative Shapes: If you want a break from diplomas, try the same dough and icing on simple star or heart cutters for celebratory treats. Or pipe other shapes like graduation caps.
Personally, I once made a batch using a cream cheese glaze instead of royal icing for a softer, tangier finish—great if you’re not into the firmness of royal icing. It’s fun to experiment!
Serving & Storage Suggestions
These cookies are best served at room temperature, allowing the crisp edges and soft centers to shine through. Arrange them on a platter with a few fresh flowers or ribbon-wrapped boxes for an elegant presentation at graduation parties or ceremonies.
Pair these cookies with a light beverage like sparkling lemonade or even a creamy hot chocolate for chilly days. They also make a charming gift when stacked in a decorative tin or cellophane bag tied with matching ribbon.
Store iced cookies in an airtight container layered with parchment paper to prevent sticking. They keep well at room temperature for up to 5 days. For longer storage, freeze them in a single layer wrapped tightly in plastic wrap, then placed in a sealed freezer bag for up to 3 months. Thaw at room temperature before serving.
Reheat isn’t recommended as it can soften the royal icing, but if you prefer softer cookies, a quick 5-second zap in the microwave can warm them slightly without ruining the look.
Nutritional Information & Benefits
Each sugar cookie (about 2.5 inches) contains roughly 150 calories, 7g fat, 20g carbohydrates, and 1g protein. The recipe uses real butter and fresh ingredients which provide richness without artificial additives.
Royal icing, while mainly sugar, is used sparingly to decorate, adding a touch of sweetness without overwhelming the cookie. Using natural extracts and avoiding artificial colors can keep it cleaner.
For dietary considerations, this recipe can be adapted gluten-free or vegan, as noted earlier. Be mindful of allergens: contains wheat, eggs, and dairy by default.
From a wellness perspective, these treats are best enjoyed in moderation but can be part of joyful celebrations that support mental health and community bonding. Baking and sharing cookies like these have always been my way to connect and celebrate milestones with loved ones.
Conclusion
Perfect diploma-shaped sugar cookies with elegant royal icing bring a special touch to any graduation or celebration. They’re approachable enough for home bakers yet classy enough to impress guests. The buttery cookie combined with smooth, glossy icing creates a texture and flavor that’s simply memorable.
Feel free to customize the flavors, colors, and designs to make them your own. Whether it’s your first time decorating or you’ve been piping for years, this recipe offers a satisfying balance of simplicity and style that makes the baking process a pleasure.
Honestly, these cookies have become my go-to when I want to mark an occasion with something handmade but polished. If you try them, I’d love to hear how you decorated your diplomas or what flavor twists you added—drop a comment or share your photos!
And when you’re ready to round out your celebration menu, these diploma cookies pair beautifully with savory bites like crispy baked ham and cheese croissants or a sweet finale like maraschino cherry shortbread cookies. Wishing you joyful baking and happy celebrations!
FAQs
Can I make the cookie dough ahead of time?
Yes! You can prepare the dough and refrigerate it for up to 3 days before rolling and baking. Just bring it to room temperature for about 15 minutes before rolling out.
How do I prevent royal icing from cracking?
Make sure not to add too much powdered sugar or water. Also, allow each layer of icing to dry completely before adding more. Avoid storing cookies in overly dry or cold environments.
Can I use store-bought royal icing instead of making my own?
Absolutely. Store-bought royal icing can save time, but make sure it’s the piping consistency and not too runny for detailed work.
What if I don’t have a diploma-shaped cookie cutter?
No problem! Use a rectangular cutter and decorate with icing to mimic the diploma shape and ribbon. You can also cut rectangles with a knife after rolling out the dough.
How long do these cookies keep?
Stored in an airtight container at room temperature, they last about 5 days. For longer storage, freeze them well-wrapped for up to 3 months.
Pin This Recipe!
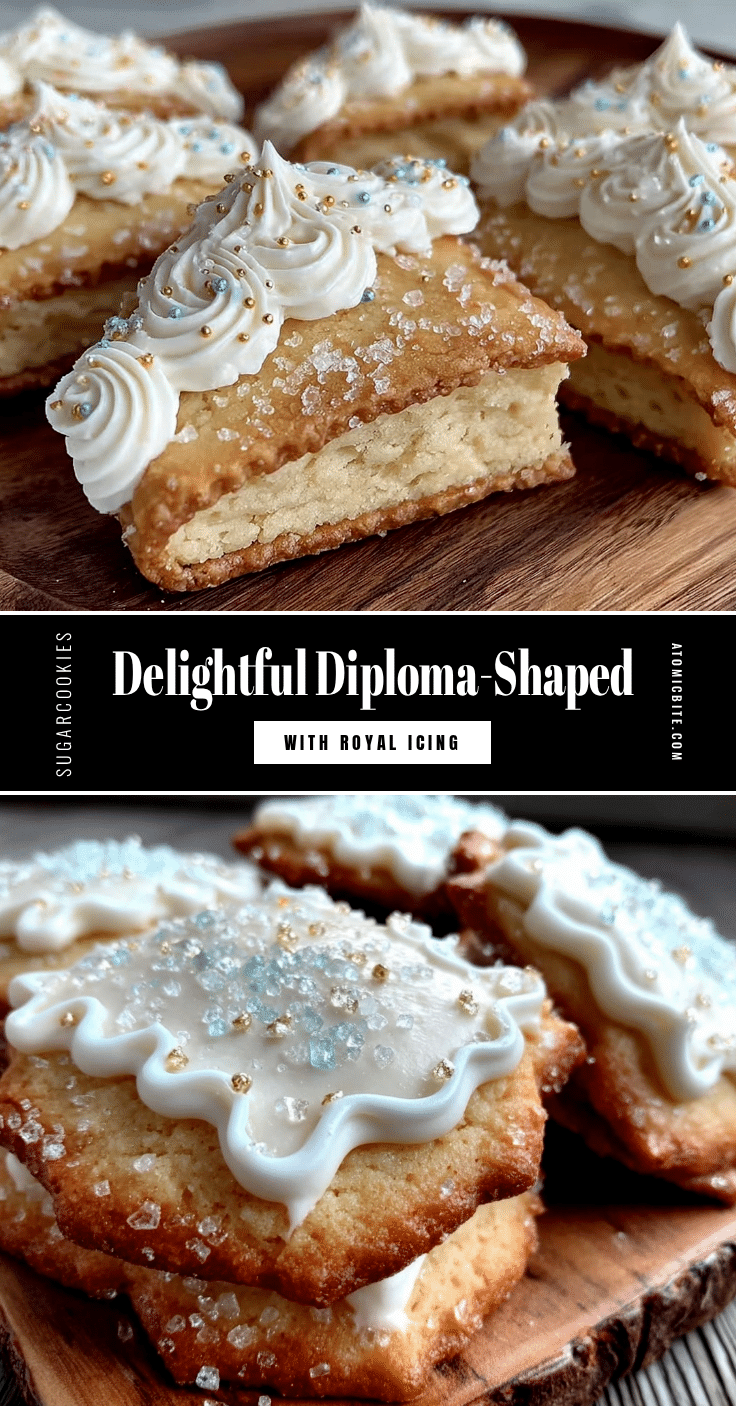
Perfect Diploma-Shaped Sugar Cookies Recipe with Easy Royal Icing Tutorial
These diploma-shaped sugar cookies feature a buttery, tender texture with an elegant royal icing finish, perfect for graduation parties and celebrations. The recipe is approachable, using simple pantry staples and easy decorating tips.
- Prep Time: 25 minutes
- Cook Time: 10 minutes
- Total Time: 1 hour 35 minutes
- Yield: 24 cookies 1x
- Category: Dessert
- Cuisine: American
Ingredients
- 2 ¾ cups (345g) all-purpose flour
- 1 teaspoon baking powder
- ½ teaspoon salt
- 1 cup (227g) unsalted butter, softened
- 1 ½ cups (300g) granulated sugar
- 1 large egg, room temperature
- 2 teaspoons pure vanilla extract
- 2 tablespoons whole milk
- 3 cups (360g) powdered sugar, sifted
- 2 large egg whites or 4 tablespoons meringue powder with 6 tablespoons water
- ½ teaspoon cream of tartar
- 1 teaspoon vanilla or almond extract (optional)
- Food coloring gels (optional)
Instructions
- Mix dry ingredients: whisk together flour, baking powder, and salt in a medium bowl. Set aside.
- Cream butter and sugar: beat softened butter with granulated sugar on medium speed until light and fluffy, about 3–4 minutes.
- Add egg and vanilla: beat in egg and vanilla extract, then add milk and mix until blended.
- Incorporate dry ingredients: gradually add flour mixture to wet ingredients, mixing on low speed until just combined.
- Chill the dough: shape dough into a disk, wrap in plastic wrap, and chill in the fridge for at least 1 hour.
- Roll and cut: preheat oven to 350°F (175°C). Roll dough to ¼ inch thickness and cut with diploma-shaped or rectangular cutter. Place cookies on lined baking sheets with 1 inch spacing.
- Bake: bake for 8–10 minutes until edges start to turn golden. Cool on baking sheets 5 minutes, then transfer to wire racks to cool completely.
- Prepare royal icing: beat powdered sugar with egg whites (or meringue powder and water) and cream of tartar until glossy and stiff peaks form. Add extract if desired and tint with food coloring.
- Decorate: outline and flood cookies with white icing, let dry 20 minutes. Pipe ribbon details with colored icing and smooth edges with toothpicks. Let dry completely, preferably overnight.
Notes
Work on a cool surface and keep icing covered with a damp cloth when not in use to prevent drying out. If icing gets too stiff, add a few drops of water to loosen. Outline cookies first and wait a few minutes before flooding for tidier edges. Store iced cookies in airtight containers with parchment layers. Dough can be refrigerated up to 3 days before baking. Use meringue powder instead of raw egg whites for safer, stable icing. For gluten-free, substitute flour with a gluten-free blend. Vegan adaptations include vegan butter and aquafaba.
Nutrition
- Serving Size: 1 cookie (about 2.5
- Calories: 150
- Fat: 7
- Carbohydrates: 20
- Protein: 1
Keywords: sugar cookies, diploma cookies, royal icing, graduation cookies, easy sugar cookies, celebration cookies, cookie decorating


