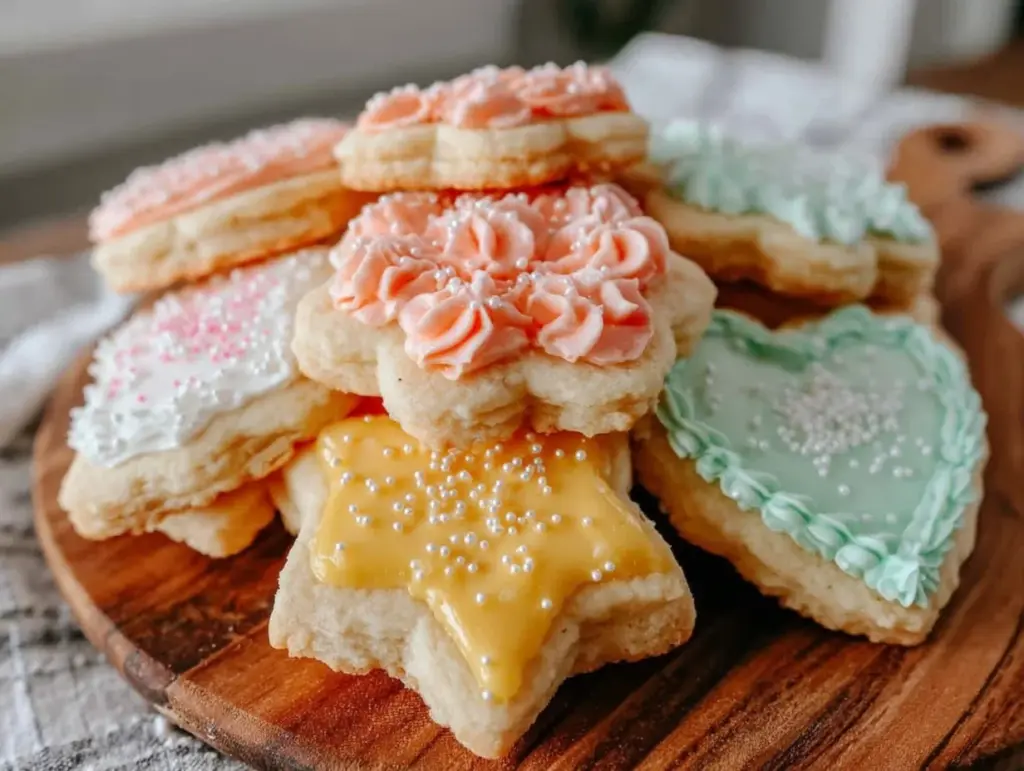
“You know that moment when you bite into a sugar cookie that’s just the right balance of tender, sweet, and a little buttery? That’s exactly what happened the first time I made these perfect pastel sugar cookie cutouts with royal icing. Honestly, I wasn’t planning on getting fancy—just needed a quick treat to bring to a last-minute gathering. But what started as a simple idea turned into a full-on obsession for pastel colors and delicate icing details. I remember standing in my kitchen, icing bag in hand, with the soft smell of vanilla and butter swirling around me, thinking, ‘Maybe I’m not such a “not really a baker” type after all.’ There’s something quietly satisfying about rolling out dough, cutting shapes, and watching those cookies transform into little edible works of art.
What really hooked me was how these cookies aren’t just tasty—they’re a nostalgic little celebration on a plate. The pastel hues remind me of springtime picnics and childhood birthday parties, yet the royal icing adds that smooth, glossy finish that feels just a notch above your everyday sugar cookie. I’ve made these for casual brunches and even paired them with a batch of crispy baked ham and cheese croissants for a cozy weekend treat. And the best part? They’re surprisingly straightforward to make, even if you’re someone who usually shies away from frosting.
After a few tries, some icing mishaps (a few too-thick globs here and there), and plenty of taste tests, I realized these pastel sugar cookie cutouts with royal icing were here to stay. They bring a little calm and creativity to my kitchen, and honestly, they’re the kind of recipe that makes you want to slow down and savor the process. That’s why I keep coming back to them.
Why You’ll Love This Recipe
This recipe for perfect pastel sugar cookie cutouts with royal icing has earned a special spot in my baking rotation, and here’s why you’ll want to give it a try too:
- Quick & Easy: The dough comes together in about 15 minutes, and the icing sets nicely within a few hours—ideal for last-minute celebrations or spontaneous baking sessions.
- Simple Ingredients: No need for fancy or hard-to-find items; this recipe uses pantry staples like butter, sugar, and eggs, plus basic royal icing ingredients you might already have.
- Perfect for Occasions: Whether it’s Easter brunch, baby showers, or a casual weekend treat, these pastel cookies add a festive touch with minimal fuss.
- Crowd-Pleaser: Kids and adults alike go wild for these. The soft texture combined with the sweet, smooth royal icing makes them a universal favorite.
- Unbelievably Delicious: The buttery cookie base paired with subtly flavored royal icing hits that perfect comfort-food note. The pastel icing isn’t just pretty—it tastes fresh and light.
What sets this recipe apart is the balance between simplicity and style. I’ve tested other sugar cookie recipes, but this one’s dough is forgiving—no guesswork on chilling times or rolling thickness. Plus, the royal icing tutorial here breaks down the steps so even those nervous about piping can get those edges crisp and clean. I like to use a little almond extract in the icing for a subtle twist, which really rounds out the flavor.
At the end of the day, this recipe isn’t just about cookies—it’s about that quiet pleasure of making something beautiful and delicious without stress. If you want a go-to sugar cookie recipe that’s both straightforward and impressive, this one’s for you.
What Ingredients You Will Need
This recipe uses simple, wholesome ingredients to deliver bold flavor and satisfying texture without the fuss. Most are pantry staples, and you can swap a few to suit your preferences or dietary needs.
- For the Sugar Cookie Dough:
- 2 ¾ cups (345g) all-purpose flour, sifted
- 1 teaspoon baking powder
- ½ teaspoon salt
- 1 cup (227g) unsalted butter, softened (I like using Land O Lakes for great texture)
- 1 ½ cups (300g) granulated sugar
- 2 large eggs, room temperature
- 2 teaspoons pure vanilla extract
- For the Royal Icing:
- 4 cups (480g) powdered sugar, sifted
- 3 tablespoons meringue powder
- 9-10 tablespoons warm water (adjust as needed for consistency)
- 1 teaspoon vanilla or almond extract (optional, adds depth)
- Pastel gel food coloring (pink, mint green, lavender, soft yellow—you can mix to get perfect shades)
For a gluten-free option, substitute the all-purpose flour with a 1:1 gluten-free baking blend. If you want to keep it dairy-free, swap butter with a plant-based margarine, but note the flavor will be a little different. When picking food coloring, I swear by AmeriColor gel colors for vibrant, true pastels without watering down the icing.
These ingredients are easy to find year-round; I often make a batch of these cookies in spring and then again near holidays like Christmas, swapping pastel colors for festive reds and greens. The royal icing here is designed to dry hard but stay tasty, perfect for intricate designs or simple smooth finishes.
Equipment Needed
To make these pastel sugar cookie cutouts with royal icing, you’ll want a few basic kitchen tools. Don’t worry—nothing too fancy or expensive.
- Stand mixer or hand mixer: Essential for creaming butter and mixing dough smoothly.
- Rolling pin: A standard rolling pin works fine; I prefer one with thickness rings to keep dough even.
- Cookie cutters: Choose your favorite shapes—hearts, stars, or classic circles. Metal cutters give the cleanest edges.
- Baking sheets lined with parchment paper or silicone mats: Helps prevent sticking and makes cleanup easy.
- Cooling racks: To let cookies cool evenly without sogginess underneath.
- Mixing bowls: One for dough, one for icing.
- Piping bags and tips: A small round tip (like Wilton #2 or #3) is perfect for outlining and flooding with royal icing. Disposable bags are budget-friendly and easy to clean up.
- Spoons or spatulas: For mixing icing and scraping bowls.
If you don’t have a stand mixer, a sturdy hand mixer is perfectly fine—just be patient creaming the butter. For piping, if you don’t own tips, you can snip the end of a piping bag to create a small hole and still get good results. I’ve found that silicone baking mats last forever and seriously make a difference compared to parchment paper, but both work.
Preparation Method
- Mix Dry Ingredients: In a medium bowl, whisk together 2 ¾ cups (345g) sifted all-purpose flour, 1 teaspoon baking powder, and ½ teaspoon salt. Set aside. This keeps the flour mixture light and lump-free.
- Cream Butter and Sugar: Using a stand mixer or hand mixer, beat 1 cup (227g) softened unsalted butter and 1 ½ cups (300g) granulated sugar on medium speed for 3-4 minutes until pale and fluffy. This step is key for tender cookies.
- Add Eggs and Vanilla: Beat in 2 large eggs one at a time, followed by 2 teaspoons vanilla extract. Mix until fully combined, scraping down the bowl as needed.
- Combine Wet and Dry: Gradually add the flour mixture to the wet ingredients, mixing on low speed until just combined. Avoid over-mixing to keep cookies tender. The dough should be soft but not sticky—if it’s too sticky, pop it in the fridge for 15 minutes.
- Chill the Dough: Wrap the dough in plastic wrap and refrigerate for at least 1 hour. Chilling prevents spreading and helps the dough roll out smoothly.
- Preheat Oven and Prepare Baking Sheets: Set oven to 350°F (175°C). Line baking sheets with parchment paper or silicone mats.
- Roll and Cut Dough: On a lightly floured surface, roll the dough to about ¼ inch (6mm) thickness. Use cookie cutters to cut shapes, transferring them carefully to the baking sheet. Leave about 1 inch (2.5 cm) between cookies.
- Bake: Bake for 8-10 minutes, until edges are just starting to turn golden. The centers should still look pale—this keeps them soft after cooling.
- Cool Completely: Transfer cookies to a wire rack. Let cool fully before icing to avoid melting the royal icing.
- Prepare Royal Icing: In a bowl, combine 4 cups (480g) sifted powdered sugar and 3 tablespoons meringue powder. Add 9 tablespoons warm water and 1 teaspoon vanilla or almond extract. Beat on high for 5-7 minutes until stiff peaks form.
- Adjust Consistency: For outlining, use thicker icing; for flooding, thin with a teaspoon of water at a time until it flows smoothly but isn’t runny. Divide icing into bowls and tint with pastel gel colors.
- Decorate Cookies: Outline each cookie with thick icing, let set 10 minutes, then flood with thinner icing. Use a toothpick or small tool to spread icing evenly and pop any air bubbles. Allow to dry completely, at least 4 hours or overnight.
Pro tip: If your dough warms up while rolling, pop it back in the fridge a few minutes. And when piping icing, work patiently—if mistakes happen, you can scrape off and redo before it dries.
Cooking Tips & Techniques
Getting these pastel sugar cookie cutouts just right took some trial and error, so here’s what I’ve learned:
- Don’t Skip Chilling: Chilling the dough is essential. I once tried skipping this step on a whim—big mistake. The cookies spread too much and lost their shape. Always chill for at least an hour.
- Use Gel Food Coloring: Liquid colors can thin your royal icing, making it harder to control. Gel colors keep the texture perfect and the colors vibrant but soft.
- Practice Piping: If you’re new to royal icing, practice on parchment paper first. It helps build confidence before decorating the actual cookies.
- Control Icing Consistency: For clean edges, thicker icing is your friend. For filling, thin it out just enough to flow smoothly. Too thin and it runs off; too thick and it won’t spread.
- Work in Small Batches: Divide your dough and icing into smaller portions. It’s easier to manage and keeps the dough fresh.
- Temperature Matters: If your kitchen is warm, royal icing can dry too fast or get sticky. Keep a fan nearby or a cool spot to let cookies dry evenly.
Funny enough, I once tried making these cookies during a summer heatwave without air conditioning. The royal icing was a nightmare! Lesson learned: cool kitchens make for happier cookies and calmer decorators.
Variations & Adaptations
These pastel sugar cookie cutouts are a great base to customize for different occasions and tastes. Here are some ideas I’ve tried or recommend:
- Flavor Twists: Add lemon zest or a splash of almond extract to the cookie dough for a fresh flavor change. For the royal icing, try swapping vanilla for peppermint extract for a wintery vibe.
- Diet-Friendly: Use almond flour in place of regular flour for a gluten-free version. For vegan cookies, swap butter with coconut oil and use aquafaba (chickpea water) instead of eggs. Adjust royal icing with aquafaba too.
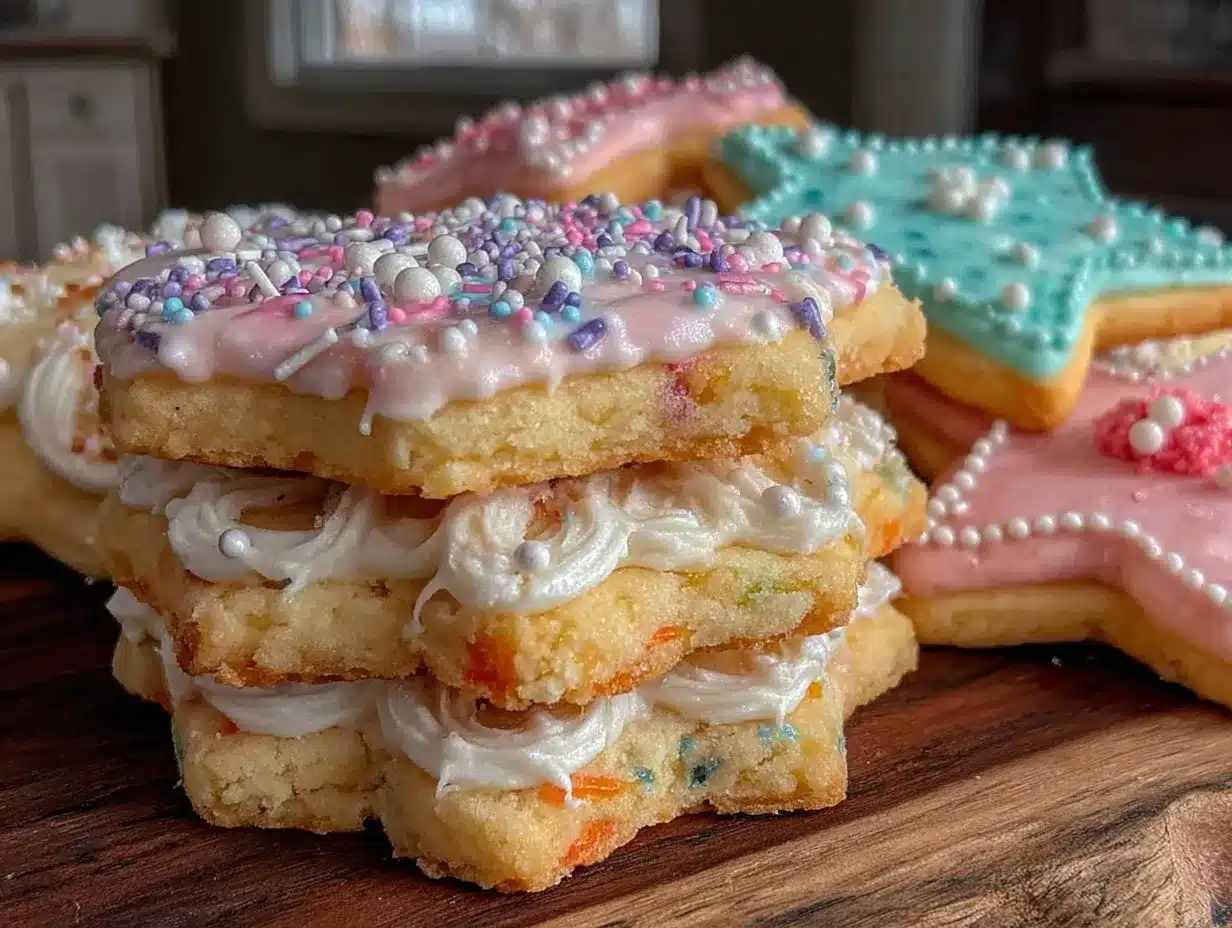
- Seasonal Colors: Swap the pastel palette for autumn tones (burnt orange, deep reds, mustard yellow) or holiday colors like red and green. This recipe works beautifully with any gel colors.
- Alternative Decorating: Instead of royal icing, try a simple glaze made from powdered sugar and milk for a quicker finish. Or add sprinkles before icing dries for extra texture and fun.
- Personal Touch: One time, I made these cookies with a friend for a baby shower, switching the pastel colors to soft blues and yellows and adding tiny hand-drawn details with edible markers. It was a hit!
Serving & Storage Suggestions
These pastel sugar cookie cutouts are best served at room temperature, allowing the buttery texture and smooth icing to shine through. For brunch or tea parties, arrange them on a pretty platter with fresh flowers for that extra touch of charm.
They pair wonderfully with light beverages like herbal tea, milk, or a sparkling lemonade. If you want to create a spread, these cookies balance nicely alongside savory dishes like the crispy baked turkey sliders or a rich cheese ball like the creamy dill pickle cheese ball.
To store, place cookies in an airtight container layered between parchment paper. They keep well at room temperature for up to 5 days. For longer storage, freeze baked, undecorated cookies and thaw before icing. Decorated cookies freeze best if fully dried and wrapped individually in plastic wrap, then stored in a container for up to a month.
When reheating, avoid microwaves as they can melt the icing. Instead, bring to room temperature naturally or warm briefly in an oven set to 200°F (95°C) for 5 minutes.
Flavors often mellow and improve slightly after a day, so if you’re prepping ahead, you’re in luck—the taste and texture only get better.
Nutritional Information & Benefits
Each pastel sugar cookie cutout (about 3-inch diameter) contains approximately:
| Calories | 150 kcal |
|---|---|
| Fat | 7g (4g saturated) |
| Carbohydrates | 22g |
| Sugar | 14g |
| Protein | 1.5g |
These cookies are a treat and naturally high in sugar and fat, so moderation is key. The butter provides some vitamin A and healthy fats, while the eggs contribute protein. Using real vanilla extract adds flavor without artificial additives.
For those watching gluten intake, swapping to gluten-free flour blends works well without sacrificing texture. The recipe is naturally nut-free but contains eggs and dairy, so keep that in mind for allergies.
From a wellness standpoint, baking at home means you control your ingredients—no preservatives or artificial colors like many store-bought cookies. Plus, the joy and mindfulness of decorating these pastel sugar cookie cutouts is a little mental boost in itself.
Conclusion
Making perfect pastel sugar cookie cutouts with royal icing is one of those baking projects that feels fancy but is totally doable. The buttery, tender cookies paired with smooth, pastel-hued icing bring both comfort and creativity to the kitchen. It’s a recipe that invites you to slow down and enjoy the process, whether you’re baking for a special occasion or just because.
Feel free to tweak the flavors, colors, and shapes to match your mood or event. I love how these cookies can be both playful and elegant, and they’ve become a quiet favorite in my recipe collection. Plus, the satisfaction of seeing those smooth, glossy icing finishes? It never gets old.
If you try this recipe, I’d love to hear how it went—any fun decorating stories or personal twists you added. Baking is always better when shared, right? So grab your rolling pin, pick your favorite pastel shades, and get ready to create some sweet memories.
FAQs
Can I make the dough ahead of time?
Yes! You can chill the dough wrapped in plastic wrap for up to 2 days before rolling and cutting. Just let it sit at room temperature for 10-15 minutes before rolling if it’s too firm.
How long does royal icing take to dry completely?
Royal icing usually takes about 4-6 hours to dry hard at room temperature. For best results, let decorated cookies dry overnight.
Can I use powdered sugar instead of granulated sugar in the dough?
Granulated sugar gives the best texture and spread, so it’s recommended. Powdered sugar will create a denser cookie and may affect flavor.
What if my royal icing is too runny or too thick?
If it’s too runny, add a little more powdered sugar. If it’s too thick, add water a teaspoon at a time until you reach the desired consistency for outlining or flooding.
How do I store decorated sugar cookies to keep them fresh?
Store in an airtight container layered with parchment paper at room temperature for up to 5 days. For longer storage, freeze undecorated cookies and decorate after thawing, or freeze fully dried decorated cookies wrapped individually.
Pin This Recipe!
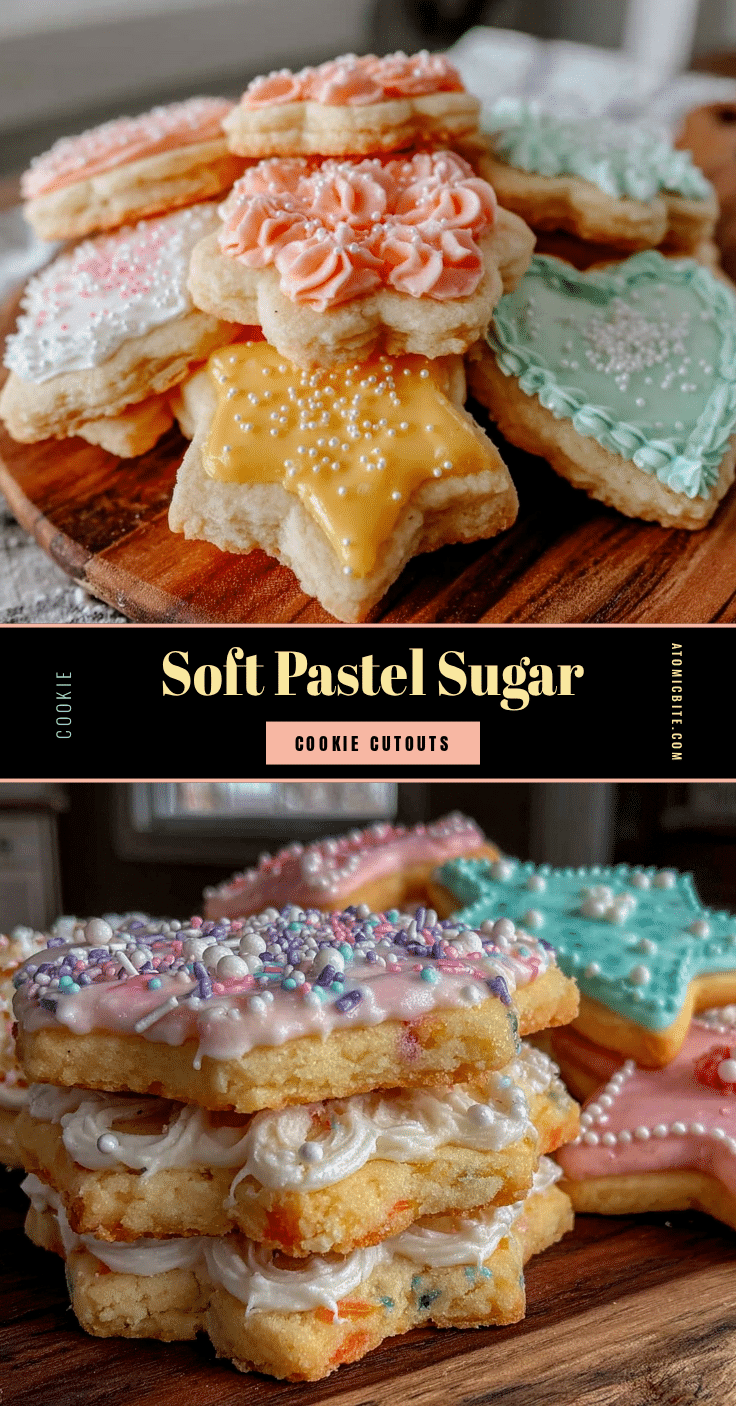
Perfect Pastel Sugar Cookie Cutouts Recipe Easy Royal Icing Tutorial

Tender, buttery sugar cookies decorated with smooth pastel royal icing, perfect for celebrations and everyday treats. This recipe is straightforward and yields beautifully decorated cookies with a nostalgic touch.
- Prep Time: 15 minutes
- Cook Time: 8-10 minutes
- Total Time: 1 hour 30 minutes
- Yield: 24 cookies 1x
- Category: Dessert
- Cuisine: American
Ingredients
- 2 ¾ cups (345g) all-purpose flour, sifted
- 1 teaspoon baking powder
- ½ teaspoon salt
- 1 cup (227g) unsalted butter, softened
- 1 ½ cups (300g) granulated sugar
- 2 large eggs, room temperature
- 2 teaspoons pure vanilla extract
- 4 cups (480g) powdered sugar, sifted
- 3 tablespoons meringue powder
- 9–10 tablespoons warm water (adjust as needed for consistency)
- 1 teaspoon vanilla or almond extract (optional)
- Pastel gel food coloring (pink, mint green, lavender, soft yellow)
Instructions
- Mix Dry Ingredients: In a medium bowl, whisk together 2 ¾ cups (345g) sifted all-purpose flour, 1 teaspoon baking powder, and ½ teaspoon salt. Set aside.
- Cream Butter and Sugar: Using a stand mixer or hand mixer, beat 1 cup (227g) softened unsalted butter and 1 ½ cups (300g) granulated sugar on medium speed for 3-4 minutes until pale and fluffy.
- Add Eggs and Vanilla: Beat in 2 large eggs one at a time, followed by 2 teaspoons vanilla extract. Mix until fully combined.
- Combine Wet and Dry: Gradually add the flour mixture to the wet ingredients, mixing on low speed until just combined. If dough is too sticky, refrigerate for 15 minutes.
- Chill the Dough: Wrap the dough in plastic wrap and refrigerate for at least 1 hour.
- Preheat Oven and Prepare Baking Sheets: Set oven to 350°F (175°C). Line baking sheets with parchment paper or silicone mats.
- Roll and Cut Dough: On a lightly floured surface, roll dough to about ¼ inch (6mm) thickness. Cut shapes with cookie cutters and place on baking sheet about 1 inch apart.
- Bake: Bake for 8-10 minutes until edges start to turn golden but centers remain pale.
- Cool Completely: Transfer cookies to a wire rack and cool fully before icing.
- Prepare Royal Icing: In a bowl, combine 4 cups (480g) powdered sugar and 3 tablespoons meringue powder. Add 9 tablespoons warm water and 1 teaspoon vanilla or almond extract. Beat on high for 5-7 minutes until stiff peaks form.
- Adjust Consistency: Use thicker icing for outlining and thin with water for flooding. Divide and tint with pastel gel colors.
- Decorate Cookies: Outline cookies with thick icing, let set 10 minutes, then flood with thinner icing. Use a toothpick to spread icing evenly and pop air bubbles. Allow to dry completely, at least 4 hours or overnight.
Notes
Chill dough for at least 1 hour to prevent spreading. Use gel food coloring for vibrant pastel colors without thinning icing. Practice piping on parchment paper before decorating cookies. Store decorated cookies in airtight container layered with parchment paper at room temperature for up to 5 days or freeze for longer storage.
Nutrition
- Serving Size: 1 cookie (about 3-in
- Calories: 150
- Sugar: 14
- Fat: 7
- Saturated Fat: 4
- Carbohydrates: 22
- Protein: 1.5
Keywords: sugar cookies, pastel cookies, royal icing, cutout cookies, easy sugar cookie recipe, holiday cookies, decorated cookies


