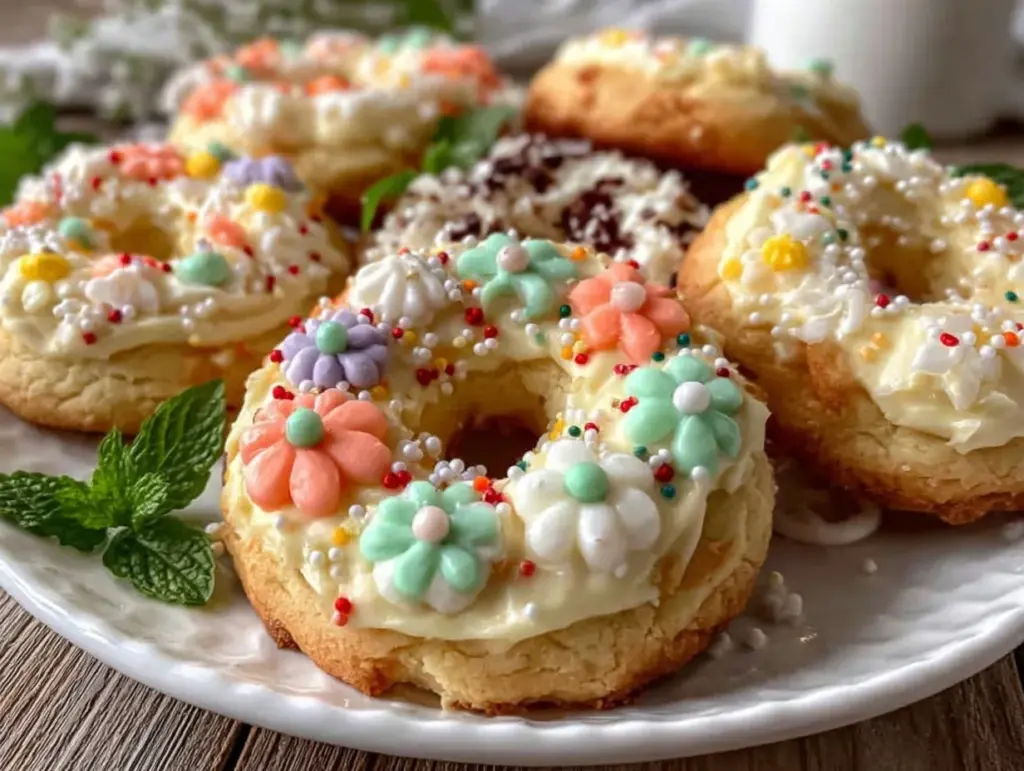
“You really have to try these,” my neighbor insisted, dropping off a tin of delicate sugar cookies decorated like tiny spring blossoms. I was skeptical at first—royal icing seemed like a whole art form I’d never quite mastered, and sugar cookies often turn out either too tough or too bland. But after a bite, I was totally hooked. Those perfect spring flower sugar cookies with royal icing had this buttery, tender crumb that just melted, while the icing was smooth and crisp with just the right sweetness. Honestly, it was one of those surprise wins that I found myself making again and again that same week—sometimes just to unwind after a long day.
There’s something quietly joyful about the way these cookies look on a plate, like little bits of sunshine after a cold winter. The floral designs aren’t just pretty—they remind me of those early morning walks when the garden starts waking up, full of buds ready to burst. And the royal icing? It’s not just decoration. It adds that satisfying snap and a touch of elegance that turns a simple cookie into a special moment. I started experimenting with colors and shapes, and soon enough, they became my go-to for gifting and small celebrations. Nothing too fancy or intimidating, just simple, approachable baking that feels like a small act of kindness.
What stuck with me is how forgiving these cookies are. You can tweak the icing consistency, play with different flower patterns, or even sneak in subtle flavors like lemon zest or vanilla bean. It’s a recipe that feels both classic and fresh—kind of like spring itself. So if you’re looking for a sweet project that’s as delightful to make as it is to eat, these sugar cookies might just be your new favorite. They’ve certainly become mine.
Why You’ll Love This Recipe
After countless batches and tweaks, this recipe for perfect spring flower sugar cookies with royal icing has earned a permanent spot in my baking rotation. Here’s why it might just win you over too:
- Quick & Easy: The dough comes together in about 15 minutes, and the cookies bake in under 10, making it perfect for spontaneous baking sessions or last-minute gifts.
- Simple Ingredients: You’ll probably find everything in your pantry already—no need for fancy or hard-to-find items.
- Perfect for Spring Gatherings: Whether it’s a garden party, a birthday, or just a cozy afternoon tea, these cookies bring a fresh, seasonal vibe everyone appreciates.
- Crowd-Pleaser: The balance of buttery, tender cookie and crisp, sweet royal icing gets nods from kids and adults alike.
- Unbelievably Delicious: The texture is spot on—soft but sturdy enough for intricate icing designs that hold beautifully.
This isn’t just another sugar cookie recipe. The secret lies in the royal icing technique I use, which creates that flawless smooth finish without cracking. The dough itself is lightly flavored with a hint of vanilla and a touch of almond extract, which adds warmth without overpowering the delicate floral decorations. Plus, it’s a recipe I’ve tested multiple times, so you can trust it to work whether you’re a beginner or a seasoned baker. Honestly, it’s satisfying to bake cookies that taste as good as they look—something that isn’t always easy to pull off.
It’s also a recipe that invites creativity—play with colors, flowers, or even try piping tiny bees or butterflies to go along with the blossoms. These cookies bring a little joy and beauty to any occasion, and that’s why they keep coming back to my kitchen.
What Ingredients You Will Need
This recipe uses simple, wholesome ingredients to deliver both bold flavor and a satisfying texture without fuss. Most of these are pantry staples, and if you’re missing something, I’ll include easy substitutions along the way.
- For the Sugar Cookies:
- All-purpose flour, 2 ¾ cups (340 grams) – I like King Arthur for consistency
- Baking powder, 1 teaspoon – helps keep the cookies light
- Salt, ½ teaspoon – balances sweetness
- Unsalted butter, 1 cup (227 grams), softened – room temperature for easy creaming
- Granulated sugar, 1 cup (200 grams) – for that classic sweetness
- Large egg, 1 – room temperature works best
- Pure vanilla extract, 2 teaspoons – adds warmth and depth
- Almond extract, ¼ teaspoon (optional) – subtle, nutty note that complements the floral theme
- For the Royal Icing:
- Powdered sugar, 4 cups (480 grams), sifted – use a fine sugar for smooth icing
- Pasteurized egg whites, 3 tablespoons (or 6 tablespoons meringue powder + 8 tablespoons water as a dry alternative)
- Fresh lemon juice, 1 tablespoon – brightens the flavor
- Water, 2-4 tablespoons – adjust for desired consistency
- Gel food coloring – choose your favorite spring shades like pastel pink, soft yellow, lavender, and mint green
Ingredient Tips: If you want a dairy-free cookie, swap butter for a plant-based margarine, but know the texture may be slightly different. For a gluten-free version, try a 1:1 gluten-free baking flour blend (though shaping might be a bit softer). I find that using fresh lemon juice in the royal icing really helps the flavors pop and prevents it from tasting overly sweet or artificial.
Equipment Needed
- Stand mixer or hand mixer – essential for creaming butter and sugar smoothly, though you can mix by hand if you’re patient.
- Mixing bowls – a medium and a large one work well.
- Rolling pin – for even dough thickness; a small rolling pin works if your cookie sheet is limited.
- Cookie cutters – floral shapes like daisies, tulips, and roses make for charming designs, but any shape you like will do.
- Baking sheets lined with parchment paper or silicone mats – prevents sticking and ensures even baking.
- Cooling rack – to let your cookies cool completely before icing.
- Piping bags and small round piping tips (sizes #1 or #2) – for detailed royal icing work.
- Spoons and small bowls – for mixing and tinting icing colors.
If you don’t have piping bags, small zip-top bags with the corner snipped off work fine for icing. For budget-friendly cookie cutters, check out your local craft store or online shops—they often have seasonal sets that are great for spring themes. Keeping your tools clean and dry between uses will help maintain the best icing consistency and prevent clogs in your tips.
Preparation Method

- Mix the Dry Ingredients: In a medium bowl, whisk together 2 ¾ cups (340 g) all-purpose flour, 1 teaspoon baking powder, and ½ teaspoon salt. Set aside. This ensures even distribution and a tender crumb.
- Cream Butter and Sugar: In your mixer bowl, beat 1 cup (227 g) softened unsalted butter and 1 cup (200 g) granulated sugar on medium speed for 3-4 minutes until light and fluffy. You’ll notice the mixture becomes pale and smooth, which is key for tender cookies.
- Add Egg and Extracts: Beat in 1 large room temperature egg, 2 teaspoons pure vanilla extract, and ¼ teaspoon almond extract (if using). Mix until combined but don’t overbeat or the dough can become tough.
- Combine Wet and Dry: Gradually add the dry ingredients to the wet, mixing on low speed until just combined. The dough will be soft but not sticky—if it feels too sticky, pop it in the fridge for 15 minutes to firm up.
- Chill the Dough: Wrap the dough in plastic wrap and refrigerate for at least 1 hour. This step helps the dough hold its shape during baking and makes rolling easier.
- Roll and Cut: Preheat oven to 350°F (175°C). On a lightly floured surface, roll out dough to about ¼ inch (6 mm) thickness. Use spring flower cookie cutters to cut shapes, transferring cookies carefully to parchment-lined baking sheets.
- Bake: Bake for 8-10 minutes until edges just start to turn golden. The cookies will look slightly soft but will firm up as they cool. Remove from oven and cool on the baking sheet for 5 minutes before transferring to a wire rack to cool completely.
- Prepare Royal Icing: In a clean bowl, beat 4 cups (480 g) sifted powdered sugar, 3 tablespoons pasteurized egg whites (or meringue powder + water), 1 tablespoon lemon juice, and 2 tablespoons water until smooth and glossy. Adjust water for consistency—too stiff and it won’t pipe smoothly; too runny and it won’t hold shapes.
- Color and Decorate: Divide icing into small bowls and tint with gel food coloring. Use piping bags fitted with small round tips for outlining and flooding cookie surfaces. Let outlines dry 10-15 minutes before flooding the inside. Add details like dots or lines while icing is still wet for a textured effect.
- Dry Completely: Let decorated cookies dry at room temperature for 4-6 hours or overnight to allow the royal icing to harden fully.
Pro tip: When rolling dough, I like to roll between two sheets of parchment paper to avoid extra flour, which can dry out cookies. Also, if your icing starts to crust in the bowl, just add a few drops of water and stir gently to bring it back.
Cooking Tips & Techniques
Royal icing can be intimidating, but here’s what I’ve learned to keep things smooth:
- Egg Whites or Meringue Powder? I prefer pasteurized egg whites for a natural shine and taste, but meringue powder is a safe, shelf-stable alternative that works well if you avoid raw eggs.
- Consistency Matters: I keep two consistencies on hand: a thicker one for outlines that holds its shape, and a thinner one for flooding that spreads smoothly but dries firm. Test by dragging a spoon through the icing—if it takes about 10 seconds to smooth out, it’s flood-ready.
- Practice Piping on Parchment: Before decorating cookies, I often practice flower shapes on parchment paper to get a feel for pressure and flow. It’s a little trick that builds confidence.
- Don’t Rush Drying: Let royal icing dry completely before stacking or packaging cookies to avoid smudges. A fan or gentle airflow can speed drying but avoid direct heat.
- Storage Tip: Store baked cookies in an airtight container at room temperature for up to 5 days, but icing may soften slightly. For longer storage, freeze undecorated cookies and decorate after thawing.
One mistake I made early on was piping too quickly—royal icing needs a steady hand and patience. If you rush, the edges blur and designs lose crispness. Also, keep your icing covered with a damp cloth when not in use to prevent drying out mid-project.
Variations & Adaptations
These spring flower sugar cookies are a fantastic canvas for creativity. Here are a few ideas I’ve played with:
- Flavor Twists: Add lemon zest or orange extract to the dough for a bright citrus note. You can also mix lavender or rosewater into the royal icing for a floral twist.
- Dietary Adjustments: For gluten-free, use a 1:1 gluten-free baking flour blend. For vegan-friendly, try a plant-based butter substitute and aquafaba (chickpea water) instead of egg whites in the icing, though texture may vary.
- Color Schemes: Instead of pastel spring shades, try jewel tones like deep purples and golds for a more dramatic look. Metallic edible dusts can add shimmer for special occasions.
- Different Baking Methods: These cookies are perfect for air frying if you have a large enough basket—reduce baking time to about 6-7 minutes at 320°F (160°C).
One personal favorite was adding tiny piped bee accents to the flowers, which delighted my kids and made the cookies feel extra special. These small touches can turn simple cookies into little stories on a plate.
Serving & Storage Suggestions
These cookies are best served at room temperature, allowing the royal icing’s crisp texture to shine. Arrange on a pretty platter with fresh sprigs of mint or edible flowers for a charming presentation. They pair wonderfully with a cup of tea, lemonade, or even a light sparkling wine for grown-up gatherings.
To store, keep the cookies in a single layer inside an airtight container at room temperature for up to 5 days. The icing will maintain its snap but may soften slightly if humidity is high. For longer storage, freeze the undecorated cookies in a single layer on a baking sheet, then transfer to a freezer-safe bag. Thaw completely before decorating.
When reheating is desired, avoid microwaving as it can soften the icing too much. Instead, bring cookies to room temperature naturally, or warm gently in a low oven (about 200°F/93°C) for a few minutes to refresh the dough’s softness without melting the icing.
Nutritional Information & Benefits
Each sugar cookie (without icing) contains approximately 150-180 calories, with 6-8 grams of fat and 20-25 grams of carbohydrates, depending on size. The royal icing adds sugar and a small amount of protein from egg whites but is generally light since it’s used sparingly.
Key ingredients like butter provide vitamin A and essential fats, while using real vanilla and lemon juice adds natural flavor without artificial additives. For those mindful of allergens, note that this recipe contains eggs and gluten, but with adaptations, it can suit gluten-free and vegan diets.
From a wellness perspective, these cookies are a treat best enjoyed in moderation, but the joy of making and sharing them can be just as nourishing as the ingredients themselves.
Conclusion
These perfect spring flower sugar cookies with royal icing have become one of those recipes I reach for when I want something both beautiful and comforting. They’re approachable enough for beginners yet offer room to play and perfect your decorating skills. Whether you’re baking for a sunny brunch, a festive party, or just a quiet afternoon, these cookies bring a little sweetness and charm to the table.
Feel free to customize the colors, shapes, and flavors to suit your mood or occasion. I love how this recipe invites creativity without pressure—it’s all about enjoying the process and the delicious results. If you try them, I’d love to hear how your spring flowers turn out, and what little twists you add to make them your own.
And if you’re ever in the mood for a savory snack to go alongside your sweet treats, those crispy baked turkey sliders have been a favorite crowd-pleaser in my house, pairing surprisingly well with a fresh batch of cookies for a balanced spread.
Frequently Asked Questions
Can I make the dough ahead of time?
Yes, you can prepare the dough and refrigerate it for up to 3 days before rolling and baking. Just wrap it tightly in plastic wrap to prevent drying out.
How long does royal icing take to dry?
Royal icing typically takes 4-6 hours to dry completely at room temperature, but overnight is best for a firm finish.
What if my royal icing cracks?
Cracking usually happens if the icing is too thick or dries too quickly. Try thinning the icing slightly with water and avoid direct heat or drafts while drying.
Can these cookies be frozen after baking?
Absolutely! Freeze baked, undecorated cookies in a single layer, then thaw before decorating. Decorated cookies don’t freeze well as the icing can crack.
What’s the best way to store decorated cookies?
Store in an airtight container at room temperature in a single layer. If stacking is necessary, place parchment paper between layers to protect the icing.
Pin This Recipe!
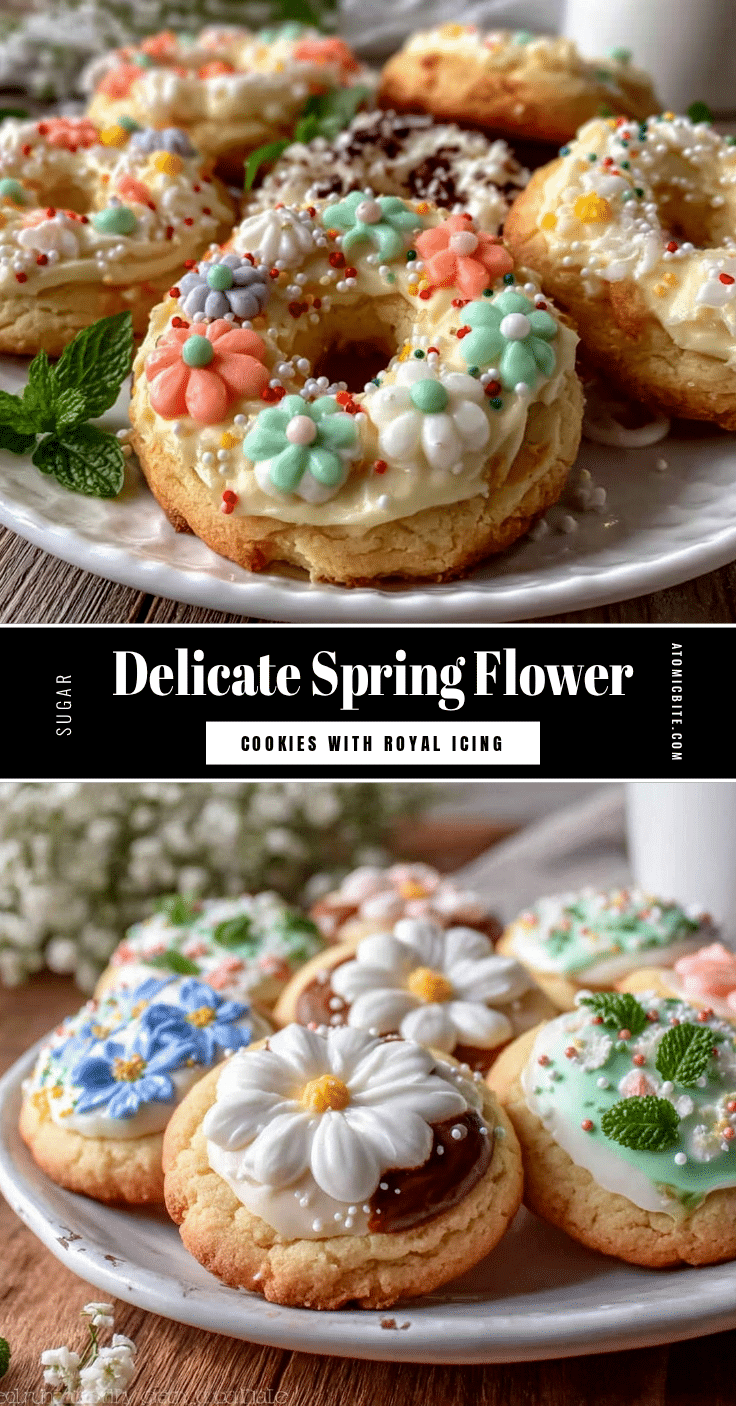
Perfect Spring Flower Sugar Cookies with Royal Icing

Delicate sugar cookies with a buttery, tender crumb decorated with smooth, crisp royal icing in charming spring flower designs. Perfect for gifting, celebrations, or a sweet project to enjoy.
- Prep Time: 15 minutes
- Cook Time: 10 minutes
- Total Time: 1 hour 25 minutes
- Yield: 24 cookies 1x
- Category: Dessert
- Cuisine: American
Ingredients
- 2 ¾ cups (340 grams) all-purpose flour
- 1 teaspoon baking powder
- ½ teaspoon salt
- 1 cup (227 grams) unsalted butter, softened
- 1 cup (200 grams) granulated sugar
- 1 large egg
- 2 teaspoons pure vanilla extract
- ¼ teaspoon almond extract (optional)
- 4 cups (480 grams) powdered sugar, sifted
- 3 tablespoons pasteurized egg whites (or 6 tablespoons meringue powder + 8 tablespoons water)
- 1 tablespoon fresh lemon juice
- 2–4 tablespoons water
- Gel food coloring (pastel pink, soft yellow, lavender, mint green)
Instructions
- In a medium bowl, whisk together flour, baking powder, and salt. Set aside.
- In a mixer bowl, beat softened butter and granulated sugar on medium speed for 3-4 minutes until light and fluffy.
- Beat in egg, vanilla extract, and almond extract (if using) until combined.
- Gradually add dry ingredients to wet mixture on low speed until just combined. If dough is sticky, refrigerate for 15 minutes.
- Wrap dough in plastic wrap and refrigerate for at least 1 hour.
- Preheat oven to 350°F (175°C). Roll dough on a lightly floured surface to ¼ inch (6 mm) thickness.
- Cut dough with spring flower cookie cutters and place on parchment-lined baking sheets.
- Bake for 8-10 minutes until edges start to turn golden. Cool on baking sheet for 5 minutes, then transfer to wire rack to cool completely.
- Prepare royal icing by beating powdered sugar, egg whites, lemon juice, and water until smooth and glossy. Adjust water for desired consistency.
- Divide icing into bowls and tint with gel food coloring. Use piping bags with small round tips to outline and flood cookies. Let outlines dry 10-15 minutes before flooding.
- Add details while icing is wet for texture. Let decorated cookies dry at room temperature for 4-6 hours or overnight.
Notes
Roll dough between parchment sheets to avoid extra flour and dry cookies. Keep royal icing covered with a damp cloth when not in use to prevent drying. Store baked cookies in airtight container up to 5 days; freeze undecorated cookies for longer storage. Let royal icing dry completely before stacking or packaging.
Nutrition
- Serving Size: 1 cookie
- Calories: 165
- Sugar: 15
- Sodium: 90
- Fat: 7
- Saturated Fat: 4
- Carbohydrates: 23
- Protein: 2
Keywords: sugar cookies, royal icing, spring cookies, flower cookies, homemade cookies, easy baking, cookie decorating


