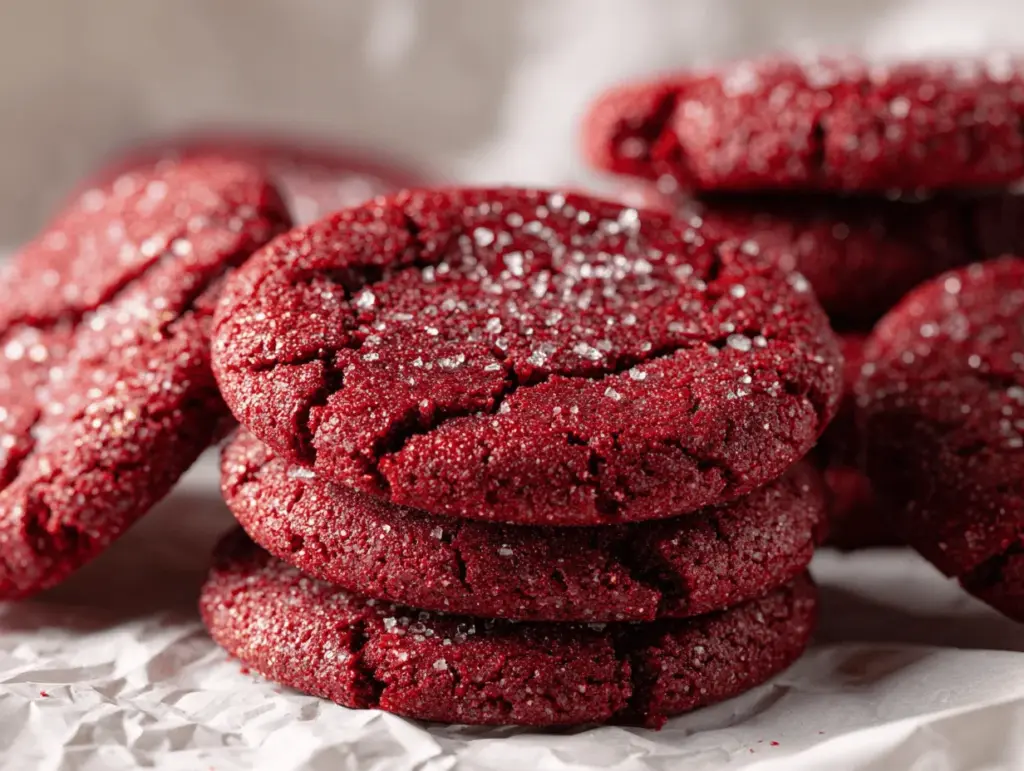
The first time I baked a batch of red velvet cookies, the kitchen filled with this lush, chocolatey aroma that made my family wander in, noses first. Honestly, there’s just something about that classic red hue and that soft, fudgy bite—right out of the oven, I swear it’s impossible to eat just one. Red velvet cookies aren’t just regular cookies; they’re a little bit of magic, perfect for bake sales, parties, or those random Tuesday cravings.
I stumbled onto this red velvet cookies recipe when I wanted something bold for a local school bake sale. Cupcakes felt overdone, brownies a bit too predictable. But cookies? Everyone loves cookies! Red velvet’s tangy cocoa flavor with a fudgy center and a crackly top—now that’s a showstopper. After countless batches and a couple of “cookie fails,” I finally landed on this version that’s both easy and absolutely irresistible.
What I love is how these cookies check every box: gorgeous to look at, quick to make, and universally adored. They’ve become my go-to for bake sales because they always disappear first—kids and adults alike find them hard to resist. If you’ve ever craved the decadent flavor of red velvet cake but wanted something even more snackable, this red velvet cookies recipe is for you. Plus, you don’t need fancy ingredients or pastry chef skills; just a little mixing, scooping, and baking, and you’ll have a batch ready in no time.
As someone who’s tested dozens of cookie recipes (and eaten more than I’d like to admit), I can promise you these are the fudgy red velvet cookies you’ve been searching for. Whether you’re baking for a crowd or just treating yourself, get ready to fall in love—these cookies are about to become a staple in your kitchen, too.
Why You’ll Love This Red Velvet Cookies Recipe
- Quick & Easy: These cookies come together in under 30 minutes. Seriously—no chilling, no fuss, just mix, scoop, and bake. Perfect for busy school nights or last-minute bake sale prep.
- Simple Ingredients: No need to search specialty stores. You’ll probably find everything right in your pantry, from cocoa powder to classic red food coloring.
- Perfect for Any Occasion: Whether you’re making a Valentine’s Day treat, filling up a holiday cookie tray, or trying to win “most popular” at the next bake sale, these fudgy red velvet cookies fit right in.
- Crowd-Pleaser: I’ve watched entire trays disappear at school events and family gatherings. Kids love the color and soft texture; adults appreciate the rich cocoa flavor and that hint of cream cheese tang.
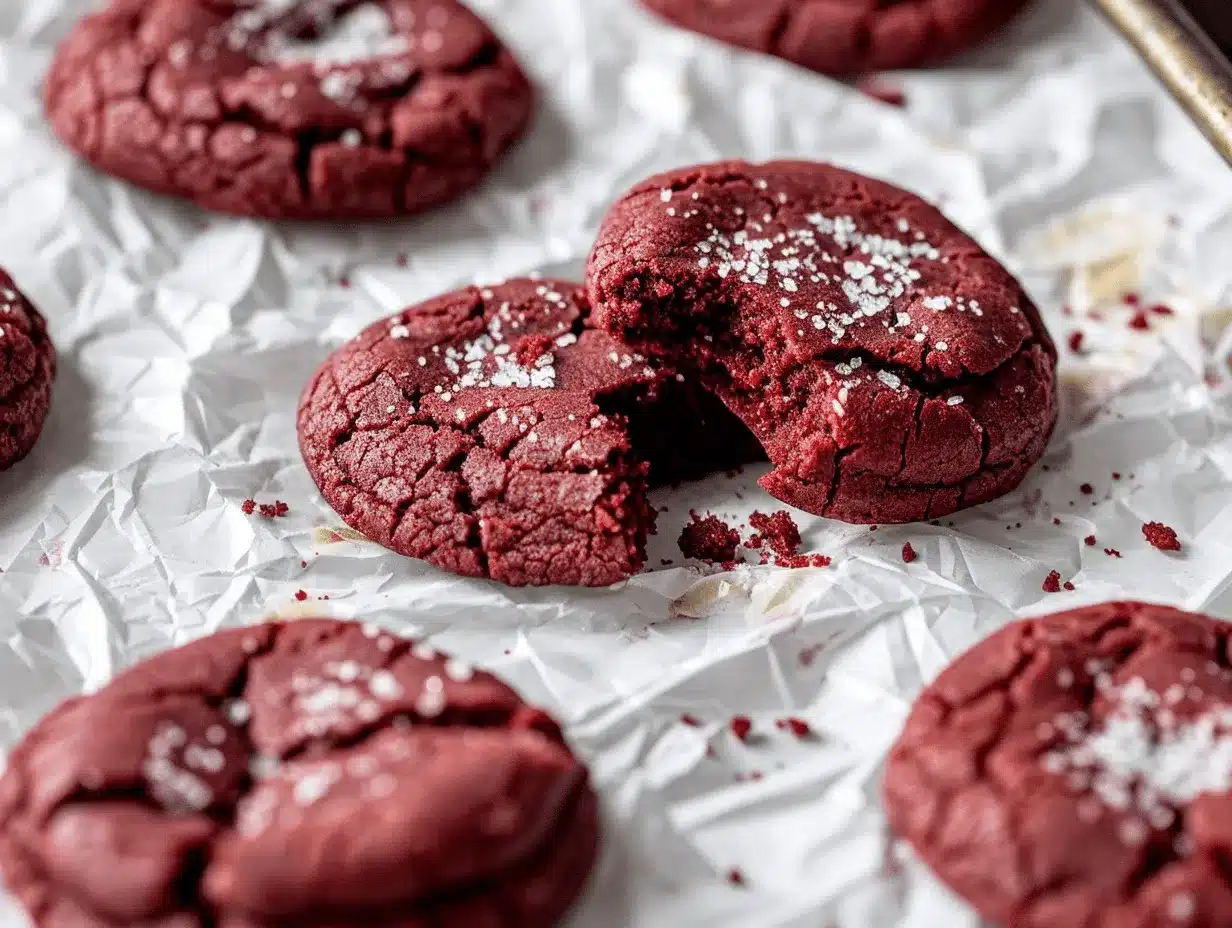
- Unbelievably Delicious: The texture is what gets me every time—crisp edges, gooey fudgy center, and those pops of white chocolate or cream cheese chips (if you add them). It’s that kind of cookie that makes you go “mmm” out loud.
What sets this red velvet cookies recipe apart? For starters, I blend both butter and a touch of cream cheese into the dough, which makes each bite extra tender and rich. The cocoa isn’t overpowering—it’s just enough for that signature red velvet flavor, balanced by a tangy note and a deep red color that’s Instagram-worthy. Trust me, these aren’t just dyed chocolate cookies; they’re the real deal.
I’ve tested this recipe a dozen times, tweaking the cocoa ratio and toying with mix-ins. The result is a red velvet cookie that’s not just good—it’s crave-worthy. You’ll experience pure comfort in every bite, but with a playful twist that makes them perfect for sharing. So if you’re looking for a treat that’s easy, eye-catching, and totally delicious, this is the cookie for you. Whether you’re a novice baker or a cookie connoisseur, this recipe belongs in your collection.
What Ingredients You Will Need
This red velvet cookies recipe uses simple, familiar ingredients to guarantee bold flavor and that perfect fudgy texture. Most are pantry staples, and there’s plenty of room for swaps if you need them. Here’s what you’ll need to bake up a batch:
- Unsalted Butter (1/2 cup / 113g, softened) – Adds richness and helps create a tender crumb. I always use unsalted so I can control the salt level.
- Cream Cheese (2 oz / 56g, softened) – Just a touch makes the cookies extra fudgy and gives that classic red velvet tang. Philadelphia is my standby, but store brands work, too.
- Granulated Sugar (3/4 cup / 150g) – Sweetens and helps crisp the cookie edges.
- Brown Sugar (1/4 cup / 50g, packed) – Adds moisture and just a hint of caramel flavor. Light brown sugar is perfect here.
- Large Egg (1, room temperature) – Binds everything together. If you forgot to take it out, just soak it in warm water for 5 minutes.
- Vanilla Extract (1 tsp / 5ml) – For warmth and depth. I use pure vanilla for best flavor.
- Red Food Coloring (1 tbsp / 15ml, liquid or gel) – The star of the show! Gel coloring gives the brightest red. Adjust the amount if you prefer a lighter or deeper shade.
- All-Purpose Flour (1 1/2 cups / 190g) – Gives structure. For gluten-free, swap in a 1:1 gluten-free blend; King Arthur’s is my favorite.
- Unsweetened Cocoa Powder (1/4 cup / 25g, natural) – Brings the chocolatey base. I like Hershey’s, but Dutch-process works for a deeper flavor.
- Baking Soda (1/2 tsp / 2.5g) – Helps the cookies puff up in the oven.
- Salt (1/4 tsp / 1g) – Balances the sweetness.
- White Chocolate Chips (3/4 cup / 135g, optional) – For creamy, sweet bursts throughout. You can swap in semi-sweet or dark chips if you like.
Ingredient Tips:
- If you’re out of cream cheese, use Greek yogurt (same amount) for a subtle tang and slightly lighter texture.
- No red coloring? The cookies will still taste great—just less vibrant. Add a touch of beet powder if you want a natural tint.
- Try adding chopped pecans or walnuts for a nutty crunch, or swap white chocolate chips for mini marshmallows for a fun s’mores twist.
Everything in this recipe serves a purpose—from the cream cheese’s richness to the red coloring’s playful pop. Trust me, these ingredients work together for the fudgiest, most irresistible red velvet cookies ever.
Equipment Needed
- Mixing Bowls: At least two—one for wet ingredients, one for dry. I use stainless steel because they’re easy to clean and don’t stain from food coloring.
- Electric Mixer or Stand Mixer: A hand mixer is totally fine, but a stand mixer makes creaming butter and sugar a breeze. If you’re mixing by hand, just put in a little extra elbow grease!
- Rubber Spatula: For scraping every bit of dough from the bowl. I’ve found the flexible kind works best for sticky batters.
- Measuring Cups & Spoons: For accurate results. I prefer metal for dry ingredients and glass for liquids—less mess, more precision.
- Baking Sheets: Sturdy, rimmed sheets prevent cookies from slipping off. Line them with parchment for easy cleanup.
- Parchment Paper or Silicone Baking Mat: Prevents sticking and helps cookies bake evenly.
- Cookie Scoop (1.5 tbsp or 20-25g size): Optional, but this guarantees evenly sized cookies that bake up perfectly round. You can use a spoon if needed—just try to keep the portions consistent.
- Wire Cooling Rack: For cooling cookies quickly and evenly.
I’ve baked with both budget and “splurgy” gear. Honestly, you don’t need anything fancy—my first bake sale batch used thrift store bowls and a wooden spoon! Just keep your tools clean, especially after using food coloring (it can stain plastic spatulas). If you bake often, invest in a heavy-duty baking sheet—they last forever and keep cookies from burning on the bottom.
How to Make Fudgy Red Velvet Cookies
-
Preheat & Prep:
- Preheat your oven to 350°F (175°C). Line two baking sheets with parchment paper or a silicone mat.
- This keeps cookies from sticking and makes cleanup a breeze.
-
Cream Butter, Cream Cheese & Sugars:
- In a large mixing bowl, beat 1/2 cup (113g) unsalted butter and 2 oz (56g) cream cheese until smooth and creamy—about 1-2 minutes.
- Add 3/4 cup (150g) granulated sugar and 1/4 cup (50g) brown sugar. Beat for another 1-2 minutes until the mixture is fluffy and pale.
- (Tip: If your butter or cream cheese isn’t soft enough, microwave in 5-second bursts until just pliable.)
-
Add Egg, Vanilla & Color:
- Beat in 1 large egg and 1 teaspoon (5ml) vanilla extract until well combined.
- Add 1 tablespoon (15ml) red food coloring. (Start with less if you want a lighter color—add more for a bold red!)
- Mix until the color is uniform. Don’t worry if it looks super red—it will mellow as you add the dry ingredients.
-
Mix Dry Ingredients:
- In a separate bowl, whisk together 1 1/2 cups (190g) all-purpose flour, 1/4 cup (25g) unsweetened cocoa powder, 1/2 teaspoon (2.5g) baking soda, and 1/4 teaspoon (1g) salt.
- Make sure the cocoa is evenly distributed—it’s no fun biting into a pocket of dry powder.
-
Combine Wet & Dry:
- Gradually add the dry ingredients to the wet, mixing on low just until no streaks of flour remain. Don’t overmix—it can make the cookies tough.
- (If the dough feels sticky, chill it in the fridge for 10 minutes. Usually, it’s scoopable right away.)
-
Add Mix-Ins:
- Fold in 3/4 cup (135g) white chocolate chips (or your favorite mix-in) using a spatula. Save a few to press into the tops for extra bakery-style looks.
-
Scoop & Bake:
- Using a 1.5-tbsp cookie scoop, drop dough mounds onto your prepared baking sheets, spacing them about 2 inches (5cm) apart.
- Bake for 9-11 minutes, until the edges are set and centers look slightly underbaked. (They’ll finish cooking as they cool—don’t wait for them to look dry!)
-
Cool & Enjoy:
- Let the cookies cool on the baking sheet for 5 minutes—this helps them set and keeps them fudgy inside.
- Transfer to a wire rack to cool completely. Or, you know, sneak one warm—no judgment!
Prep Tips: Red food coloring can stain—wipe up any spills right away. If you want extra tall, bakery-style cookies, chill the dough for 30 minutes before baking. And don’t be alarmed if the dough looks super red; it’ll bake up just right!
Cooking Tips & Techniques
Over the years, I’ve learned a few tricks for getting the absolute best red velvet cookies, every single time. Here’s what I wish someone had told me before my first attempt:
- Don’t Overbake: The cookies should look a little soft in the center when you pull them out. If you wait until they look “done,” they’ll end up cakier, not fudgy.
- Room-Temperature Ingredients: Softened butter and cream cheese blend much more smoothly, so the dough is lump-free.
- Mix Gently: Once you add flour, mix just until combined. Overmixing can make cookies tough or dry.
- Red Food Coloring: Gel food coloring packs a punch—use less if you want a lighter color, but remember, the cookies’ red deepens as they bake.
- Cookie Scoop Magic: A cookie scoop makes all the difference for even size and perfect rounds. Hand-rolling works, but scoops are faster (especially for big batches at bake sales).
- Sticky Dough? Chill It: If the dough is too sticky to handle, pop it in the fridge for 10-30 minutes. This also helps the cookies bake up thicker.
- Troubleshooting: If cookies spread too much, your butter may have been too soft. If they’re too puffy, try pressing the dough balls down slightly before baking.
I’ve made every mistake in the book—overmixed dough, overbaked batches, and even a few “pink velvet” cookies from too little coloring. The key is not to stress! With a little practice and these tips, you’ll get bakery-worthy red velvet cookies every time. And honestly, even the less-than-perfect ones still taste amazing.
Variations & Adaptations
One of the best things about this red velvet cookies recipe is how easy it is to make it your own. Here are a few fun twists and swaps I’ve tried:
- Gluten-Free: Use a 1:1 gluten-free flour blend. King Arthur or Bob’s Red Mill both work great—no one will know the difference.
- Vegan: Swap the butter for plant-based margarine, cream cheese for vegan cream cheese, and use a flax egg (1 tbsp flaxseed meal + 2.5 tbsp water). Make sure your chips are dairy-free.
- Chocolate Overload: Replace white chocolate chips with dark or semi-sweet chips, or add both for a double chocolate hit.
- Holiday Version: Add crushed peppermint or green sprinkles to make these festive for Christmas cookie trays.
- Nuts for Crunch: Stir in 1/2 cup chopped pecans or walnuts for a nutty bite (so good with the fudgy dough!).
- Stuffed Cookies: Place a mini cream cheese ball or a square of chocolate in the center of each dough ball before baking for a gooey surprise.
My family is obsessed with the chocolate chip version, but I personally love stuffing the cookies with a cream cheese filling—think red velvet cheesecake cookies! Don’t be afraid to experiment and find your favorite. Whether you’re avoiding gluten, dairy, or just want to try something new, there’s a red velvet cookie for everyone.
Serving & Storage Suggestions
These red velvet cookies are at their best slightly warm—gooey in the middle, crisp at the edges. Serve them on a pretty platter at room temperature for bake sales, or stack them in a clear jar for a fun edible gift.
If you’re pairing, a cold glass of milk or a mug of coffee is classic. For parties, try serving with a scoop of vanilla ice cream for a decadent dessert. They’re also perfect alongside fresh berries or a little whipped cream.
To store, let cookies cool completely. Keep in an airtight container at room temperature for up to 4 days. They stay soft and fudgy! For longer storage, freeze baked cookies in a zip-top bag for up to 2 months. Thaw at room temperature or pop in the microwave for 10-15 seconds to refresh. The flavors actually deepen after a day or two—so don’t worry if you’re prepping ahead for an event.
Nutritional Information & Benefits
Each red velvet cookie (about 35g) contains approximately:
- Calories: 140
- Fat: 7g
- Carbohydrates: 18g
- Sugar: 11g
- Protein: 2g
These cookies are a treat, but there are some perks: the cream cheese adds a little calcium, and cocoa powder brings a touch of antioxidants. You can make them gluten-free or nut-free if needed. For a lighter version, try reducing the sugar or swapping in a sugar substitute—just know the texture may change slightly. Always check your chocolate chips for allergens if sharing with a group. Personally, I love knowing these cookies have no artificial preservatives and are made with real, simple ingredients you can feel good about sharing.
Conclusion
If you’re looking for the ultimate bake sale treat, this red velvet cookies recipe is the answer. They’re quick, easy, and absolutely delicious—perfect for impressing friends, family, or a crowd of hungry kids. The fudgy centers, bold color, and hint of tang make these cookies truly stand out from the usual bake sale fare.
Don’t be afraid to make these your own! Play with mix-ins, swap out chips or nuts, or try a fun holiday variation. I keep coming back to this recipe because it’s always a hit, and there’s something so comforting about a homemade cookie that’s both familiar and a little bit special.
Give these a try, and let me know how you customize your batch. Did you go classic, or did you add your own twist? Leave a comment, share with friends, or tag me on social—I can’t wait to see your red velvet cookie creations! Happy baking, and remember: life is too short for boring cookies.
Frequently Asked Questions
How do I get my red velvet cookies to be bright red?
Use gel food coloring for the most vibrant color. Start with a tablespoon, and adjust as needed—just remember the color deepens as the cookies bake. If you want a natural alternative, a bit of beet powder works, though the shade will be less intense.
Can I freeze red velvet cookie dough?
Absolutely! Scoop the dough onto a baking sheet, freeze until solid, then transfer to a zip-top bag. Bake straight from frozen—just add 1-2 minutes to the baking time. This is a lifesaver for last-minute guests or bake sales.
What’s the best way to keep these cookies soft?
Store them in an airtight container with a slice of bread (weird, but it works). The bread keeps the cookies soft and chewy for days. Also, don’t overbake—the centers should look slightly underdone when you take them out.
Can I make these cookies gluten-free?
Yes! Swap the all-purpose flour for a cup-for-cup gluten-free flour blend. I’ve had great results with King Arthur and Bob’s Red Mill brands. The cookies turn out just as fudgy and delicious.
Are red velvet cookies safe for nut-free bake sales?
They can be! Just skip any nut mix-ins and be sure to check all labels for cross-contamination if you’re baking for allergies. Most white chocolate chips are nut-free, but double-check to be sure.
Pin This Recipe!

Red Velvet Cookies

These easy, fudgy red velvet cookies are a showstopping treat with a classic cocoa flavor, tangy cream cheese, and a vibrant red hue. Perfect for bake sales, parties, or whenever you crave a decadent, snackable version of red velvet cake.
- Prep Time: 15 minutes
- Cook Time: 10 minutes
- Total Time: 25 minutes
- Yield: 20 cookies 1x
- Category: Dessert
- Cuisine: American
Ingredients
- 1/2 cup (113g) unsalted butter, softened
- 2 oz (56g) cream cheese, softened
- 3/4 cup (150g) granulated sugar
- 1/4 cup (50g) light brown sugar, packed
- 1 large egg, room temperature
- 1 teaspoon (5ml) vanilla extract
- 1 tablespoon (15ml) red food coloring (liquid or gel)
- 1 1/2 cups (190g) all-purpose flour
- 1/4 cup (25g) unsweetened cocoa powder (natural or Dutch-process)
- 1/2 teaspoon (2.5g) baking soda
- 1/4 teaspoon (1g) salt
- 3/4 cup (135g) white chocolate chips (optional)
Instructions
- Preheat your oven to 350°F (175°C). Line two baking sheets with parchment paper or a silicone baking mat.
- In a large mixing bowl, beat the unsalted butter and cream cheese until smooth and creamy, about 1-2 minutes.
- Add the granulated sugar and brown sugar. Beat for another 1-2 minutes until the mixture is fluffy and pale.
- Beat in the egg and vanilla extract until well combined.
- Add the red food coloring and mix until the color is uniform.
- In a separate bowl, whisk together the flour, cocoa powder, baking soda, and salt.
- Gradually add the dry ingredients to the wet ingredients, mixing on low just until no streaks of flour remain. Do not overmix.
- Fold in the white chocolate chips (if using), reserving a few to press into the tops of the cookies if desired.
- Using a 1.5-tablespoon cookie scoop or spoon, drop dough mounds onto the prepared baking sheets, spacing them about 2 inches apart.
- Bake for 9-11 minutes, until the edges are set and centers look slightly underbaked.
- Let the cookies cool on the baking sheet for 5 minutes, then transfer to a wire rack to cool completely.
Notes
For best results, use gel food coloring for a vibrant red color. Do not overbake—the centers should look slightly underdone for a fudgy texture. Dough can be chilled for thicker cookies or if it’s too sticky. Cookies can be made gluten-free with a 1:1 gluten-free flour blend. Store in an airtight container for up to 4 days or freeze for up to 2 months.
Nutrition
- Serving Size: 1 cookie (about 35g)
- Calories: 140
- Sugar: 11
- Sodium: 70
- Fat: 7
- Saturated Fat: 4
- Carbohydrates: 18
- Fiber: 1
- Protein: 2
Keywords: red velvet cookies, bake sale cookies, fudgy cookies, easy red velvet, cream cheese cookies, white chocolate chip cookies, holiday cookies, valentine's day cookies