Introduction: The Magic of Salted Caramel Apple Crumble Bars
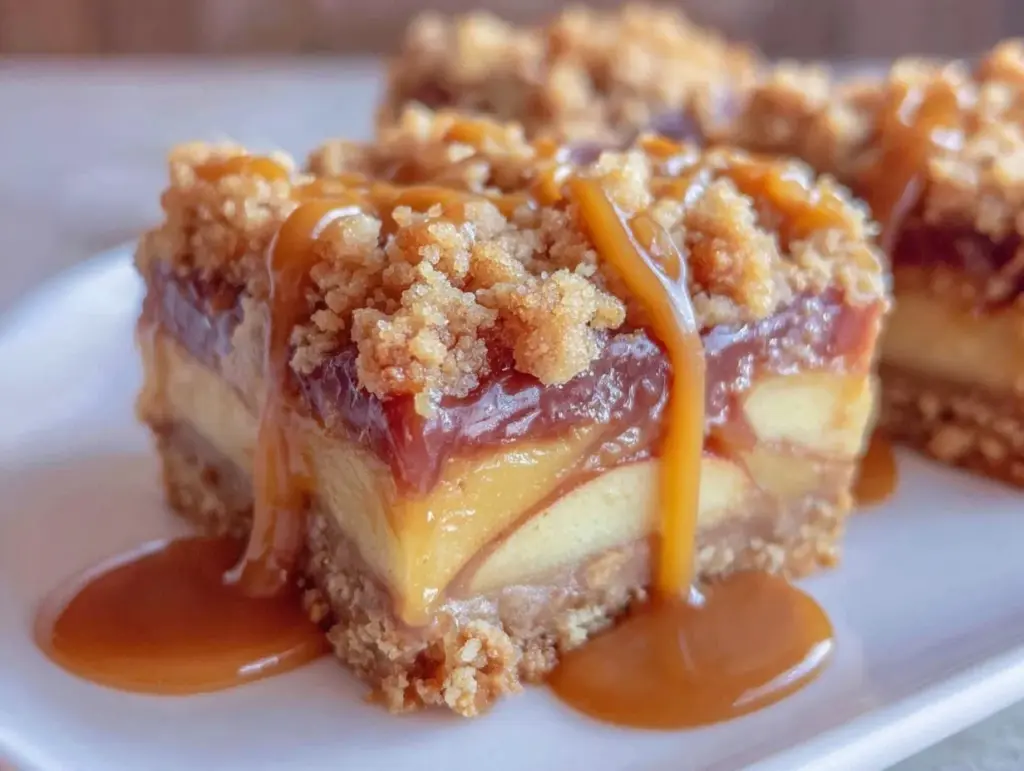
Let me tell you, the aroma of cinnamon-laced apples and buttery crumble baking together is something you just don’t forget. The first time I pulled these Salted Caramel Apple Crumble Bars out of the oven, the kitchen was filled with that sweet, toasty scent—a little bit apple orchard, a little bit grandma’s house, and a whole lot of “wow.” As soon as the warm salted caramel started to bubble up around the edges, I knew I was onto something good. It’s the kind of moment where you pause, take a deep breath, and just smile because you know you’re onto something truly special.
When I was knee-high to a grasshopper, my grandma used to make apple crisp every fall. I’d sneak spoonfuls straight out of the pan before it even made it to the table. Years later, I tried to recreate that memory—but with a twist. I wanted something you could eat with your hands, perfect for cozy fall gatherings, potlucks, and (let’s face it) sneaking bites right off the cooling rack. Honestly, I wish I’d stumbled on this recipe years ago!
My family couldn’t stop picking off the crumble topping, and my kids went wild for the gooey caramel layer. My husband, who swears he’s “not a dessert person,” asked for seconds (and thirds). These bars are dangerously easy, providing pure, nostalgic comfort with every bite. They’re perfect for a sweet treat at your kids’ school party, brightening up your Pinterest cookie board, or just enjoying with a mug of hot cider on a rainy weekend.
I’ve tested this recipe more times than I can count—in the name of research, of course. It’s become a staple for family gatherings, gifting to friends, and yes, late-night snacks. If you love salted caramel, apples, and that irresistible crumble topping, you’re going to want to bookmark this one. It honestly feels like a warm hug on a chilly day!
Why You’ll Love These Salted Caramel Apple Crumble Bars
Making these bars isn’t just about baking—it’s about creating a moment. I’ve spent countless fall afternoons perfecting the recipe, tweaking the caramel-to-apple ratio, and getting the crumble just right. Trust me, I’ve learned a thing or two along the way!
- Quick & Easy: These bars come together in under an hour (even faster if you chop those apples like a ninja). They’re perfect for busy weeknights or last-minute cravings.
- Simple Ingredients: No fancy store runs required—almost everything is a pantry staple. Apples, oats, flour, butter, and sugar—just good, honest ingredients.
- Perfect for Gatherings: Whether it’s a fall party, Thanksgiving, or a casual weekend brunch, these bars are always a hit.
- Crowd-Pleaser: Both kids and adults rave about the gooey caramel and buttery crumble. They disappear fast, so keep an eye out!
- Unbelievably Delicious: The balance of sweet-tart apples, rich salted caramel, and crunchy topping makes these bars pure comfort food.
What makes this recipe different? For starters, the homemade salted caramel beats anything you’ll get in a jar (though shortcuts are totally allowed). The crumble topping is loaded with oats for heartiness, and the base is sturdy enough to hold up as a handheld treat. I use a blend of tart and sweet apples for that classic flavor, plus a pinch of flaked sea salt for a grown-up finish.
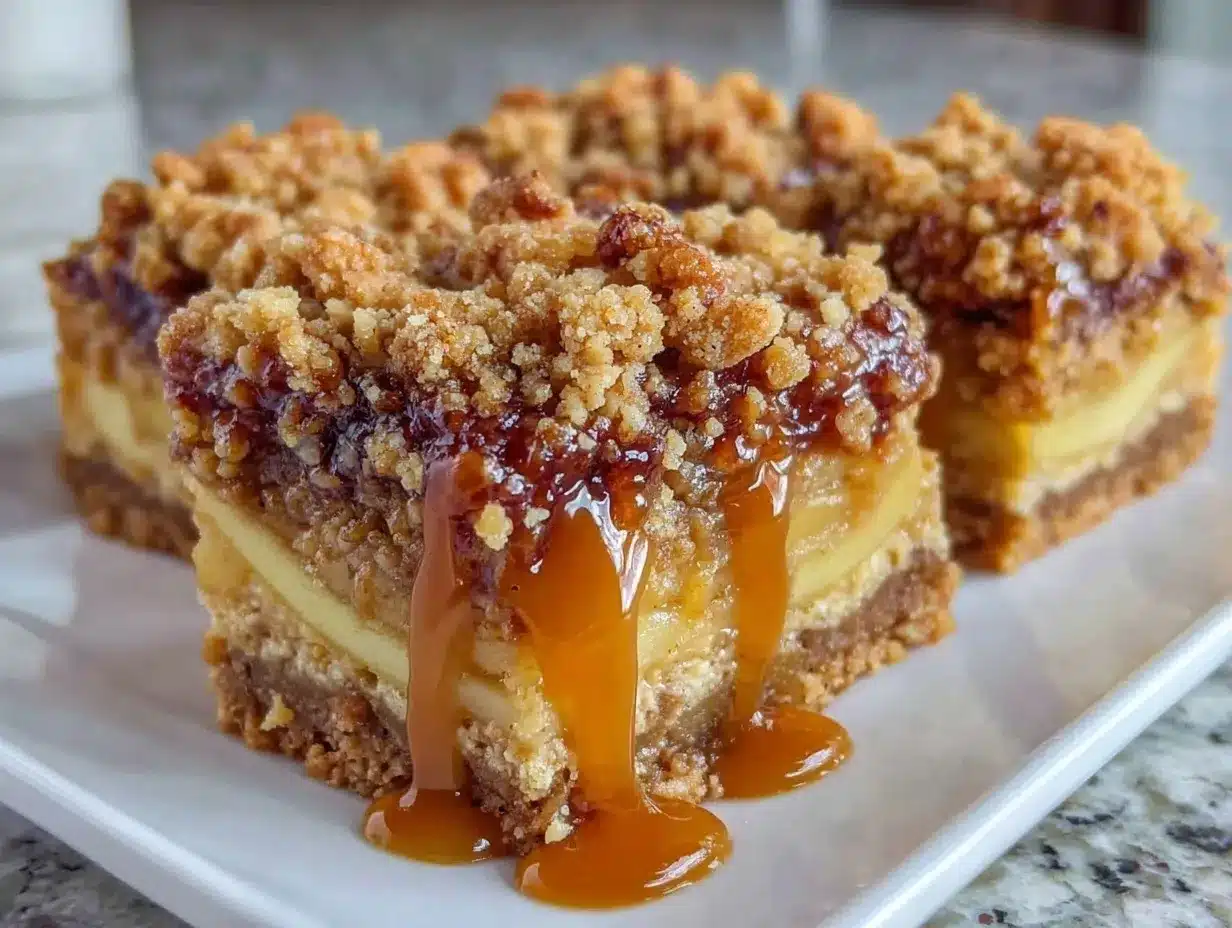
This isn’t just another apple bar recipe—it’s my best version. The caramel layer is thick, the apples are juicy but never soggy, and the crumble is golden and crisp. It’s comfort food reimagined: easier, faster, and still with that soul-soothing satisfaction you crave. Perfect for impressing dinner guests, gifting to friends, or turning a regular Tuesday into something memorable. After the first bite, you’ll know why I keep making these year after year.
What Ingredients You Will Need
These Salted Caramel Apple Crumble Bars use simple, wholesome ingredients to deliver bold flavor and satisfying texture—no fuss, no fancy tricks. Most of these are pantry staples, but a couple little upgrades make all the difference.
- For the Crumble Base & Topping:
- All-purpose flour (2 cups / 240g) – forms the structure
- Old-fashioned oats (1 1/2 cups / 150g) – adds chew and heartiness
- Brown sugar (1 cup / 200g, packed) – for caramel notes
- Unsalted butter (1 cup / 225g, melted) – brings richness
- Cinnamon (1 tsp / 3g) – classic fall flavor
- Baking powder (1/2 tsp / 2g) – a little lift
- Pinch of salt (1/4 tsp / 1g) – balances sweetness
- For the Apple Filling:
- Tart apples (3 medium, peeled, cored, and diced, about 2 1/2 cups / 300g; Granny Smiths are my favorite for their tang)
- Sweet apples (2 medium, peeled, cored, and diced, about 1 1/2 cups / 180g; Honeycrisp or Gala work great)
- Lemon juice (1 tbsp / 15ml) – keeps apples bright
- Granulated sugar (1/3 cup / 65g) – adds sweetness
- Cornstarch (2 tbsp / 16g) – thickens the filling
- Cinnamon (1/2 tsp / 2g) – another layer of warmth
- For the Salted Caramel:
- Granulated sugar (1 cup / 200g)
- Unsalted butter (6 tbsp / 85g, cut into pieces)
- Heavy cream (1/2 cup / 120ml)
- Flaked sea salt (1/2 tsp / 3g, plus more for sprinkling)
(You can swap in store-bought caramel sauce for a shortcut, but homemade truly makes it shine!)
- Optional Add-ins:
- Chopped pecans or walnuts (1/2 cup / 60g, for crunch)
- Vanilla extract (1 tsp / 5ml, for depth)
Ingredient tips: I recommend Bob’s Red Mill for oats—they’re always just the right texture. If apples aren’t in season, you can use frozen diced apples (thawed and drained). For gluten-free, swap in a 1:1 GF flour blend. If you need dairy-free, use coconut oil in place of butter and canned coconut cream for the caramel. For a nut-free version, skip the add-ins—no one will miss them!
In summer, you can actually swap in peaches or pears for the apples, and the recipe works just as beautifully. The ingredients are forgiving, so don’t stress if you’re missing one or two—these bars are all about that cozy, homey vibe.
Equipment Needed
- 9×13-inch (23x33cm) baking pan: Classic for bar recipes—lined with parchment for easy lifting.
- Mixing bowls (2-3): One for dry, one for wet, one for apples.
- Medium saucepan: For caramel (or use a microwave if you’re short on time).
- Whisk & spatula: For mixing and spreading (a silicone spatula is handy for sticky batter).
- Peeler & cutting board: For prepping apples.
- Sharp knife: For dicing apples—watch your fingers!
- Measuring cups & spoons: Accuracy is key here (I always keep my trusty glass set handy).
If you don’t have a 9×13 pan, you can use two 8×8 pans or a quarter-sheet tray. I’ve made these in a glass Pyrex as well as metal—both work, but metal browns the edges just a touch more. For the caramel, if you don’t have a heavy-bottomed saucepan, a nonstick pot is fine (just keep an eye on it).
Maintenance tip: Parchment paper can be reused if you’re making multiple batches (I’m all about saving a little here and there). Budget option: Dollar store measuring cups work fine—just double-check the lines!
Preparation Method
- Prep the Pan & Oven: Preheat your oven to 350°F (175°C). Line your 9×13-inch pan with parchment, leaving an overhang for easy lifting. (Trust me, you’ll thank yourself at cleanup time!)
- Make the Crumble Base: In a large bowl, stir together 2 cups (240g) flour, 1 1/2 cups (150g) oats, 1 cup (200g) brown sugar, 1 tsp cinnamon, 1/2 tsp baking powder, and 1/4 tsp salt. Pour in 1 cup (225g) melted butter and mix until crumbly. Reserve about 1 1/2 cups (200g) of this mixture for the topping; press the rest firmly into the pan. The base should be even and compact—if it looks a little shaggy, press it down with the bottom of a measuring cup.
- Prepare the Apple Filling: Toss diced apples (about 4 cups / 480g) with 1 tbsp (15ml) lemon juice, 1/3 cup (65g) sugar, 2 tbsp (16g) cornstarch, and 1/2 tsp (2g) cinnamon in a bowl. Stir until everything’s coated and juicy. Spread this evenly over the crumble base. If the apples look dry, don’t worry—they’ll release their juices as they bake.
- Make the Salted Caramel: In a medium saucepan over medium heat, melt 1 cup (200g) sugar until deep golden and liquid (keep swirling, don’t stir). Add 6 tbsp (85g) butter—be careful, it’ll bubble up! Whisk until smooth. Pour in 1/2 cup (120ml) heavy cream slowly; whisk until glossy and thick. Stir in 1/2 tsp (3g) flaked sea salt. (Shortcut: Use 1 cup store-bought caramel sauce. Warm it slightly for easy pouring.)
- Assemble the Bars: Drizzle half the caramel over the apples. Sprinkle reserved crumble mixture over the top, pressing gently. Finish with another drizzle of caramel and a pinch of extra sea salt. (If you’re using nuts, add them now for crunch.)
- Bake: Bake at 350°F (175°C) for 33-38 minutes, until the topping is golden and the apples are bubbling. The kitchen will smell like a fall festival—seriously! If the edges brown too quickly, cover loosely with foil for the last 10 minutes.
- Cool & Slice: Let bars cool in the pan for at least 1 hour. Lift out using parchment, then slice into squares. For clean edges, wipe your knife between cuts. (If you can wait, chilling them for another hour makes them even easier to slice.)
Troubleshooting: If the bars seem too soft, just chill them before slicing—they’ll firm up. If your caramel is grainy, try stirring in a teaspoon of water and reheating gently. Apple layer too runny? Next time, add a little more cornstarch.
Personal tip: I always double the caramel if I’m feeling extra indulgent. And if you’re short on time, use store-bought caramel—no one will judge!
Cooking Tips & Techniques
There’s a little science and a lot of heart behind these Salted Caramel Apple Crumble Bars. Here are some tricks I’ve picked up along the way, plus a few mistakes I don’t mind admitting!
- Apple Prep: Use a mix of tart and sweet apples for the best flavor. Don’t over-chop—uneven pieces give more texture.
- Caramel Success: Let the sugar melt slowly and resist the urge to stir until it’s fully liquefied. I’ve burned more than one batch by rushing (patience really pays off!).
- Crumble Consistency: If the topping looks dry, add another tablespoon of melted butter. You want clumps, not dust.
- Layering Technique: Press the base down—hard! The tighter you pack it, the better the bars hold together. I use the flat side of a measuring cup.
- Multitasking: While the apples are draining, whip up the caramel. Saves time and you feel like a pro.
- Baking: Watch for bubbling caramel around the edges and a golden brown topping. If the middle looks pale, give it a couple extra minutes.
- Cooling: Bars must cool before slicing, otherwise they fall apart (learned this the hard way). If you’re impatient, stick the pan in the fridge for 30 minutes.
Common mistake: Overcrowding the pan with apples makes the bars soggy. Trust the measurements—less is more here! For consistent results, always measure the flour with the spoon-and-level method rather than scooping.
And honestly, don’t sweat imperfections. A little unevenness in the crumble or a caramel drip down the side just adds character. These bars are meant to be rustic and cozy!
Variations & Adaptations
One of the joys of this recipe is how easy it is to tweak. Here are some favorite ways to make it your own:
- Gluten-Free: Swap the all-purpose flour for a 1:1 gluten-free baking blend. Oats are naturally gluten-free—just double-check your packaging.
- Dairy-Free: Use coconut oil in place of butter and canned coconut cream for the caramel. The result is just as rich!
- Seasonal Fruit Swap: Try pears, peaches, or even plums in place of apples. Each fruit brings a new twist.
- Flavor Boosts: Add a pinch of cardamom or nutmeg to the apple filling for warmth. Or stir a handful of dried cranberries in for a tart bite.
- Nut-Free: Omit the pecans or walnuts—these bars are still plenty crunchy.
- Vegan Option: Use plant-based butter and coconut milk for caramel. Substitute flax eggs (1 tbsp ground flax + 2.5 tbsp water per egg) if you want to up the binding for the base.
- Personal Favorite: I once made these with a splash of bourbon in the caramel for adult gatherings. Wow—talk about depth of flavor!
You can also bake these bars in muffin tins for individual servings or halve the recipe for a smaller batch. The possibilities are endless, so don’t be afraid to get creative!
Serving & Storage Suggestions
These Salted Caramel Apple Crumble Bars are best served slightly warm or at room temperature. For parties, slice them into bite-sized squares and stack them on a rustic wooden tray—looks cute and keeps things casual. They pair beautifully with vanilla ice cream, whipped cream, or even a scoop of cinnamon gelato if you’re feeling fancy.
Complementary beverages: Try spiced apple cider, chai tea, or a mug of hot coffee. For brunch, I love serving these bars alongside a savory egg casserole or crisp bacon.
Storage tips: Bars keep well in an airtight container at room temperature for up to 3 days. For longer storage, refrigerate for up to a week, or freeze for up to 2 months. (Just thaw overnight in the fridge before serving.) Reheat gently in the microwave—10-15 seconds does the trick for a gooey caramel finish.
Pro tip: The flavors deepen after a day, so making these bars ahead actually makes them better. If you’re gifting, wrap squares in parchment and tie with twine—they travel well and look adorable!
Nutritional Information & Benefits
Each Salted Caramel Apple Crumble Bar (based on a 9×13 pan, 18 bars) is roughly:
- Calories: 210
- Fat: 8g
- Carbohydrates: 34g
- Protein: 2g
- Fiber: 2g
- Sugar: 20g
Health benefits: Apples bring vitamin C and fiber, oats add heart-healthy whole grains, and nuts (if used) supply good fats. The recipe is easy to adapt for gluten-free or dairy-free diets, and you can dial back the sugar if needed.
Potential allergens: Contains dairy, gluten, and nuts (if added). For nut-free, skip pecans/walnuts. For gluten-free, use certified GF oats and flour blend.
From a wellness perspective, I love that these bars celebrate real fruit and whole grains. They’re rich but not heavy, and a small piece makes a satisfying treat. Honestly, I feel good serving them to my family—especially with a few simple swaps!
Conclusion
There’s something downright magical about biting into a Salted Caramel Apple Crumble Bar on a chilly day. The gooey caramel, tender apples, and crunchy topping make every bite feel like home—whether you’re celebrating with friends, sending treats to school, or just sneaking a midnight snack.
Customize these bars to suit your tastes and pantry—swap the fruit, adjust the spices, or play with the crumble. That’s the beauty of baking at home. Personally, I love how this recipe brings people together and sparks a little joy on even the dreariest fall afternoon.
Give these bars a try, share your own twist, and let me know how they turn out in the comments below. If you love them, pin the recipe for later or pass it on to a friend—after all, good food is meant to be shared! Wishing you many cozy, caramel-filled moments ahead.
Frequently Asked Questions
Can I make Salted Caramel Apple Crumble Bars ahead of time?
Absolutely! These bars actually taste better after a day, once the flavors meld. Store them in an airtight container and slice right before serving.
What kind of apples work best for this recipe?
A mix of tart (Granny Smith) and sweet (Honeycrisp, Gala) apples gives the best flavor and texture. But honestly, any firm apple will do!
How do I keep the crumble topping crunchy?
Make sure to use old-fashioned oats, press the topping gently, and bake until golden. If you want extra crunch, add chopped nuts.
Can I use store-bought caramel sauce?
Yes! Store-bought is a great shortcut if you’re short on time. Just warm it slightly before drizzling so it spreads evenly.
Are these bars freezer-friendly?
Definitely. Freeze cooled bars in a single layer, then transfer to a bag or container. Thaw overnight in the fridge before serving, and reheat gently if you want them warm.
Pin This Recipe!
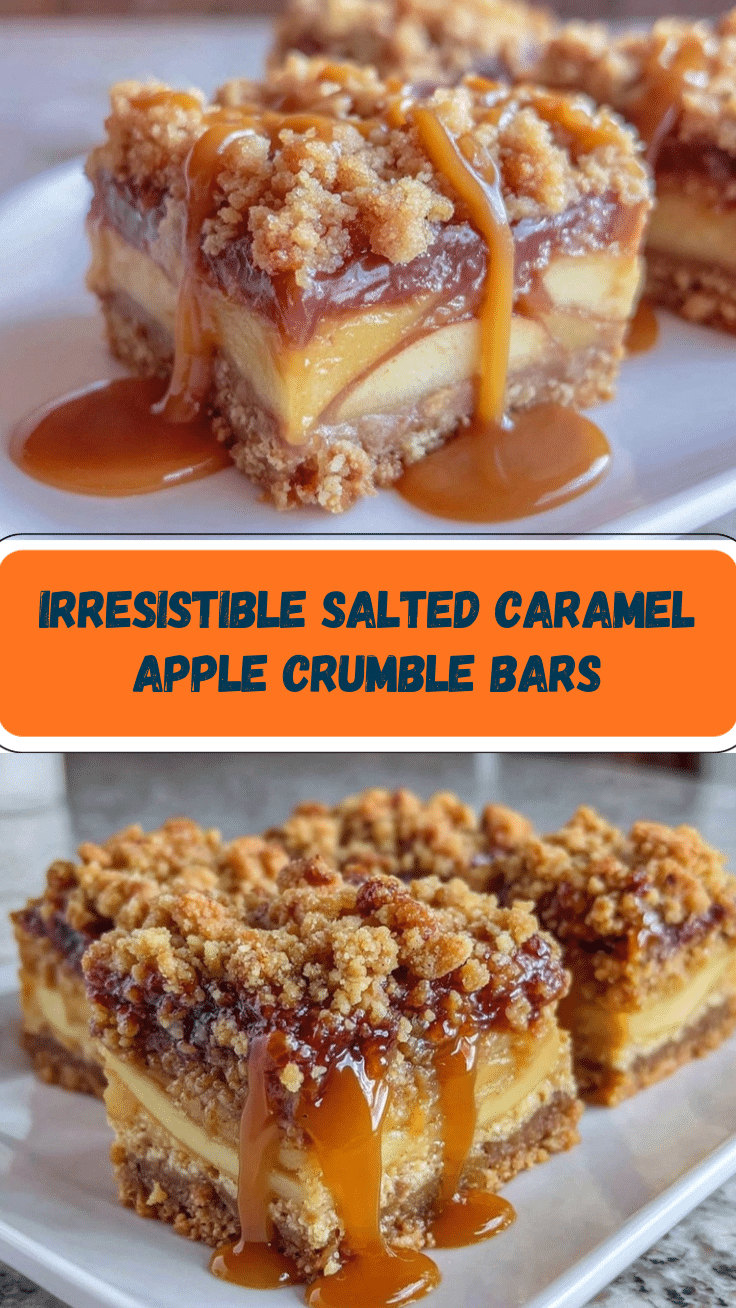
Salted Caramel Apple Crumble Bars

These Salted Caramel Apple Crumble Bars combine gooey homemade caramel, tender apples, and a buttery oat crumble for the ultimate handheld fall dessert. Perfect for parties, potlucks, or cozy nights in, they’re easy to make and guaranteed to impress.
- Prep Time: 20 minutes
- Cook Time: 35 minutes
- Total Time: 55 minutes
- Yield: 18 bars 1x
- Category: Dessert
- Cuisine: American
Ingredients
- 2 cups all-purpose flour
- 1 1/2 cups old-fashioned oats
- 1 cup brown sugar, packed
- 1 cup unsalted butter, melted
- 1 teaspoon cinnamon
- 1/2 teaspoon baking powder
- 1/4 teaspoon salt
- 3 medium tart apples (Granny Smith), peeled, cored, and diced (about 2 1/2 cups)
- 2 medium sweet apples (Honeycrisp or Gala), peeled, cored, and diced (about 1 1/2 cups)
- 1 tablespoon lemon juice
- 1/3 cup granulated sugar
- 2 tablespoons cornstarch
- 1/2 teaspoon cinnamon
- 1 cup granulated sugar (for caramel)
- 6 tablespoons unsalted butter, cut into pieces (for caramel)
- 1/2 cup heavy cream (for caramel)
- 1/2 teaspoon flaked sea salt, plus more for sprinkling
- Optional: 1/2 cup chopped pecans or walnuts
- Optional: 1 teaspoon vanilla extract
Instructions
- Preheat oven to 350°F (175°C). Line a 9×13-inch baking pan with parchment paper, leaving an overhang for easy lifting.
- In a large bowl, mix together flour, oats, brown sugar, cinnamon, baking powder, and salt. Pour in melted butter and mix until crumbly. Reserve about 1 1/2 cups of this mixture for the topping; press the rest firmly into the prepared pan.
- In another bowl, toss diced apples with lemon juice, granulated sugar, cornstarch, and cinnamon until well coated. Spread evenly over the crumble base.
- To make the salted caramel, melt granulated sugar in a medium saucepan over medium heat until deep golden and liquid (swirl, don’t stir). Add butter and whisk until smooth. Slowly pour in heavy cream, whisking until glossy and thick. Stir in flaked sea salt.
- Drizzle half the caramel over the apples. Sprinkle reserved crumble mixture over the top, pressing gently. Finish with another drizzle of caramel and a pinch of extra sea salt. Add nuts if using.
- Bake for 33-38 minutes, until topping is golden and apples are bubbling. If edges brown too quickly, cover loosely with foil for the last 10 minutes.
- Let bars cool in the pan for at least 1 hour. Lift out using parchment, then slice into squares. For clean edges, wipe your knife between cuts. Chilling for another hour makes slicing easier.
Notes
For gluten-free, use a 1:1 GF flour blend and certified GF oats. For dairy-free, substitute coconut oil for butter and coconut cream for caramel. Bars are best served slightly warm or at room temperature and can be made ahead—flavors deepen after a day. Store in an airtight container at room temperature for 3 days, refrigerate for up to a week, or freeze for up to 2 months. If bars seem soft, chill before slicing. Double the caramel for extra indulgence.
Nutrition
- Serving Size: 1 bar
- Calories: 210
- Sugar: 20
- Sodium: 80
- Fat: 8
- Saturated Fat: 5
- Carbohydrates: 34
- Fiber: 2
- Protein: 2
Keywords: salted caramel, apple bars, crumble bars, fall dessert, party dessert, easy apple recipe, oat bars, caramel apple bars


