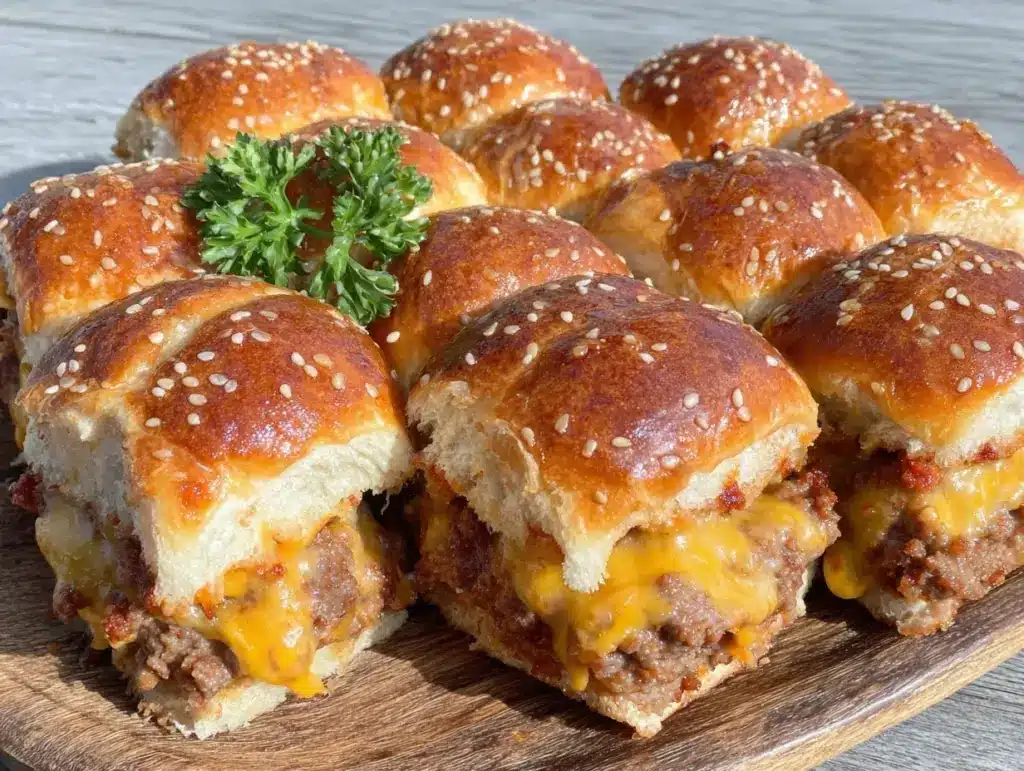
Let me paint you a picture—imagine the buttery aroma of freshly baked Hawaiian rolls mixing with sizzling beef, melted cheddar, and a hint of tangy pickles wafting through your kitchen. The first time I made these savory cheeseburger sliders with Hawaiian rolls, I swear the whole neighborhood could smell what was coming out of my oven! The steam rising as you pull apart those golden rolls is pure magic—trust me, it’s the kind of moment where you pause, take a deep breath, and just grin because you know you’ve hit on something special.
When I was knee-high to a grasshopper, my mom used to throw together simple sandwiches for family gatherings. Years later, after a rainy weekend spent trying to recreate that nostalgic comfort, I stumbled upon this cheeseburger sliders recipe—and honestly, I wish I’d found it years ago. These little bites pack all the flavor of a classic cheeseburger, but they’re dangerously easy to make and perfect for sharing.
My family couldn’t stop sneaking them off the cooling rack (and, let’s face it, neither could I). There’s just something about that sweet Hawaiian roll paired with juicy beef and gooey cheese that makes everyone go back for seconds. Whether you’re planning a game night, a birthday bash, or just want to brighten up your Pinterest board, these sliders are the answer. They’ve become a staple for family gatherings, last-minute potlucks, and even gifting to neighbors—tested countless times, in the name of research, of course.
If you’re craving that “warm hug” feeling in bite-sized form, you’re going to want to bookmark this cheeseburger sliders recipe. It’s party food at its absolute best!
Why You’ll Love This Recipe
After years of recipe testing, kitchen flops, and flavor tweaks, I can say with confidence—these savory cheeseburger sliders with Hawaiian rolls are pure gold. You know what sets them apart? It’s not just the gooey cheese or the pillowy rolls; it’s the way every ingredient works together for perfect comfort food, every single time.
- Quick & Easy: Comes together in under 40 minutes—ideal for busy weeknights, spontaneous parties, or when the craving hits and you want something fast.
- Simple Ingredients: Nothing fancy here; you probably have most of the essentials already. No extra trips to specialty stores required!
- Perfect for Parties: Whether it’s a birthday, holiday, game night, or backyard barbecue, these sliders always steal the show. They’re great for a crowd and super easy to serve.
- Crowd-Pleaser: Kids, adults, picky eaters—you name it, everyone loves them. They disappear from the platter before you know it!
- Unbelievably Delicious: The combo of sweet Hawaiian rolls, juicy seasoned beef, and melty cheddar is next-level. You get that classic burger taste, but in a tender, pull-apart package.
Here’s what makes this recipe stand out: Instead of just layering ingredients, you bake the assembled sliders together, which lets the cheese melt into the beef and the rolls soak up all those savory juices. I use a little garlic powder and Worcestershire sauce for depth—trust me, those tiny touches make all the difference. If you’ve ever tried sliders that turn out dry or bland, this one will redeem them forever.
It’s comfort food, reimagined for real life—quicker, easier, and packed with flavor. I’ve made these for everything from last-minute sleepovers to big holiday gatherings, and they’re always the first thing folks ask for seconds of. If you want something truly memorable without a lot of fuss, these cheeseburger sliders are the way to go.
What Ingredients You Will Need
This cheeseburger sliders recipe uses straightforward, wholesome ingredients to give you bold flavor and satisfying texture. You won’t need anything fancy—most of these are pantry staples, and there’s plenty of room for swapping based on your taste or dietary needs.
- For the Beef Filling:
- 1 pound (450 g) ground beef (80/20 for best flavor and juiciness)
- 1 small onion, finely diced (adds sweetness and depth)
- 2 cloves garlic, minced (for savory punch)
- 1 tablespoon Worcestershire sauce (for umami)
- 1 teaspoon salt
- 1/2 teaspoon black pepper
- 1/2 teaspoon garlic powder (optional, for extra flavor)
- For the Sliders:
- 12-pack Hawaiian sweet rolls (King’s Hawaiian is my go-to)
- 6 slices cheddar cheese (or about 1 1/2 cups shredded cheddar; feel free to swap for American or pepper jack)
- 1/2 cup dill pickle slices (classic cheeseburger taste; skip if you’re not a pickle fan)
- 2 tablespoons ketchup (adds tang and moisture)
- 2 tablespoons yellow mustard (for that familiar burger zing)
- For the Topping:
- 2 tablespoons unsalted butter, melted
- 1 teaspoon sesame seeds (optional, but adds a fun burger vibe)
- 1/2 teaspoon dried onion flakes (optional, for extra crunch)
For substitutions: Use turkey or plant-based ground meat for a lighter or vegetarian version. Prefer Swiss or provolone? Go for it! You can swap out Hawaiian rolls for any soft dinner roll, but the sweetness really makes these sliders special. (If you’re gluten-free, look for GF rolls in the freezer section—Udi’s is a solid choice.)
In summer, add fresh tomato slices or swap in spicy pickles. For a low-carb twist, use thin cheese rounds as your “bun” (it’s not quite the same, but it’s tasty!). I recommend using freshly grated cheese whenever possible—it melts smoother than pre-shredded. For the beef, I stick with 80/20 because it’s juicy without being too greasy, but leaner works in a pinch.
Honestly, these ingredients are forgiving. If you’re missing something, don’t sweat it—this recipe is meant to be fun and flexible!
Equipment Needed
You don’t need a fancy kitchen to nail these cheeseburger sliders—the basics do the trick. Here’s what you’ll want to have on hand:
- 9×13-inch baking dish (glass or metal works; I’ve used both)
- Large skillet (nonstick or stainless; just make sure it’s big enough for a pound of beef)
- Sharp knife (for slicing the rolls in half—you’ll want a serrated bread knife for clean cuts)
- Spatula or wooden spoon (for browning the beef)
- Small mixing bowl (for the butter topping)
- Basting brush (handy for spreading melted butter, but a spoon works in a pinch)
- Cutting board (for prepping onions and rolls)
If you don’t have a baking dish, a rimmed sheet pan works. For the skillet, I’ve made these with cast iron and it gives a nice sear, but nonstick is easier for cleanup. My bread knife is a cheap one from the grocery store—it’s lasted years with a quick sharpen now and then. If you love gadgets, a mini food processor makes quick work of onions.
Maintenance tip: If you use cast iron, give it a light oil rub after washing to keep it ready for next time. Budget-wise, you really only need a good skillet and a baking dish—everything else is gravy!
Preparation Method
- Preheat your oven: Set it to 350°F (175°C). This lets the rolls get golden and the cheese bubbly.
- Brown the beef: Heat your skillet over medium-high, add the ground beef and diced onion. Cook for 5-7 minutes, stirring often, until beef is no longer pink and onions are soft. Drain excess fat if needed (if it looks greasy, spoon some out).
- Season the meat: Add garlic, Worcestershire sauce, salt, pepper, and garlic powder. Stir until fragrant, about 1 minute. Taste and adjust seasoning as needed—sometimes I add a pinch more salt for punch.
- Prepare the rolls: Without separating the rolls, slice the entire block in half horizontally using a serrated knife. Set the bottom half in your baking dish.
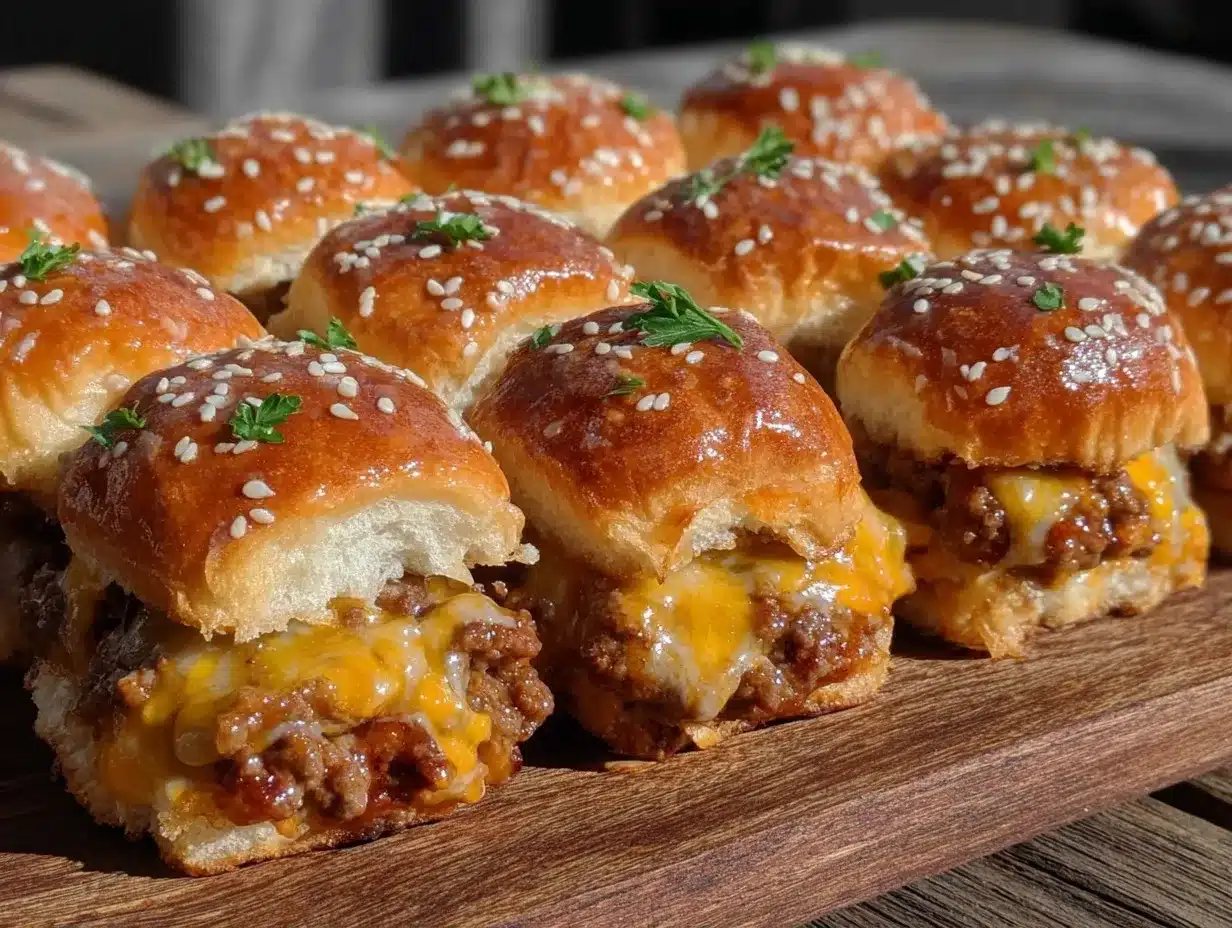
- Layer the fillings: Spread ketchup and mustard evenly over the bottom rolls. Spoon the beef mixture over, then arrange pickle slices on top. Lay cheese slices (or sprinkle shredded cheese) evenly over the beef and pickles.
- Top and assemble: Place the top half of the rolls over the fillings. Press down gently, just so everything holds together.
- Butter topping: Mix melted butter with sesame seeds and dried onion flakes (if using) in a small bowl. Brush generously over the tops of the rolls. The butter helps the sliders brown and gives a little extra flavor.
- Bake: Cover loosely with foil and bake for 15 minutes. Remove foil and bake another 5-7 minutes, until tops are golden and cheese is melted—watch for bubbling cheese and a bit of browning on the rolls.
- Cut and serve: Let the sliders cool for 2-3 minutes (makes them easier to slice). Use a sharp knife to cut into individual sliders (you’ll get 12).
- Troubleshooting: If the cheese isn’t melting, give it another minute uncovered. If the tops are browning too fast, lay foil loosely back over. Sometimes the filling spills out a bit—don’t worry, just tuck it back in!
Prep tip: Assemble everything ahead, then bake right before serving. These are best fresh, but leftovers reheat beautifully if you keep them wrapped.
Sensory cues: The beef should be well-browned and fragrant, the cheese gooey, and the rolls warm and slightly crisp on top. If your rolls feel dry after baking, brush a little extra melted butter while still hot—it’s a game changer!
Cooking Tips & Techniques
I’ve made these cheeseburger sliders with Hawaiian rolls more times than I can count, and every batch teaches me something new. Here’s what I’ve learned along the way:
- Don’t Overcook the Beef: Cook just until browned—overdoing it makes the filling dry. If you use lean beef, add a splash of water or broth before seasoning.
- Layer Evenly: Spread the beef mixture right up to the edges for every bite to be juicy. Don’t leave any gaps!
- Foil Is Your Friend: Covering with foil for the first part of baking keeps the rolls soft and lets the cheese melt. Uncover for the last few minutes to get that golden, slightly crisp top.
- Butter Topping: Don’t skimp! The butter adds flavor and keeps the rolls moist—if you’re feeling extra, sprinkle a little garlic powder in it.
- Multitasking: While beef cooks, prep the rolls and toppings. Keeps things efficient and cuts down on waiting time.
- Personal Failures: Once I used pre-shredded cheese and it didn’t melt as nicely. Freshly sliced or grated is always better for gooeyness. If your cheese isn’t melting, try a minute under the broiler—just watch closely.
- Consistency: Use the same brand of Hawaiian rolls for predictable results. Sometimes off-brand rolls are smaller or less sweet, which can change the final flavor.
- Timing: Don’t let the assembled sliders sit too long before baking or the rolls can get soggy. If you need to prep ahead, keep the filling and rolls separate until ready to bake.
Honestly, the little details make all the difference—don’t rush the layering and don’t skip the butter topping. These tips guarantee sliders so good, they’ll practically vanish from the tray!
Variations & Adaptations
The beauty of this cheeseburger sliders recipe is how easily you can make it your own. Here are a few tried-and-true variations:
- Dietary Swaps:
- Use ground turkey or chicken for a lighter option. Plant-based ground “beef” works great for vegetarians—just season generously!
- For gluten-free, sub in GF dinner rolls and double-check your condiments.
- Seasonal Flavors:
- Summer—add thin tomato slices after baking for freshness.
- Winter—mix a tablespoon of BBQ sauce into the beef for smoky warmth.
- Cheese Choices:
- Pepper jack for a spicy kick, Swiss for nuttiness, or provolone for a mild twist.
- Cooking Methods:
- Try an air fryer for small batches—just watch the butter topping doesn’t burn.
- Grill the beef filling for a smoky flavor before assembling.
- Personal Twist:
- Once, I swapped out pickles for sautéed mushrooms and onions—total umami bomb!
- Allergen Substitutions:
- Dairy-free cheese melts surprisingly well (Daiya or Violife are solid options). Skip the butter topping or use vegan spread for dairy-free.
- Flavor Customization:
- Mix in a little hot sauce or sriracha for heat, or spread a thin layer of ranch dressing for creaminess.
Honestly, you can play around with this basic method and get a completely new slider every time—just have fun with it!
Serving & Storage Suggestions
Serve these cheeseburger sliders warm, straight from the oven—the cheese will be oozy and the rolls tender. For party nights, I set them out on a big platter with extra ketchup, mustard, and pickles on the side. They’re perfect with classic potato chips, coleslaw, or a crisp green salad.
If you want to get fancy, stack them on a wooden board and sprinkle with extra sesame seeds for that “Pinterest-perfect” look. They pair great with iced tea, lemonade, or beer if you’re celebrating.
To store leftovers: Wrap sliders tightly in foil or place in an airtight container. Refrigerate for up to 3 days. For longer storage, freeze individual sliders wrapped in plastic and then foil—good for about a month.
Reheating is easy: Pop in the oven at 350°F (175°C) for 10 minutes or microwave for 30-45 seconds (cover with a damp paper towel so rolls don’t dry out). The flavors meld and get even richer after a day, so they’re great for meal prep or snacking.
If you’re taking them to a party, keep them warm in a slow cooker on the “warm” setting—they’ll stay gooey for hours!
Nutritional Information & Benefits
Each cheeseburger slider (using beef and cheddar) averages about 220 calories, 9g protein, 20g carbs, and 12g fat. If you use turkey or light cheese, the numbers go down a bit. The sweet Hawaiian rolls offer a quick energy boost, while the beef supplies iron and B vitamins.
Cheddar cheese brings calcium and protein, while pickles add a bit of vitamin K and crunch without extra calories. Go easy on the cheese and use lean beef for a lighter version. This recipe is easy to adapt for gluten-free or dairy-free diets—just swap rolls and cheese.
Allergens to watch: Wheat, dairy, and eggs (if your rolls contain them). I love making these for gatherings because they’re filling and satisfy those burger cravings in a smaller, shareable form. For me, they’re a comfort food that doesn’t feel heavy—pure happiness in every bite!
Conclusion
If you’re looking for a party snack that’s easy, wildly delicious, and always a hit, this cheeseburger sliders recipe with Hawaiian rolls is the answer. The mix of juicy beef, gooey cheese, and sweet rolls is pure comfort food—perfect for any occasion.
Don’t be afraid to make it your own—try different meats, cheeses, or toppings. That’s half the fun! I love this recipe because it brings people together, sparks smiles, and disappears fast from the table.
Got a party coming up? Bookmark this one, share with friends, or leave a comment with your favorite twist. Honestly, you’re going to want to make a double batch—these sliders are that good. Happy cooking!
FAQs
Can I make cheeseburger sliders ahead of time?
Yes! You can prepare the beef filling and slice the rolls ahead. Assemble just before baking for best texture, or bake, cool, and reheat before serving.
Do I have to use Hawaiian rolls?
Nope—any soft dinner rolls work, but Hawaiian rolls give that sweet contrast that makes these sliders so irresistible.
What’s the best cheese for sliders?
Cheddar is classic, but American, Swiss, pepper jack, or even mozzarella work. Freshly sliced or grated cheese melts best!
Can I freeze cheeseburger sliders?
Absolutely! Wrap tightly in plastic and foil; freeze up to 1 month. Reheat in the oven for best results.
How do I keep sliders warm at a party?
After baking, keep sliders covered in a slow cooker on “warm” or wrap in foil and place in a low oven (200°F/93°C) until ready to serve.
Pin This Recipe!
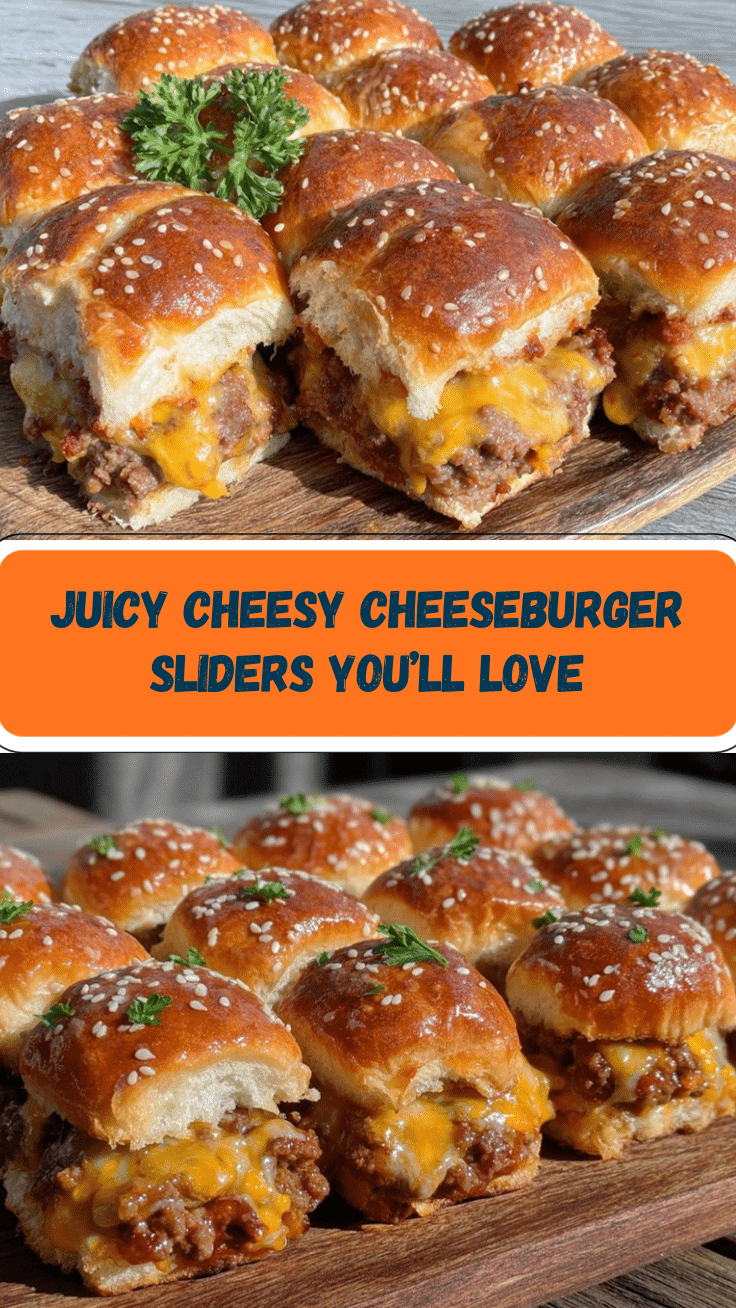
Cheeseburger Sliders Recipe: Easy Hawaiian Rolls for Perfect Party Nights

These savory cheeseburger sliders feature juicy beef, melty cheddar, and tangy pickles baked inside sweet Hawaiian rolls. Perfect for parties, game nights, or family gatherings, they come together quickly and are always a crowd-pleaser.
- Prep Time: 15 minutes
- Cook Time: 22 minutes
- Total Time: 37 minutes
- Yield: 12 sliders 1x
- Category: Appetizer
- Cuisine: American
Ingredients
- 1 pound ground beef (80/20 recommended)
- 1 small onion, finely diced
- 2 cloves garlic, minced
- 1 tablespoon Worcestershire sauce
- 1 teaspoon salt
- 1/2 teaspoon black pepper
- 1/2 teaspoon garlic powder (optional)
- 12-pack Hawaiian sweet rolls
- 6 slices cheddar cheese (or 1 1/2 cups shredded cheddar)
- 1/2 cup dill pickle slices
- 2 tablespoons ketchup
- 2 tablespoons yellow mustard
- 2 tablespoons unsalted butter, melted
- 1 teaspoon sesame seeds (optional)
- 1/2 teaspoon dried onion flakes (optional)
Instructions
- Preheat oven to 350°F (175°C).
- Heat a large skillet over medium-high. Add ground beef and diced onion. Cook for 5-7 minutes, stirring often, until beef is browned and onions are soft. Drain excess fat if needed.
- Add garlic, Worcestershire sauce, salt, pepper, and garlic powder. Stir until fragrant, about 1 minute. Taste and adjust seasoning as needed.
- Without separating the rolls, slice the entire block in half horizontally using a serrated knife. Place the bottom half in a 9×13-inch baking dish.
- Spread ketchup and mustard evenly over the bottom rolls.
- Spoon the beef mixture over the rolls, then arrange pickle slices on top.
- Lay cheese slices (or sprinkle shredded cheese) evenly over the beef and pickles.
- Place the top half of the rolls over the fillings. Press down gently.
- Mix melted butter with sesame seeds and dried onion flakes (if using) in a small bowl. Brush generously over the tops of the rolls.
- Cover loosely with foil and bake for 15 minutes. Remove foil and bake another 5-7 minutes, until tops are golden and cheese is melted.
- Let sliders cool for 2-3 minutes. Use a sharp knife to cut into 12 individual sliders.
- Serve warm. Store leftovers wrapped in foil or airtight container in the refrigerator up to 3 days.
Notes
For best results, use freshly grated or sliced cheese for optimal melting. You can substitute ground turkey or plant-based meat for a lighter or vegetarian version. Assemble ahead and bake just before serving for freshest texture. If rolls seem dry after baking, brush with extra melted butter. Leftovers reheat well in the oven or microwave. For gluten-free, use GF rolls and check condiments.
Nutrition
- Serving Size: 1 slider
- Calories: 220
- Sugar: 5
- Sodium: 420
- Fat: 12
- Saturated Fat: 6
- Carbohydrates: 20
- Fiber: 1
- Protein: 9
Keywords: cheeseburger sliders, Hawaiian rolls, party food, easy sliders, beef sliders, game night, appetizer, comfort food, kid-friendly, crowd-pleaser


