Introduction
There’s something absolutely magical about the aroma of chocolate and crushed Oreos swirling together in my kitchen—honestly, it’s the kind of smell that makes you pause mid-stir and just grin. The first time I made this Creamy Chocolate Oreo Pie, I was determined to create a Thanksgiving dessert that would stand out from the usual pumpkin or pecan options. You know what? I was instantly hooked (and so was everyone else).
This pie is pure nostalgia wrapped up in chocolatey goodness. When I was knee-high to a grasshopper, Oreo cookies were my weakness. My grandma used to keep a secret stash just for me, tucked away in the back of her pantry. Years ago, I tried to recreate that same feeling—rich, creamy, and a little bit mischievous—by combining Oreos with a luscious chocolate filling. The result? The kind of moment where you pause, take a deep breath, and just smile because you know you’re onto something truly special.
My family couldn’t stop sneaking slices off the cooling rack (and honestly, I can’t blame them). Even my cousin, who claims she “doesn’t do sweets,” went back for seconds at our last Thanksgiving. This pie has quickly become a staple for holiday gatherings, family dinners, and last-minute dessert emergencies. It’s dangerously easy, delivers pure comfort, and brightens up any Pinterest dessert board. If you’re searching for a chocolate Oreo pie that feels like a warm hug and tastes even better, you’re going to want to bookmark this one. I’ve tested this recipe at least a half-dozen times just to make sure it’s flawless—in the name of research, of course!
Why You’ll Love This Creamy Chocolate Oreo Pie
Trust me, after years of baking and a fair share of Thanksgiving dessert disasters, this Creamy Chocolate Oreo Pie stands out for all the right reasons. Here’s why you’ll fall in love with it:
- Quick & Easy: Comes together in under 30 minutes, so you’re not stuck in the kitchen all day. Perfect for busy holiday prep or last-minute guests.
- Simple Ingredients: No fancy grocery trips required; you probably already have most of these in your pantry and fridge.
- Perfect for Thanksgiving: It’s a showstopper on your dessert table and makes a sweet alternative to classic pies.
- Crowd-Pleaser: Kids scramble for seconds, adults sneak slices when no one’s looking, and Oreo lovers will literally swoon.
- Unbelievably Delicious: The creamy chocolate filling, crunchy Oreo crust, and whipped topping create a texture combo that’s next-level comfort food.
What really sets this pie apart is the special technique I use: blending a touch of cream cheese into the chocolate filling for that ultra-smooth, almost mousse-like texture. The balance of sweet and slightly salty flavors (thanks to a hint of salt in the crust) makes each bite memorable. It’s not just another Oreo pie—it’s my best version, refined over family gatherings and late-night taste tests.
This recipe isn’t just good—it’s the kind that makes you close your eyes after the first bite. It’s comfort food with a fun twist, faster and easier than you’d expect, but every bit as soul-soothing as the classics. You can impress guests without the stress or just turn an ordinary night into something special. If you’re an Oreo lover looking for the ultimate Thanksgiving dessert, this is the pie you’ve been searching for!
What Ingredients You Will Need
This creamy chocolate Oreo pie uses simple, wholesome ingredients to deliver bold flavor and satisfying texture—without any fuss. Most are kitchen staples, and you can easily swap things based on what you have on hand.
- For the Oreo Crust:
- Oreo cookies – 24 cookies, crushed (classic Oreos work best, but double-stuf for extra richness)
- Unsalted butter – 6 tablespoons (85g), melted (adds richness and helps the crust set)
- Pinch of salt (balances out the sweetness, optional but recommended)
- For the Creamy Chocolate Filling:
- Semi-sweet chocolate chips – 1 cup (170g) (I recommend Ghirardelli for best texture)
- Heavy cream – 1 cup (240ml) (makes the filling ultra-creamy and decadent)
- Cream cheese – 4 ounces (115g), softened (adds tang and smoothness)
- Powdered sugar – 1/2 cup (60g) (sweetens the filling without graininess)
- Pure vanilla extract – 1 teaspoon (for that bakery-style flavor)
- For the Whipped Topping:
- Whipped cream – 1 1/2 cups (360ml), cold (store-bought or homemade, your call)
- Extra Oreo cookies – 6 cookies, roughly chopped (for garnish and crunch)
- Chocolate shavings or mini chips (optional, just for a pretty finish)
Ingredient Notes & Substitutions:
You can swap in gluten-free Oreos for a gluten-free version, or use coconut milk and dairy-free cream cheese for a vegan adaptation. If you only have milk chocolate chips, the pie will be sweeter—so dial back the powdered sugar a bit. In a pinch, Neufchâtel cheese works instead of cream cheese. For the whipped topping, homemade whipped cream is my go-to, but a tub of frozen whipped topping (thawed) works just fine for a shortcut.
For the chocolate, stick to brands you love—quality really shines through here. If you’re making this in summer, toss in some fresh berries on top for a fruity twist. Honestly, the recipe is forgiving if you want to experiment a little—just don’t skimp on the Oreos!
Equipment Needed
You don’t need fancy gadgets for this creamy chocolate Oreo pie—just some basics and a couple of helpful tools:
- 9-inch (23cm) pie pan (glass or metal, both work—ceramic looks extra festive for Thanksgiving)
- Food processor or sturdy zip-top bag + rolling pin (for crushing Oreos; food processor saves time, but a bag and rolling pin is more fun for kids)
- Mixing bowls – at least two (one for crust, one for filling)
- Hand mixer or stand mixer (helps get the filling perfectly smooth; whisk works in a pinch but requires elbow grease)
- Rubber spatula (for scraping every last bit of filling)
- Measuring cups and spoons (precision matters for that creamy texture)
- Knife or vegetable peeler (for chocolate shavings, optional)
If you don’t own a pie pan, a square baking dish works fine—the slices just won’t be as traditional. I’ve made this pie in disposable foil pans for potlucks and it still turns out great. For the whipped topping, a balloon whisk can substitute for a mixer if you’re feeling old-school (just be ready for an arm workout!). Pro tip: wash the food processor right away—those Oreo crumbs love to stick!
Bargain brands work just as well for most tools. If you use a stand mixer, keep the whisk attachment clean for perfect whipped cream. I always keep a stack of mixing bowls handy since there’s a lot of scraping and stirring involved. Honestly, you don’t need anything fancy; just make sure your pie pan isn’t warped for even crust baking.
Preparation Method
Let’s break down this creamy chocolate Oreo pie into easy-to-follow steps so you can bake with confidence. Here’s how I do it, with plenty of little tips and troubleshooting notes along the way:
- Prepare the Oreo Crust:
Crush 24 Oreo cookies (about 2 cups/220g crumbs) in a food processor until fine. If you don’t have one, toss them in a zip-top bag and bash with a rolling pin until there are no big chunks.
Pour the crumbs into a mixing bowl. Add 6 tablespoons (85g) melted unsalted butter and a pinch of salt. Stir until the mixture looks like wet sand.
Press the crumbs firmly into a 9-inch (23cm) pie pan, making sure to coat the bottom and sides evenly. Use the bottom of a measuring cup to tamp it down. Tip: If the crust feels crumbly, add another tablespoon of melted butter.
Chill the crust in the fridge for at least 20 minutes while you prep the filling. This helps it set and prevents soggy pie later. - Make the Chocolate Filling:
Pour 1 cup (240ml) heavy cream into a microwave-safe bowl and heat for 45 seconds, until steaming but not boiling. (Alternatively, heat gently in a saucepan.)
Add 1 cup (170g) semi-sweet chocolate chips to the hot cream. Let sit for 2 minutes, then stir until smooth and glossy. If any lumps remain, microwave in 10-second bursts and stir.
In a separate bowl, beat 4 ounces (115g) softened cream cheese with 1/2 cup (60g) powdered sugar and 1 teaspoon vanilla until creamy.
Fold the chocolate mixture into the cream cheese mixture. Beat until silky and uniform. Tip: If it looks grainy, keep beating—it’ll smooth out.
Pour the chocolate filling into the chilled Oreo crust and spread evenly with a spatula. The filling should be thick but spreadable. - Chill the Pie:
Refrigerate the filled pie for at least 3 hours (overnight is best for clean slices). The filling will firm up and develop a mousse-like texture.
Warning: Don’t rush this step. If you try to slice too soon, the filling will ooze everywhere! - Prepare Whipped Topping:
Whip 1 1/2 cups (360ml) cold whipped cream until stiff peaks form. (Or use thawed whipped topping for convenience.)
Spread or pipe the whipped cream generously over the chilled pie.
Sprinkle 6 chopped Oreo cookies and chocolate shavings (optional) for garnish. Tip: Chill the pie again for 15 minutes before serving for picture-perfect slices. - Slice and Serve:
Use a sharp knife dipped in warm water for each cut. This keeps the slices neat and prevents sticking.
Sensory cue: The pie should feel cool, creamy, and slightly firm. The crust will be crisp but not hard. The first slice is always a little messy (that’s just part of the charm!).
Serve chilled and watch the smiles happen.
If the filling doesn’t set, double-check your cream measurements and chill time. For a firmer filling, add extra cream cheese or chill longer. To save time, make the crust and filling a day ahead and add whipped topping just before serving. Honestly, this pie is forgiving—just don’t skip the chilling step!
Cooking Tips & Techniques
After making more pies than I can count, here are my best tips for perfect creamy chocolate Oreo pie every time:
- Crust Consistency: Use fresh Oreos for the crust—older cookies won’t stick together as well. If it’s too dry, add more melted butter. Too greasy? Add a few extra cookie crumbs.
- Chocolate Melting: Never microwave chocolate and cream together for more than 45 seconds at a time. Stir between bursts for smoothness. Burned chocolate is the worst (been there, done that).
- Mixing Technique: Blend the cream cheese and powdered sugar until no lumps remain before adding chocolate. If you’re impatient, you might end up with a slightly grainy filling. Keep mixing—it pays off.
- Chill Time: Patience is your friend. I once served the pie too soon at a family party, and it was more like chocolate soup! Overnight chilling gives you those clean, Instagram-worthy slices.
- Whipped Cream: Make sure everything is cold—bowl, beaters, cream. Otherwise, it won’t whip up properly and might look sad (I learned that the hard way).
- Multitasking: Crush Oreos while the butter melts and whip cream while the pie chills. Saves you time for more important things—like sneaking a taste.
- Consistency: If making ahead, store the whipped topping separately and add before serving. This keeps it looking fresh and fluffy.
Don’t worry about imperfections—each pie has its own personality. If your crust cracks or filling isn’t perfect, just cover with extra whipped cream and Oreos. It’ll still taste amazing!
Variations & Adaptations
Sometimes you want to mix things up or accommodate different tastes and dietary needs. Here are my favorite creamy chocolate Oreo pie twists:
- Gluten-Free Version: Use gluten-free Oreos and double-check your chocolate chips for any hidden wheat ingredients. The taste is nearly identical (my gluten-sensitive aunt couldn’t tell the difference).
- Vegan Adaptation: Swap regular Oreos for vegan-friendly ones, use coconut cream instead of heavy cream, and dairy-free cream cheese. The filling gets a subtle coconut note—delicious and allergy-friendly!
- Mint Chocolate Oreo Pie: Add 1/2 teaspoon peppermint extract to the filling and use mint-flavored Oreos for the crust. The flavor is refreshing and perfect for winter holidays.
- Berry Topping: For summer, top with sliced strawberries or raspberries instead of extra Oreos. This adds a fresh contrast to the rich chocolate.
- Nutty Crunch: Sprinkle toasted chopped walnuts or pecans on top for a salty-sweet twist. I did this for a Friendsgiving last year and it was a hit!
I sometimes add an extra layer of peanut butter between the crust and filling—dangerously good! You can also make mini Oreo pies in muffin tins for personal servings (just reduce the chilling time). The base recipe is flexible, so feel free to experiment and make it your own. Just don’t skip the chilling step for best results!
Serving & Storage Suggestions
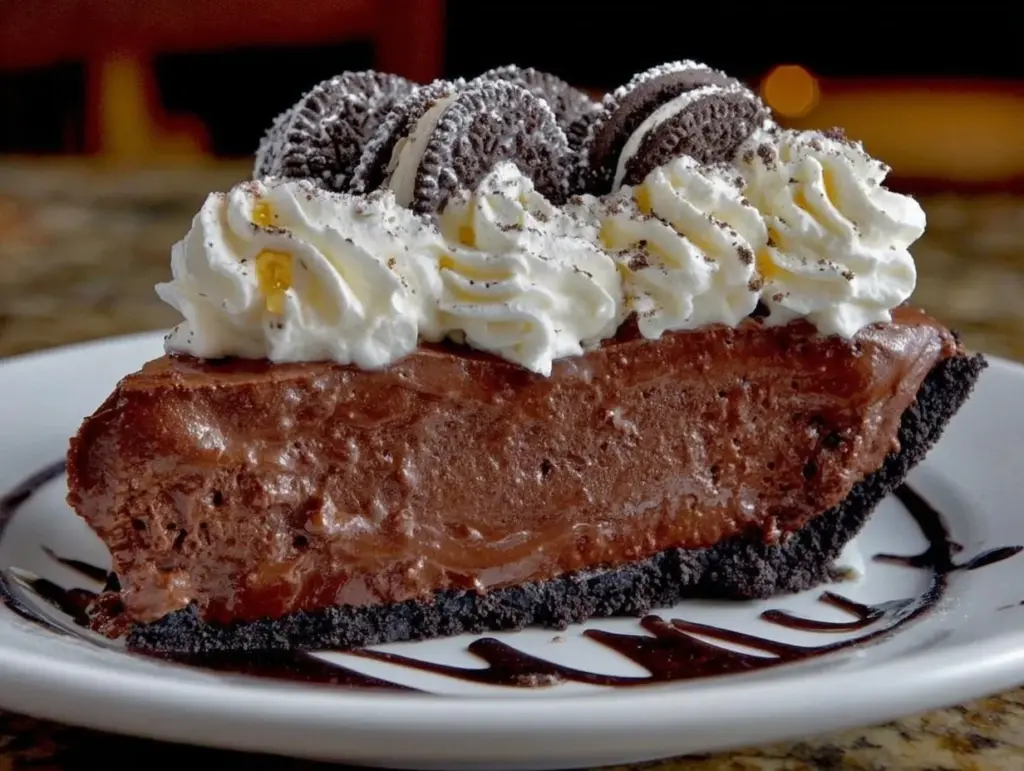
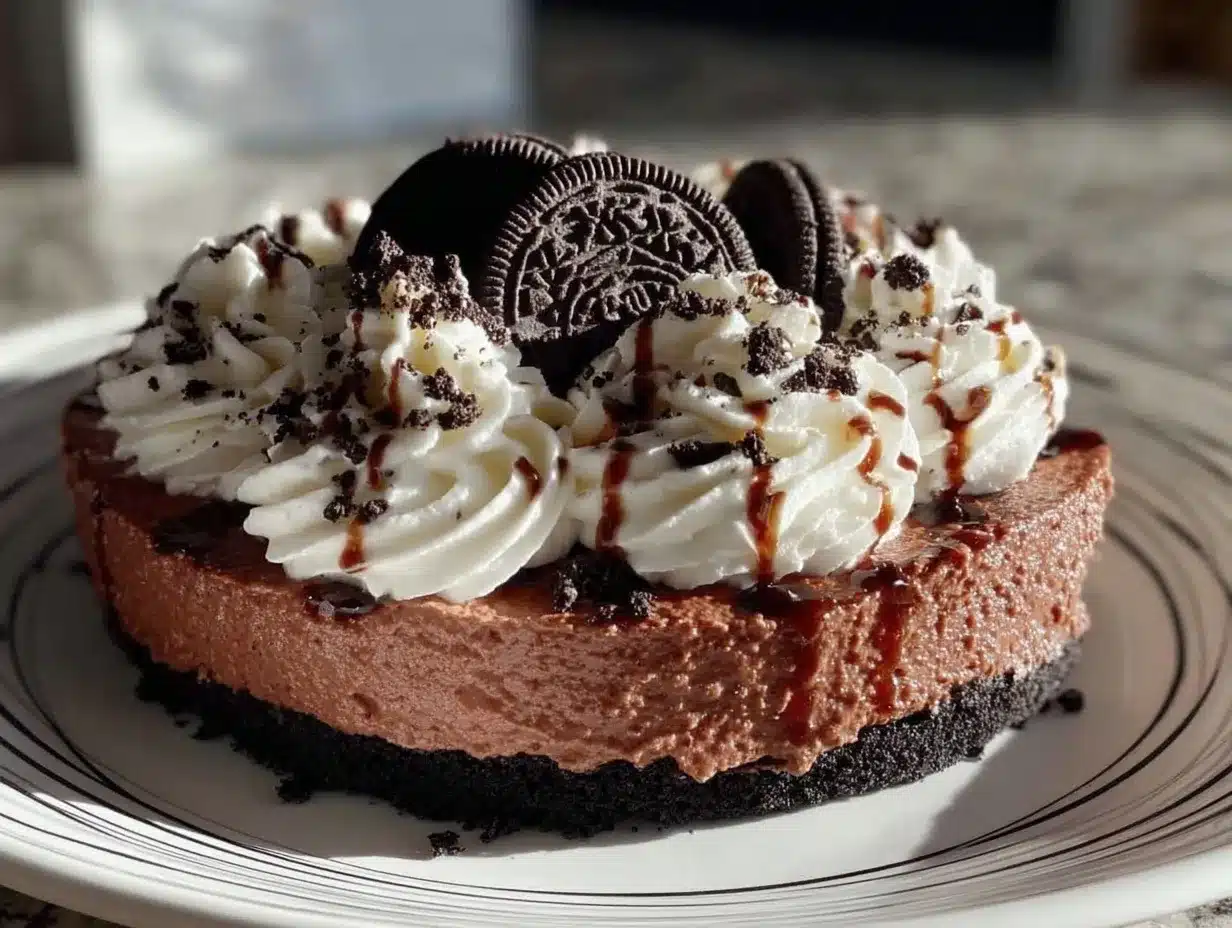
This creamy chocolate Oreo pie is best served chilled—straight from the fridge for those perfect creamy slices. I like to present it on a festive pie plate, topped with whipped cream, chunky Oreo bits, and a sprinkle of chocolate shavings for Pinterest-worthy style. If you’re feeling extra, add a drizzle of chocolate sauce or a handful of berries on the side.
Pair with a hot cup of coffee, milk, or even a dollop of ice cream for a decadent treat. It’s a fantastic finish for Thanksgiving dinner, but also works as a surprise birthday dessert or midnight snack.
Storage: Leftovers keep well in the fridge, covered tightly with plastic wrap or foil, for up to 4 days. The whipped cream may deflate a bit, but the flavor only gets deeper. For longer storage, freeze slices on a baking sheet, then transfer to a freezer bag—thaw in the fridge for 2-3 hours before serving. Reheat? Not needed—this pie is meant to be enjoyed cold!
If making ahead, store the pie without toppings and add whipped cream and Oreos the day you serve. The crust stays crisp, and the chocolate filling remains creamy. Honestly, the pie is even better the next day as the flavors mingle and meld (if you can wait that long).
Nutritional Information & Benefits
Here’s an estimated breakdown for one slice (based on 10 servings):
- Calories: ~370
- Fat: ~23g
- Carbohydrates: ~38g
- Protein: ~4g
- Sugar: ~27g
Health Highlights:
Heavy cream and cream cheese add calcium and a touch of protein. Chocolate chips provide antioxidants (yes, really!), while Oreos—well, they’re just good for the soul. If you use gluten-free or vegan options, the pie suits most dietary needs. Allergens: Dairy, wheat, and possibly soy (check your chocolate chips). For those watching sugar, consider using sugar-free Oreos and chocolate chips.
Honestly, dessert is about joy and balance. I love that this pie can be tweaked for wellness, but it’s meant to bring a smile and a sense of celebration—especially at Thanksgiving!
Conclusion
So, why is this creamy chocolate Oreo pie worth every single bite? It’s quick, simple, and guaranteed to wow your Thanksgiving crowd (or any dessert-loving group). The blend of rich chocolate, classic Oreo crunch, and smooth, dreamy filling is pure comfort—nostalgic, yet special enough for holidays.
Customize it to fit your family’s tastes—add berries, nuts, or swap in allergy-friendly ingredients. I genuinely love this recipe because it brings out smiles and happy sighs every time I serve it. Honestly, it’s become a must-have at our family table (and a frequent midnight treat, if I’m being honest).
If you give this pie a try, let me know how it turns out! Drop a comment, share your tweaks, or tag me if you post your Pinterest-worthy creation. Happy baking—and may your holidays be delicious and filled with Oreo joy!
FAQs
Can I make creamy chocolate Oreo pie ahead of time?
Absolutely! Prepare the pie up to a day in advance. Just add whipped cream and garnish right before serving for the freshest look.
What if I don’t have a food processor for the crust?
No worries—just use a zip-top bag and a rolling pin to crush the Oreos. It’s a bit more hands-on, but works just as well.
Can I freeze creamy chocolate Oreo pie?
Yes! Slice and freeze on a baking sheet, then store in a freezer bag. Thaw in the fridge before serving. The texture stays creamy and delicious.
How do I make this pie gluten-free?
Just swap in gluten-free Oreos and double-check your chocolate chips. The rest of the recipe stays the same!
What’s the best way to get clean slices?
Use a sharp knife dipped in warm water, and wipe between cuts. Chilling the pie well before slicing also helps.
Pin This Recipe!

Creamy Chocolate Oreo Pie

This creamy chocolate Oreo pie is a quick, easy, and decadent dessert featuring a crunchy Oreo crust, luscious chocolate filling, and whipped cream topping. It’s a crowd-pleaser perfect for Thanksgiving or any occasion, especially for Oreo lovers.
- Prep Time: 20 minutes
- Cook Time: 10 minutes
- Total Time: 3 hours 30 minutes
- Yield: 10 servings 1x
- Category: Dessert
- Cuisine: American
Ingredients
- 24 Oreo cookies, crushed
- 6 tablespoons unsalted butter, melted
- Pinch of salt
- 1 cup semi-sweet chocolate chips
- 1 cup heavy cream
- 4 ounces cream cheese, softened
- 1/2 cup powdered sugar
- 1 teaspoon pure vanilla extract
- 1 1/2 cups whipped cream, cold (store-bought or homemade)
- 6 Oreo cookies, roughly chopped (for garnish)
- Chocolate shavings or mini chips (optional, for garnish)
Instructions
- Crush 24 Oreo cookies in a food processor or zip-top bag until fine crumbs form.
- Mix Oreo crumbs with 6 tablespoons melted butter and a pinch of salt until the mixture resembles wet sand.
- Press the mixture firmly into a 9-inch pie pan, covering the bottom and sides evenly. Chill in the fridge for at least 20 minutes.
- Heat 1 cup heavy cream in a microwave-safe bowl for 45 seconds until steaming (not boiling).
- Add 1 cup semi-sweet chocolate chips to the hot cream. Let sit for 2 minutes, then stir until smooth. Microwave in 10-second bursts if needed.
- In a separate bowl, beat 4 ounces softened cream cheese with 1/2 cup powdered sugar and 1 teaspoon vanilla until creamy.
- Fold the chocolate mixture into the cream cheese mixture and beat until silky and uniform.
- Pour the chocolate filling into the chilled Oreo crust and spread evenly.
- Refrigerate the filled pie for at least 3 hours (overnight is best) until the filling is set.
- Whip 1 1/2 cups cold whipped cream until stiff peaks form, or use thawed whipped topping.
- Spread or pipe whipped cream over the chilled pie.
- Garnish with 6 chopped Oreo cookies and chocolate shavings or mini chips if desired.
- Slice with a sharp knife dipped in warm water for clean cuts. Serve chilled.
Notes
For gluten-free or vegan adaptations, use gluten-free Oreos and dairy-free substitutes. Chill the pie thoroughly for best results and clean slices. Make ahead and add whipped topping just before serving. Store leftovers covered in the fridge for up to 4 days or freeze slices for longer storage.
Nutrition
- Serving Size: 1 slice (1/10 of pie
- Calories: 370
- Sugar: 27
- Sodium: 220
- Fat: 23
- Saturated Fat: 13
- Carbohydrates: 38
- Fiber: 2
- Protein: 4
Keywords: Oreo pie, chocolate pie, Thanksgiving dessert, easy pie recipe, creamy pie, Oreo dessert, holiday pie, no bake pie


