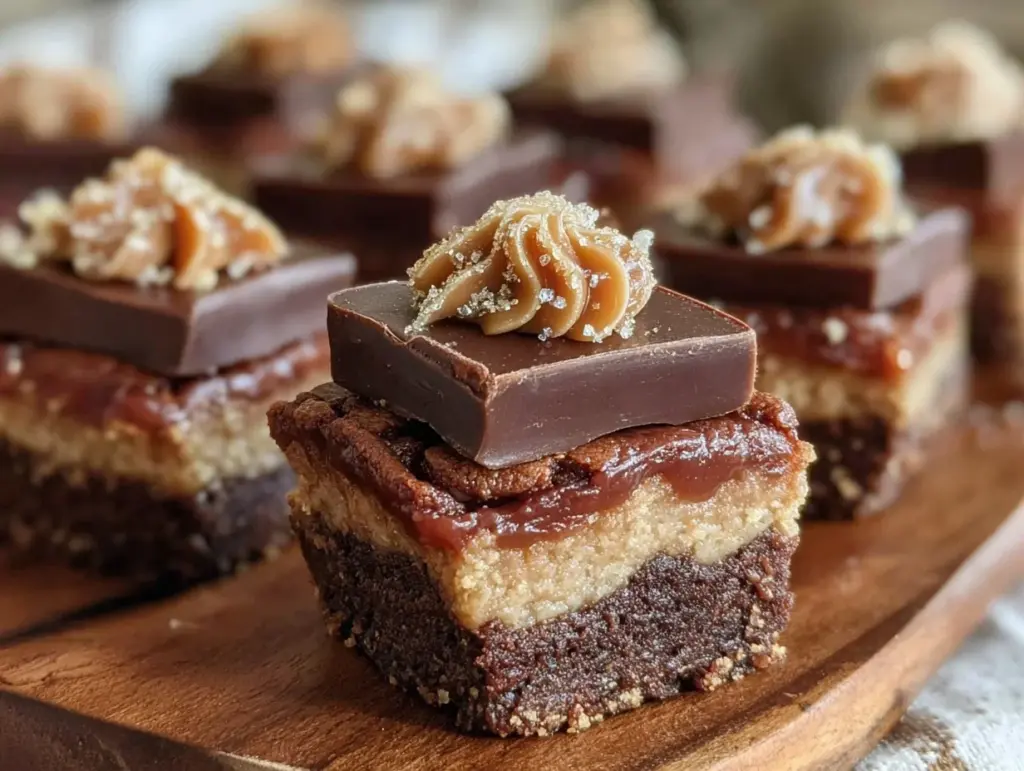
“Hey, did you see these brownie bites? They look like little graduation caps!” My cousin’s text popped up just as I was wrestling with what dessert to bring for our family’s graduation party. Honestly, I was skeptical at first—how hard could it be to make brownies look like tiny caps? But once I tried making these Perfect Graduation Cap Brownie Bites for Celebration, my doubts melted away along with the chocolate. The moment the first batch came out of the oven, the smell alone was a comforting hug after a long day.
These bites aren’t just cute; they’re a crowd favorite at every celebration I’ve brought them to. I remember the quiet buzz around the dessert table as people admired the little caps topped with the iconic tassels (made from a simple swirl of frosting and a mini candy). It’s funny how a small, thoughtful detail can make a familiar treat feel special and festive. Plus, making these was a surprisingly easy way to add some homemade charm to the party without a ton of fuss.
What really stuck with me is how these Perfect Graduation Cap Brownie Bites bring a little sense of accomplishment beyond just cake and cookies. They’ve become my go-to celebration treat when I want something that’s both fun and delicious, a sweet nod to milestones without getting overly fancy. If you’re looking for a dessert that feels like a tiny celebration in every bite, you’re in the right place.
Why You’ll Love This Recipe
- Quick & Easy: These brownie bites come together in under 45 minutes, perfect for last-minute celebration plans or when you’re juggling a million things.
- Simple Ingredients: No need for fancy or hard-to-find items—basic pantry staples and a few decorations are all you need.
- Perfect for Graduation Parties: The cap design is a fun, thematic twist that makes these treats stand out at any ceremony or gathering.
- Crowd-Pleaser: Whether kids or adults, everyone loves the fudgy texture paired with the playful decoration.
- Unbelievably Delicious: The brownies stay moist and rich, and the little frosting tassels add just the right sweet finish.
This recipe isn’t just another brownie—it’s a little project that turns a simple dessert into a statement. The trick is in the perfectly balanced fudgy brownie base, combined with a quick homemade frosting that’s easy to pipe into tassels. I also like to use dark cocoa powder for a deeper chocolate flavor, which really makes these bites stand out from the usual boxed brownies. Plus, decorating these became a fun pre-party ritual that even my less-than-crafty friends got into.
Honestly, these treats feel like a tiny celebration all on their own. Whether you’re a seasoned baker or a casual cook, the instructions and tips here will help you nail the look and flavor with confidence. And if you ever need a savory party snack to balance the sweets, I often bring along my crispy baked turkey sliders to the same events—they’re always a hit.
What Ingredients You Will Need
This recipe uses simple, wholesome ingredients to deliver bold chocolate flavor and a perfect fudgy texture without any fuss. You likely have most of these in your pantry already.
- For the Brownies:
- 1/2 cup (115g) unsalted butter, melted (I prefer Kerrygold for richness)
- 1 cup (200g) granulated sugar
- 2 large eggs, room temperature
- 1 teaspoon pure vanilla extract
- 1/3 cup (35g) unsweetened dark cocoa powder (use a good-quality brand like Valrhona or Hershey’s Special Dark)
- 1/2 cup (65g) all-purpose flour
- 1/4 teaspoon salt
- 1/4 teaspoon baking powder
- For the Frosting Tassels:
- 1/2 cup (115g) unsalted butter, softened
- 1 1/2 cups (180g) powdered sugar, sifted
- 1-2 tablespoons milk or heavy cream (to thin as needed)
- 1/2 teaspoon vanilla extract
- Black food coloring gel (just a drop for the tassels)
- For the Cap Tops:
- Square chocolate wafer cookies or cut brownies into squares (about 1.5 inches)
- Mini candy pearls or sprinkles (optional, for decoration)
If you want to make this gluten-free, swapping in almond flour or a gluten-free all-purpose blend works well. For a dairy-free option, use coconut oil instead of butter and a plant-based milk for frosting thinning. I usually grab organic eggs and fresh butter from my local market for the best flavor and freshness. In summer, you could add a raspberry or cherry on top to mimic a tassel with a pop of color.
Equipment Needed
- 8×8 inch (20×20 cm) square baking pan
- Mixing bowls (one large for batter, one for frosting)
- Electric mixer or sturdy whisk (for frosting, an electric hand mixer makes the job easier)
- Measuring cups and spoons (accuracy matters for baking!)
- Spatula and wooden spoon (for folding and mixing)
- Piping bag with a small round tip or a plastic sandwich bag with a tiny corner snipped for frosting tassels
- Cooling rack (important to let brownies cool completely before decorating)
If you don’t have a piping bag, no worries—using a plastic bag with a tiny corner cut works just fine. I also find that a silicone spatula is great for scraping every last bit of batter. For budget-friendly options, you could bake in a glass dish instead of metal, but keep an eye on baking times as glass tends to cook a bit slower. Keeping your equipment clean and dry, especially for frosting, helps prevent any clumps or uneven texture.
Preparation Method
- Preheat your oven to 350°F (175°C). Grease your 8×8 inch pan or line it with parchment paper for easy removal. This step takes about 10 minutes.
- Mix the wet ingredients: In a large bowl, whisk together the melted butter and sugar until smooth. Add the eggs one at a time, mixing well after each addition. Stir in the vanilla extract. This should take roughly 5 minutes.
- Combine the dry ingredients: In a separate bowl, sift together the cocoa powder, flour, salt, and baking powder. This helps prevent lumps and ensures even baking.
- Fold the dry mix into the wet: Gently stir the dry ingredients into the wet mixture with a spatula. Avoid overmixing—just enough to combine. The batter should be thick and glossy.
- Pour the batter into the pan: Spread evenly with a spatula. Tap the pan lightly on the counter to release air bubbles.
- Bake for 20-25 minutes. Start checking around 20 minutes by inserting a toothpick in the center; it should come out with a few moist crumbs but no wet batter. The edges will pull away slightly from the pan.
- Cool completely on a rack. This is crucial for clean cutting and decorating later—usually takes about 1 hour.
- Cut brownies into uniform squares. Aim for roughly 1.5-inch squares for perfect bite sizes.
- Make the frosting: Beat softened butter with powdered sugar and vanilla until fluffy. Add milk a little at a time to reach piping consistency. Mix in black food coloring until you get a deep, even shade.
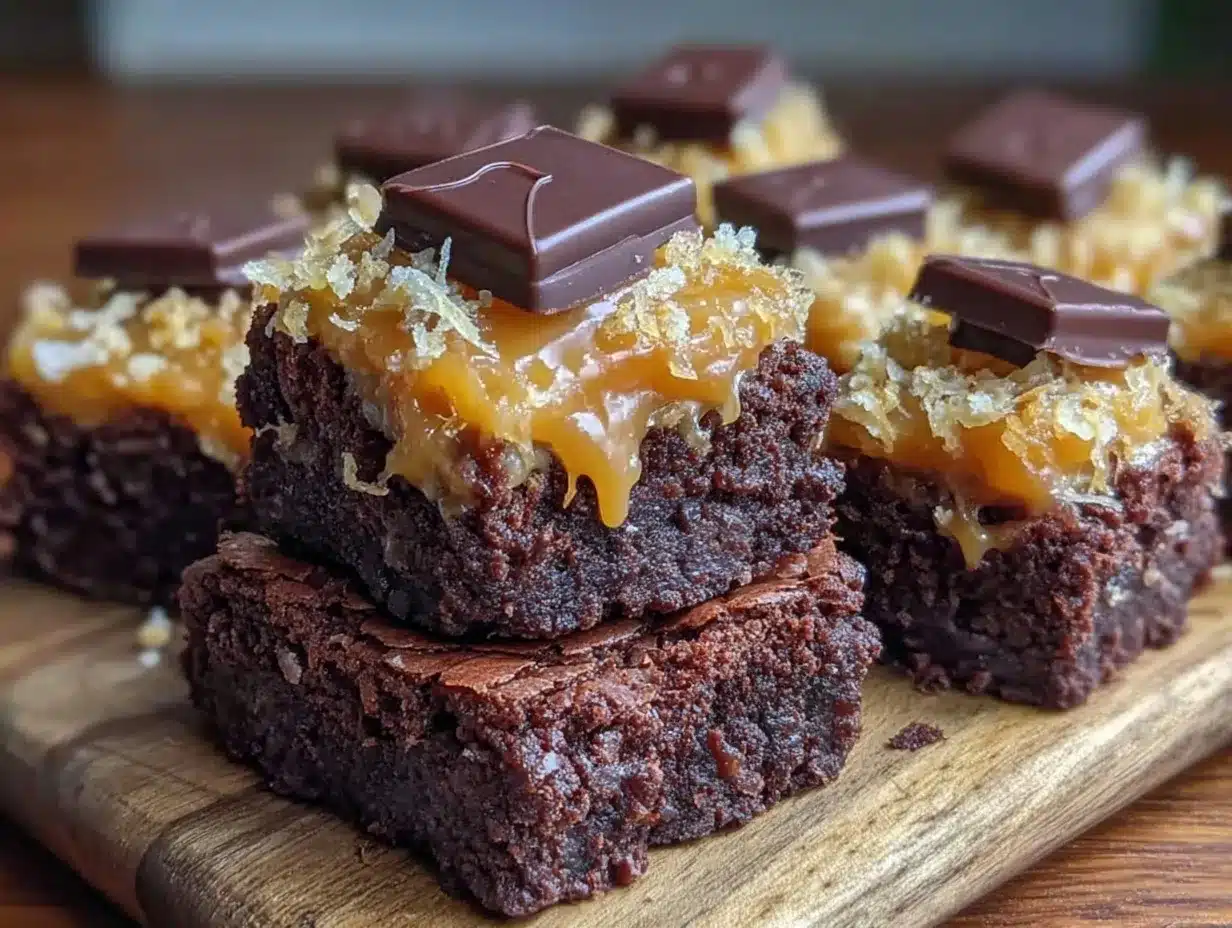
- Assemble the caps: Place a square chocolate wafer or cut brownie square on top of each brownie bite. Pipe a small dollop of frosting in the center, then pipe a thin tassel line extending from the dollop to the edge. Optionally, add a mini candy pearl at the tassel end for detail.
- Chill for 10-15 minutes. This helps the frosting set before serving.
If your frosting feels too thick, add a teaspoon of milk at a time until smoother. Too runny? Add a bit more powdered sugar. When piping the tassels, steady hands help, but don’t stress if they’re not perfect—each bite has its own charm. I like to prep the frosting while the brownies are cooling to keep things moving.
Cooking Tips & Techniques
Here’s what I’ve learned making these brownie bites a dozen times (sometimes more!)—some things to keep in mind:
- Don’t overbake: It’s tempting to bake a bit longer to be safe, but that dries out the brownies fast. Aim for fudgy, slightly underdone centers.
- Use room temperature eggs: They blend better and help with the batter’s smooth texture.
- Sift your cocoa and flour: This avoids lumps and gives a better crumb.
- Chill brownies before cutting: Warm brownies crumble easily. Patience pays off here.
- Practice frosting on parchment: Before piping tassels on the bites, try a few on parchment paper to get comfortable with pressure and speed.
- Multitasking: While brownies bake, prep frosting and clean up for a smooth workflow—keeps the kitchen less chaotic.
One time, I tried using pre-made frosting—it just didn’t have the right texture or flavor punch, so homemade is worth the extra effort. I also recommend a good quality cocoa powder for that rich, deep chocolate taste that stands out during celebrations. And if you want to add a bit of flair, a pinch of espresso powder in the batter amps up the chocolate flavor without making it taste like coffee.
Variations & Adaptations
These Perfect Graduation Cap Brownie Bites are a blank canvas for creativity. Here are some ways to switch things up:
- Flavor twists: Add chopped nuts like walnuts or pecans to the batter for crunch, or swirl in peanut butter for a nutty surprise.
- Dietary swaps: Use coconut oil instead of butter for dairy-free. Almond flour can replace all-purpose flour for a gluten-free version.
- Colorful tassels: Swap black frosting for your school’s colors—try royal blue, crimson, or gold using gel food coloring.
- Mini cupcake pans: Bake the brownies directly in mini muffin tins for naturally bite-sized pieces.
- Seasonal adaptation: For fall graduations, add a pinch of cinnamon and nutmeg to the batter for a cozy spice note.
Personally, I once made a batch with a mint frosting tassel for a winter graduation party—it was a hit, and the freshness cut through the richness nicely. For a fun twist, I’ve also decorated some bites with tiny edible glitter sprinkles to add sparkle to the celebration.
Serving & Storage Suggestions
Serve these brownie bites at room temperature for the best texture and flavor. Arrange them on a festive platter—maybe surrounded by fresh berries or edible flowers for a pretty presentation. They pair wonderfully with a cold glass of milk, coffee, or even a sparkling lemonade for a non-alcoholic celebration drink.
If you’re prepping ahead, store the bites in an airtight container in the refrigerator for up to 4 days. Bring them to room temperature before serving to soften the frosting and intensify the chocolate aroma. For longer storage, these freeze beautifully—just wrap tightly and freeze for up to 3 months. Thaw overnight in the fridge, then rest at room temperature before serving.
The flavors tend to deepen after a day or two, so if you can wait, the bites taste even better the next day. Just be sure to keep them sealed well to prevent drying out. Hosting a party? Pair these with some savory options like the crunchy taco cups to balance sweet and salty on your spread.
Nutritional Information & Benefits
Each brownie bite (about 1.5-inch square) contains approximately 120 calories, 7 grams of fat, 15 grams of carbohydrates, and 1.5 grams of protein. These treats are an indulgence, but using quality cocoa powder means you get antioxidants along with the chocolatey goodness.
The small portion size helps you enjoy a sweet moment without going overboard. For those with dietary restrictions, the recipe can be customized as mentioned earlier to be gluten-free or dairy-free. The eggs provide some protein, and using real butter adds richness and flavor without artificial ingredients.
While not a health food, these bites remind me that celebrations are about joy—and sometimes that means a little chocolate love. Enjoy mindfully, and savor the memories made around the dessert table.
Conclusion
These Perfect Graduation Cap Brownie Bites have become my secret weapon for turning a simple dessert into a meaningful celebration treat. They strike the right balance between fuss-free baking and impressive presentation. Plus, the recipe’s flexibility lets you make it your own, whether that’s changing up the colors, adding flavors, or adapting for dietary needs.
I love how these bites bring smiles and a little sparkle to graduation gatherings, turning an ordinary brownie into a keepsake moment. If you try this recipe, I’d love to hear how you customized it or what memories it helped create. Sharing these bites is sharing joy—and that’s what makes baking worth it.
So go ahead, whip up a batch, and enjoy the sweet taste of accomplishment—one perfect bite at a time.
FAQs About Perfect Graduation Cap Brownie Bites
How do I keep the brownie bites moist and fudgy?
Be careful not to overbake—check them at 20 minutes with a toothpick. The center should have moist crumbs, not wet batter. Also, use melted butter and avoid overmixing the batter.
Can I make these brownie bites ahead of time?
Yes! They store well in the fridge for up to 4 days and freeze nicely for up to 3 months. Just thaw and bring to room temperature before serving.
What can I use instead of chocolate wafer cookies for the caps?
You can cut slightly larger brownie squares or use thin chocolate squares or even homemade cookie squares for the cap tops.
Is it possible to make these vegan?
With some adjustments, yes. Use flax eggs instead of regular eggs, coconut oil in place of butter, and a plant-based milk for the frosting. The texture will be slightly different but still delicious!
How do I pipe the tassels neatly if I’m a beginner?
Practice piping on parchment paper first. Use a small round tip or a tiny corner of a plastic bag. Keep your hand steady and squeeze gently for thin, consistent lines.
Pin This Recipe!
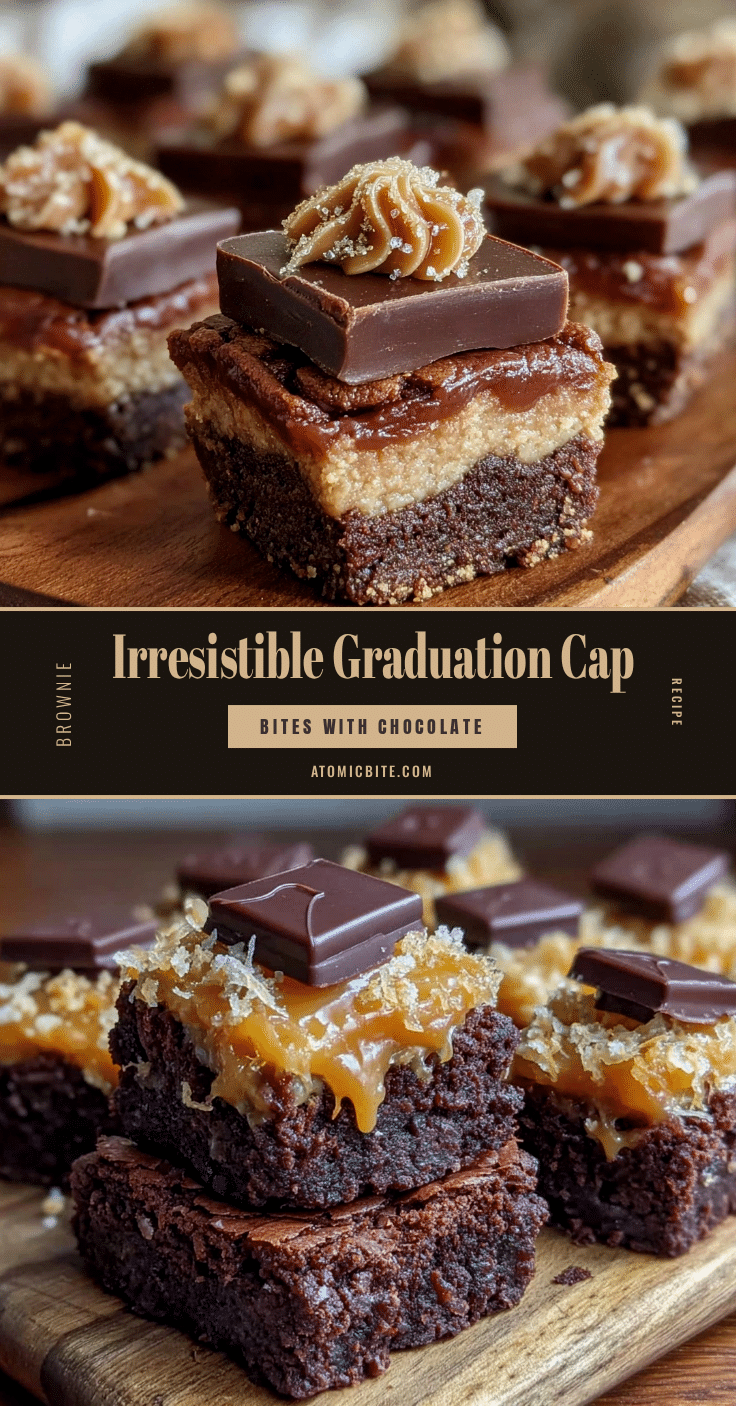
Perfect Graduation Cap Brownie Bites
These brownie bites look like little graduation caps and are perfect for celebration treats. They are quick, easy, and loved by both kids and adults for their fudgy texture and playful decoration.
- Prep Time: 15 minutes
- Cook Time: 25 minutes
- Total Time: 1 hour 40 minutes
- Yield: 24 servings 1x
- Category: Dessert
- Cuisine: American
Ingredients
- 1/2 cup (115g) unsalted butter, melted
- 1 cup (200g) granulated sugar
- 2 large eggs, room temperature
- 1 teaspoon pure vanilla extract
- 1/3 cup (35g) unsweetened dark cocoa powder
- 1/2 cup (65g) all-purpose flour
- 1/4 teaspoon salt
- 1/4 teaspoon baking powder
- 1/2 cup (115g) unsalted butter, softened (for frosting)
- 1 1/2 cups (180g) powdered sugar, sifted
- 1–2 tablespoons milk or heavy cream (to thin frosting as needed)
- 1/2 teaspoon vanilla extract (for frosting)
- Black food coloring gel (just a drop for the tassels)
- Square chocolate wafer cookies or cut brownies into squares (about 1.5 inches)
- Mini candy pearls or sprinkles (optional, for decoration)
Instructions
- Preheat your oven to 350°F (175°C). Grease your 8×8 inch pan or line it with parchment paper for easy removal.
- In a large bowl, whisk together the melted butter and sugar until smooth. Add the eggs one at a time, mixing well after each addition. Stir in the vanilla extract.
- In a separate bowl, sift together the cocoa powder, flour, salt, and baking powder.
- Gently stir the dry ingredients into the wet mixture with a spatula. Avoid overmixing—just enough to combine. The batter should be thick and glossy.
- Pour the batter into the pan and spread evenly with a spatula. Tap the pan lightly on the counter to release air bubbles.
- Bake for 20-25 minutes. Start checking around 20 minutes by inserting a toothpick in the center; it should come out with a few moist crumbs but no wet batter. The edges will pull away slightly from the pan.
- Cool completely on a rack, about 1 hour.
- Cut brownies into uniform 1.5-inch squares.
- Make the frosting: Beat softened butter with powdered sugar and vanilla until fluffy. Add milk a little at a time to reach piping consistency. Mix in black food coloring until you get a deep, even shade.
- Assemble the caps: Place a square chocolate wafer or cut brownie square on top of each brownie bite. Pipe a small dollop of frosting in the center, then pipe a thin tassel line extending from the dollop to the edge. Optionally, add a mini candy pearl at the tassel end for detail.
- Chill for 10-15 minutes to help the frosting set before serving.
Notes
Do not overbake to keep brownies moist and fudgy. Use room temperature eggs for better batter texture. Sift cocoa and flour to avoid lumps. Chill brownies before cutting for clean edges. Practice piping tassels on parchment paper before decorating. For gluten-free, substitute almond flour or gluten-free blend. For dairy-free, use coconut oil and plant-based milk. Add a pinch of espresso powder for enhanced chocolate flavor.
Nutrition
- Serving Size: One 1.5-inch brownie
- Calories: 120
- Fat: 7
- Carbohydrates: 15
- Protein: 1.5
Keywords: brownie bites, graduation cap brownies, celebration treats, fudgy brownies, easy dessert, party snacks


