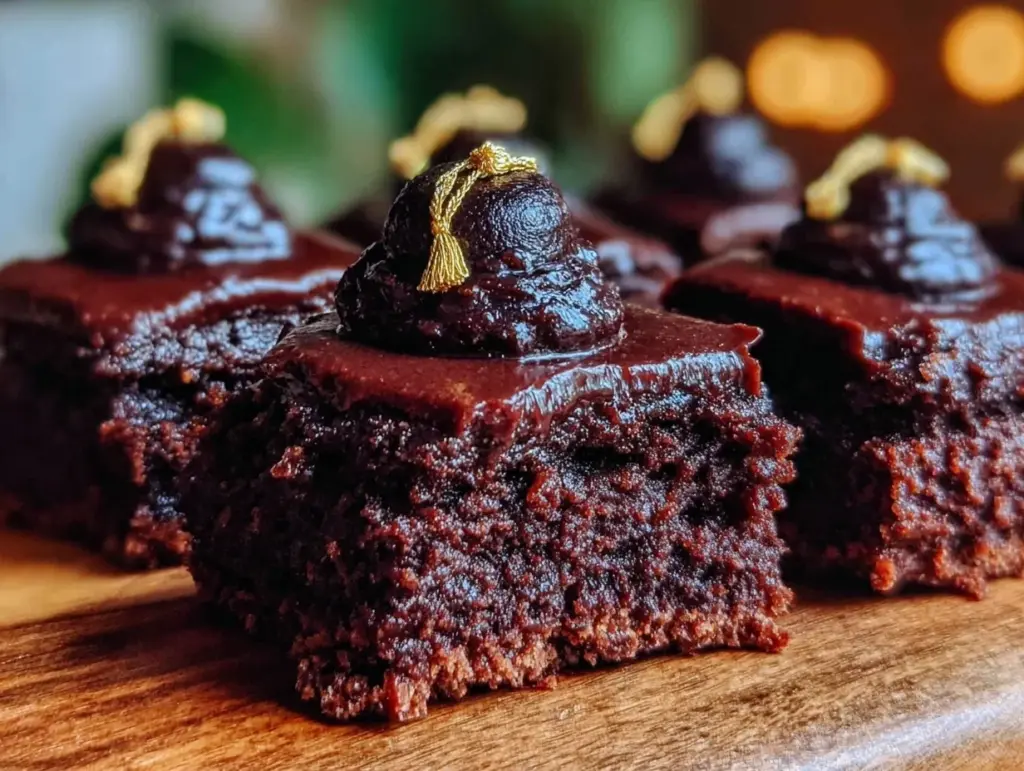
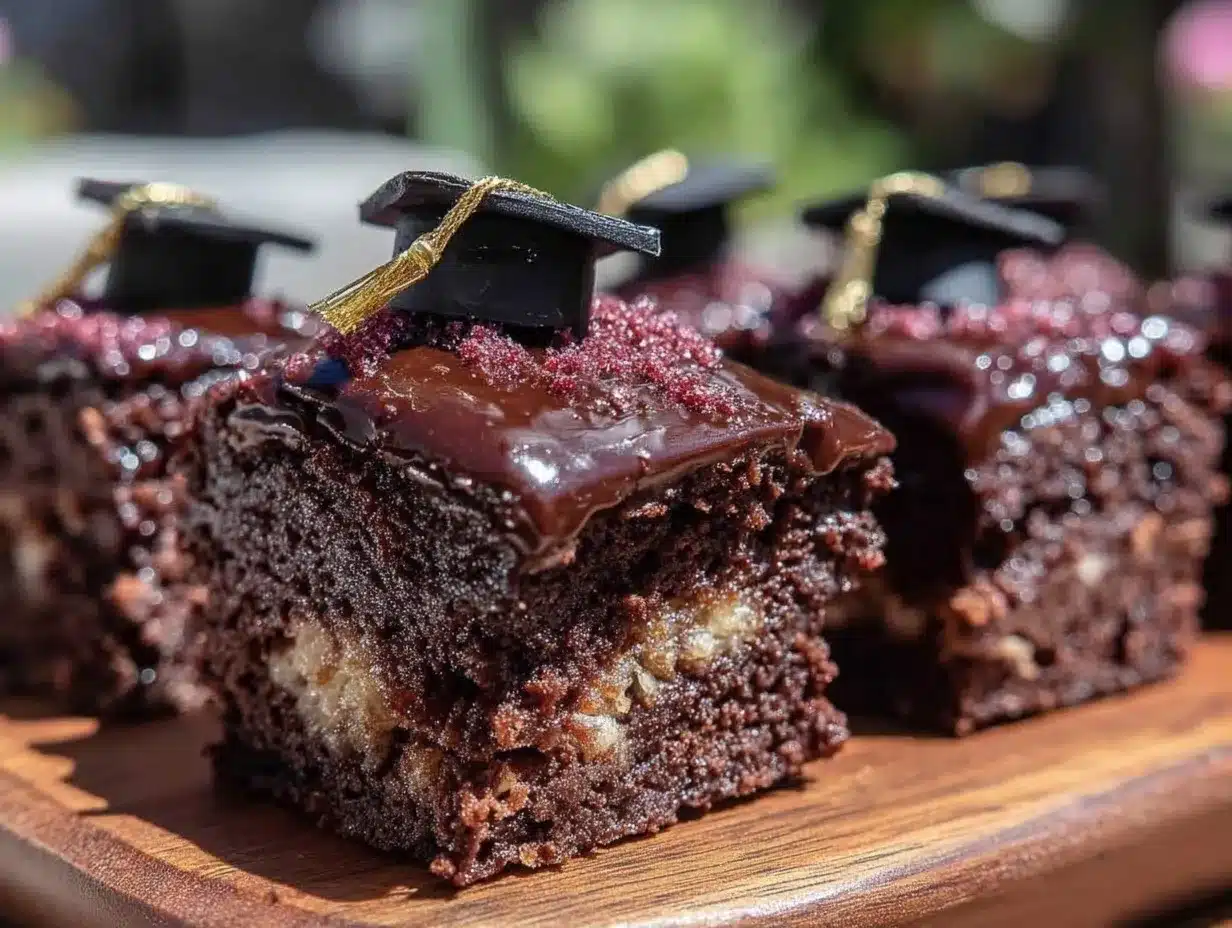
“Can you believe I almost didn’t make these mini graduation cap brownies?” I remember saying that to my sister just after I pulled them from the oven, the rich chocolate scent filling the kitchen and a hint of powdered sugar dusting the counter like a light snowfall. Honestly, I was skeptical at first—how could something so tiny and cute really hold up as a dessert for a graduation party? But as the guests started nibbling, those little caps vanished faster than I expected. It wasn’t just the novelty that got them; it was the perfect balance of fudgy brownie, creamy chocolate frosting, and that little fondant tassel that made them feel just right for celebrating.
Funny thing is, this recipe came about during a chaotic weekend when I was scrambling to throw together something festive for my nephew’s graduation. No fancy tools, no complicated steps—just a quick batch of brownies cut into bite-sized squares and topped with handmade caps from some simple ingredients. I loved how these mini treats brought a fresh, playful energy to the dessert table, standing out among the usual cookies and chips. And now? I find myself making these for nearly every celebration because they’re just that easy and crowd-pleasing.
There’s something quietly satisfying about watching the smiles when someone picks up one of these little chocolate hats, and it reminds me why I keep this recipe close. It’s not just about the taste—it’s about the moment, the joy of marking milestones with something homemade, simple, and a bit whimsical.
Why You’ll Love This Recipe
This recipe for perfect mini graduation cap brownies has been tested and tweaked through many celebrations to make sure it’s as easy as it is delicious. Here’s why it’s become a staple for marking those special moments:
- Quick & Easy: Ready in about 45 minutes from start to finish, no stress or last-minute panic.
- Simple Ingredients: Uses pantry staples like cocoa powder and flour, plus a few basics for the fondant caps—no obscure items needed.
- Perfect for Celebrations: Whether it’s a graduation, party, or just a fun gathering, these brownies bring a festive flair that’s hard to beat.
- Crowd-Pleaser: Kids, adults, and even the picky eaters come back for seconds, making them a universal hit.
- Unbelievably Delicious: The fudgy texture paired with silky frosting and a touch of sweetness from the fondant creates a flavor that’s both nostalgic and fresh.
What sets this recipe apart is the way the mini caps are crafted—no complicated molds or fancy decorating skills required. The secret lies in cutting the brownies precisely and using a straightforward chocolate ganache for the “mortarboard” base before topping with a square of fondant and a little tassel made from licorice or piped frosting. It’s a smart twist that makes the whole presentation pop without needing a pastry degree.
Honestly, these mini graduation cap brownies capture that feeling of pride and celebration in each bite. They’re a little bit playful, a little bit indulgent, and totally worth making for anyone wanting to add some personality to their dessert spread. Plus, if you’re looking for more crowd-pleasing party ideas, the crispy baked turkey sliders are another favorite that pair nicely at celebrations.
What Ingredients You Will Need
This recipe uses simple, wholesome ingredients to deliver bold flavor and satisfying texture without the fuss. Most of these are pantry staples, and the fondant components are easy to assemble or substitute.
- For the Brownies:
- All-purpose flour – 1 cup (120 g)
- Unsweetened cocoa powder – ½ cup (50 g), preferably Dutch-processed for richness
- Granulated sugar – 1 cup (200 g)
- Unsalted butter – ½ cup (113 g), melted and slightly cooled (I prefer Land O’Lakes for consistent results)
- Large eggs – 2, room temperature
- Vanilla extract – 1 teaspoon
- Salt – ¼ teaspoon
- Baking powder – ¼ teaspoon
- For the Chocolate Ganache “Cap”:
- Semi-sweet chocolate chips – ½ cup (90 g)
- Heavy cream – ¼ cup (60 ml)
- Unsalted butter – 1 tablespoon (about 14 g), optional for extra gloss
- For the Fondant “Mortarboard” and Tassel:
- White fondant – about 4 ounces (115 g), pre-made or homemade
- Black food coloring gel – a few drops (optional, to tint fondant)
- Licorice strings or black piping gel – for tassels
Ingredient tips: When selecting cocoa powder, the Dutch-processed kind gives a smoother, less bitter finish, but natural cocoa works fine too. For a gluten-free twist, you can swap the flour with almond flour, but the texture will be a bit different—still delicious!
The fondant can be tinted black or kept white for a classic look; I’ve found that using ready-made fondant from your local craft store saves time. If you want to skip fondant, try cutting small squares of chocolate bark as the mortarboard base, though the fondant gives that authentic cap feel.
Equipment Needed
- 8×8-inch (20×20 cm) square baking pan – perfect for achieving even brownie thickness.
- Mixing bowls – at least two for wet and dry ingredients.
- Whisk and rubber spatula – for mixing and folding batter smoothly.
- Microwave-safe bowl or double boiler – to melt chocolate for ganache.
- Sharp knife or pizza cutter – for cutting brownies into neat squares.
- Small rolling pin or smooth bottle – to roll out fondant evenly.
- Pastry brush or small spoon – for applying ganache if needed.
- Measuring cups and spoons – precise measurements matter in baking.
If you don’t have a rolling pin, a clean wine bottle works just as well for fondant. For melting chocolate, a microwave-safe bowl with short bursts of heating prevents burning better than direct heat on the stove. And a serrated knife can help cut brownies cleanly without squishing them.
Preparation Method
- Preheat your oven to 350°F (175°C). Grease the 8×8-inch pan lightly or line it with parchment paper, leaving some overhang for easy removal.
- Mix dry ingredients: In a medium bowl, whisk together the flour, cocoa powder, baking powder, and salt until well combined. This ensures even distribution of leavening and cocoa flavor.
- Combine wet ingredients: In a separate large bowl, whisk the melted butter and sugar until smooth. Add eggs one at a time, whisking well after each addition. Stir in vanilla extract.
- Fold dry into wet: Gradually add the dry mixture to the wet, folding gently with a rubber spatula until just combined. Don’t overmix—just until no flour streaks remain for fudgy brownies.
- Pour batter into pan: Spread evenly with an offset spatula or the back of a spoon. The batter will be thick but smooth. Bake for 20–25 minutes, or until a toothpick inserted near the center comes out with just a few moist crumbs.
- Cool completely: Let the brownies cool in the pan on a wire rack for at least 30 minutes. This step is crucial for clean cuts and frosting application.
- Prepare the ganache: Heat cream in a small saucepan until it just begins to simmer. Pour over the chocolate chips in a bowl and let sit for 2 minutes, then stir gently until smooth. Stir in butter if using for shine. Allow ganache to cool until thick but spreadable (about 15 minutes).
- Cut brownies into 12 equal squares: Use a sharp knife, wiping it clean between cuts for neat edges.
- Top each brownie with ganache: Spread a thin layer on top of each square to act as the “mortarboard” base.
- Roll out fondant and cut squares: Dust your surface lightly with powdered sugar and roll the fondant to about 1/8 inch (3 mm) thickness. Cut 12 small squares slightly smaller than the brownies (about 1.5 inches/4 cm). Tint fondant black with food coloring if desired.
- Place fondant squares on ganache: Gently press each fondant “cap” onto the ganache layer to stick.
- Create tassels: Use thin strips of licorice or pipe a small line of black frosting from the center edge of each fondant square. Let them set for about 10 minutes before serving.
Pro tip: If fondant feels sticky, chill it briefly before cutting. For a glossy ganache that sets nicely without cracking, allow it to cool at room temperature rather than the fridge.
Cooking Tips & Techniques
From my experience, the key to perfect mini graduation cap brownies lies in timing and texture balance.
- Don’t overbake: You want fudgy brownies, not dry ones. Start checking at 20 minutes—ovens vary, and a slightly underbaked center is fine because the brownies will firm up as they cool.
- Mix gently: Overmixing the batter develops gluten and leads to cakey brownies, which is not what you want here. Fold ingredients just until combined.
- Ganache consistency: Let it cool enough to spread easily but not so much that it hardens. If it’s too runny, the fondant won’t stick well.
- Cutting brownies: Use a warm, sharp knife for smooth edges. Wipe the blade clean between cuts to avoid crumbs clinging to the knife.
- Fondant handling: Dust your surface and rolling pin with powdered sugar to prevent sticking. If fondant tears, press gently to smooth or patch with a little water.
One lesson I learned the hard way: don’t rush the cooling process. Trying to frost warm brownies will cause ganache to melt and look sloppy. Patience pays off, and your mini caps will look neat and polished every time.
If you’re juggling multiple dishes for a party, these brownies are great because you can prep the ganache and fondant while the brownies bake or cool. Multitasking like this saved me during a hectic celebration when I also made creamy dill pickle cheese balls that everyone raved about.
Variations & Adaptations
Want to mix things up? Here are some tasty ways to adapt these mini graduation cap brownies:
- Flavor swap: Add a teaspoon of espresso powder to the brownie batter for a mocha twist that deepens the chocolate flavor.
- Diet-friendly: Use a gluten-free flour blend to make these brownies gluten-free. Swap out the butter for coconut oil to make them dairy-free, and use dairy-free chocolate chips for the ganache.
- Seasonal toppings: Instead of fondant, top brownies with a swirl of cream cheese frosting tinted in school colors, then pipe simple tassels with colored icing.
- Mini cupcake style: Bake the batter in mini muffin tins to create bite-sized brownie bites, then assemble the caps on top after cooling.
- Personal twist: I once tried sprinkling chopped toasted pecans on the ganache before the fondant to add crunch and a nutty flavor—turned out to be a fun surprise!
Serving & Storage Suggestions
These mini graduation cap brownies are best served at room temperature, allowing the ganache and fondant to shine without becoming too soft or sticky. Arrange them on a festive platter, maybe alongside some fresh berries or a few edible flowers for an extra celebratory touch.
They pair wonderfully with a cold glass of milk, coffee, or even a sparkling punch to toast the graduate. For an all-around party spread, these brownies complement savory snacks like crunchy taco cups perfectly.
Store leftovers in an airtight container at room temperature for up to 3 days. Refrigeration isn’t necessary but can help if your kitchen is warm; just bring brownies back to room temp before serving. They also freeze well—wrap individually in plastic wrap and place in a freezer bag for up to 2 months. Thaw overnight in the fridge, then let sit at room temperature before enjoying.
One neat thing about these brownies: the flavors meld and deepen if you make them a day ahead, making them even more irresistible during your celebration.
Nutritional Information & Benefits
Each mini graduation cap brownie provides roughly 150-180 calories, depending on exact portion size and ingredients used. They offer a moderate amount of fat and sugar, so enjoy them as a special treat rather than an everyday snack.
The cocoa powder is packed with antioxidants, which have been shown to support heart health, and using real butter adds richness without artificial additives. Eggs provide protein and essential nutrients, making these brownies a more satisfying dessert.
For dietary considerations, this recipe can easily be adapted to gluten-free or dairy-free versions, as mentioned earlier. However, the fondant usually contains gelatin or similar ingredients, so check labels if you have allergies or follow vegetarian/vegan diets.
From a wellness perspective, these mini brownies offer a controlled portion size that lets you indulge without going overboard—a little celebration treat with a lot of flavor.
Conclusion
Perfect mini graduation cap brownies are a fun, charming way to celebrate milestones with friends and family. They bring together fudgy chocolate, creamy ganache, and playful fondant details into bite-sized moments of joy. I love how simple they are to make and how much personality they add to any dessert table.
Feel free to tweak the flavors or decorations to match your own celebration style—the recipe is flexible and forgiving. Just remember: it’s not about perfection but the happy memories you create around these little treats.
Whenever I bake these, I’m reminded that food is a language of love and pride, especially when it’s as easy and delightful as these mini graduation cap brownies. If you try them out, I’d love to hear how you customized your caps or which variations became your favorites!
FAQs About Perfect Mini Graduation Cap Brownies
Can I make these brownies ahead of time?
Absolutely! You can bake the brownies a day or two in advance and assemble the caps just before serving. They also freeze well if wrapped tightly.
What if I don’t have fondant or don’t want to use it?
You can substitute with a thick layer of chocolate ganache shaped into squares or use colored cream cheese frosting to create the cap look.
How do I keep the fondant from sticking?
Dust your work surface and rolling pin lightly with powdered sugar or cornstarch to prevent sticking while rolling out the fondant.
Can these be made dairy-free?
Yes, swap butter for coconut oil and use dairy-free chocolate chips and cream for the ganache. Make sure to check the fondant ingredients for dairy content.
What’s the best way to cut brownies without crumbling?
Use a sharp knife, warm it under hot water, dry it, then cut in a single smooth motion. Clean the knife between cuts for clean edges.
Pin This Recipe!
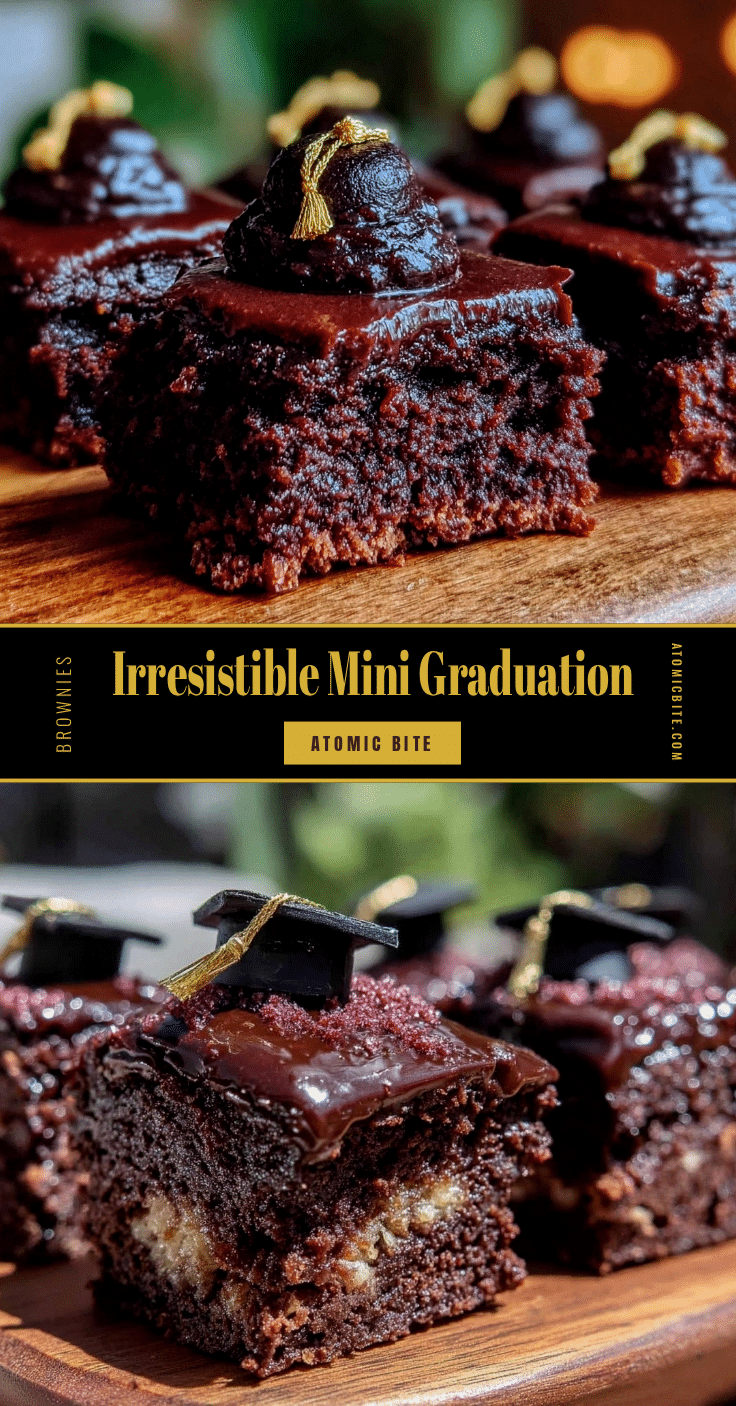
Perfect Mini Graduation Cap Brownies
These mini graduation cap brownies are fudgy, topped with creamy chocolate ganache and fondant tassels, perfect for celebrations and easy to make.
- Prep Time: 15 minutes
- Cook Time: 25 minutes
- Total Time: 45 minutes
- Yield: 12 treats 1x
- Category: Dessert
- Cuisine: American
Ingredients
- 1 cup all-purpose flour (120 g)
- ½ cup unsweetened cocoa powder (50 g), preferably Dutch-processed
- 1 cup granulated sugar (200 g)
- ½ cup unsalted butter (113 g), melted and slightly cooled
- 2 large eggs, room temperature
- 1 teaspoon vanilla extract
- ¼ teaspoon salt
- ¼ teaspoon baking powder
- ½ cup semi-sweet chocolate chips (90 g)
- ¼ cup heavy cream (60 ml)
- 1 tablespoon unsalted butter (about 14 g), optional for ganache gloss
- About 4 ounces white fondant (115 g), pre-made or homemade
- Black food coloring gel, a few drops (optional)
- Licorice strings or black piping gel for tassels
Instructions
- Preheat oven to 350°F (175°C). Grease an 8×8-inch pan or line with parchment paper with overhang.
- In a medium bowl, whisk together flour, cocoa powder, baking powder, and salt.
- In a large bowl, whisk melted butter and sugar until smooth. Add eggs one at a time, whisking well after each. Stir in vanilla extract.
- Fold dry ingredients into wet ingredients gently with a rubber spatula until just combined.
- Pour batter into pan and spread evenly. Bake 20–25 minutes or until a toothpick inserted near center comes out with a few moist crumbs.
- Cool brownies completely in pan on wire rack for at least 30 minutes.
- Heat heavy cream until just simmering. Pour over chocolate chips in a bowl and let sit 2 minutes. Stir until smooth. Stir in butter if using. Let ganache cool until thick but spreadable (about 15 minutes).
- Cut brownies into 12 equal squares using a sharp knife, wiping clean between cuts.
- Spread a thin layer of ganache on each brownie square as the mortarboard base.
- Dust surface with powdered sugar and roll fondant to about 1/8 inch (3 mm) thickness. Cut 12 small squares about 1.5 inches (4 cm), slightly smaller than brownies. Tint fondant black if desired.
- Place fondant squares on ganache layer, pressing gently to stick.
- Create tassels using thin licorice strips or pipe black frosting from center edge of each fondant square. Let set about 10 minutes before serving.
Notes
Do not overbake to keep brownies fudgy. Let brownies cool completely before frosting to avoid melting ganache. Use powdered sugar to prevent fondant sticking. Use a warm knife for clean brownie cuts. Ganache should be thick but spreadable for best fondant adhesion. Fondant can be tinted black or substituted with chocolate bark or cream cheese frosting.
Nutrition
- Serving Size: 1 mini brownie (1 of
- Calories: 165
- Sugar: 16
- Sodium: 70
- Fat: 9
- Saturated Fat: 5
- Carbohydrates: 22
- Fiber: 2
- Protein: 2
Keywords: mini brownies, graduation treats, chocolate brownies, party dessert, fudgy brownies, ganache, fondant caps


